Homeschool Science Activity: Chocolate Chip Cookie Chemistry

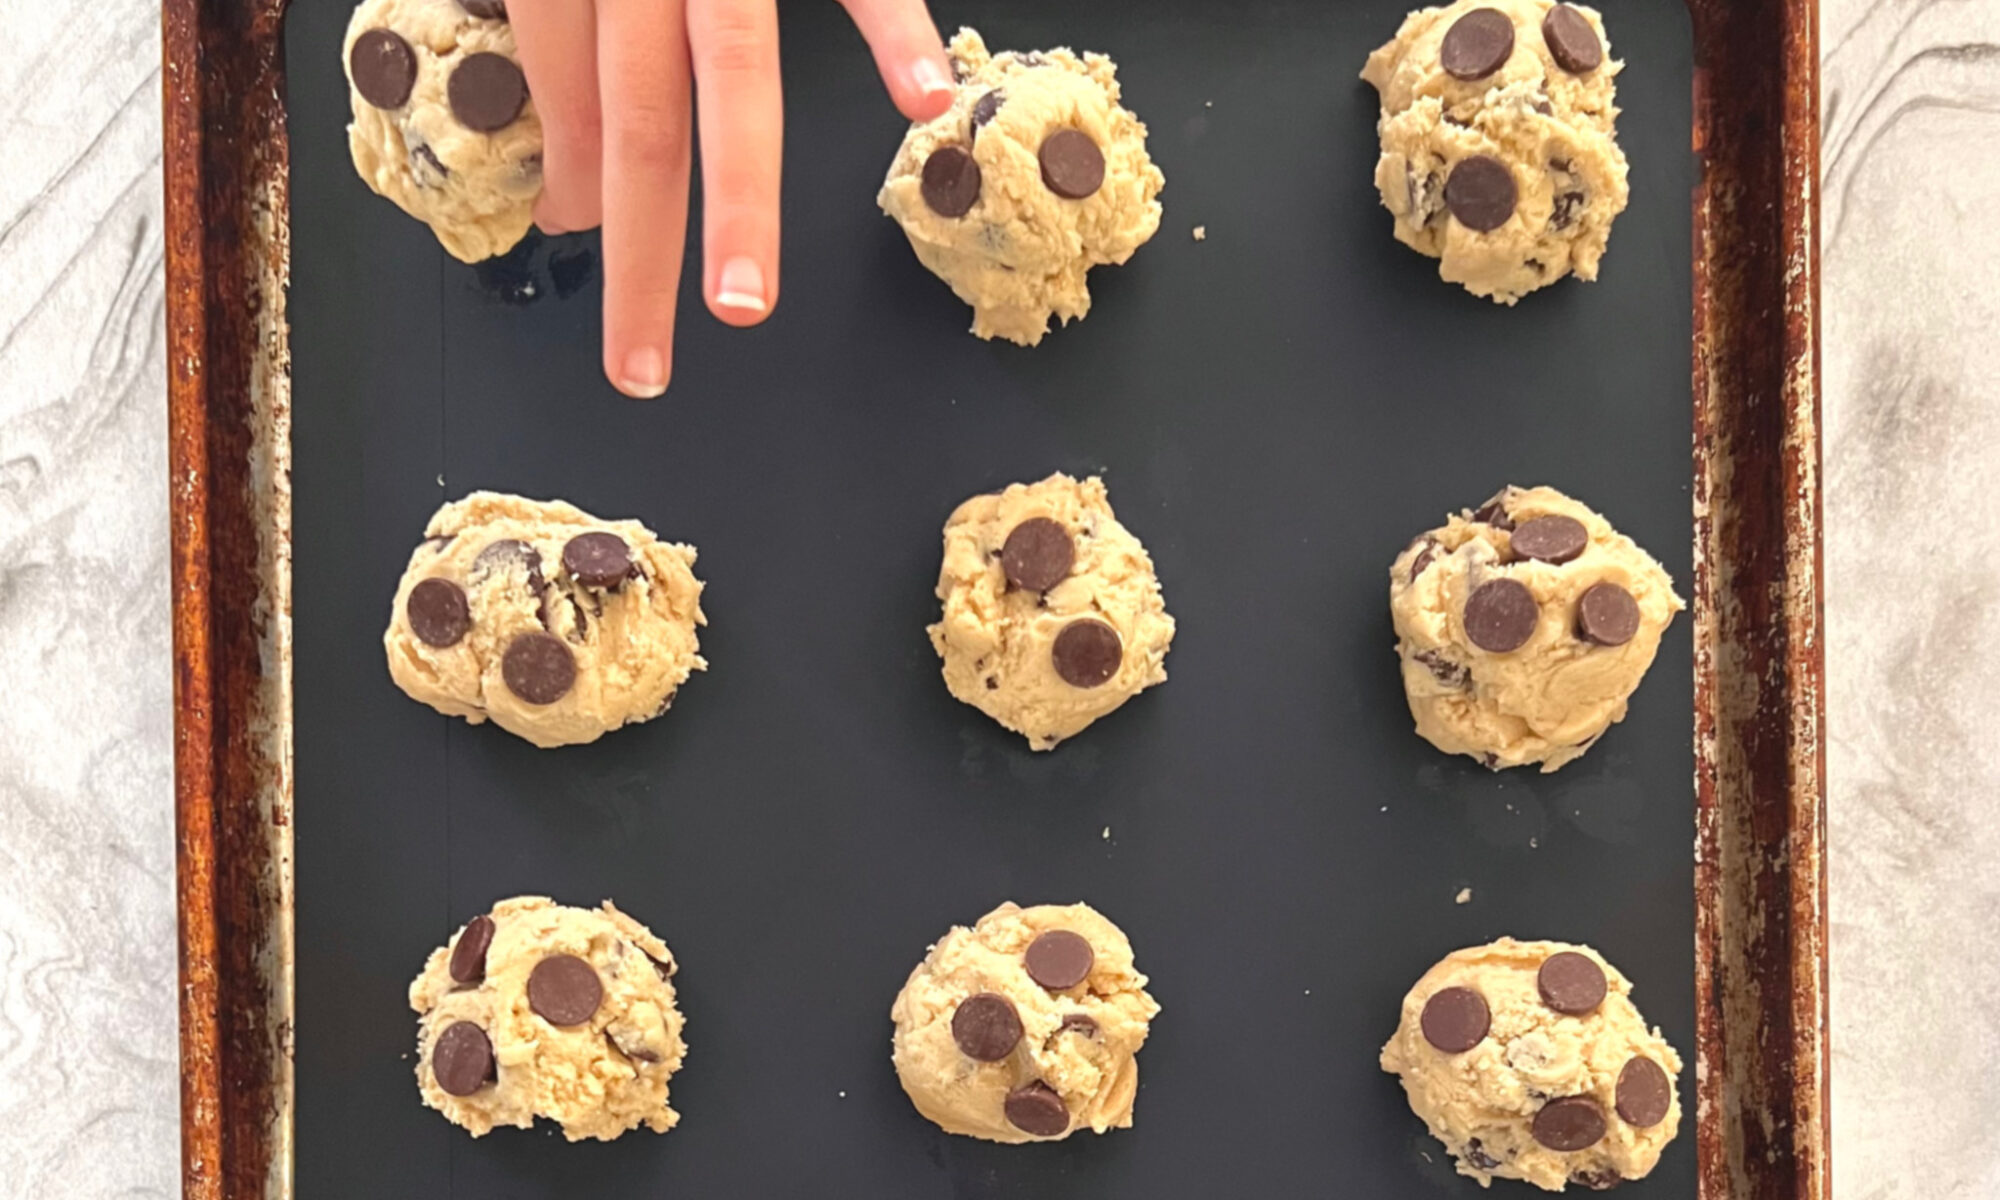
Homeschool Science Activity: Chocolate Chip Cookie Chemistry - Balls of Chocolate Chip Cookie Dough on Baking Pan with Silicone Mat Child Hand is Placing Last Ball of Cookie Dough

Homeschool Science Activity: Chocolate Chip Cookie Chemistry

Blair Lee, M.S.

Kitchen Chemistry: A Homeschool Science Activity

What’s better than baking cookies? Turning it into a homeschool science activity! Baking is more than just mixing ingredients; it’s a delicious chemistry experiment you can eat. In this fun and educational activity, you’ll explore the chemical reactions responsible for turning raw ingredients into a delicious snack, making it a perfect blend of science and baking. Ready to combine learning and flavor? Let’s dive into this tasty lab inspired by Blair Lee’s kitchen chemistry class!

Edible Chemistry

All cooking involves chemistry. The ingredients are the reactants and what is made is the product. When developing new chemistry experiments in and out of the kitchen, a good scientist only changes one thing at a time. That is important, because if changes are observed, scientists want to know what has caused the change.

While making this recipe, you will investigate how changes in one reactant changes the product. You will halve a batch of cookies and put all chocolate chips in one of the batches and in the other batch, you will use two types of chips: half chocolate chip cookies and half chips of another flavor.

Equipment

  •     2 Baking Sheets – Lined with parchment paper or a silicone mat (If you do not have either of these, the cookies can be baked without them)
  •       Liquid Measuring Cups
  •       Dry Measuring Cups
  •       Measuring Spoons
  •       Mixer
  •       Spatula
  •       Dish towel
  •       Timer
  •       Oven Mitts
  •       Pencil

Ingredients

  • 1 cup butter, softened or butter substitute
  • 3/4 cup white (granulated) sugar
  • 3/4 cup light brown sugar, packed
  • 2 tsp pure vanilla extract
  • 1 large egg or egg substitutes
  • 2 ¼ cups all-purpose flour
  • 1 tsp baking soda
  • 1 tsp salt
  • 1 ½ cups chocolate chips, divided into 1 cup of chips and ½ cup of chips  
  • ½ cup white chocolate, peanut butter, OR butterscotch chips
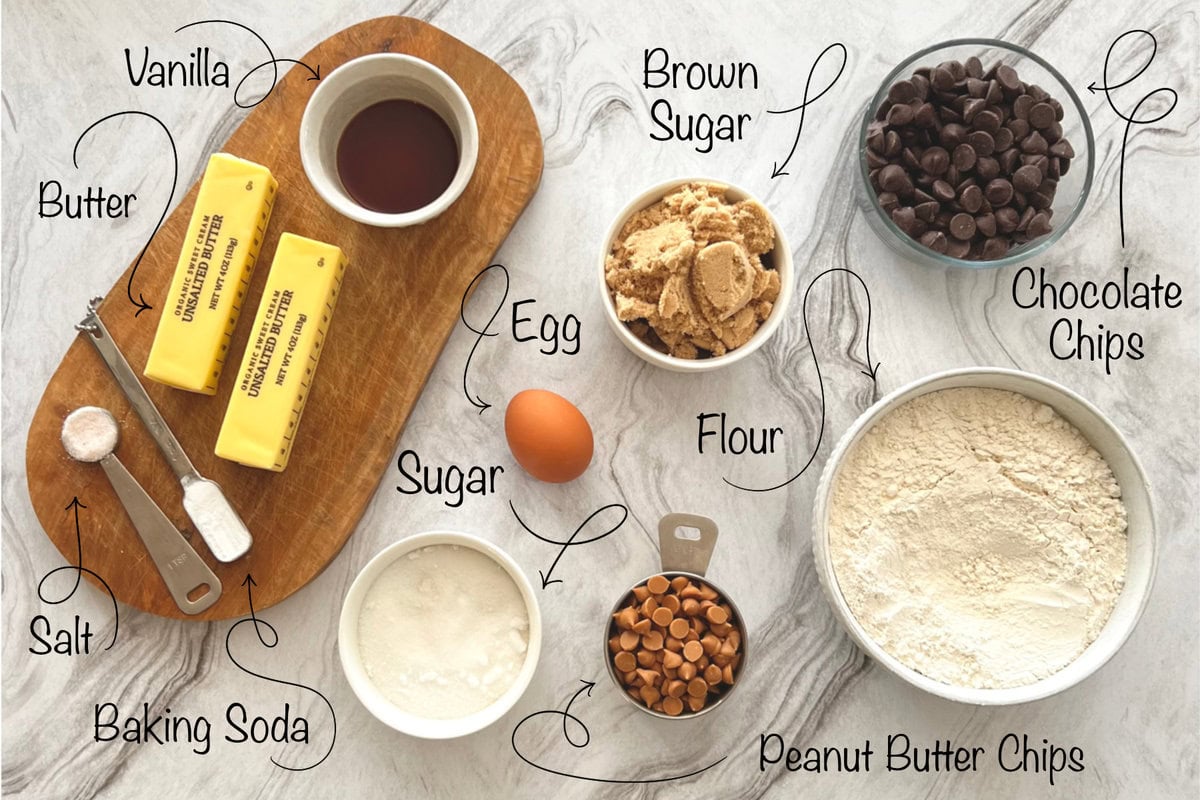
Homeschool Science Activity: Chocolate Chip Cookie Chemistry - Flat Lay of Cookie Ingredients with Labels

Instructions

1.  Preheat oven to 375 degrees F (375F). Line a baking pan with parchment paper or a silicone mat and set aside.

2.  In a separate bowl, mix flour, baking soda, salt, and baking powder. Set aside.

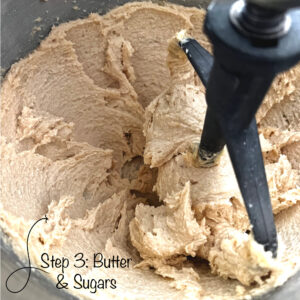
3.  With the mixer, cream together butter and sugars until combined.

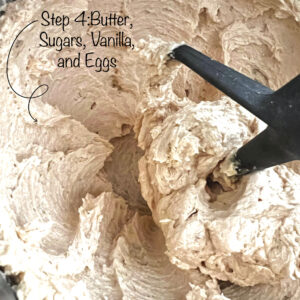
4.  Beat in eggs and vanilla until fluffy.
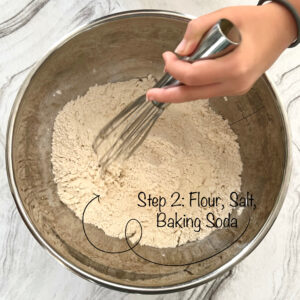
Chocolate Chip Cookie Chemistry Activity: Bowl on Table with Hand Whisking Flour, Baking Soda, and Salt Together
Homeschool Science Activity: Chocolate Chip Cookie Chemistry - Butter, Brown Sugar, White Sugar Being Mixed Together in Stand Mixer
Chocolate Chip Cookie Chemistry Activity: Mixing butter, sugars, vanilla, and eggs in stand mixer.

5.  Mix in the dry ingredients until combined.

6.  Divide the dough in half. Put one of the halves back into the mixer and add one cup of chocolate chips. Mix these into the dough.

7.  Roll 2-3 TBS (depending on how large you like your cookies) of dough at a time into balls and place them, evenly spaced, on your prepared cookie sheets. (Alternatively, you can use a small cookie scoop to make your cookies).

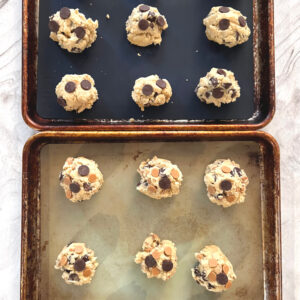
8.  Make the other half of the dough. Add ½ cup of chocolate chips and ½ cup of the other chips. Mix these into the dough. Form into cookies, as you did in the previous step.

Homeschool Science Activity: Chocolate Chip Cookie Chemistry - Balls of Chocolate Chip Cookie Dough on Baking Pan with Silicone Mat Child Hand is Placing Last Ball of Cookie Dough
Chocolate Chip Cookie Chemistry Activity - Two Pans of Balled Cookie Dough Ready to be Baked - One Chocolate Chip and One Peanut Butter Chip
Chocolate Chip Cookie Chemistry Activity - Balls of Peanut Butter Chocolate Chip Cookie Dough on Pan Ready to Bake

Checklist

o   My ingredients are set out and ready.

o   My equipment is set out and ready.

o   I have cleaned the counter where I will prepare food.

o   I washed my hands with antibacterial soap.

o   I have gathered my safety gear (oven mitts).

o   The oven is set to the correct temperature.

o   I wrote a hypothesis.
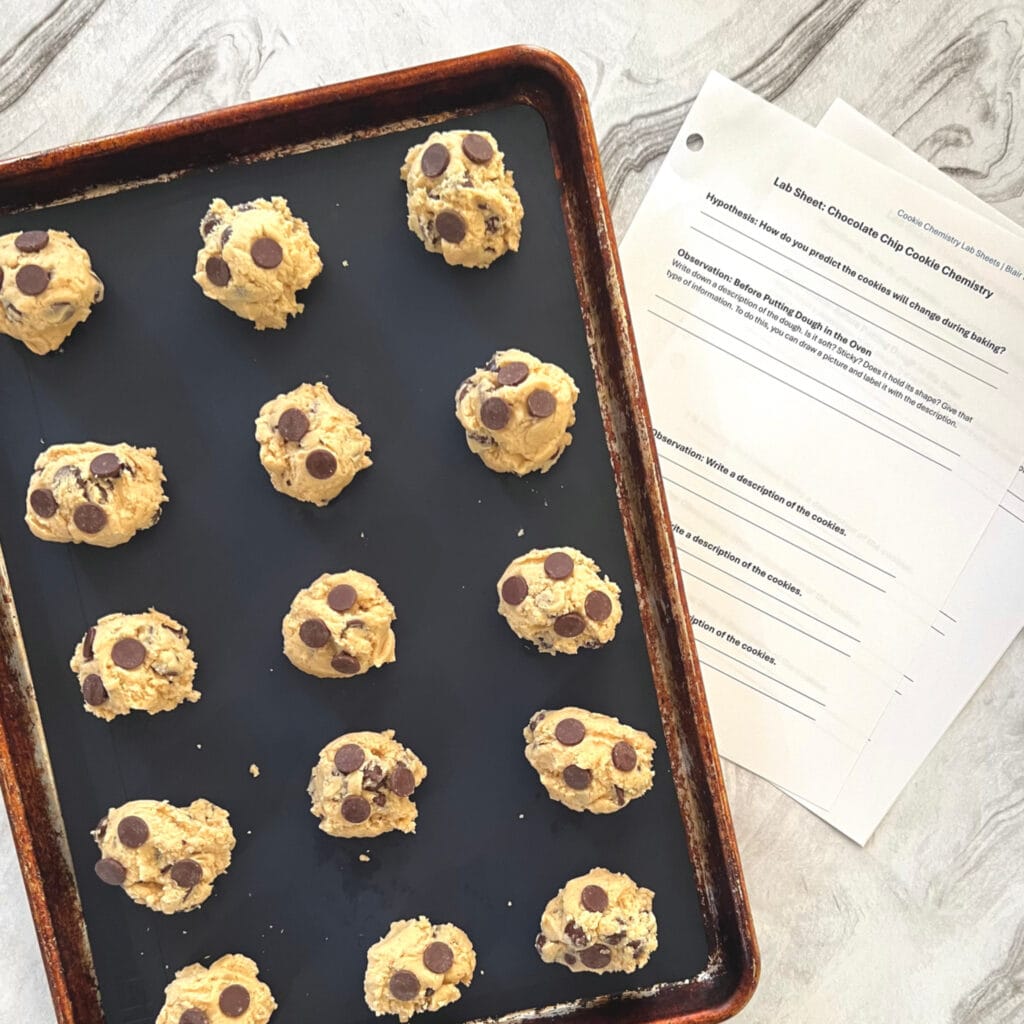
Homeschool Science Activity: Chocolate Chip Cookie Chemistry - Pan of Chocolate Chip Cookie Dough Ready to be Baked with Lab Sheets

Chocolate Chip Cookie Lab - Observations

When you slide the pan into the heated oven, it sets off a series of chemical processes and reactions that transform the reactants in the dough to cookies.

Butter Melts First

When you put the cookies in the oven, the dough starts to heat up. As it does, a series of processes happen, starting with butter. The melting point of butter is 92F. The melting point of most nondairy substitutes is even lower. When the butter starts to melt, the dough spreads.

Butter is made of water, fat, and milk solids. At 100F, the water in the butter starts to steam as the butter is melting. When water steams, it needs to escape the dough. This causes the cookies to expand.

Taking Shape

When the dough reaches 150F, proteins in the egg (or egg substitute) begin to take shape. They go from runny to solid.

Water Boils in Cookies, Too

When the dough reaches 212F, water boils away, drying out the cookies.
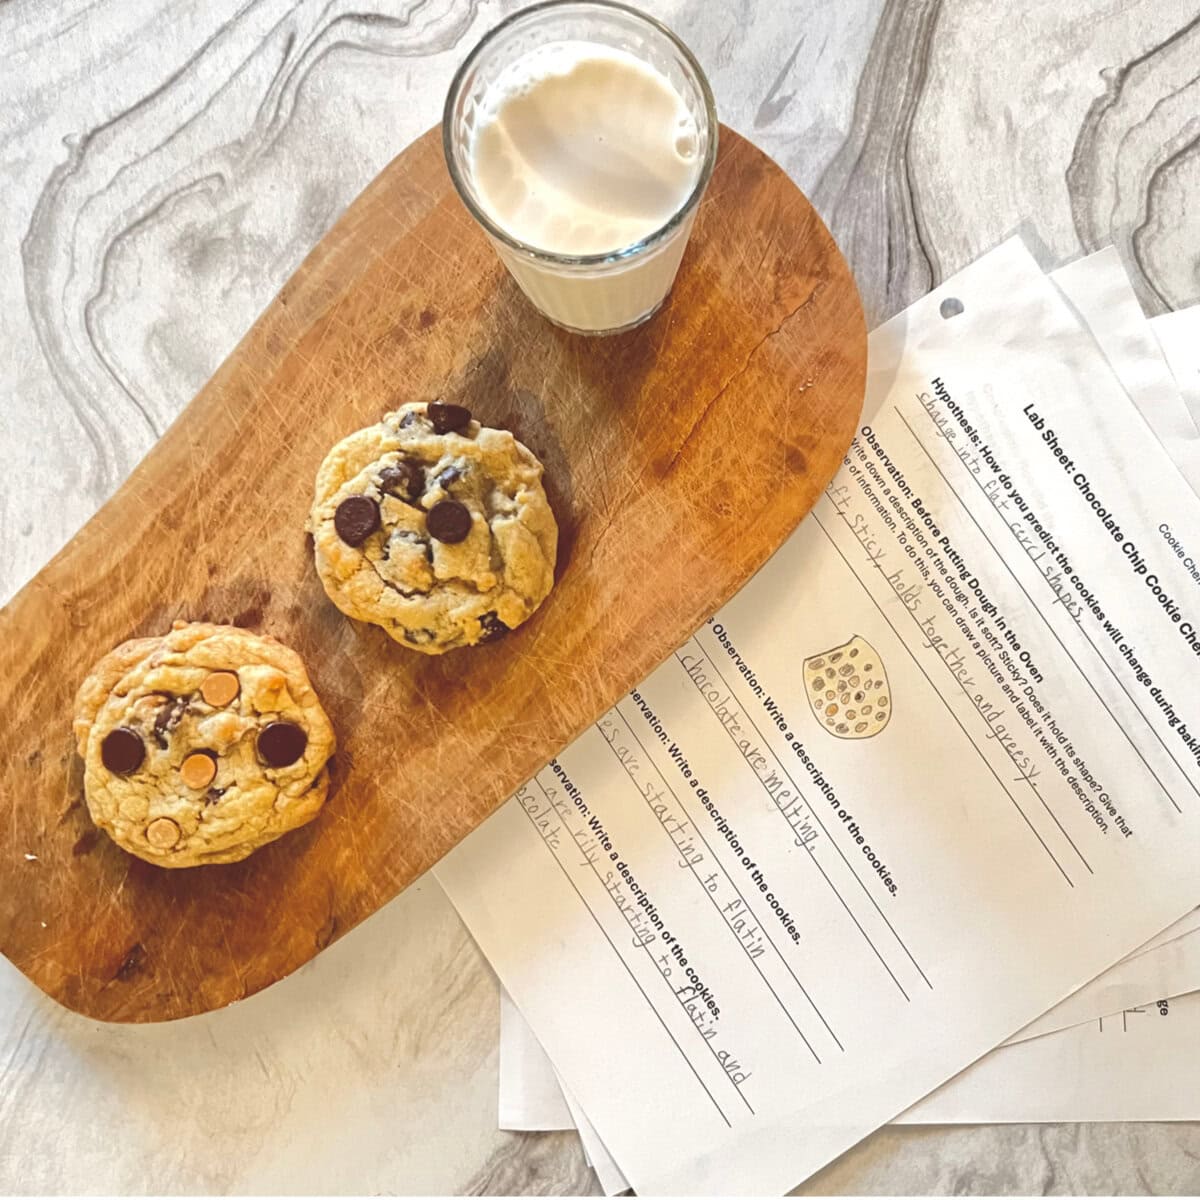
Homeschool Science Activity - Chocolate Chip Cookie Chemistry - Two Cookies Sitting on Board with Glass of Milk, Chocolate Chip Cookie Chemistry Lab Sheets Sitting Next to Cookies

Chocolate Chip Cookie Chemistry Lab

Leavening Agents

As the water boils away, the baking soda reacts with a type of chemical, called an acid, in the dough. Baking soda is a leavening agent. A leavening agent is a chemical added to dough or batter that, in the cooking process, goes through a chemical reaction.

One of the products of the reaction is a gas (carbon dioxide) that causes the dough to rise. This creates airy pockets in the cookies.

Chocolate Chip Cookie Aroma

When the dough reaches 310F, a chemical reaction called the “Maillard reaction” occurs. When this reaction occurs, sugar and proteins react with each other. At this point, the cookies begin to brown. The Maillard reaction gives cookies a characteristic flavor. You can smell this reaction occurring when you start to smell the cookies.

The Maillard reaction is discussed more in depth through the course.

Caramelizing Sugar

When the dough reaches 356F, sugar in the cookies undergoes a chemical change. This is called caramelization. Caramelization changes the taste of the cookies to have a slightly caramel flavor.

Homeschool Science Activity: Chocolate Chip Cookie Lab - Woman and Child Placing Cookies on Baking Sheet

Turn Baking Into a Homeschool Science Activity

Exploring the science behind baking can transform a simple recipe into an engaging learning experience for young minds. By using this recipe as a homeschool science activity, you can teach valuable lessons about chemical reactions, observation, and the scientific method—all while enjoying delicious homemade cookies. From the Maillard reaction to the role of leavening agents, every step in this tasty experiment brings chemistry to life in a fun, hands-on way. So, gather your ingredients, hypothesize, and bake your way to both learning and sweet satisfaction!

Don't Forget Your Lab Sheets!

Don’t forget to download the lab sheets to enhance your homeschool science activity! With the lab sheets in hand, this baking experiment becomes an exciting opportunity to blend hands-on learning with tasty treats. Print them out, gather your ingredients, and get ready for a delicious dive into kitchen chemistry!

Explore More: Chemistry Courses and Free Homeschooling Resources

This article is a sneak peek into an upcoming kitchen chemistry course designed to make science fun, engaging, and delicious! Packed with hands-on experiments like this chocolate chip cookie lab, the course will explore the fascinating chemical processes that happen right in your kitchen. Stay tuned for its release, and in the meantime, check out some of our other chemistry courses that dive into topics like atoms, molecules, the periodic table, chemical reactions, and more.

Did you know that this article was originally published in our free online magazine, which features educational content, creative ideas, and other essential homeschool resources?! Don’t miss out—sign up today and get inspired to bring science to life in your homeschool!



Science Teaching Methods: Build a Mini Planetarium

Science Teaching Methods: Tall tree silhouette with man silhouette against a dark night sky full of stars

Science Teaching Methods: How to Build a Mini Planetarium

Blair Lee, M.S.

Hands On Science Teaching Methods

Introducing new science teaching methods can transform the way children understand and engage with scientific concepts. One effective approach is through hands-on projects that bring the wonders of the natural world right into your home.

In this activity, we’ll show you how to create a simple, homemade star projector using everyday materials, offering an engaging way to learn about constellations and the night sky. This project encourages children to use observation and fine motor skills while exploring the stars from the comfort of their own home—perfect for homeschooling families looking to make science both fun and meaningful.

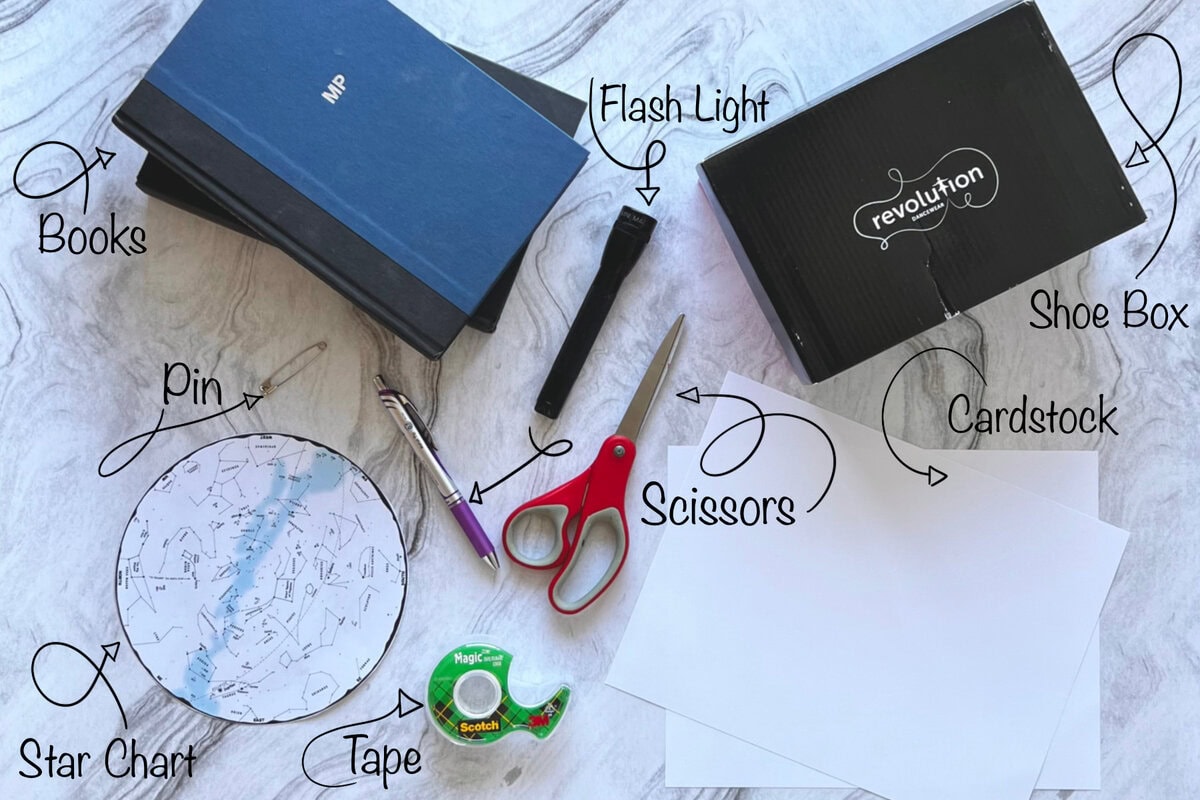
Materials

  • Shoe box
  • Scissors
  • Cardstock 
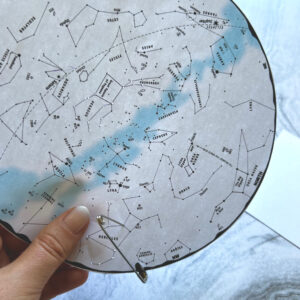
  • Star chart for your latitude  or optional but highly recommended a star map you made while stargazing
  • Pen or pencil
  • Pin
  • Tape
  • Flashlight
  • Books
Sciene Teaching Methods: Flat Lay of Items Needed for Mini Planetarium Project: Books, Shoe Box, Pin, Pen, Flash Light, Scissors, Star Chart, Tape, Card Stock

Procedure

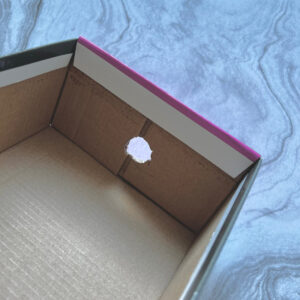
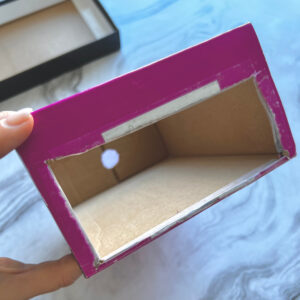
1. Remove the lid from shoe box to work on the bottom (lidless) box. On one of the small-sided ends of the bottom box draw a circle the same circumference as the handle end of the flashlight. Cut a hole just big enough for this end of the flashlight to fit into.

2. On the opposite side of the box, cut out a rectangle that is almost that entire section. You just need a small lip to attach the paper to.

Build a Mini Planetarium Project: Hole Cut in Bottom of Shoe Box for Flashlight to Fit Through for Planetarium Project
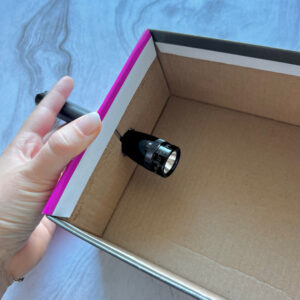
How to Build a Mini Planetarium: Flash Light in Bottom of Shoe Box for Planetarium Project
How to Build a Mini Planetarium: Hole Cut in Bottom of Shoe Box for Planetarium Project

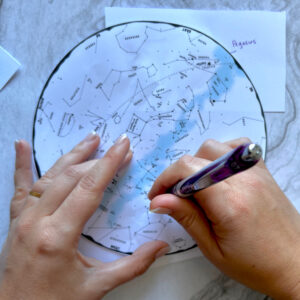
3. Using the star chart or your star map, draw dots on the card stock showing the stars in your night sky. 

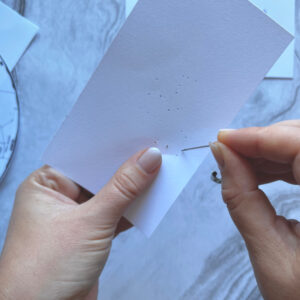
4. Poke holes through the dots with a pin.

Science Teaching Methods: Poking Hole Through Star Chart with Pin - Step 3 of How to Make a Mini Planetarium
How to Make a Mini Planetarium: Drawing Dots on Card Stock Using Star Chart
Science Teaching Methods: Poking Holes in Card Stock to Align with Star Chart for Mini Planetarium Activity

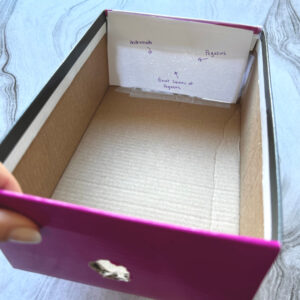
5. Put the card stock over the rectangular hole of the box, and tape it in place.

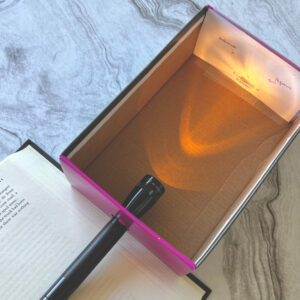
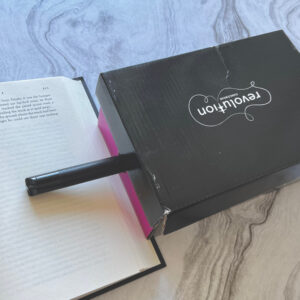
6. Slide the flashlight in from the inside of the box, so that the head of it is in the box. Make sure you can turn the flashlight on and off when the lid is on the box. Support the end of the flashlight that is outside of the box with a stack of books. Put the lid on the box.

How to Build a Mini Planetarium: Card stock with holes poked for stars taped to the open end of the shoe box.
Science Teaching Methods: How to Build a Mini Planetarium - Flash light in show box pointing at star card to demonstrate how mini planetarium projector is to be set up. Flash light handle resting on a book.
How to Make a Mini Planetarium: Mini Planetarium Projector Set-Up: Shoe Box with Lid On, Flashlight Handle Coming Out of Box and Resting on a Book.

7. In a darkened room, turn on the flashlight, and project your constellation onto a wall. 

8. Quiz your friends or family to see if they can identify the different constellations.

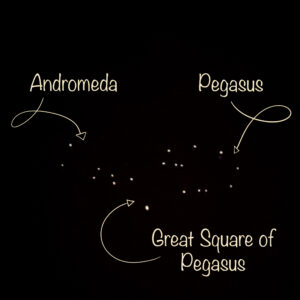
Science Teaching Methods: How to Make a Mini Planetarium - Star Projection of Andromeda, Pegasus, and the Great Square of Pegasus
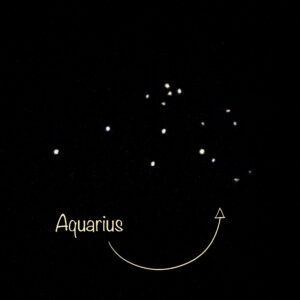
How to Make a Mini Planetarium: Star Projection of Aquarius
How to Make a Mini Planetarium: Star Projection of Hercules

Let the Science Fun Continue!

With a few simple materials and some creativity, science teaching methods like this star projector activity can make learning an adventure right in your own home. Not only does this project spark curiosity and excitement, but it also gives children a hands-on way to connect with the night sky and deepen their understanding of astronomy. Activities like these help build critical thinking and observational skills, fostering a love for science that can last a lifetime. So, dim the lights, turn on your projector, and watch your children marvel as they explore the universe from their very own living room!

Not ready for the planetarium fun to come to an end? For those ambitious enough to want a larger and more detailed planetarium build, check out this Build Your Own Planetarium project from Space.com.

Also, be sure to check out The Stargazer’s Notebook for a more in-depth look into the the stars, planets, and celestial objects that occupy our skies.


Homeschool Science Fun: Candy Rock Cycle Activity

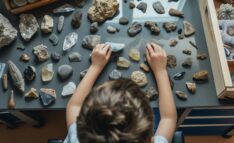
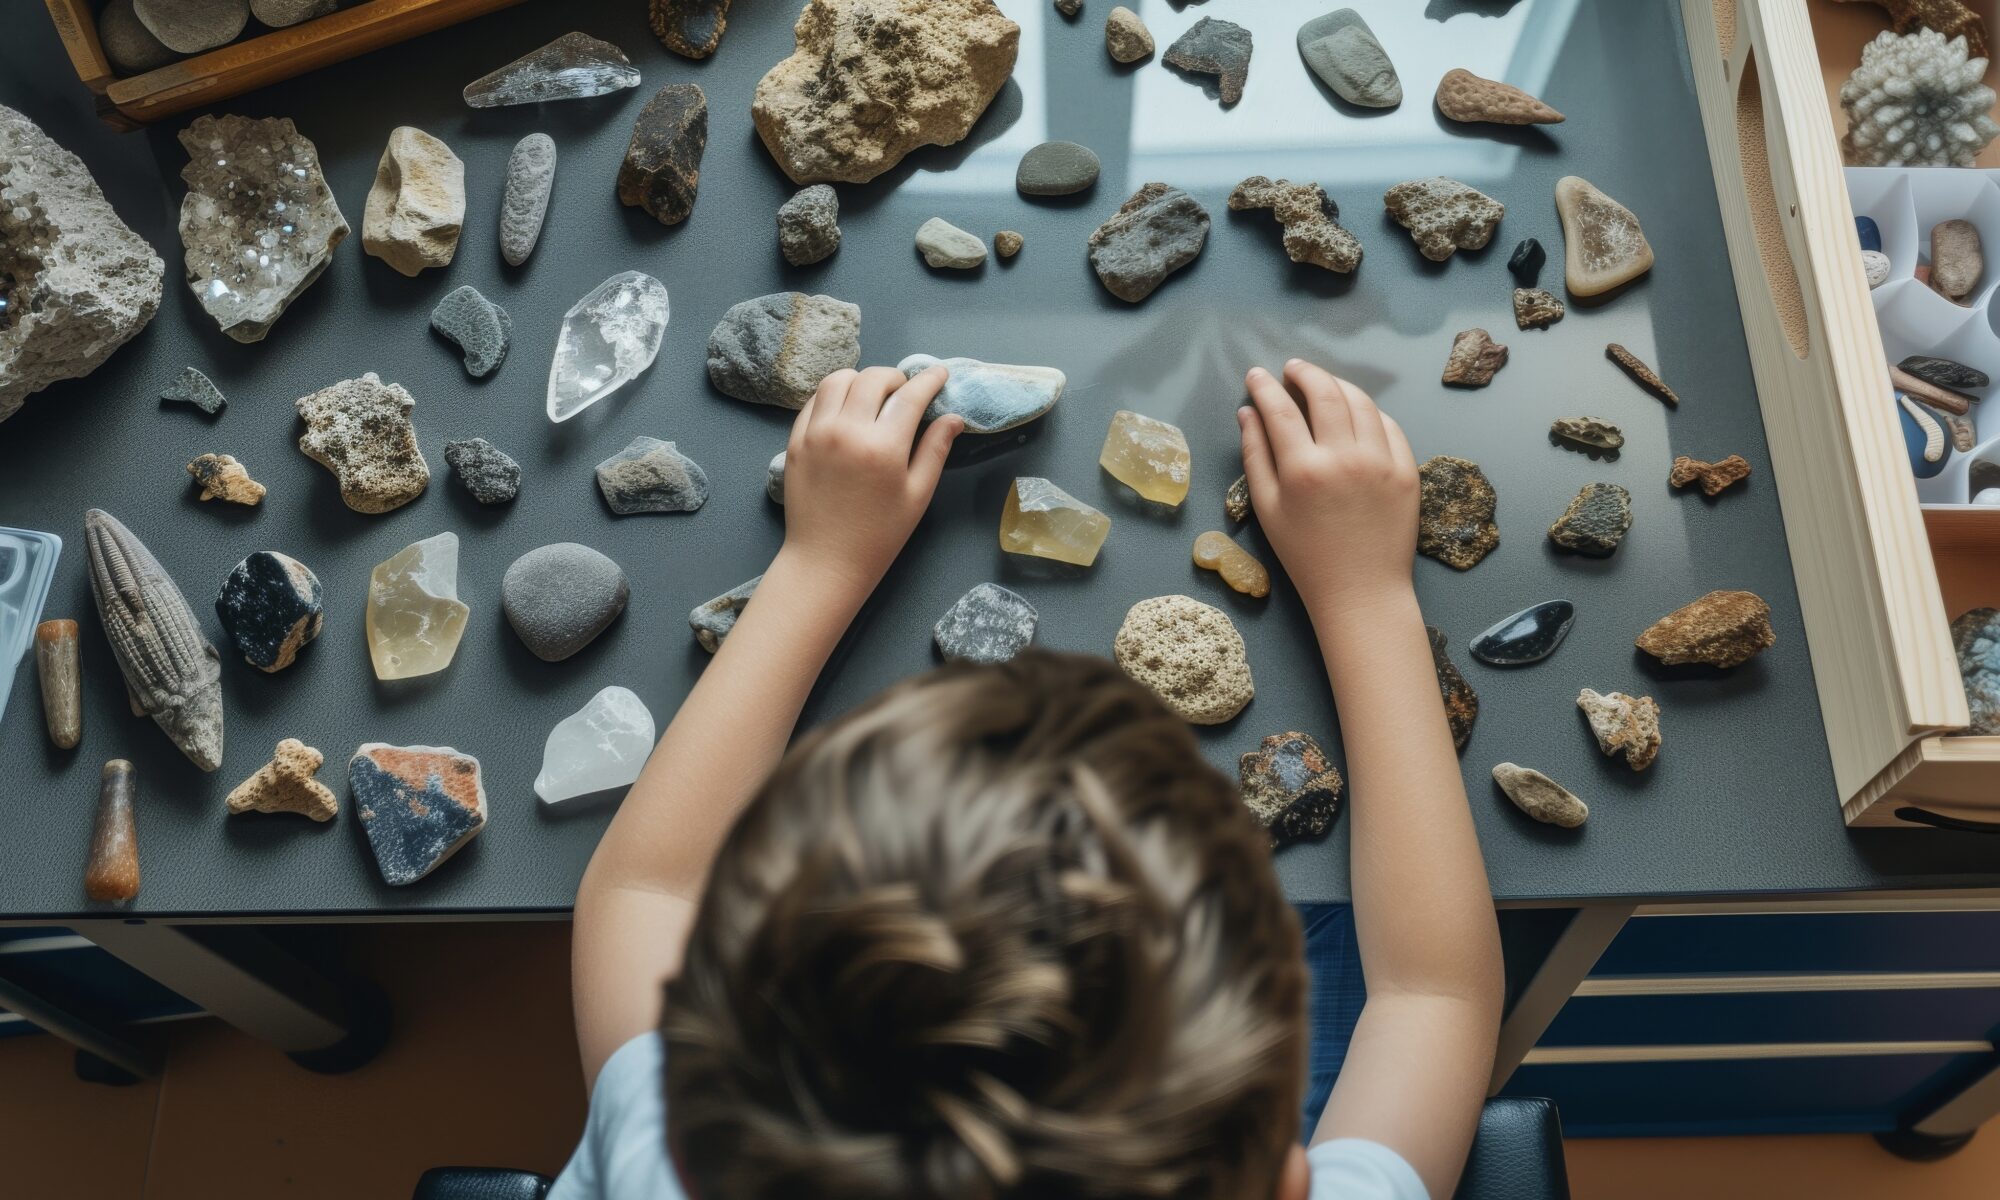
Homeschool Science Child Sitting at Desk Examining Table Full of Rocks

Homeschool Science Fun: Candy Rock Cycle Activity

Blair H. Lee, M.S.

Looking for Something to Do with All That Leftover Candy...

As research for this homeschool science activity, I put a poll in the SEA Homeschoolers Facebook group to learn which candy most people would be throwing out sometime between November and March. What I learned surprised me. It truly was a situation where one person’s trash was another person’s favorite candy. Take Tootsie rolls for example. I was a young child when I decided that Tootsie Rolls were yucky. What could that chewie, fake chocolatey sweet be made of? And why are they foisted on young people as if they are treat? Could it be that they are just inexpensive to make? That’s the answer I settled on. Much to my surprise, we have many SEA members who list Tootsie Rolls as their favorite candy. And licorice, obviously the best candy in the world, was not well liked at all. But no matter what candy you are thinking of throwing out over the next few months, this activity is for you!

Materials

  • Candy: It helps if there’s chewy candy in the mix. This lab is more difficult if all the candy is hard. Even if you would typically eat them, a few Starbursts or fruit rollup pieces, with their low melting points, should be included.
  • Scissors, knife, and/or mallet (depending on the candy type)
  • Plastic Bag
  • Cutting board
  • Microwave
  • Heavy book
Bowls of different types of candy sitting to table top. Hand of child reaching for candy

Procedure

1. Unwrap the candy. On your activity sheet, where it says “Any Type of Rock” draw a picture of your candy pile. 

Homeschool Science - Rock Candy Activity - Pile of Candy on Cutting Board

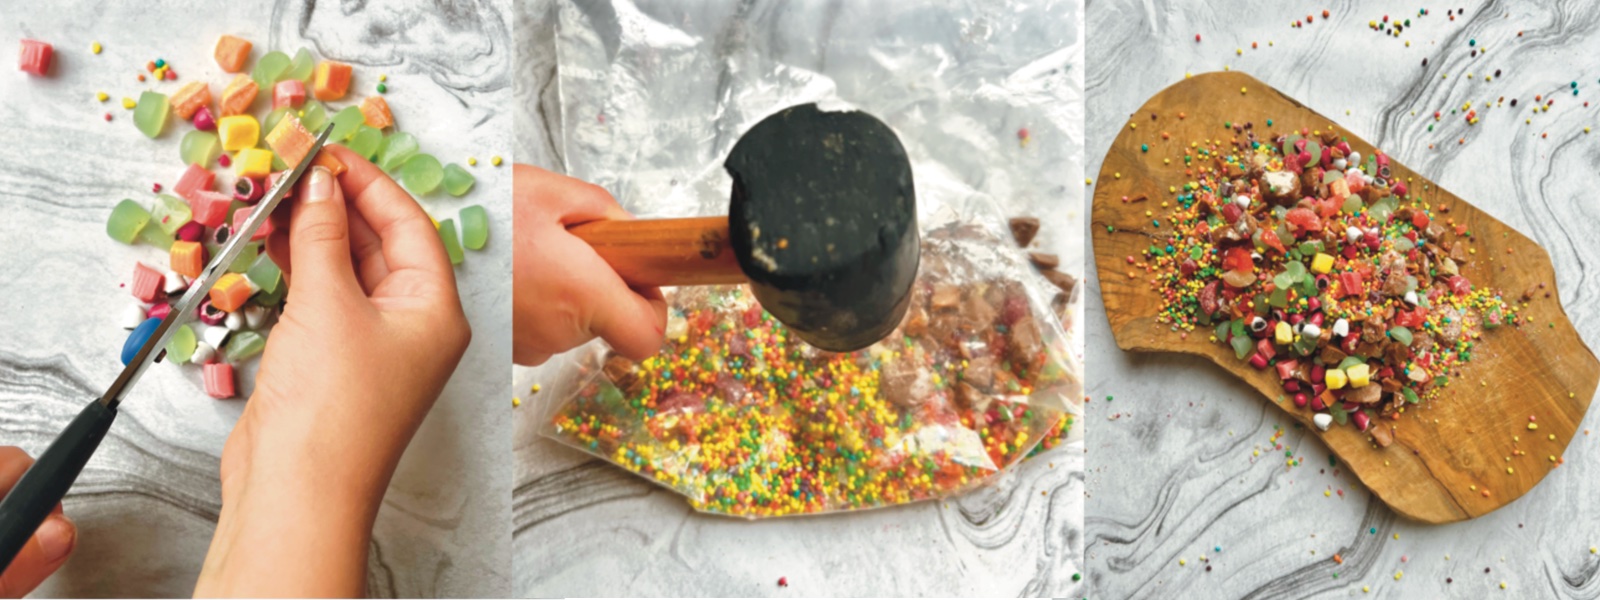
2. Weather the candy. Weathering is the process of breaking down rocks. Use your weathering tools (scissors, knife, and/or mallet) to break the rocks down. Draw a picture of this in the box that says “Sediments.”

Rocky Cycle Candy Activity - Weathering Rock Pieces ie Cutting and Smashing Candy Bits

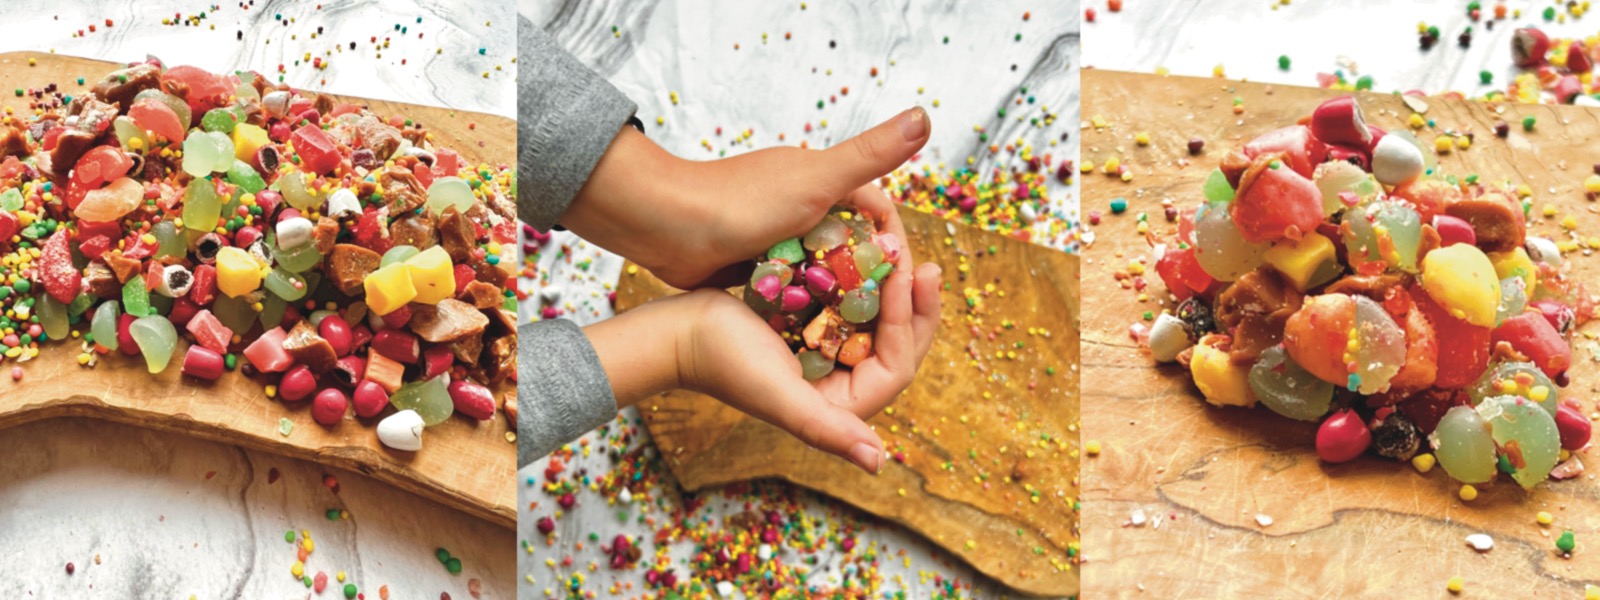
3. Divide the sediments into three piles. Take one of the piles and knead it with your hands. Press down on it once it softens, and then knead it a bit more. Press down once more. That compaction of the sediments is how sedimentary rock forms. Draw a picture of this in the box labeled “Sedimentary Rock.” 

Forming Sedimentary Rocks from Candy Bits - Homeschool Science - Rock Cycle

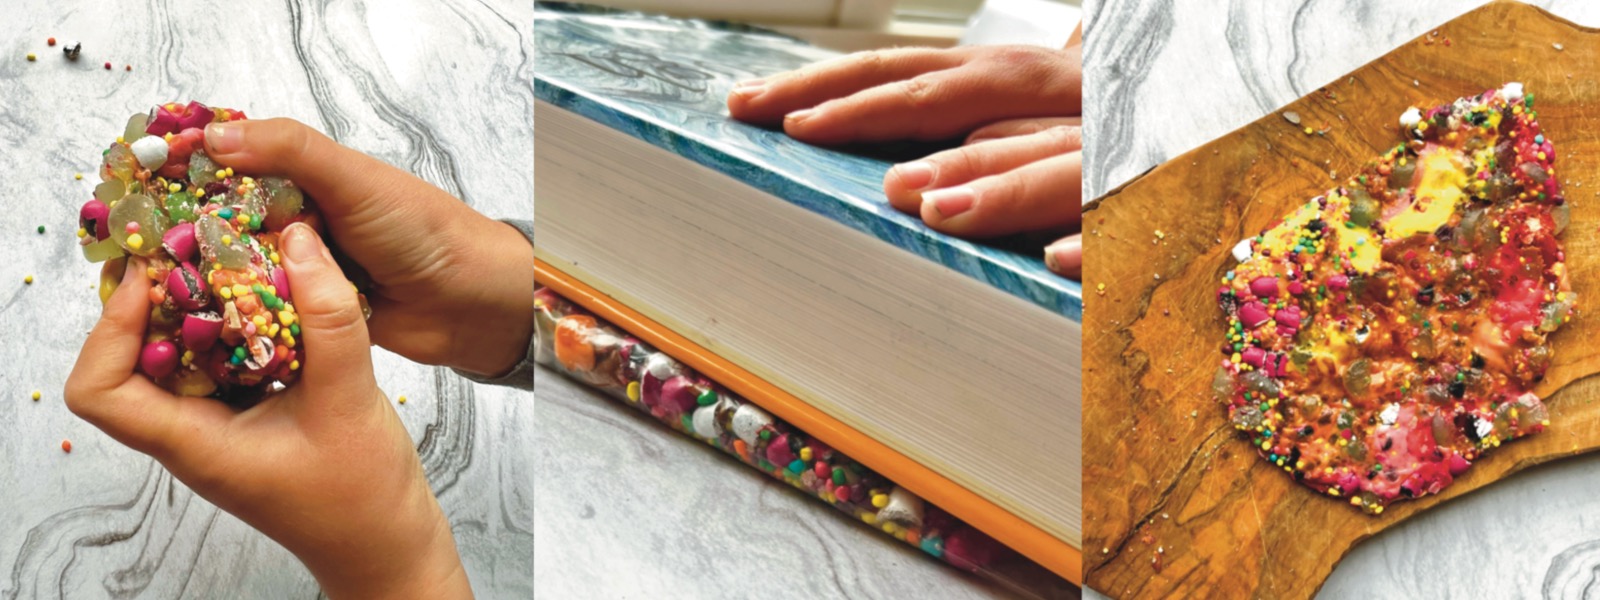
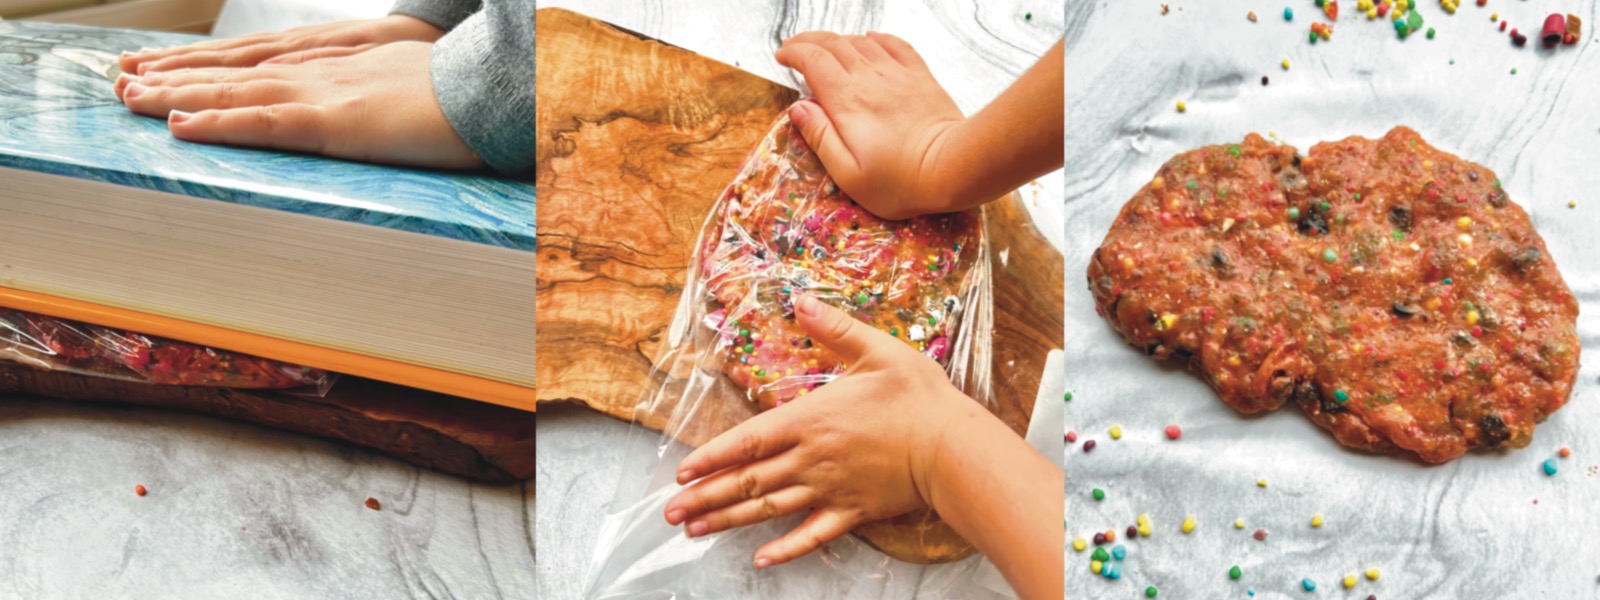
4. Put one of the piles of sediment into the plastic bag. Knead this until it sticks together. Press down on this with the heavy book. Heat this for 10 seconds. Make sure it is not too hot. Continue kneading and folding. And pressing with the book. Fold it at least 5 times. Melting, folding, and cooling under pressure models how metamorphic rock forms. Take it out of the baggie and draw a picture of this in the box labeled “Metamorphic Rock.”  

Metamorphic Rock - Rock Candy Lab

5. Put the last of the piles of sediment into the baggie. Heat this for 20 seconds. Make sure it is not too hot to hold. Knead it until it starts to cool. Press on it with the book in between melting and kneading. Repeat this until the candy is melted and well mixed.  Melting under pressure models how igneous rock forms. Draw a picture of this in the box labeled “Igneous Rock.” 

Forming Igneous Rock with Candy - Rock Candy Activity Lab

Don't Forget to Grab this Homeschool Science Lab Sheet!

Ready to explore the wonders of geology with this homeschool science activity? Be sure to review the different stages of rock formation with your students at every stage of the process to help solidify their understanding. And don’t forget to download the lab sheet to guide you through each step and reinforce the learning!


Homeschool Science: An Edible Fossil Hunt Activity

Homeschool Science Edible Fossil Dig - Little Boy Digging Through Cookie to Find Fossils (Candy)

Homeschool Science: An Edible Fossil Hunt Activity

Blair H. Lee, M.S.

Homeschool Science Activity: Digging into the Past

Excerpted from Real Science Odyssey – Biology 1

Have you ever imagined uncovering ancient treasures hidden beneath the Earth’s surface, finding clues about the plants and animals that lived millions of years ago? If so, you’ve pictured the life of a paleontologist! These scientists are dedicated to studying fossils, the preserved remains of creatures and plants from the distant past. Their work involves more than just digging in the dirt—they also spend time in labs carefully studying and identifying the fossils they uncover.

While many people think fossils are always large, some are so small they can be hard to spot. But don’t worry—you won’t be hunting for tiny fossils today! Instead, you’ll participate in a fun and creative fossil dig at an ancient seabed filled with different types of fossils. In this free homeschool science activity, the fossils are represented by snacks like raisins, M&M’s, nuts, and pretzels. The raisins and nuts represent plants, while the M&M’s and pretzels represent animals. Just like real fossils, the deeper you dig, the older the remains you will find. After your exciting dig is complete, you’ll get to enjoy your edible discoveries as a tasty reward!

Homeschool Science Edible Fossil Dig - Little Boy Digging Through Cookie to Find Fossils (Candy)

Materials

Instructor’s Note: This is more fun if you have baked the cookies before this homeschool science lab begins, without students seeing where the “fossils” are hidden.

Read through steps 1-7 of the procedures before making the cookies. 

  • 8in x 8in Pan
  • *Batch of cookie dough (you choose what type – if choosing chocolate chip cookie dough as your base, omit the chocolate chips)
  • 1/2 cup coconut or pretzels (broken into 1/4 inch pieces)
  • 1/3 cup of Red M&Ms
  • 1/4 cup Yellow M&Ms
  • 1/3 cup Peanuts
  • 1/4 cup Walnuts
  • 1/2 cup Raisins
  • Chocolate Bars – Enough to lay side by side and cover the entire 8in x 8in surface area, do not be stingy with this! (You can substitute frosting, if you prefer)
  • 2 Toothpicks per Student
  • Lab Sheets
  • Pen or Pencil
  • 6 Different Colored Pencils – One for each type of “fossil”
  • Knife
  • Spatula
  • Plate

* The ingredients for the cookies depend on the cookie recipe you choose.

Ingredient Add Ins for Fossil Dig Activity - Pretzels, MMs, Chocolate Bars, Peanuts, Raisins, Walnuts
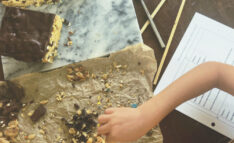
Fossil Dig Homeschool Science Activity Cookie Bars in Pan Ready to Bake

Preparing the Dig Site

  1. Make the cookie dough per the recipe instructions.
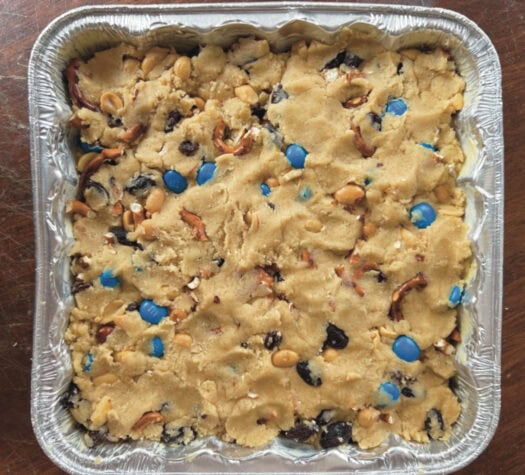
  2. Before baking, mix together the raisins, the red M&Ms, 1/3 cup of coconut/pretzels (rest will be used at a later step), and peanuts. Add this mixture to the cookie dough. Do not try to evenly distribute these add-ins.
  3. Spread the dough into the 8in x 8in pan. Even though the distribution is not uniform, make sure that there are some “fossils” in each 4-inch square of cookies. There will be four squares total.
  4. Bake the cookies following the directions for bar cookies from your cookie dough recipe.
  5. Once the cookies have finished baking, sprinkle the walnuts, remaining pretzels/coconut, and yellow M&Ms on top of the cookies.
  6. Lay the chocolate bars on top of the cookies, covering all of the walnuts, pretzels/coconut, and M&Ms.
  7. Place this cookie pan back into the warm (but off) oven until the chocolate on top has melted. The chocolate should be covering all the items to some degree, including those layered on top.
  8. Once chocolate has melted, place in the refrigerator until chocolate has hardened.
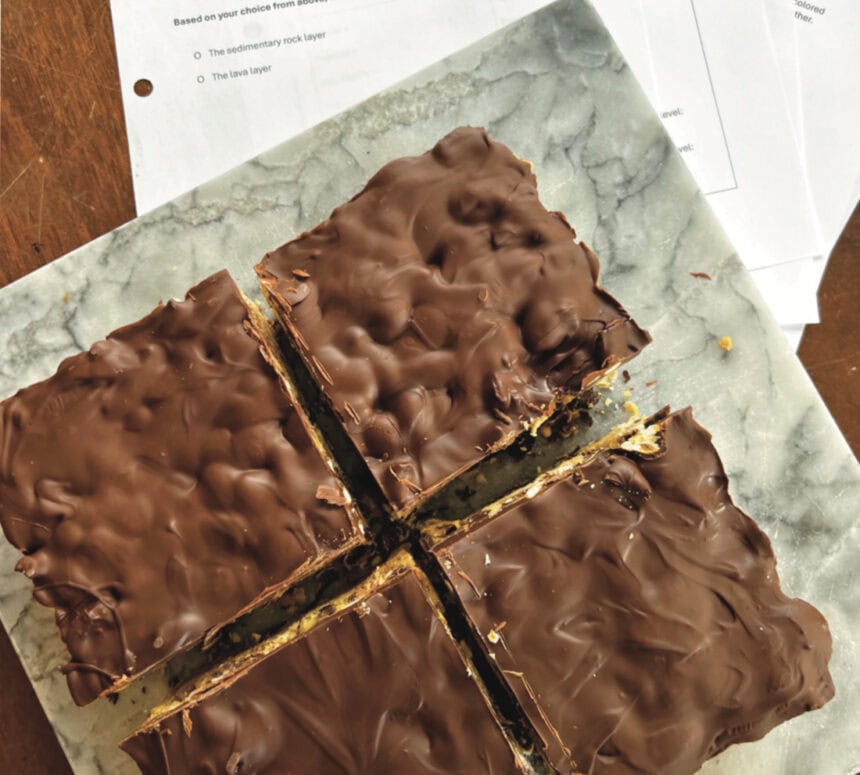
  9. Cut the cookies into 4-inch squares to match the grid on page 1 of the lab sheet. *If you need more than four squares, quarter each square for a total of sixteen 2-inch squares. Use a pen and a ruler to change the grid on page 1 of the homeschool science lab sheet and add these to the bar graph. Each of the squares is called a quadrant.
Fossil Dig Cookie Bars Completed and Cut into Quadrants with Homeschool Science Lab Sheets

Digging for Fossils

  1. Use the spatula to take out one cookie square and put it on a plate. Have students answer the first two questions on their lab sheet.
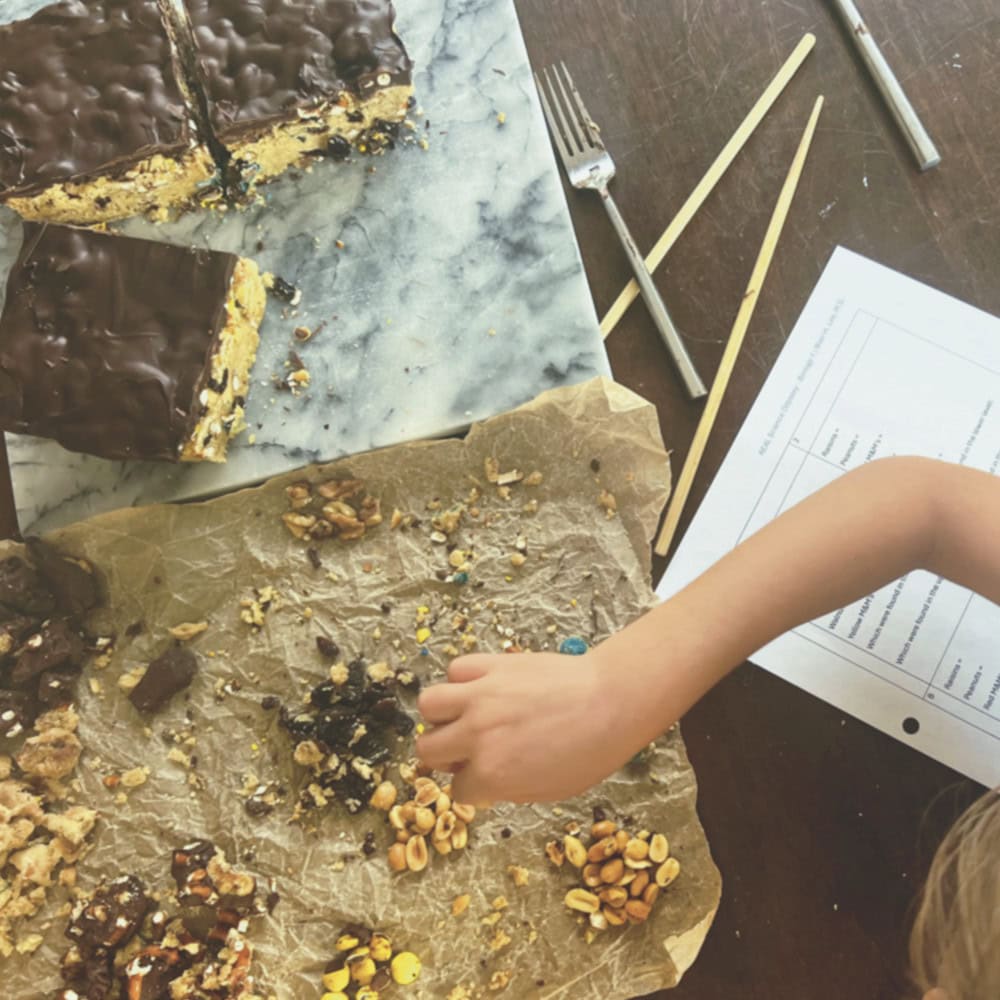
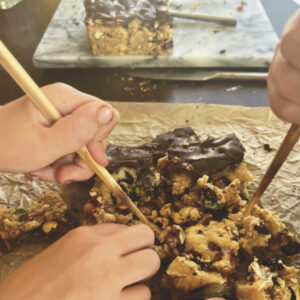
  2. Let the students get to work, using the toothpicks to separate and group the materials. There should be seven piles, one for each type of “fossil”: raisins, red M&Ms, yellow M&Ms, peanuts, walnuts, pretzels/coconut, and one for cookie crumbs. Take note of the layer in which each item is found.
  3. When the students are done with a quadrant, they will make note the number of each fossil found in that quadrant. They will examine all quadrants.
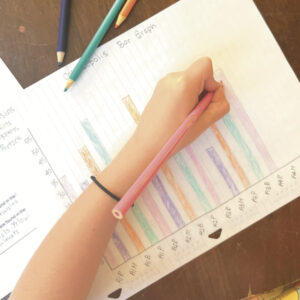
  4. After digging through all quadrants, students will put their results into the bar graph and answer the questions on the homeschool science lab sheet.
Homeschool Science Edible Fossil Dig - Two Children Digging Through Cookie to Find Fossils (Candy)
Edible Fossil Dig - Two Children Digging Through Cookie to Find Fossils (Candy)
Homeschool Science - Edible Fossil Dig - Childs Hand Filling Out Bar Graph
Edible Fossil Dig - Little Boy Digging Through Cookie to Find Fossils (Candy)

Instructor's Notes

If this is the first bar graph students have made, be prepared to help them. You might need to scaffold the instruction by doing the bars in the graph for quadrant A1.

To make cookies vegan: make the base recipe for chocolate chip cookies without eggs and substitute a vegan butter.

To make the cookies dairy free: use a dairy free butter substitute.

In the demo, blue M&Ms were subbed for red because that is what was available. Feel free to swap colors as needed but make sure that the two colors you use are easily distinguishable.

More homeschool science lab fun: Use a search engine to see if there is a dig site in your area and visit it!

Keep the Homeschool Science Fun Going!

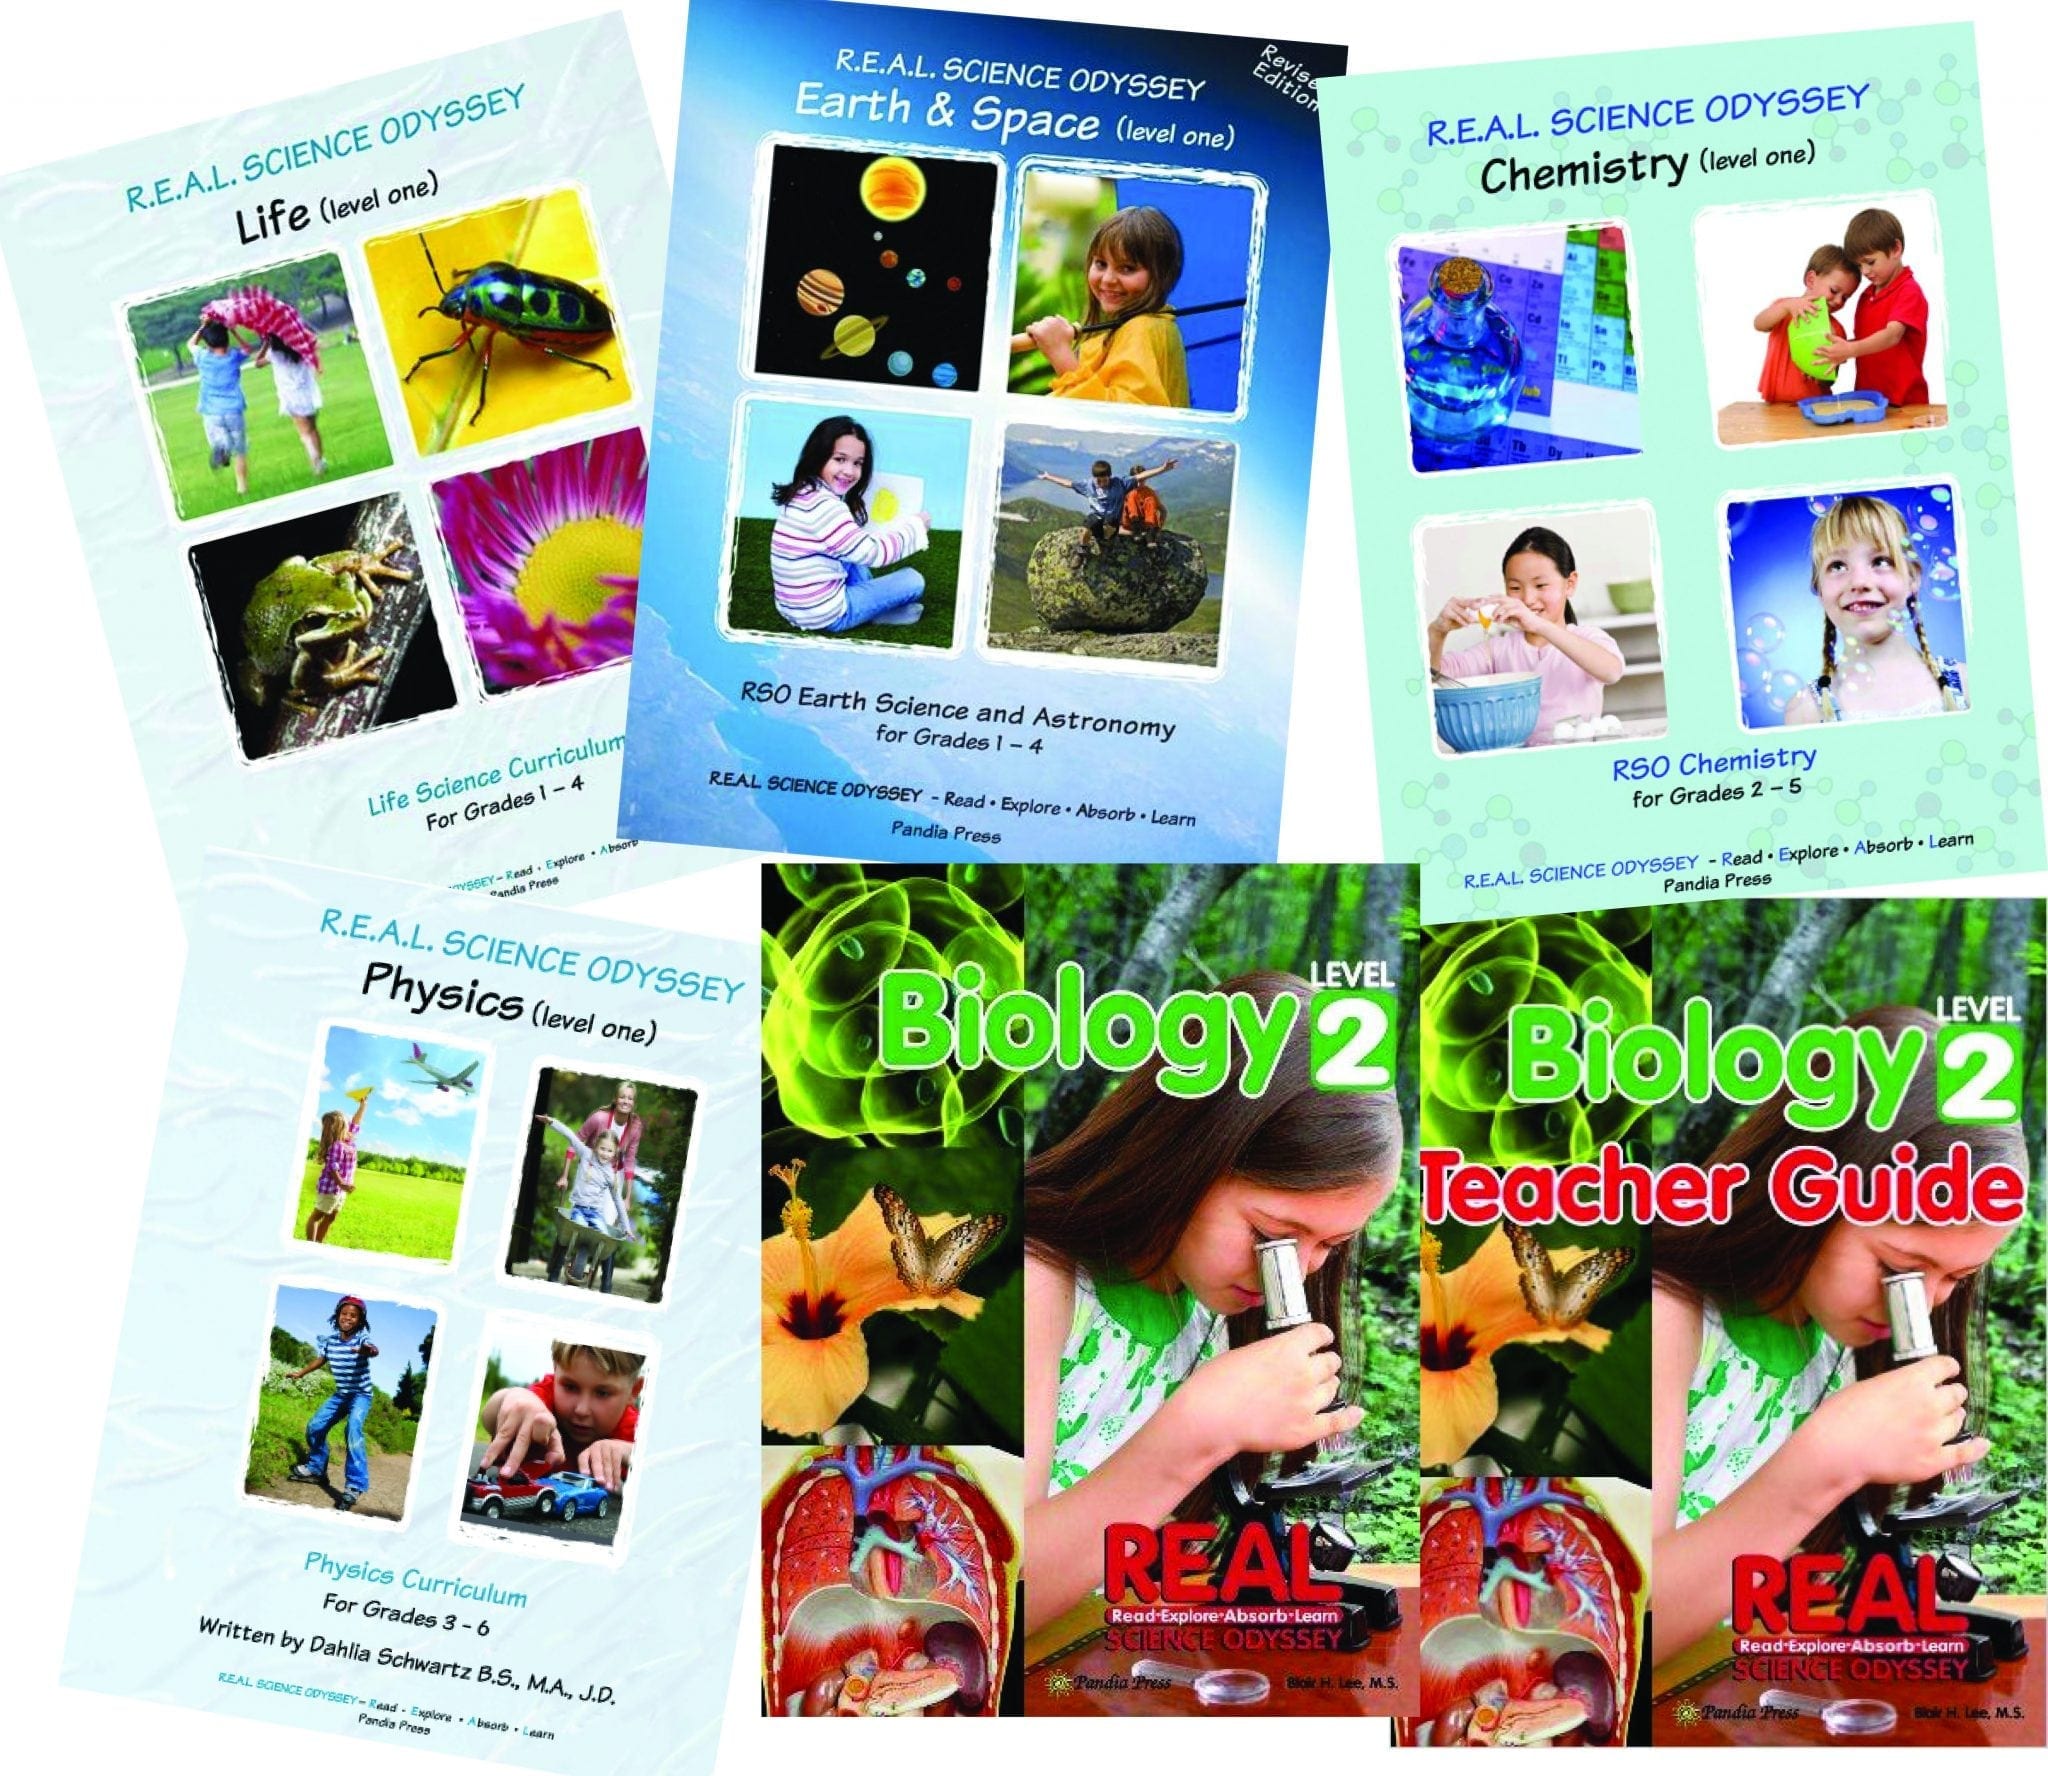
We hope you enjoyed participating in this homeschool science hands-on learning activity with your students! If you are interested in learning more key science concepts through an incremental series of lessons and hands-on exploration, be sure to check out REAL Science Odyssey.


Teaching the Science of Climate Change to Middle Schoolers

Teaching the Science of Climate Change to Middle Schoolers, Secular Homeschool Science

Q & A on (Almost) Everything You Want to Know about Teaching the Science of Climate Change to Middle Schoolers*


*don’t be afraid to ask!

When I was asked to teach a course on the science of climate change to the middle schoolers in our science group, believe me, I had some questions!

As I worked to answer those questions, I gained a deeper appreciation for how interconnected everything (and I do mean everything) really is. And I got excited thinking about the many ways this course could challenge and inspire the kids with all kinds of learning…and dare I say it?  Change the world!

Here are some of the questions I asked as I got started.  I hope to help make this more approachable and encourage you to tackle the science of climate change in your homeschool or co-op!

1.  Why consider teaching about the science of climate change?

For me, this goes to the heart of why we teach anything.  We want to empower our kids with tools to build a good life—one in which they find their own point of view and understand their position in this world, where they can identify problems and think about solutions, where they can find joy and pleasure and beauty.

A course on the science of climate change encompasses every discipline necessary for developing these life tools: critical thinking, deep understanding of scientific method, geography, geology, chemistry, communication, math, physics, biology, creativity, morality, politics, economics, and an appreciation of the interconnectedness of all life and systems in our world.  It even includes the arts.  Talk about a powerhouse of interdisciplinary learning!

2.  Why the science of climate change, and not just climate change?

We’re specifically talking about teaching the science of climate change, not simply the topic of climate change, and this distinction is important.

Science means asking questions, evaluating data, thinking deeply and creatively.  It’s more than a collection of facts.  It is coming to grips with how we know what we know, how we figure out what’s problematic, how we imagine and create a future that works for our world.

Learning about the science of climate change means asking lots of questions and making lots of connections.

3.  Why teach this to middle schoolers?

The science of climate change is excellent for middle schoolers.

By this age, kids have learned some basic weather science, chemistry, physics, and social studies.  They are aware of the value of trees and forests.  They also have a grasp of basic farming or gardening concepts.  These things are a foundation for building their understanding of the science of climate change.  And building on their foundational knowledge is one of the things middle schoolers do best!

In learning about climate change, they will take scientific theories, models, and facts and make connections with history, with present conditions, and with future possibilities.  They will see first-hand how real-life science gets done because they will be doing it, just like the scientists whose work they are learning about.  They will devise creative solutions for the problems they identify, collaborate with each other, and present their data and ideas creatively and colorfully.  They will tackle the ethical issues in their passionate, big-hearted way.  (They probably will even get a little muddy.)

4.  Ok, but what about the elephant in the room?

There is overwhelming scientific consensus on the impacts of climate change, yet some people consider this to be a controversial topic.  Do not let that intimidate you.

Teaching controversy is a key aspect of teaching for global competence—preparing students to investigate the world and weigh perspectives is critical to their growth as global citizens.

And I think you will find, as you explore the issues and learn about this science, that the real questions are about what we can and should do to change climate change.

5.  I’m not a climate change expert!  How do I know what to cover?

You’re probably already watching documentaries and reading a lot.  Be intentional about noticing things that pertain to climate change, particularly the connectedness of earth’s systems with the peoples and ecosystems.  When something grabs your attention, explore it.

But don’t worry about becoming an expert on climate change.

You (and the kids) will learn a great deal, believe me, but the main point of all this is to foster an understanding of:

  • How we know what is going on
  • How it all works together
  • How to evaluate sources
  • How scientists do what they do
  • How we can figure out what to do next
  • Any other HOWs you and the kids come up with!

6.  Climate change can be really depressing. How do I keep the kids (and myself) from sinking into despair?

Here’s where I took a lesson from Ivy and Bean.

Yes, Ivy and Bean.

Ivy and Bean: What’s the Big Idea? (book 7) by Annie Barrows and Sophie Blackhall.  In this story, the fifth-grade class presents a lesson on climate change to Ivy and Bean’s second-grade class, miring the younger kids deep in an existential crisis of hopelessness and despair over the doomed polar bears and the destructiveness of humanity.  With a stroke of genius, their teacher allows the second graders take ownership of the problem: for their science fair projects, they devise clever ways to help cool down the earth.  Thus the children’s hope is restored, their creativity blossoms, and most importantly, they no longer feel that life is meaningless and the future bleak with misery and ruination.

Fact: Middle-schoolers are not much different from second-graders when it comes to hopefulness and existential crises.  Focus not only on the problems, but also on the real and possible solutions.  Always end the lessons with something they can feel hopeful about, or at the very least, take care that you don’t leave them despondent!

7.  What will the kids do in a course on the science of climate change?Teaching the Science of Climate Change to Middle Schoolers, Secular Homeschool Science

There are so many opportunities here!  With some thoughtful preparation, you can create a course on climate change that will allow your learners to:

  • engage in scientific experiments
  • learn how to gather data
  • evaluate sources
  • examine the practice of peer-review in scientific publication
  • practice data analysis and presentation
  • apply mathematical formulas to analyze data and determine potential futures
  • learn about earth’s systems in a meaningful way
  • explore humanity’s role and impact on earth’s environment and systems
  • apply chemistry to real life
  • combine a study of history with science
  • draw
  • play games
  • think creatively
  • do field work
  • take field trips
  • learn about and talk with scientists and inventors
  • solve problems
  • …and more!

8.  What will I use to teach the science of climate change?

As I prepared to teach this course, I found more material than one person could possibly need.  Some of it is fantastic.  In fact, there’s so much available from reputable sources that your primary difficulty will be deciding what not to use and keeping what works best!

Here are the primary curricula I used:

I combined these with some videos, interactives, articles, and games to create a full, rich learning experience for a relatively low cost.  Supplies for labs mostly can be found in your home or supermarket; a few will need to be sourced ahead of time.  You can easily use these for co-op classes, after-school classes, or your own family.

I challenged the kids to bring their ideas to the class, too.

Our group decided to incorporate some project-based learning: the kids decided to design and build their own green energy technology!  This is a work in progress, and I’m so excited to see what they come up with!

9.  Are you ready to learn more about creating a robust course on the science of climate change with all kinds of interdisciplinary learning?

Like you, I’m super busy and appreciate when I don’t have to do a thing totally from scratch.  Our course is still in progress, but I’m really pleased with how it’s turned out. I am more than happy to tell you what we’re doing in greater detail, including a list of supplies and links plus how to prep for the classes!  I’ll make these available on my blog over the next few weeks and months at backyardowls.com.

A final thought:

I’ve been inspired by designing and teaching this course and by the big-hearted, creative kids I’m lucky to be working with.  It really is exciting to think I can make a difference in their lives and in the world.  I hope you’re inspired, too, to see what you can do with this in your homeschool!  I promise: it’s worth it!

More About Climate Change & Secular Science for Homeschoolers

The Science of Climate Change Explained
Vetting Secular Science Curriculum
A Science Lab in Your Home

Teaching the Science of Climate Change to Middle Schoolers, Secular Homeschool Science


When Experiments Don’t Work, That’s When the Science Really Gets Fun!

Homeschool Science by Blair Lee

We have all been there, even me. It is the situation where your child and you set up and perform a science experiment only to have it fail. For most people this is frustrating. When this happens parents often wonder if their children are learning from it. As a scientist, I find it interesting that our response is frustration and doubt instead of delight. R. Buckminster Fuller said it best when he said, There is no such thing as a failed experiment, only experiments with unexpected outcomes. Unexpected outcomes should be treated with a sense of wonder. You have just been handed a logic puzzle that requires the scientific method to try to solve it.

Unexpected outcomes from an experiment are when you get to practice real science like scientists do. Most if not all the experiments in the courses you are using have been performed successfully or they would not be assigned. That means that the experiments in science book have expected outcome predicated on the consistent results from the huge number of times the experiment has been performed. If you get an unexpected outcome, you and your child get to brainstorm to figure out what set of conditions changed.

For most of us the first thing we do is question whether it was us. We pore over the experiment’s set up, procedure, and materials to ensure that we didn’t miss anything or make a mistake. If we didn’t make any mistakes, we conclude that the problem must be with the experiment itself.  This series of steps is exactly what you should do if the experiment yields unexpected results. While looking over the written instructions and troubleshooting your procedure discuss the learning goals for the experiment. Ask your child if the learning goals were met since the experiment didn’t give the expected results. If the answer is that they were not met, why not? What do you need to do to meet those learning goals?

One of the main learning goals for all scientific experiment is that kids begin, through use, to come to an intuitive understanding of the scientific method. It helps to focus on the scientific method when troubleshooting an experiment. A hypothesis is an educated guess. When a scientist makes a hypothesis, they are basing it on the observations and results their fellow scientists and they themselves have conducted. When scientists get results that are not consistent with previous experiments before rethinking a hypothesis they look over the procedure used to see if anything was changed. That should be you next step as well.

While poring over how the experiment was conducted there are several questions to ask with regard to the procedure. Is it possible that there is a typo in the procedure? Maybe you missed a step? Perhaps there are multiple ways to interpret one of the steps? Sometimes there is a step that is very finicky and needs to be followed exactly. When that happens it can make the experiment more complicated to duplicate than the author realized. Do not be shy about contacting the publisher or author of the lab. They should welcome the feedback and will often try to help you duplicate his or her results. I have been contacted several times about experiments that weren’t working in my science courses.

I start troubleshooting with the materials. Problems with materials are the most common cause of unexpected results in an experiment. This is the observation phase of the scientific method as applied to the situation. It’s important to focus on each ingredient. In my science courses there have been three instances where experiments failed because of materials. I have learned that cornstarch can absorb a lot of moisture in very humid environments, and that this can cause problems for some experiments. It turns out that in the last five years manufacturers have begun putting an ingredient called hi-float into balloons before they fill them with helium so that the balloons will lose helium more slowly. Did you know that in some states it takes a much higher concentration of bleach to turn food color in water colorless than in other states. We went ingredient by ingredient observing how each was behaving in the experiment to determine what was causing the unexpected results. It was a lot of fun and great science practice both at the same time. 🙂

At the end of this you might or you might not know what gave the unexpected results. Either way it is good to discuss the results and observations and come up with some conclusions from the experiment. Good statements to include in the conclusion of all lab reports is how this experiment could be improved on to meet the learning goals of the experiment. This is especially important in an experiment where you got unexpected results.

I’m hoping that most of your experiments go the way they are intended. The next time an experiment gives unexpected results, instead of getting frustrated, I hope you realize how much fun and learning can happen by applying the scientific method to logically deduce what led to the results. I promise you, you do not have to be a scientist to enjoy the process.

More Secular Homeschool Science Posts by Blair Lee & SEA

Teaching the Science of Climate Change to Middle Schoolers
Vetting Science Curriculum
A Science Lab in Your Home


How to Put Together the Best Science Field Trip

Science Field Trip

How to Put Together the Best Science Field Trip

Field trips aren’t just fun; they are also educational! Field trips give kids opportunities for hands-on learning, allow for new experiences, and lead to a better understanding of topics. By taking science field trips, kids can experience things that expense and expertise put out of most people’s reach. By following a few simple tips, you can ensure the science field trips this year are the best ever.
When planning what your children will study in science during the coming year, start thinking of when and where field trips would make sense. Include these in your overall homeschool plan for the year. Field trips are meaningful academic endeavors and deserve to be treated as such.  Spend some time on homeschool group pages, YELP, and TripAdvisor asking about and investigating potential places to visit. It helps to be fairly specific about what you are studying and what you hope to see. That way it is easier to decide if the visit will add much to your academics.

Think outside the box. If you are studying geology, for example, a field trip to a Natural History Museum is a great idea. When studying the rock cycle, a hike where you identify types of rock and gain knowledge about the geological processes that occurred where you live can be even more educational. If studying chemistry, visit a fireworks display after researching what compounds are used to make each color. Studying biology this year? Call your local hospital and see if they give guided tours. With some ingenuity and research you will be able to use field trips as a way of focusing on those areas of science you want to highlight.

Once you find a place to visit, it is a good idea to call to get information about some of the logistics. Find out if there is a best time and date. You are a homeschooler, so you can tailor your trip so that it doesn’t coincide with those times that are busiest. Make sure and ask about special exhibits, tours, and any field workers or researchers available for questions. If there is anything in particular you want to see, make sure and ask if it is going to be available. Once, on a trip to Vienna, I was very excited about seeing the Darwin exhibit at their museum. I did not see it however, because the only full day we had in Vienna was the one day the museum was closed. Too bad I didn’t check their hours of operation ahead of time. We could have scheduled things differently. Many institutions have reduced or no cost for educational field trips for public schools. It is a good idea to ask if they will pass those savings on to you. I once received a discount for our homeschooling group at a planetarium by scheduling to come at the same time a public school class was attending.

Take the time to front-load, pre-teach, some of the science information. All learners, including parents, get much more out of field trips if they know something about what they are seeing. Think of the times you have gone to an event with someone who is passionate about the subject. She might be an expert, but she enjoys herself immensely, often more than any of the non-experts. Have you ever noticed how those experts almost always make connections from things they see?  What is known about a subject gives a person “hooks” to hang information from and improves the overall learning experience. At a minimum, kids should be familiar with the general vocabulary and core concepts you want to focus on when you plan the field trip.

On the day of the field trip go, enjoy, and immerse. Take the time to walk through, investigate, and explore. Save the quiz and the questions for the next day or on the way home. If you think there is something worth highlighting, though, make sure and do that. Just remember, different people absorb this sort of experiential learning differently and at different rates. A tactile learner may not seem to get as much out of a field trip as a person who learns through talking about what they see, when in fact it is just two different ways of accessing and processing information as a person gains ownership of it. When you do discuss it, be thoughtful about what you saw and continue to bring elements that make connections into your science classes throughout the year. This helps what is learned during the field trip stay pertinent and memorable.

If you are lucky, the field trip might even spark a new interest. I know for homeschoolers this is a double-edged sword as you try to cover all the course material. But in science, these sorts of interests are where most scientists come from.  One of the nice things about a field trip that has been paired with the course you are studying is that even the rabbit holes relate to what you are studying. Field trips are something most homeschoolers go on without much prompting. By using the few simple tips above, those field trips can be even better than ever.

Check out our review of Math and Magic in Wonderland here.


Using RSO Biology 2 for High School Biology

Journal

Using RSO Biology 2 for High School Biology

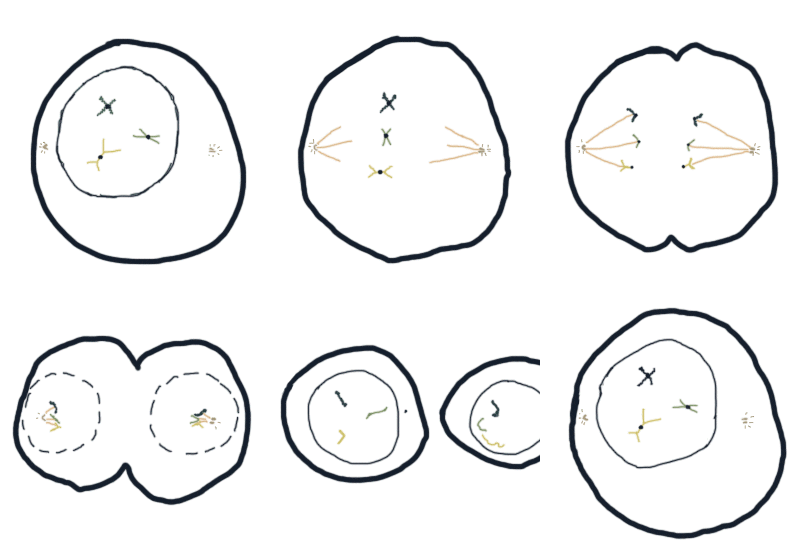
mitosis
Cell division video by Ansel
There is a planned level 3 book that will use the Level 2 book with added material in each chapter and in each unit. In the mean time, I am getting many requests for how Biology 2 could be brought up to the high school level. Some parts of it, like the microscope section, are already at a Level 2 and 3. This is not as complete as the level 3 book will be, but like these suggestions, the level 3 book will use Bio 2 and add to it.
Before I get into the specifics of how to do this, I would tell you to relax about this. About six months before Sean started ninth grade, I looked over the California A – G requirements. These are the specific course requirements students need in order to be considered for application to one of the University of California, UC, schools. This university system is considered by many to be one of the top university systems in the United States. Within each of these requirements you can look at the content UC expect you to cover. I was flabbergasted. Many of the science requirements and labs were blindingly easy and in many cases not central to an understanding of the subject. The reason I was so flabbergasted was that if a student did nothing more than meet those, it would be very unlikely they would be successful in science classes taken at UC schools. I taught at UCSD while I was in graduate school there. Even the introductory level science courses at UCSD are challenging if you haven’t had good science in high school. These standards, to me, are an extension of the button-checking, testing culture that pervades schools from grades 1 through 12. They are too often a collection of hoops that if a student jumps through will give them a ticket so they can apply to certain universities. This is done without a focused effort on kids having the necessary skills and tools to understand how learning happens in general, and specifically as it applies to science, how the natural and physical world works. These hoops also often do not focus on the skills necessary to succeed in their college classes. (Blair gets off soapbox now and gets on with the task at hand.)
Let’s start with what the necessary skills are for a high school student studying biology.
1. understanding how to apply the scientific method – this includes having the ability to practice science by applying the scientific method to a given science issue. 2 articles I wrote about the scientific method:
2. being able to write a lab report – Lab reports are a very formulaic type of writing. Understanding how to write a lab report is a great way to introduce the formulaic nature of some types of writing. In college, when students take lab classes they are expected to know how to write a lab report. I never took or taught a college lab class where this skill was taught, but in most cases all or the majority of your grade in lab classes comes from these reports.
3. the ability to read, understand, and discuss current science topics at a high school level
4. having a basic understanding of the foundational fundamentals that underpin biology – that is not to say there are not some important side issues that are critical to learn – it just makes more sense to include those into a discussion focused on a conceptual understanding of the basics of biology
5. being able to apply math to the science of biology

The Specifics of what you should do with the course

· Lab reports mandatory
· Use Show What You Know problem sets as quizzes, and have students take tests that you grade
· Document experiments – you can use photos for this and lab reports; I think it’s a good idea to make students accountable for this documentation. Good documentation is a part of good science. By being responsible for documenting their work, students, in a practical way, come to understand that.
· Practice science: This has a specific meaning in science education. It refers to people being able to use what they know to design an experiment where they “practice” science that follows the scientific method. I have included links to articles I’ve written to use as projects where students can practice the science they are learning. The most up-to-date version of the science fair article is in the current issue, 4/16, of the magazine home | school | life.
· science fair: you can do this even if it’s just you and your child. Choose 1 question and have him or her design an experiment based on that question: https://blairleeblog.wordpress.com/2014/08/27/a-science-fair-in-your-science-co-op-class/
· Electron transport chain during photosynthesis – I have included a link to a search page for a YouTube video on this topic. You or your students should find one of these he or she likes and understands. You should expect students either in writing, as an additional question to a test, or through discussion to explain this concept. It is important for high school students to understand that the electron transport chain, at its most basic, is the method cells use to generate energy. It is through something as simple as a cascading release of electrons going from molecule to molecule that organisms get the energy to do everything associated with life. Https://www.google.com/webhp?sourceid=chrome-instant&ion=1&espv=2&ie=UTF-8#q=youtube+video+photosynthesis+and+the+electron+transport+chain
· For each unit choose a focus in addition to the material kids are covering. Make it something meaningful for them and relevant from the standpoint of current science. This is something that kids will do on their own. You can choose what they read. (I recommend at least giving them one starting article). You need to read the article too, or at least be familiar with the topic, and then discuss it. I am giving suggestions below. If your child has a different interest, they should learn about that topic.
  • Unit 1: study viruses – AIDS virus, Zika virus, Ebola virus – all of these are great choices. If you have multiple students, consider letting each student choose a virus they read about, and then discuss. I like to tell Sean teach me about it. You learn so much more when you are trying to educate someone on a topic.
  • Unit 2: choose something related to cells and chemistry – I have included a possible extracurricular study for this looking at lead toxicity. https://www.facebook.com/notes/9672…
  • Unit 3: if you can afford it, have your child send his or her DNA to be analyzed. Use the analysis to study this topic. If you can’t, then a good choice would be to learn more about Neanderthals and the current understanding about the differences in their chromosomes compared to modern humans. Or you could study this very interesting topic, and have kids watch lesson 1: part 1 through part 5, https://www.youtube.com/playlist?li…
  • Unit 4: during this, the longest unit of the book, kids will work on the practice of science by designing two of their own experiments. I would spend the time focusing on designing experiments and how to apply the specifics of the scientific method to their experiments. This is a good lead-in because in Unit 5 kids are first introduced to the formal definition of the scientific theory. Without a clear understanding of how science is practiced and the specific parts that go into the practice of science, the specific application of the word theory in science is often confused with its common use outside of science. A very interesting, to me, LOL but hard, activity that I wrote can be found at the link below. If you have a math loving child they might love this. It’s a great demonstration too. PM me if you need someone to walk you through it. https://blairleeblog.wordpress.com/2015/02/22/why-are-we-all-so-different-an-unpublished-lab-from-r-e-a-l-science-odyssey-biology-2/
  • Unit 5: Your Inner Fish from HHMI – watch it and discuss it. If your child is into videography, a great project would be to have them make their own video about evolution. http://www.hhmi.org/biointeractive/your-inner-fish-series
  • Unit 6: have students choose an environmental topic or environmentalist and learn about that, him, or her. It can be one of the environmentalists from the famous science series in this Unit. They are all really cool people.
  • Unit 7: Because so many high schools don’t even teach this, it would be easy to argue that this already is at a high school level. The main difference between the high school level courses I have seen, those that do teach this, in the way this is taught is that the cladogram’s use biochemical and genetic markers instead of the more apparent physiological markers I chose. If you have a student who is very strong in science, I recommend looking up cladograms that use those, otherwise I would stick with the cladograms as they are written. The unfamiliar chemical terminology can make the cladograms seem harder than they are, and many kids find them challenging as written.
  • There is a research report that students work on in Unit 7. This paper is based on one I wrote in the first evolutionary biology class I took when I was in college. High school students should be expected to write this report with more emphasis on the evolutionary history of the organism.
A great article for those of you using RSO Bio 2 in a co-op is listed below. It was lots of suggested resources: https://blairleeblog.wordpress.com/2014/07/30/how-two-homeschooling-moms-used-real-science-odyssey-biology-2-in-their-co-op/
This post contains an affiliate link.
Check out our review of Be Naturally Curious here.


Science and the Secular Homeschooler

Science and the Secular Homeschooler

Science and the Secular Homeschooler

I live in Southern California. I taught science at community college, and now I write about it. Those two sentences convey a lot of information about how easy it is for me to negotiate my way through the homeschool community.

Where I live in California, there are many large secular or inclusive homeschool groups. In my experience in California, unless a group states that it is faith-based, it is understood that it isn’t. With one exception, the religious homeschoolers I have met in California have never seemed put-off by my stance about science or my being secular. I once overheard a homeschooler I knew to be a Young Earther tell another homeschooler, who had just explained to me that dinosaurs didn’t really go extinct, because dinosaurs were lizards and lizards still exists, “She taught science at a college. You know how scientists are.” This was the first time, but not the last being a scientist earned me a free pass to participate in activities with religious homeschoolers without my secularity being an issue. I admit though, when I socialize, I don’t talk science with people who don’t want to talk about it.

In 2013, after homeschooling for seven years, my eyes were opened to what it might be like for secular homeschoolers, who are not scientists living in areas with large secular communities. That is the year my biology course came out. It is one thing to be a homeschooling scientist who lives in California. It is quite another to be a homeschooling scientist, who lives in California, and publishes materials that say, “It is a fact that evolution occurs. The theory part is how it happens.” On May 22, 2013 the first review of my Biology book was posted on Amazon. It was 3-stars; the complaint was that it “Teaches Evolution and global warming”. I have always felt fortunate it wasn’t 1-star. Then in June of 2013, I was at a homeschool convention in California and was approached by someone who wanted to argue that any science text that did not include a discussion of the book of Genesis, when explaining evolution, was flawed and biased. One of the conference organizers overheard and put a stop to the conversation, telling the person they were at a secular conference. See what I mean about secular homeschooling in California.

Despite these two occurrences, I continued living in my “California bubble,” thinking it was similar for other secular homeschoolers. Then in September, 2014, I traveled to Georgia for the National Alliance of Secular Homeschoolers, NASH, Conference. It was there I realized how different it was for secular homeschoolers in other parts of the country. It was then that I came to understand how important it is for those of us in areas where we can comfortably tell others we are secular homeschoolers to provide support for homeschoolers in areas less tolerant of their secular homeschooling neighbors. I met homeschoolers who lived in communities where there was not another secular homeschooler. I met homeschoolers who had to make the choice between finding groups where their children could socialize versus being honest about the fact that those children learned from secular materials. I also met homeschoolers who were willing to brave the storm and isolation, and admit that they were secular homeschoolers. That is hard to do. It really is.

Before attending the NASH conference, I understood the importance of writing science materials for the homeschool community that include topics like evolution and the human causes for climate change. That did not mean I understood the importance for those of us living in areas where the consequences for doing it are negligible, of standing up, raising a hand, and saying, “I am a secular homeschooler”. Homeschooling by its very nature can be isolating. When you live in a community where being secular isolates you further, it can get lonely. What can our global community of science-loving secular homeschoolers do?

  1. If you live in one of those areas, start a science co-op. You do not need to be an expert or a scientist to start one. All you need are good reference materials, one or more people to run it, and a location.

Science is not the only academic discipline with fault lines drawn between secular and non-secular homeschoolers, but it is where most of the problems arise. That is because some of the well-established facts and theories of science are at odds with a literal interpretation of religious doctrine from several different faiths. There is continued agitation by some to change science to fit religious doctrine. The problem is science doesn’t work that way. When you change or omit science facts and theories to fit your philosophy, and then teach using those changes or omissions, you are no longer teaching science. I suppose you are teaching religious philosophy with some science woven through it. Scientists take issue with this for two main reasons. First, it is a denial of some of the foundational and fundamental principles all science is based on. For a scientist, this is incredibly frustrating and seriously misrepresentative of how the natural and physical world works. Scientists obviously care a lot about science, or they wouldn’t spend all those years in college studying it. 🙂 Second, the people and users of these non-secular materials continue to call it science while these materials clearly, at least to a scientist, are not really science.

No homeschooler would be surprised by the statistic Gallup released in 2014 stating that 42% of Americans believe God created humans in their present form 10,000 years ago. That is certainly a dismal figure, but it has a good side too. 58% do not believe that. And while it is true that many of the people who do believe that are homeschoolers, there is no way ALL the people who do not believe God created humans in their present form 10,000 years ago live in California 😉 Starting a science co-op is a great way to find the other members of your local homeschooling community who understand the difference between philosophy and science. In addition, running a secular science co-op provides an important service by promoting science literacy.

  1. Join secular Facebook groups and forums. When you live in areas where there is not a good-sized secular community, it can be hard to find discussion about good secular materials, especially science. Online secular groups and forums can be a great place to get information about and recommendations for secular academic materials.
  2. Those of us who are in areas where we can do it, or who feel comfortable doing it no matter where we live, need to make sure we stand up and be counted as secular homeschoolers. It might not seem important in a state like California, but it is important to recognize your advocacy and support might resonate in places you have never been and with people you have never met. It seems part of the human condition to want a group to belong to and a community where we feel understood. I think we evolved that way 😉

For more homeschooling tips, check out the FREE SEA Homeschoolers Magazine here!



Physics for Middle School and High School

For the past few months, I have been receiving emails asking for my help figuring out science for next year. The emails are from parents who are hoping RSO Astronomy and Earth Science 2 will be out for the start of the 2015/2016 school year. It won’t. I even get emails from people hoping RSO Chemistry 2 will be out. I only have 1 chapter of that book written, so it definitely will not be out next year. I will start writing it in time for Sean to use it for chemistry during the next school year, but that course is going to be in very rough form when he uses it. When parents find out these courses will not be ready they want my help figuring out what they can use in the interim.

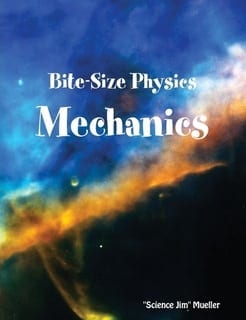
To help all of you, I wrote this post detailing what we did for Physics when Sean was in middle school. We used Bite-Size Physics, a course written by Science Jim Mueller. Like my courses, this course is rich in labs that are paired well with theory. In fact, when I went to his website to get information for this post, I was pleased to read Mueller discussing something I also focus on in my courses. He states, “Here’s the problem, science books with experiments but no content or books with content but no experiments. You have to create an effective science curriculum with these poor materials.” (It reads a bit weird – but he means “you” the parents.) http://www.bitesizephysics.com/bitesizephysics.html It seems that one of Mueller’s goals with his course is the same as one of mine, which is to create a course that pairs content with experiments, so you don’t have to. Like my courses, these are not video labs either. These are get-your-hands-dirty, I-need-space-to-spread-out, homeschool-science-rocks labs. As a side note, I was at an event recently (not a homeschool event) when someone who is a fellow homeschooler began pushing very hard to have me try an on-line program where all labs are virtual. Uh, no, but thanks for the input. They did not know who I was other than that I am a fellow homeschooling parent of a high school student. RSO Physics will be out at some point. These suggestions are not for a course that will take the place of that course. These are suggestions for a more advanced course. I do not recommend using Bite-Size Physics in place of RSO Level 1 Physics.

For those of you who used RSO Biology 2 for high school. If that worked for you, then this course could also be used for high school. I will tell you what you should do to bring it up to the high school level. This course would work very well for a science co-op.

Bite-Size Physics by Science Jim Mueller

There are several options for packages, I recommend buying the bundle, because it comes with the fun and cheesy videos where he explains concepts. Sean loved them. There is some of the same material in his Force Book (which comes in this bundle) as there is in the Physics Book (which is the main spine for the course.) It is a bit confusing, but it in no way detracts from the course. In case you are wondering, I am not affiliated with the author at all. He has no idea I am recommending his course. It is just a really well done Physics course. Both Sean and I loved it. Here is where we bought our bundle. http://www.currclick.com/product/43327/Super-Science-Jim-Pack-BUNDLE?manufacturers_id=297&it=1

For Middle School

This is what Sean did.

  • Bite-Size Physics – There is math throughout the course. He makes it very easy to ignore the math. I had Sean do the math, but if your student is not strong in math, the course can be done without it. Sean struggled with some of the math. When this happened we breezed through it. Sean learned a lot of physics even when the math was lightened or skipped.

In addition, Sean read

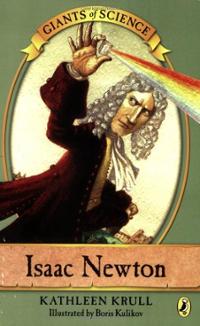
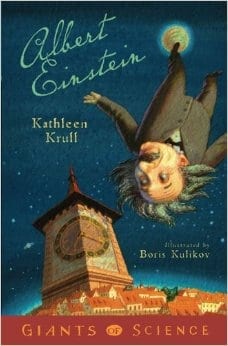
  • Three books from Kathleen Krull’s Giants of Science series
    • Isaac Newton
    • Leonardo de Vinci
    • Albert Einstein
Isaac Newton, Kathleen Krull
Leonardo de Vinci, Kathleen Krull
Albert Einstein, Kathleen Krull
  • Several books from the Max Axiom Graphic Library series
    • Electricity
    • Forces and Motion
    • Magnetism
    • Scientific Methods
    • Energy
    • Light

physics max axiom

Here is a nice illustration with the books in the series. I recommend this series, where appropriate, in the RSO courses I write.

  • I had Sean write lab reports. Use the guidelines I give in Biology 2 for what a middle school lab report should look like.

For High School

  • Bite-Size Physics – The math should not be optional unless your child really struggles with math. In fact you should go online and find more math problems that cover the same physics to increase the math. Make sure there are solutions with the problems you find. Here is an example of what I mean: http://www.physicsclassroom.com/calcpad/circgrav/problems
  • Make sure your student begins to understand how units are used in applied math problems. Even if you do fewer math problems as you focus on this. Being comfortable converting between units and doing Dimensional Analysis is an important concept in all high school and college science courses especially physics and chemistry. Look it up if you have a high school student and you don’t know what I am talking about.
  • Lab reports – these should not be optional. Somewhere between 1 a week to 2 a month is a good number of lab reports.
  • Have your student read 1 to 3 books focusing on physics or a famous physicist. Here is a list, but the book does not needto be on it. Let students have some say in the choice. The choice shouldreflect their interests. I like to download a sample of a book (even if I am not going to read it in e-book form) so that Sean can check it out to make sure the reading level is a good fit.
    • Physics of the Future, Michio Kaku
    • Physics of the Impossible, Michio Kaku
    • E=mc2: A Biography of the World’s Most Famous Equation, David Bodanis
    • Surely Your Joking Mr. Feynman!, Richard Feynman
    • How to Solve It: A New Aspect of Mathematical Method, G. Polya
    • The Theory of Almost Everything, Robert Oerter
    • The Cartoon Book of Physics, Larry Gonick
    • Emperor’s New Mind, R. Penrose
    • Dark Side of the Universe: Dark Matter, Dark Energy, and the Fate of the Cosmos, Iain Nicolson
    • A Brief History of Time, Stephen Hawking
    • From Eternity to Here, Sean Carroll
  • Read http://preposterousuniverse.com/eternitytohere/quantum/ which is chapter 11 of From Eternity to Here by Sean Carroll. It is free to read. Carroll does a good job of making the complicated subject of quantum mechanics understandable.

High school students should keep a record of the work done. The easiest way to do this is to keep a file with the lab reports, data sheets, and photos of the labs. Also keep a record of the books read. A short synopsis, oral or written, from the student about the book is a good idea, but not mandatory. An oral synopsis can be done into a wireless phone.

I hope you have a great year of science.

Check out our post on month six of handcrafting high school here and month seven here.


Handcrafting High School: Year 1, The First Four Months: Science

Science: A Parent’s Passion

        I LOVE science‼ My son likes science. This is the main area of handcrafting Sean’s education that has focused on the passions of someone in his family besides him. (My husband’s and my other passions are shared by Sean.) I am a scientist, and I know a lot of science. Even though he doesn’t have my strong passion for science, my son is good at science. He has had the benefit of a good science education. I am a passionate proponent of people learning how the natural and physical world works. I do not think of science as an ancillary subject, and I believe strongly that the treatment by our academic institutions of science as ancillary has led to a lot of the problems our world is facing right now.

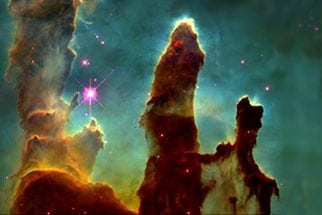
Stars are being born here. This is from the Hubble Telescope. It is easy to understand how captivating it is to study astronomy.
Science: Stars are being born here. This is from the Hubble Telescope. It is easy to understand how captivating it is to study astronomy. Photo from, http://hubblesite.org/gallery/album/

I want to come clean with you; I did something I caution other parents against doing. I am using my middle school science textbook for high school. I made sure Astronomy and Earth Science was far enough along so that I could use it with Sean this year. Let me start by telling you, it is a middle school text. I am beefing it up by adding more math to it, having him write regular lab reports, and having him read relevant periodicals, books, and on-line articles to go along with the weekly theory, but I am not significantly changing my text. I am calling this course Applied Chemistry and Physics, which it is, on Sean’s high school transcript to make it easier for the colleges where he applies to recognize the coursework this class entails.

It might make me sound a bit like a control freak (I am not btw), but here are my reasons for using my text even if it is a middle school text. My choices of texts and courses are severely limited when it comes to those that are sold to the homeschool community because:

  • I will not use a course that excludes or misrepresents scientific facts, principles, models, or theories that are considered core ideas in the field. I am a scientist. I am not going to play silly games about what constitutes good science. I care too much about it. It pains me to admit it, but most of the science materials developed specifically for the homeschool community play this game of omission and/or misrepresentation with many of the core established understandings of science. When I see this it is a signal to me that the person responsible for the material does not have the same passion I do for teaching people how the natural and physical world works, and I just cannot use their stuff.
  • I find many public school texts available for homeschoolers to be dry, arcane, and full of advanced topics without enough grounding in the foundational fundamentals.
  • Many texts have an inadequate or thoughtless pairing of labs with the theory.
  • Often with public school texts, there is just too much material to get through in a year, with too much emphasis on facts that could easily be looked up using your phone (which is what we all do!).
  • Most public school texts assume the material is going to be taught by a teacher, so the fit isn’t easy if you are not prepared to teach from it. And even I would rather not put together a yearlong series of lectures for just one student from someone else’s text. That is one reason my texts are written to the student as a really complete series of lecture notes. (That is how I think of my texts.) I consider each chapter in my text to be one (occasionally two) lecture’s worth of material written in a conversational manner. It is also why the Teacher’s Guide has a Text Review. Those would be my lecture notes if I were teaching from my book. It is much easier for me, the author, to write the lecture notes, than for parents who are using my texts.

This does make me sound like a control freak about science doesn’t it?!? LOL!

I have my reasons for using my text, but even so, a year ago it would have made me nervous to use this course for high school. Then two unrelated events happened that made me take a harder look at the science many consider high school level.

  1. I signed Sean up for a science co-op class to take along with this one. The class met the University of California a to g requirement for a high school science class. The class only met once a month! The labs did not seem to be carefully paired with the theory. They felt more like a hodgepodge of laboratory techniques crammed together. I concluded that if this class met the UC System requirements, then we were doing above and beyond that with my middle school courses.
  2. Early in the 2014/2015 school year, I was contacted by a parent who is using RSO Biology 2. They had recently moved to New York State. Here is her statement from a review she wrote about RSO Biology 2 on Amazon, “I’m now using this book to teach a science co-op in NY. According to the White Plains school district, the labs in this book can be used to qualify for the biology/living environment Regents Exam.” In a separate email, I learned that to graduate from high school in New York State you must take certain classes and then pass the Regent’s Exam for those classes. After reviewing the material in RSO Biology 2, the White Plains School District told the homeschooling parent that as long as they saved the records from the biology labs this course would satisfy the high school requirement for a year of biology/living environment. The irony was the parent was not trying to get them to approve this as a high school level course. Her daughter was in middle school. When she moved to the White Plains school district they wanted to look at the materials she was using before giving their approval that she could homeschool her daughter! She shared the topics and labs from RSO Biology 2 to get them to approve this book for use in middle school. Instead the school district approved the book for high school (and middle school). Her daughter and the other students at the co-op are getting credit for both, I guess. there was also a comment in a similar vein from a different reviewer on Amazon. This is a quote from their comment, “P.S. I suppose I should mention that before this program, he scored in the 69th percentile on science (7.3 GE) according to a national, standardized test for fifth-graders. This year he scored in the 90th percentile in science (13+ GE) on the same national, standardized test given to sixth-graders. What does that mean? It means he’s got mastery of the content more than anything.”
RSO Biology 2
Science: RSO Biology 2 http://www.pandiapress.com/?page_id=82

When RSO Biology 2 first came out, people contacted me about using it for high school. My standard response was that it was not written to be a high school level text and there were things that were left out that I would have included in a high school level course. For example, I left out the electron transport chain during the discussion of photosynthesis. I left out a probability exercise showing the number of different combinations of chromosomes that can be made during meiosis and then recombined at fertilization for two diploid organisms with 3 chromosomes in their karyotype. (I did write this though. My publisher wisely had me remove it. It really was advanced even for most high school students. 😉 ) There would be more chemistry woven into the biology. Next school year Sean will study chemistry. I will have to make sure he gets the important biochemistry then.

I spent some time thinking (mildly obsessing my husband and publisher would say, LOL!) about the situation with the Regent’s Exam, and I think I know why the school district felt RSO Biology 2 qualifies as a high school level course. Good science programs are moving away from a focus on memorizing facts and to a focus on science practices. In most cases, the basic concepts and foundational fundamentals are the same for a high school and middle school text. Maybe middle school courses do not check every single box for the more complicated concepts, but there is no way for middle school and high school students to practice most of the more advanced concepts anyway. Very few texts have a strong focus on the application and practice of the science concepts being taught. RSO Biology 2 (and Astronomy and Earth Science 2) have that as a primary focus. There is a focus in these courses on learning the foundational fundamentals and then applying them. A focus on the application and practice of science concepts and foundational fundamentals translates to a focus on using the scientific method in a meaningful way, the way scientists actually use it.  It is one of the reasons I have students make their own slides in RSO Biology 2. If you buy prepared slides, you will get a better view of the specimen than if you prepare your own slides. I guarantee it! But if you do that you will never become good at making slides, and studying science should not just be about looking at what others have done. Studying science should include you interacting with the natural and physical world to come to a better, more complete understanding of how it works.

Science
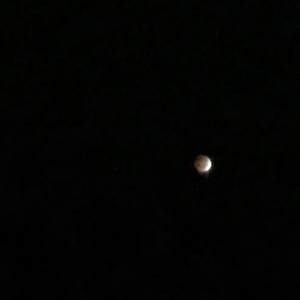
Science: Lunar eclipse, 10/7/2014

I would have used Astronomy and Earth Science 2 even without these two things happening, but I would have obsessed more, making sure I covered the specific facts I am leaving out of the middle school text that I would not leave out in a high school text. I have a confession to make about last year too. I used my biology text as a high school level biology course in 8th grade. Sean wanted to do biology again in 8th grade. The sequence for Sean’s science during middle school was 5th grade: middle school biology, 6th grade: physics, 7th grade: chemistry, 8th grade: high school biology. He hasn’t had astronomy or earth science since 2nd grade.

So far this has been a great year of science. The sequence of topics in the text is astronomy, geology, hydrology, the atmosphere and meteorology, and environmental science. Sean has only gotten through the astronomy portion. Sean is loving science this year. Astronomy has really captured his interest and imagination. I have to be careful when Sean looks at the supplementary videos and articles, because he can lose a day that way. Not that I mind, it is just that I have to make sure there is nothing pressing when he starts science!

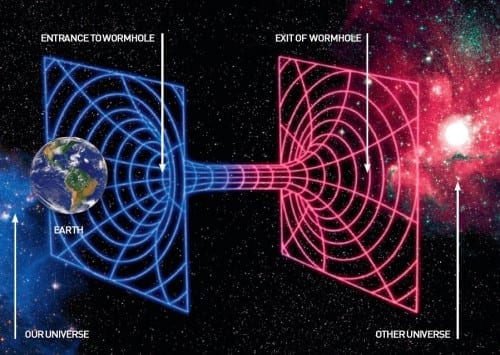
The Parallel Universe Theory has captivated Sean's imagination.
Science: The Parallel Universe Theory has captivated Sean’s imagination. Illustration from, http://www.tip-day.com/parallel-universe-myth-reality-new-hypothesis/

In addition to using my course, Sean has read the following:

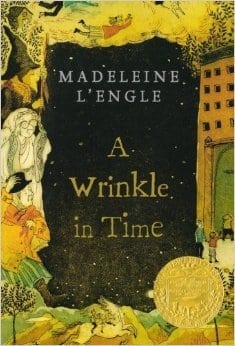
A Wrinkle in Time
Science: A Wrinkle in Time
  • A Wrinkle in Time by Madeleine L’Engle – The reading level was a little young for him, but I coupled the reading with a discussion of Einstein’s Theories and how there could be “wrinkles” in time. (A topic that isn’t too young for him or anyone else!) Sean loved this. In addition to his studies, he has taken the time to learn MUCH‼ more than I know about parallel universe theories!
A Brief History of Nearly Everything
Science: A Short History of Nearly Everything
  • A Short History of Nearly Everything by Bill Bryson – This book along with my course, I feel, took Astronomy and Earth Science 2 up to the high school level! Sean has loved parts of this book and been lukewarm about others. I should probably state here, my son will enter college with a level of science that will enable him to do well in his science courses. Sean knows more science than most adults, but most adults do not have much science knowledge. Unless Sean changes his mind, Sean’s focus in high school science will not be at the AP science level. If your student’s focus is at the AP science level, this is not a rigorous enough course for you. But because of the focus on the foundational fundamentals, Sean is able to make connections across the science disciplines that are deep and nuanced

.

The Martian
Science: The Martian
  • The Martian by Andy Weir – I read this book in two days. It took Sean a week. This book is science, science fiction, action, and a nail biter. Each day that Sean read this, I had him email me a writing technique he noticed and liked that the author had used, I also had him email me 1 science fact from the book.

I know many of you want to get your hands on this text NOW!! I am peddling as fast as I can, I promise!


Check out our post on teaching computer science in home schooling high school here.


Learning Science

Learning Science, Secular Science Homeschooling

 Homeschooling and Science

A Winning Combination

Sean Lee learning about the science of aviation.

I am reposting this article in response to an article in the New York Times. There is a link to that article at the bottom of this post.  The article validates what I am detailing below about how science is best learned!

Learning science is something I have spent 24 years working at in one aspect or another. Today I want to talk about what I have learned over these years educating in various venues and to a broad range of age groups. This is the text from a talk I gave at the California Homeschool Network Convention, CHN Family Expo, in June, 2014.

I was a college professor, teaching chemistry and biology at community colleges before retiring to homeschool my son. I also write secular science textbooks for the Real Science Odyssey series. This is a series of textbooks that have been written primarily for use in a homeschool or small co-op setting. As you can imagine, at our house, we definitely take time to learn science. In the school year 2013/2014, these two areas, facilitating my son’s science education and my textbooks, combined when I taught a homeschool science co-op using the REAL Science Odyssey Biology 2 Course I wrote. I learned some things teaching this co-op. I will touch on some of those things today, but if you want more, you should go to my articles in my blog where there is information detailing what I learned about teaching a science co-op for homeschoolers.

First I would like to ask a question. Have you ever had a great science course? If you have, what made it great? I doubt that even one person thought of a science class that only had reading text and listening to lectures! People approach me all the time worried about the job they are doing teaching science. So many people have had a bad experience in school when it came to science. Those same people want their children to learn science but they do not know what a good science course looks like.

When I think about what a great science course looks like, I recognize that the elements for it are best met with the type of environment we have in the homeschool community, whether in our own home or in a small co-op. I’ve come to understand that the homeschooling environment is absolutely the best environment for learning science.

So how can I say this? There are many people, notable scientists among them (Bill Nye comes to mind at the top of the list), who believe the exact opposite.

Of all academic subjects, science is the one that is the best fit for the homeschooling environment. Why? Because science is best taught where there is the time and space to ponder, research, explore, and get up and experiment. With the right tools and support you don’t need a science degree either. All you need is a willingness and desire to have your child learn how the natural and physical world works.

Start early:

  • Serious subjects are taught beginning in grade school.
  • Why isn’t the subject that teaches how the natural and physical world works serious enough to start teaching early?
  • Starting early allows for more depth and complexity.
  • I hear from people that they can wait to teach science, that kids are not ready to be taught science in grade school. I don’t understand the logic behind this. Science explains how the natural and physical world works. Why isn’t grade school the perfect time to begin teaching science? It’s sad, because kids want to know about plants and butterflies, stars and planets, how cooking works, atoms and energy. Young children are fascinated by these things. I actually think a big part of the problem with science education is that parents are not fascinated by it anymore, and it’s really a shame. Adults are not fascinated by it because their science education was so poor. We as homeschoolers can change that.
  • Recently I volunteered at the Intel International Science and Education Fair, the Intel ISEF. It is a huge international science fair. They consider it a science talent search with thousands of high school students from across the globe competing for a total of $4 million in prize money. I always enjoy myself immensely at these gatherings because it’s the only time I get to sit around with a whole bunch of scientists and talk science. At lunch time I happened to sit down with 6 female scientists. Three of them were, or had been, high school science teachers and one was a community college teacher who taught people how to teach science. We all got to talking about what we did or had done and of course it came to homeschooling science when they wanted to know what I did. It was very interesting. You might think this group would not be proponents of homeschooling. I did. You and I would be wrong. These women had been to many science fairs as volunteers and what they saw, again and again, was that increasingly often the best science fair projects were from homeschooled students. I was told that more often than not the homeschooled kids are the ones that win the science fairs. I was curious to find out why they thought homeschooled kids were doing a superior job of learning and experimenting with science. They said to me that the problem stems from when traditional schools begin teaching science. According to them, science is being taught later and later in schools. This is due to the current state of public education and the testing which affects a school’s funding. Schools pour time and money into language arts and math, because if test scores are low in those areas a school’s funding is cut.
  • Teachers focus all their energy and resources on math and language arts to the detriment of science. If kids are lucky enough to get science before high school it is as a component of language arts. It isn’t science for the sake of science. Now this touches on several things I want to talk about in a minute. But when science is a component of language arts, it’s about reading science. It’s not about doing science and there’s a big difference. It’s why a lot of adults think science is boring. So what happens when you don’t start science until high school is that you have students who come into high school weak in science. Therefore the science teachers have to start teaching at a much more basic level then they were teaching in years past.
  • If you’re curious to see the difference in levels, go to the Pandia Press website and look at the difference in REAL Science Odyssey Life 1, Chemistry 1, and Biology 2. RSO Life 1 is written for early grade school, Chemistry 1 is written for late grade school, and Biology 2 is written for middle school. You can look at them in the ‘Try It before You Buy It’ section. I really encourage you to look at them side by side. I encourage you to compare the two biology texts and to look at the progression within these books. There’s a big change. There’s a certain amount of knowledge that you begin to anticipate and expect that students are going to have. Students who start a new school year with some knowledge have an advantage. This is similar to what is done in math or language arts. You do not want to be teaching high school students phonics or basic spelling chunks. You want to be discussing literature with them.
REAL Science Odyssey Chemistry 1, Blair Lee M.S.
REAL Science Odyssey Chemistry 1, Blair Lee M.S. http://www.pandiapress.com/?page_id=86

Focus on the fundamentals:

  • Scientific Method
  • Good Foundation means a good grasp of how the various pieces relate
  • Good Foundation allows for a better understanding of new concepts
  • Good Foundation leads to a better ability to analyze data, models, and theories about how the natural and physical world works
  • When I talk about fundamentals, I am talking about the underlying principles that are the root knowledge required for a more advanced understanding of a subject. These are things that high school students in traditional schools are no longer coming into the science classroom knowing.
  • Scientific Method: An important aspect of learning science is learning how to use the scientific method. Using the scientific method depends on knowing the basic facts of science. The absolute best way to learn the scientific method is through applying it. The scientific method is based on experimentation, observation, and deductive reasoning. One reason that the homeschool environment is superior is because homeschoolers are given the time and space for experimentation, making observations, and deductive reasoning. It really is the best environment for learning science. Teasing out the answer to a problem is not something you can set a time limit for accomplishing. Schools, by their very nature, are forced into giving students time limits to learn and apply science concepts.   This doesn’t lend itself to a practical understanding of how the scientific process really works.
  • A solid foundation in the basic fundamentals of science will result in students who have a good grasp of how the various pieces in science relate, which leads to a better understanding of new concepts. A strong focus on the foundational fundamentals also leads to a better ability to analyze more complex data, models, and theories for how the natural and physical world works
  • There are certain fundamental principles that are the basic building blocks for understanding science concepts. For example atoms; all matter is made of atoms. Every single science principle where we explain how the natural and physical world works at its core is talking about atoms. Even a graduate student studying complicated scientific principles and theories must understand the basics of atoms. An understanding of atoms is one of the foundational fundamental principles in all of science and is necessary to understand how other pieces of scientific information relate.
  • I think it is a problem that often there is not a focus on the basic fundamentals for two reasons. The first is that the students’ knowledge base is not complete. The second thing I see happening in middle school and high school texts and classes is that concepts that are too complicated are brought in before there is an understanding of the underlying principles. This leads to spotty knowledge which results in people thinking they’re not good in science when it is actually the quality of their education that’s not good. In these situations, some students will learn the new material, but most students will just breeze right over it. I like to use foreign language as an example here. If you’re sitting in a restaurant and you overhear someone speaking a language you don’t know you tune the speaker out. But if you know a little of that language you will listen, try to understand what they’re saying, maybe even start a conversation with them. It’s the same thing with science. If I start talking about polarity and water molecules and you don’t even understand the basics of what a molecule is, you don’t know what I’m talking about and your brain glazes over or moves on to something else. If you do have some knowledge of molecules and polarity, you will pay attention and engage in the conversation, adding to your knowledge base.

Learn each discipline as a single subject:

  • Does not create artificial boundaries
  • Allows for an in-depth understanding of the foundational fundamentals, instead of a “Jack of all Trades, Master of None” approach
  • Mastery of each science discipline is superior for that discipline and for making connections across disciplines
  • On the face of it, it might sound like spending an entire year every four years on a single subject creates artificial boundaries between science disciplines. While it is important that the material you use to teach points out and makes connections between the different disciplines, the best approach is to learn the fundamentals of each discipline and make connections once the basics are understood. This creates a cohesive body of knowledge which enhances a student’s ability to make connections between the disciplines.
  • Often science is learned with a grab bag approach, which I call the smattering approach. When I told the gals at the Intel ISEF fair that I was not a fan of the smattering approach they said that in the past they would have agreed with me. But that now, the state of the science being taught is in such a shabby state that they would even like it if people went back to the smattering approach. It turns out that the smattering approach for learning science is better than not learning it at all. So I guess if it’s between the smattering approach and nothing at all, the smattering approach is okay to use. Otherwise, any good science teacher will tell you you’re better off teaching science as a single subject, just as we do every other academic subject we care about our children learning.
  • This really goes back to teaching the foundational fundamentals. You start to build on concepts, creating a firm foundation, adding more and more complicated material on top of it. Anyone who has worked with their child in math knows exactly what I’m talking about. There is no other subject that we take seriously that we do not teach as a single subject. There is a reason for that.

Rely on one or more good textbooks:

Real Science Odyssey Biology 2
RSO Biology 2 http://www.pandiapress.com/?page_id=82#level2
  • Comprehensive
  • It helps to have a guide, someone who is an expert in that field, to help you figure out the scope and sequence of the material to cover.
  • Different students access information differently.
  • Focus on the fundamentals.
  • Make sure the text is secular teaching the theories and models that are central to each science discipline.
  • Don’t teach a co-op class without a text.
  • I write science textbooks that are long and complete. I do not write fluffy science. So it should not surprise people that I am a fan of having some sort of guide and guidance to follow for each subject that I’m having my child study over the course of the year. I learned my lesson with first grade biology that even someone who is very knowledgeable in the field could use some direction. When I homeschooled my son in first grade I had a guide and reference material for every subject he was learning, except biology. I thought, “How hard will it be? I taught biology at community college. I have a biology degree from UCSD. Biology is going to be a piece of cake.” It turns out, with all the other subjects he was working on I was overwhelmed when it came to planning and figuring out a course of study as I went along. In fact, when my son was in second grade I had him work through RSO Life 1 and Earth and Space 1!
  • I will be honest; my reference material is not always a textbook. In history we use video courses and material where someone else has put together a complete package. Science is a little different than history though, because you are still going to need lab sheets, material lists, and I really think it’s good for students to be able to read the information if they need it.
  • Choose texts that are comprehensive and do not skip over the basics, introducing advanced topics and language with a focus on the fundamentals. I do not think it matters which science discipline you start with, but I would suggest waiting until 3rd grade for chemistry and physics. When your child is ready for their multiplication tables they are ready for chemistry. It has to do with the abstract nature of chemistry.
  • Every area of science has a lot of information to it. It helps to have a guide, someone who is an expert in that field, help you figure out the scope and sequence of the material to cover. I believe there is no way to teach the foundational fundamentals or to teach science as a year-long single subject without a textbook. In every science class I have ever taught, I have been handed a stack of textbooks. I was given the teacher’s textbook, the lab manual, the answer key, and test making software, because a committee of people at the community college where I was teaching decided that was what the course was going to look like that year. Perhaps this sounds limiting, but I did not find it so. You can use the textbooks as a touch point if you want, but it is essential to have a guide so that the material is covered in a complete fashion.
  • The other important thing about having a good textbook is that students access information in various ways. I learned how important it is to have reference material when I taught a co-op class this year. Based on my experience, I wouldn’t have my son take a science co-op class if there wasn’t a textbook because if the subject gets complicated your child needs something to reference, not the Internet either. I think it is important to have something they can hold in their hands, something they can underline, highlight, and make notes from. A source that you can both go to.
  • Along the lines of accessing information I’ve actually been thinking about making some videos for my text and putting them on my blog for kids who are struggling with some of the more complicated concepts. The genetics unit in my biology textbook, for instance, is an area kids find very difficult. I think if students had me lecture out of the book to them, those kids who were feeling challenged by the concepts would be able to understand the information better. I’m very into making sure there are multiple ways to access information.

 Carefully pair theory with labs and activities

  • All theory and no labs, what a bore
  • All labs and no theory, teach cooking instead 

Let’s be clear about what I’m talking about when I call something a good science course. I am not talking about sitting in your seats. I am talking about getting up and moving around, getting your hands dirty. I’m talking about taking those foundational fundamentals and applying them to real-world labs and activities that relate well to the theory. This is where science becomes fun.

  • When scientific theories are paired well with labs and activities it enhances an understanding of the scientific method and science learning. It demonstrates through use and practice how hypotheses are formed and conclusions determined based on science facts that are presented in the text.
  • Sometimes I see science being taught where it is all theory with no labs or activities. The science theory is the science information in the written text. Other times I see science being taught with all labs and activities but no theory. Neither is adequate.
  • Honestly all theory with no labs and activities, why bother. That’s where science gets a bad name. For parents I know that the labs and activities are work. I know you do not always feel like setting them up. I know this because I teach my child science, and I don’t always feel like setting them up, but I do it because it’s important to me that my son gets a good science education. A good science education has labs and activities that are carefully paired with the text and theory.
  • All lab and activities with no theory might be fun, but you are not learning science cohesively. You’re not learning the foundational fundamentals. For example, how many of you understand the complicated process that occurs when you bake a cake? By this I mean the physics and chemistry involved in the baking process. To bake a cake you don’t need to know the underlying science because that is not your reason for baking it. It is about making a yummy treat for your family. In order for it to be called science you would need to understand the physics and chemistry of the process. And to know and understand the science you need to have studied the theory and then done the experiments. That way it all ties together.
  • When this is done; the pairing of the theory with the labs and activities, no place outside a college lab that is thoughtfully paired with a lecture course can match the homeschool community. It might be another reason why we are winning all of those science fairs.

5 Steps to a Great Science Education

  1. Start Early
  2. Focus on the Fundamentals
  3. Single Subject
  4. Good Textbook &/or Reference Materials
  5. Carefully Paired Theory and Labs & Activities

I hope that this helps any of you who are worried about your children’s learning of science, and that this doesn’t sound complicated to you. All you need to facilitate your child learning science is a desire and the resources to make it happen. I want to close with, “Science is so much fun to do, to share and interact. I really hope you take the time to explore science with your child. Who knows, maybe the next time someone asks you if you have had a great science course you will raise your hand, because the years of science you did while homeschooling your child were just that good!”

Update: In December of 2014 the New York Times published an article about college reinventing how science is taught and better learned using the principles and methods I am advocating here!

http://www.nytimes.com/2014/12/27/us/college-science-classes-failure-rates-soar-go-back-to-drawing-board.html?_r=0

This post contains affiliate links.

Check out this list for materials to use for your own homeschool science co-op here and read some of my Lunar Ramblings here.


A question in the Co-op: Scientific Theories

What happens to scientific theories when definitions change or new information comes to light? 
I love this exchange, and I thought many of you would too. There has been quite a bit of interest about homeschooling science co-ops based on the number of hits the co-op blog posts on this site are getting. This is an email I received recently from someone who is teaching one. I have also included my reply. 
Email to me Tue, 16 Sep 2014 20:41:45 -0400
I just started teaching biology for my co-op out of your book (thanks for the notes on your blog on teaching it in a co-op btw), and I’ve had the kids watch the full program of BBC hidden universe, secret life of a cell https://www.youtube.com/watch?v=FFrKN7hJm64 which pretty much convinced the kids that viruses were alive, which meant that during the debate on whether viruses were alive or not, they decided that the definition of living was outdated and needed to be changed.
The very big problem was chapter 2 – this week, right after I explained the difference between a scientific theory and non-scientific theories, we came to cell theory, and one of the students pointed out that if viruses are alive, cell “theory” isn’t true. Please help, I’m sure there is a good explanation I can give the kids, I just don’t know it. I’ve looked through a bunch of internet articles, and the consensus seems to be that a virus is definitely not a cell, and there may be a new classification of alive.
Scientific Theories: The theory of natural selection as it relates to frog size.
Read about using RSO Chemistry 1 for a science co-op here.