I live in Southern California. I taught science at community college, and now I write about it. Those two sentences convey a lot of information about how easy it is for me to negotiate my way through the homeschool community.
Where I live in California, there are many large secular or inclusive homeschool groups. In my experience in California, unless a group states that it is faith-based, it is understood that it isn’t. With one exception, the religious homeschoolers I have met in California have never seemed put-off by my stance about science or my being secular. I once overheard a homeschooler I knew to be a Young Earther tell another homeschooler, who had just explained to me that dinosaurs didn’t really go extinct, because dinosaurs were lizards and lizards still exists, “She taught science at a college. You know how scientists are.” This was the first time, but not the last being a scientist earned me a free pass to participate in activities with religious homeschoolers without my secularity being an issue. I admit though, when I socialize, I don’t talk science with people who don’t want to talk about it.
In 2013, after homeschooling for seven years, my eyes were opened to what it might be like for secular homeschoolers, who are not scientists living in areas with large secular communities. That is the year my biology course came out. It is one thing to be a homeschooling scientist who lives in California. It is quite another to be a homeschooling scientist, who lives in California, and publishes materials that say, “It is a fact that evolution occurs. The theory part is how it happens.” On May 22, 2013 the first review of my Biology book was posted on Amazon. It was 3-stars; the complaint was that it “Teaches Evolution and global warming”. I have always felt fortunate it wasn’t 1-star. Then in June of 2013, I was at a homeschool convention in California and was approached by someone who wanted to argue that any science text that did not include a discussion of the book of Genesis, when explaining evolution, was flawed and biased. One of the conference organizers overheard and put a stop to the conversation, telling the person they were at a secular conference. See what I mean about secular homeschooling in California.
Despite these two occurrences, I continued living in my “California bubble,” thinking it was similar for other secular homeschoolers. Then in September, 2014, I traveled to Georgia for the National Alliance of Secular Homeschoolers, NASH, Conference. It was there I realized how different it was for secular homeschoolers in other parts of the country. It was then that I came to understand how important it is for those of us in areas where we can comfortably tell others we are secular homeschoolers to provide support for homeschoolers in areas less tolerant of their secular homeschooling neighbors. I met homeschoolers who lived in communities where there was not another secular homeschooler. I met homeschoolers who had to make the choice between finding groups where their children could socialize versus being honest about the fact that those children learned from secular materials. I also met homeschoolers who were willing to brave the storm and isolation, and admit that they were secular homeschoolers. That is hard to do. It really is.
Before attending the NASH conference, I understood the importance of writing science materials for the homeschool community that include topics like evolution and the human causes for climate change. That did not mean I understood the importance for those of us living in areas where the consequences for doing it are negligible, of standing up, raising a hand, and saying, “I am a secular homeschooler”. Homeschooling by its very nature can be isolating. When you live in a community where being secular isolates you further, it can get lonely. What can our global community of science-loving secular homeschoolers do?
If you live in one of those areas, start a science co-op. You do not need to be an expert or a scientist to start one. All you need are good reference materials, one or more people to run it, and a location.
Science is not the only academic discipline with fault lines drawn between secular and non-secular homeschoolers, but it is where most of the problems arise. That is because some of the well-established facts and theories of science are at odds with a literal interpretation of religious doctrine from several different faiths. There is continued agitation by some to change science to fit religious doctrine. The problem is science doesn’t work that way. When you change or omit science facts and theories to fit your philosophy, and then teach using those changes or omissions, you are no longer teaching science. I suppose you are teaching religious philosophy with some science woven through it. Scientists take issue with this for two main reasons. First, it is a denial of some of the foundational and fundamental principles all science is based on. For a scientist, this is incredibly frustrating and seriously misrepresentative of how the natural and physical world works. Scientists obviously care a lot about science, or they wouldn’t spend all those years in college studying it. 🙂 Second, the people and users of these non-secular materials continue to call it science while these materials clearly, at least to a scientist, are not really science.
No homeschooler would be surprised by the statistic Gallup released in 2014 stating that 42% of Americans believe God created humans in their present form 10,000 years ago. That is certainly a dismal figure, but it has a good side too. 58% do not believe that. And while it is true that many of the people who do believe that are homeschoolers, there is no way ALL the people who do not believe God created humans in their present form 10,000 years ago live in California 😉 Starting a science co-op is a great way to find the other members of your local homeschooling community who understand the difference between philosophy and science. In addition, running a secular science co-op provides an important service by promoting science literacy.
Join secular Facebook groups and forums. When you live in areas where there is not a good-sized secular community, it can be hard to find discussion about good secular materials, especially science. Online secular groups and forums can be a great place to get information about and recommendations for secular academic materials.
Those of us who are in areas where we can do it, or who feel comfortable doing it no matter where we live, need to make sure we stand up and be counted as secular homeschoolers. It might not seem important in a state like California, but it is important to recognize your advocacy and support might resonate in places you have never been and with people you have never met. It seems part of the human condition to want a group to belong to and a community where we feel understood. I think we evolved that way 😉
If James, Sean’s 30 year old brother, gets his campaign finance reform NGO started, volunteer once a week for him.
Big History with online group – https://www.bighistoryproject.com/home – Sean will be doing a lot of history this year. I probably wouldn’t have him also do this, but both of us think he will enjoy and get a lot out of working with a group of homeschooled kids. So it is just a year with a lot of history!
I let Sean choose between designing a website by himself that will be live by the end of the school year, 2016, or take a series of three courses at UCSD Extension focusing on learning to program in HTML and CSS. He chose designing a website. He already has put in some time on The Homeschool History Project website, and he is enjoying the project. It was getting to be too much to do everything and something had to give. He wants to focus on politics and crew this year, and I can’t blame him. I do to, at least the politics part.
Lit analysis
These will be in addition to the book club books. These are not in the order that they will be read. Before I tell you what the list is, I thought you might be interested in the process I use to decide what books are going to read over the course of a year. I look for books with content that is relevant to what we are studying. I narrow these down based on the quality of the writing, and how likely someone of Sean’s age is to get through the material.
Blood Meridian, Cormac McCarthy – http://www.amazon.com/Blood-Meridian-Evening-Redness-International-ebook/dp/B003XT60E0/ref=sr_1_1?s=books&ie=UTF8&qid=1432508385&sr=1-1&keywords=blood+meridian – We are also going to look at how badly Native Americans were treated. I understand that some of the themes running through Beloved and Blood Meridian are for a mature audience. I decided with the first two books on this list that we would deal with the disturbing content when it comes up. They are a part of our history. One of the things we will study while we are reading these books is how government policies enacted at the beginning of our democracy and throughout the subsequent years that were designed to be discriminatory have continued to have negative impacts to the affected people and our country as a whole.
How to Read Literature Like a Professor, Thomas C Foster, http://www.amazon.com/How-Read-Literature-Like-Professor/dp/0062301675/ref=sr_1_1?s=books&ie=UTF8&qid=1435938339&sr=1-1&keywords=how+to+read+literature+like+a+professor. Early in the year we will read this book so that Sean can benefit from it as we read the other books. I think this book should be essential reading for teens who might take the SAT or ACT. I do not think that is the only reason to read it though. It is in interesting insight into the techniques and tropes used in literature.
We will be using my text along with a text I found that uses data analysis for situations in geology. The book has students work through and interpret the data. This logical analysis of science data will be a great compliment to what we are doing in politics.
Sean will be scripting, producing, and directing 10 min. videos of me going over the more difficult topics from each chapter.
Sean will be editing my final draft of Astronomy and Earth Science 2 as he works through it.
There are four academic pursuits that will be woven throughout all of the above
Analyzing written material and pulling meaning from it
Tight writing
Being able to formulate an opinion and state that opinion clearly while using supporting statements
Work on the skill of logically analyzing written and oral arguments where someone is trying to convince you of something. Try to ferret out when someone states an opinion as if it is a fact. Pay attention to the logical process used to form the opinion and how well the facts support the opinion. Study the quality of the sources used to support the argument.
I am not sure exactly what, but something with Thom Jones at Crime Scene Camps, http://www.crimescenecamps.com/onlineclasses.html. I promise you, I am not getting free classes or materials from Thom. His classes are that good!
FYI, Homeschooling High School Rocks!
Check out this Real Science Odyssey Lab Photo Journal here.
For the past few months, I have been receiving emails asking for my help figuring out science for next year. The emails are from parents who are hoping RSO Astronomy and Earth Science 2 will be out for the start of the 2015/2016 school year. It won’t. I even get emails from people hoping RSO Chemistry 2 will be out. I only have 1 chapter of that book written, so it definitely will not be out next year. I will start writing it in time for Sean to use it for chemistry during the next school year, but that course is going to be in very rough form when he uses it. When parents find out these courses will not be ready they want my help figuring out what they can use in the interim.
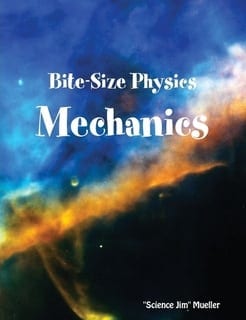
To help all of you, I wrote this post detailing what we did for Physics when Sean was in middle school. We used Bite-Size Physics, a course written by Science Jim Mueller. Like my courses, this course is rich in labs that are paired well with theory. In fact, when I went to his website to get information for this post, I was pleased to read Mueller discussing something I also focus on in my courses. He states, “Here’s the problem, science books with experiments but no content or books with content but no experiments. You have to create an effective science curriculum with these poor materials.” (It reads a bit weird – but he means “you” the parents.) http://www.bitesizephysics.com/bitesizephysics.html It seems that one of Mueller’s goals with his course is the same as one of mine, which is to create a course that pairs content with experiments, so you don’t have to. Like my courses, these are not video labs either. These are get-your-hands-dirty, I-need-space-to-spread-out, homeschool-science-rocks labs. As a side note, I was at an event recently (not a homeschool event) when someone who is a fellow homeschooler began pushing very hard to have me try an on-line program where all labs are virtual. Uh, no, but thanks for the input. They did not know who I was other than that I am a fellow homeschooling parent of a high school student. RSO Physics will be out at some point. These suggestions are not for a course that will take the place of that course. These are suggestions for a more advanced course. I do not recommend using Bite-Size Physics in place of RSO Level 1 Physics.
For those of you who used RSO Biology 2 for high school. If that worked for you, then this course could also be used for high school. I will tell you what you should do to bring it up to the high school level. This course would work very well for a science co-op.
Bite-Size Physics by Science Jim Mueller
There are several options for packages, I recommend buying the bundle, because it comes with the fun and cheesy videos where he explains concepts. Sean loved them. There is some of the same material in his Force Book (which comes in this bundle) as there is in the Physics Book (which is the main spine for the course.) It is a bit confusing, but it in no way detracts from the course. In case you are wondering, I am not affiliated with the author at all. He has no idea I am recommending his course. It is just a really well done Physics course. Both Sean and I loved it. Here is where we bought our bundle. http://www.currclick.com/product/43327/Super-Science-Jim-Pack-BUNDLE?manufacturers_id=297&it=1
For Middle School
This is what Sean did.
Bite-Size Physics – There is math throughout the course. He makes it very easy to ignore the math. I had Sean do the math, but if your student is not strong in math, the course can be done without it. Sean struggled with some of the math. When this happened we breezed through it. Sean learned a lot of physics even when the math was lightened or skipped.
In addition, Sean read
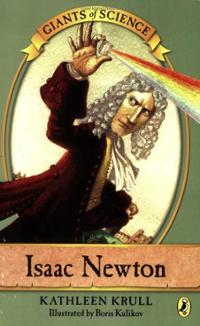
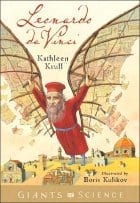
Three books from Kathleen Krull’s Giants of Science series
Isaac Newton
Leonardo de Vinci
Albert Einstein
Isaac Newton, Kathleen KrullLeonardo de Vinci, Kathleen KrullAlbert Einstein, Kathleen Krull
Several books from the Max Axiom Graphic Library series
Electricity
Forces and Motion
Magnetism
Scientific Methods
Energy
Light
Here is a nice illustration with the books in the series. I recommend this series, where appropriate, in the RSO courses I write.
I had Sean write lab reports. Use the guidelines I give in Biology 2 for what a middle school lab report should look like.
For High School
Bite-Size Physics – The math should not be optional unless your child really struggles with math. In fact you should go online and find more math problems that cover the same physics to increase the math. Make sure there are solutions with the problems you find. Here is an example of what I mean: http://www.physicsclassroom.com/calcpad/circgrav/problems
Make sure your student begins to understand how units are used in applied math problems. Even if you do fewer math problems as you focus on this. Being comfortable converting between units and doing Dimensional Analysis is an important concept in all high school and college science courses especially physics and chemistry. Look it up if you have a high school student and you don’t know what I am talking about.
Lab reports – these should not be optional. Somewhere between 1 a week to 2 a month is a good number of lab reports.
Have your student read 1 to 3 books focusing on physics or a famous physicist. Here is a list, but the book does not needto be on it. Let students have some say in the choice. The choice shouldreflect their interests. I like to download a sample of a book (even if I am not going to read it in e-book form) so that Sean can check it out to make sure the reading level is a good fit.
Physics of the Future, Michio Kaku
Physics of the Impossible, Michio Kaku
E=mc2: A Biography of the World’s Most Famous Equation, David Bodanis
Surely Your Joking Mr. Feynman!, Richard Feynman
How to Solve It: A New Aspect of Mathematical Method, G. Polya
The Theory of Almost Everything, Robert Oerter
The Cartoon Book of Physics, Larry Gonick
Emperor’s New Mind, R. Penrose
Dark Side of the Universe: Dark Matter, Dark Energy, and the Fate of the Cosmos, Iain Nicolson
A Brief History of Time, Stephen Hawking
From Eternity to Here, Sean Carroll
Read http://preposterousuniverse.com/eternitytohere/quantum/ which is chapter 11 of From Eternity to Here by Sean Carroll. It is free to read. Carroll does a good job of making the complicated subject of quantum mechanics understandable.
High school students should keep a record of the work done. The easiest way to do this is to keep a file with the lab reports, data sheets, and photos of the labs. Also keep a record of the books read. A short synopsis, oral or written, from the student about the book is a good idea, but not mandatory. An oral synopsis can be done into a wireless phone.
I hope you have a great year of science.
Check out our post on month six of handcrafting high school here and month seven here.
I am reposting this article in response to an article in the New York Times. There is a link to that article at the bottom of this post. The article validates what I am detailing below about how science is best learned!
Learning science is something I have spent 24 years working at in one aspect or another. Today I want to talk about what I have learned over these years educating in various venues and to a broad range of age groups. This is the text from a talk I gave at the California Homeschool Network Convention, CHN Family Expo, in June, 2014.
I was a college professor, teaching chemistry and biology at community colleges before retiring to homeschool my son. I also write secular science textbooks for the Real Science Odyssey series. This is a series of textbooks that have been written primarily for use in a homeschool or small co-op setting. As you can imagine, at our house, we definitely take time to learn science. In the school year 2013/2014, these two areas, facilitating my son’s science education and my textbooks, combined when I taught a homeschool science co-op using the REAL Science Odyssey Biology 2 Course I wrote. I learned some things teaching this co-op. I will touch on some of those things today, but if you want more, you should go to my articles in my blog where there is information detailing what I learned about teaching a science co-op for homeschoolers.
First I would like to ask a question. Have you ever had a great science course? If you have, what made it great? I doubt that even one person thought of a science class that only had reading text and listening to lectures! People approach me all the time worried about the job they are doing teaching science. So many people have had a bad experience in school when it came to science. Those same people want their children to learn science but they do not know what a good science course looks like.
When I think about what a great science course looks like, I recognize that the elements for it are best met with the type of environment we have in the homeschool community, whether in our own home or in a small co-op. I’ve come to understand that the homeschooling environment is absolutely the best environment for learning science.
So how can I say this? There are many people, notable scientists among them (Bill Nye comes to mind at the top of the list), who believe the exact opposite.
Of all academic subjects, science is the one that is the best fit for the homeschooling environment. Why? Because science is best taught where there is the time and space to ponder, research, explore, and get up and experiment. With the right tools and support you don’t need a science degree either. All you need is a willingness and desire to have your child learn how the natural and physical world works.
Start early:
Serious subjects are taught beginning in grade school.
Why isn’t the subject that teaches how the natural and physical world works serious enough to start teaching early?
Starting early allows for more depth and complexity.
I hear from people that they can wait to teach science, that kids are not ready to be taught science in grade school. I don’t understand the logic behind this. Science explains how the natural and physical world works. Why isn’t grade school the perfect time to begin teaching science? It’s sad, because kids want to know about plants and butterflies, stars and planets, how cooking works, atoms and energy. Young children are fascinated by these things. I actually think a big part of the problem with science education is that parents are not fascinated by it anymore, and it’s really a shame. Adults are not fascinated by it because their science education was so poor. We as homeschoolers can change that.
Recently I volunteered at the Intel International Science and Education Fair, the Intel ISEF. It is a huge international science fair. They consider it a science talent search with thousands of high school students from across the globe competing for a total of $4 million in prize money. I always enjoy myself immensely at these gatherings because it’s the only time I get to sit around with a whole bunch of scientists and talk science. At lunch time I happened to sit down with 6 female scientists. Three of them were, or had been, high school science teachers and one was a community college teacher who taught people how to teach science. We all got to talking about what we did or had done and of course it came to homeschooling science when they wanted to know what I did. It was very interesting. You might think this group would not be proponents of homeschooling. I did. You and I would be wrong. These women had been to many science fairs as volunteers and what they saw, again and again, was that increasingly often the best science fair projects were from homeschooled students. I was told that more often than not the homeschooled kids are the ones that win the science fairs. I was curious to find out why they thought homeschooled kids were doing a superior job of learning and experimenting with science. They said to me that the problem stems from when traditional schools begin teaching science. According to them, science is being taught later and later in schools. This is due to the current state of public education and the testing which affects a school’s funding. Schools pour time and money into language arts and math, because if test scores are low in those areas a school’s funding is cut.
Teachers focus all their energy and resources on math and language arts to the detriment of science. If kids are lucky enough to get science before high school it is as a component of language arts. It isn’t science for the sake of science. Now this touches on several things I want to talk about in a minute. But when science is a component of language arts, it’s about reading science. It’s not about doing science and there’s a big difference. It’s why a lot of adults think science is boring. So what happens when you don’t start science until high school is that you have students who come into high school weak in science. Therefore the science teachers have to start teaching at a much more basic level then they were teaching in years past.
If you’re curious to see the difference in levels, go to the Pandia Press website and look at the difference in REAL Science Odyssey Life 1, Chemistry 1, and Biology 2. RSO Life 1 is written for early grade school, Chemistry 1 is written for late grade school, and Biology 2 is written for middle school. You can look at them in the ‘Try It before You Buy It’ section. I really encourage you to look at them side by side. I encourage you to compare the two biology texts and to look at the progression within these books. There’s a big change. There’s a certain amount of knowledge that you begin to anticipate and expect that students are going to have. Students who start a new school year with some knowledge have an advantage. This is similar to what is done in math or language arts. You do not want to be teaching high school students phonics or basic spelling chunks. You want to be discussing literature with them.
Good Foundation means a good grasp of how the various pieces relate
Good Foundation allows for a better understanding of new concepts
Good Foundation leads to a better ability to analyze data, models, and theories about how the natural and physical world works
When I talk about fundamentals, I am talking about the underlying principles that are the root knowledge required for a more advanced understanding of a subject. These are things that high school students in traditional schools are no longer coming into the science classroom knowing.
Scientific Method: An important aspect of learning science is learning how to use the scientific method. Using the scientific method depends on knowing the basic facts of science. The absolute best way to learn the scientific method is through applying it. The scientific method is based on experimentation, observation, and deductive reasoning. One reason that the homeschool environment is superior is because homeschoolers are given the time and space for experimentation, making observations, and deductive reasoning. It really is the best environment for learning science. Teasing out the answer to a problem is not something you can set a time limit for accomplishing. Schools, by their very nature, are forced into giving students time limits to learn and apply science concepts. This doesn’t lend itself to a practical understanding of how the scientific process really works.
A solid foundation in the basic fundamentals of science will result in students who have a good grasp of how the various pieces in science relate, which leads to a better understanding of new concepts. A strong focus on the foundational fundamentals also leads to a better ability to analyze more complex data, models, and theories for how the natural and physical world works
There are certain fundamental principles that are the basic building blocks for understanding science concepts. For example atoms; all matter is made of atoms. Every single science principle where we explain how the natural and physical world works at its core is talking about atoms. Even a graduate student studying complicated scientific principles and theories must understand the basics of atoms. An understanding of atoms is one of the foundational fundamental principles in all of science and is necessary to understand how other pieces of scientific information relate.
I think it is a problem that often there is not a focus on the basic fundamentals for two reasons. The first is that the students’ knowledge base is not complete. The second thing I see happening in middle school and high school texts and classes is that concepts that are too complicated are brought in before there is an understanding of the underlying principles. This leads to spotty knowledge which results in people thinking they’re not good in science when it is actually the quality of their education that’s not good. In these situations, some students will learn the new material, but most students will just breeze right over it. I like to use foreign language as an example here. If you’re sitting in a restaurant and you overhear someone speaking a language you don’t know you tune the speaker out. But if you know a little of that language you will listen, try to understand what they’re saying, maybe even start a conversation with them. It’s the same thing with science. If I start talking about polarity and water molecules and you don’t even understand the basics of what a molecule is, you don’t know what I’m talking about and your brain glazes over or moves on to something else. If you do have some knowledge of molecules and polarity, you will pay attention and engage in the conversation, adding to your knowledge base.
Learn each discipline as a single subject:
Does not create artificial boundaries
Allows for an in-depth understanding of the foundational fundamentals, instead of a “Jack of all Trades, Master of None” approach
Mastery of each science discipline is superior for that discipline and for making connections across disciplines
On the face of it, it might sound like spending an entire year every four years on a single subject creates artificial boundaries between science disciplines. While it is important that the material you use to teach points out and makes connections between the different disciplines, the best approach is to learn the fundamentals of each discipline and make connections once the basics are understood. This creates a cohesive body of knowledge which enhances a student’s ability to make connections between the disciplines.
Often science is learned with a grab bag approach, which I call the smattering approach. When I told the gals at the Intel ISEF fair that I was not a fan of the smattering approach they said that in the past they would have agreed with me. But that now, the state of the science being taught is in such a shabby state that they would even like it if people went back to the smattering approach. It turns out that the smattering approach for learning science is better than not learning it at all. So I guess if it’s between the smattering approach and nothing at all, the smattering approach is okay to use. Otherwise, any good science teacher will tell you you’re better off teaching science as a single subject, just as we do every other academic subject we care about our children learning.
This really goes back to teaching the foundational fundamentals. You start to build on concepts, creating a firm foundation, adding more and more complicated material on top of it. Anyone who has worked with their child in math knows exactly what I’m talking about. There is no other subject that we take seriously that we do not teach as a single subject. There is a reason for that.
It helps to have a guide, someone who is an expert in that field, to help you figure out the scope and sequence of the material to cover.
Different students access information differently.
Focus on the fundamentals.
Make sure the text is secular teaching the theories and models that are central to each science discipline.
Don’t teach a co-op class without a text.
I write science textbooks that are long and complete. I do not write fluffy science. So it should not surprise people that I am a fan of having some sort of guide and guidance to follow for each subject that I’m having my child study over the course of the year. I learned my lesson with first grade biology that even someone who is very knowledgeable in the field could use some direction. When I homeschooled my son in first grade I had a guide and reference material for every subject he was learning, except biology. I thought, “How hard will it be? I taught biology at community college. I have a biology degree from UCSD. Biology is going to be a piece of cake.” It turns out, with all the other subjects he was working on I was overwhelmed when it came to planning and figuring out a course of study as I went along. In fact, when my son was in second grade I had him work through RSO Life 1 and Earth and Space 1!
I will be honest; my reference material is not always a textbook. In history we use video courses and material where someone else has put together a complete package. Science is a little different than history though, because you are still going to need lab sheets, material lists, and I really think it’s good for students to be able to read the information if they need it.
Choose texts that are comprehensive and do not skip over the basics, introducing advanced topics and language with a focus on the fundamentals. I do not think it matters which science discipline you start with, but I would suggest waiting until 3rd grade for chemistry and physics. When your child is ready for their multiplication tables they are ready for chemistry. It has to do with the abstract nature of chemistry.
Every area of science has a lot of information to it. It helps to have a guide, someone who is an expert in that field, help you figure out the scope and sequence of the material to cover. I believe there is no way to teach the foundational fundamentals or to teach science as a year-long single subject without a textbook. In every science class I have ever taught, I have been handed a stack of textbooks. I was given the teacher’s textbook, the lab manual, the answer key, and test making software, because a committee of people at the community college where I was teaching decided that was what the course was going to look like that year. Perhaps this sounds limiting, but I did not find it so. You can use the textbooks as a touch point if you want, but it is essential to have a guide so that the material is covered in a complete fashion.
The other important thing about having a good textbook is that students access information in various ways. I learned how important it is to have reference material when I taught a co-op class this year. Based on my experience, I wouldn’t have my son take a science co-op class if there wasn’t a textbook because if the subject gets complicated your child needs something to reference, not the Internet either. I think it is important to have something they can hold in their hands, something they can underline, highlight, and make notes from. A source that you can both go to.
Along the lines of accessing information I’ve actually been thinking about making some videos for my text and putting them on my blog for kids who are struggling with some of the more complicated concepts. The genetics unit in my biology textbook, for instance, is an area kids find very difficult. I think if students had me lecture out of the book to them, those kids who were feeling challenged by the concepts would be able to understand the information better. I’m very into making sure there are multiple ways to access information.
Carefully pair theory with labs and activities
All theory and no labs, what a bore
All labs and no theory, teach cooking instead
Let’s be clear about what I’m talking about when I call something a good science course. I am not talking about sitting in your seats. I am talking about getting up and moving around, getting your hands dirty. I’m talking about taking those foundational fundamentals and applying them to real-world labs and activities that relate well to the theory. This is where science becomes fun.
When scientific theories are paired well with labs and activities it enhances an understanding of the scientific method and science learning. It demonstrates through use and practice how hypotheses are formed and conclusions determined based on science facts that are presented in the text.
Sometimes I see science being taught where it is all theory with no labs or activities. The science theory is the science information in the written text. Other times I see science being taught with all labs and activities but no theory. Neither is adequate.
Honestly all theory with no labs and activities, why bother. That’s where science gets a bad name. For parents I know that the labs and activities are work. I know you do not always feel like setting them up. I know this because I teach my child science, and I don’t always feel like setting them up, but I do it because it’s important to me that my son gets a good science education. A good science education has labs and activities that are carefully paired with the text and theory.
All lab and activities with no theory might be fun, but you are not learning science cohesively. You’re not learning the foundational fundamentals. For example, how many of you understand the complicated process that occurs when you bake a cake? By this I mean the physics and chemistry involved in the baking process. To bake a cake you don’t need to know the underlying science because that is not your reason for baking it. It is about making a yummy treat for your family. In order for it to be called science you would need to understand the physics and chemistry of the process. And to know and understand the science you need to have studied the theory and then done the experiments. That way it all ties together.
When this is done; the pairing of the theory with the labs and activities, no place outside a college lab that is thoughtfully paired with a lecture course can match the homeschool community. It might be another reason why we are winning all of those science fairs.
5 Steps to a Great Science Education
Start Early
Focus on the Fundamentals
Single Subject
Good Textbook &/or Reference Materials
Carefully Paired Theory and Labs & Activities
I hope that this helps any of you who are worried about your children’s learning of science, and that this doesn’t sound complicated to you. All you need to facilitate your child learning science is a desire and the resources to make it happen. I want to close with, “Science is so much fun to do, to share and interact. I really hope you take the time to explore science with your child. Who knows, maybe the next time someone asks you if you have had a great science course you will raise your hand, because the years of science you did while homeschooling your child were just that good!”
Update: In December of 2014 the New York Times published an article about college reinventing how science is taught and better learned using the principles and methods I am advocating here!
What happens to scientific theories when definitions change or new information comes to light?
I love this exchange, and I thought many of you would too. There has been quite a bit of interest about homeschooling science co-ops based on the number of hits the co-op blog posts on this site are getting. This is an email I received recently from someone who is teaching one. I have also included my reply.
Email to me Tue, 16 Sep 2014 20:41:45 -0400
I just started teaching biology for my co-op out of your book (thanks for the notes on your blog on teaching it in a co-op btw), and I’ve had the kids watch the full program of BBC hidden universe, secret life of a cell https://www.youtube.com/watch?v=FFrKN7hJm64 which pretty much convinced the kids that viruses were alive, which meant that during the debate on whether viruses were alive or not, they decided that the definition of living was outdated and needed to be changed.
The very big problem was chapter 2 – this week, right after I explained the difference between a scientific theory and non-scientific theories, we came to cell theory, and one of the students pointed out that if viruses are alive, cell “theory” isn’t true. Please help, I’m sure there is a good explanation I can give the kids, I just don’t know it. I’ve looked through a bunch of internet articles, and the consensus seems to be that a virus is definitely not a cell, and there may be a new classification of alive.
Scientific Theories: The theory of natural selection as it relates to frog size.
I love this question and this debate. If scientists need to update the definition of living to include viruses, then the cell theory needs to be broadened to include viruses. Perhaps your student who feels strongly about this could rewrite it for the class, adding another element to the cell theory. Working scientific theories are updated often as new information or understandings come to light. This is actually the strength of scientific theories. Take Newton’s Law of Universal Gravitation into consideration. For centuries it was thought to be THE explanation for gravity everywhere in the universe until Einstein showed that Newton’s Law of Universal Gravitation only worked when the mass of the object is small (at least smaller than a planet), or the velocity (speed) the object is moving is low (so not at speeds close to the speed of light). The working scientific theory explaining gravity had to be rewritten and broadened to include these situations, large masses and speeds close to the speed of light, and is now called the Theory of Relativity.
In case you are wondering I am not weighing in on the debate. But if the class decides the definition of what constitutes an organism needs to be updated to include viruses, than they are correct in thinking the cell theory needs to be updated too.
Here is a question this made me think of, “Is it a mistake to treat the definitions of science terms and questions, like that used to define what is living as having to have a cell, as static, if one of the strengths of scientific theories and models is that they grow, broaden, and change as knowledge and understanding does?”
If you are teaching a science co-op class and have something you want to share, e-mail me at blairleescience@gmail.com. I will put a blog post together.
The two photos are from Jantar Mantar in Jaipur, India. Jantar Mantar is an observatory that was built in the 18th century.
Read about using RSO Chemistry 1 for a science co-op here.
REAL Science Odyssey Chemistry 1 is a great choice for a science co-op, however because it was designed to be done 2 days a week it presents some scheduling challenges when conducting the labs in 1 day. You might want to teach this class 2 days per week, if you do, follow the format in the book as laid out on pages 14 – 16 of RSO Chemistry 1. If you don’t, some weeks will require parents to do work at home. This schedule is for doing the class 1 day per week.
Chemistry Co-Op: RSO Chemistry 1, Blair Lee M.S. RSO Chemistry 1
Note: The page numbers below are for the written text. If you have an e-book these page numbers will be a little off. Refer to the schedule in the book if there is any confusion about page numbers.
For more general information about teaching a science co-op read my blog article, Using REAL Science Odyssey for a Homeschool Co-op: General Notes.
Unless noted I recommend the following format for your class each week:
In class
Read the theory
Conduct the lab
At Home
Crossword Puzzle, when there is one
Some assignments and projects, as indicated below
Week 1
The first week of class can be a bit hectic. I suggest you divide the week up this way
In class: Lab #2 pages 27 – 30
*** It is very important you go over the process you are using when conducting this lab. Discuss the scientific method, what it means, and how it is being applied.
At home: Lab #1 and the crossword puzzle pages 23 – 25, 31
Week 2
Each week discuss the parts to the scientific method. These are on the lab sheets for most labs. By the end of the year you want students to be fluent in the vocabulary used when applying the scientific method.
Lab #1 pages 37 – 39
Lab #2 pages 43 – 44
Week 3
At home: Read over pages 46 – 47 and Make Parts poster page 47
In class:
Do the Parts! Lab: 49 – 51 next week
Types! Lab: pages 54 – 61, There will be plenty of time for students to do this individually, but you could have students work on this together, so that the entire class makes this on a large table building one element at a time. If you do, make sure everyone participates (maybe put the labels in a hat and have students choose one, and make that element when it is his or her turn; if you have more than 10 students have students work in pairs for the larger elements like neon).
Week 4
There is a lot of sitting around today so I would suggest breaking it up by
Read pages 66 – 67
Do Parts! Lab: 49 – 51: Have an extra balloon for each student to take home, so they can share this demonstration with their family. Ask students to teach their family what is happening in this experiment.
Do The Alphabet Lab #1 pages 69 – 73: Work through this methodically with your students. Students will be using this periodic table for several more chapters DO NOT let them take it home!!!
Have student do pages 75 – 79 at home, unless you have time at the end of class in which case have them do page 75 in class
Week 5
There are three parts to the Atomic Numbers section
Atomic Numbers Lab #1 can be done as a demonstration or individually it is up to you
While you wait the 20 minutes for the final observation for Lab #1: Read over page 81 and have students fill in the atomic numbers section on their periodic table.
Atomic Numbers Lab #2 start in class, if students don’t finish it have them finish it at home
Week 6
In class:
Read over pages 95 – 96 and have students fill in the assigned section on their periodic table
Do Massive Matters Lab #2
At home: Massive Matters Lab #1
Week 7
Read over page 105 and have students fill in the assigned section on their periodic table
Do the Lab, page 111
Save the worksheet page 109 for last in case you need to have students do it at home
Week 8
In class:
Read over page 113 – 115 and have students fill in the atomic numbers section on their periodic table
Do Lab 119 – 122; take your time with this lab. It is a really good one
At home: page 117
Week 9
The lab on page 129 – 131 requires an oven. If this is a problem for you:
Fill in worksheet pages 125 – 127
Have students (with parental supervision) do the lab at home and bring the muffins in for a tasting party. If you do this have student mix in berries or chocolate chips (assign this individually) so you have some variation in the muffins.
You should have completed periodic tables to put on walls or desks for students to show off to their parents. This is the end of Unit 3, so it is a good place to take the time to do this.
Week 10
Over the next 9 weeks students will be creating a book for the first three rows of the periodic table going across by group. There is some drawing to be done each week. Class time for this can be problematic because some students will take 5 minutes to do the same task another student take 55 minutes on.
Each week for the next 8 weeks: Read over the For My Notebook page and make notes about the elements in the spaces on the pages for the Element Book.
I will give you my advice each week, but you might need to tweak it.
Recruit 1 or a group of parents to do the work on pages 139 – 140 for each student
This week In class:
Read page 136: have students follow along on their periodic table
Fill out page 137 and glue it to their book. Do not let students take this home.
Read page 141: have students fill in the Facts section on page 149. This and every other week, have students work on the rest of the page at home.
Do Lab page 143 – 145
Read page 142: have students fill in the Facts section on page 151. This and every other week, have students work on the rest of the page at home.
Week 11
The Lab for this week< Crystal Creation, is short and will not be completed until next week. Students should be able to do all the work for their Element Book including decorating it in class.
Week 12
Make observations for the Crystal Creation Lab page 157.
Expect a fun mess with the lab today! Save some of this for week 26. It will stay good if you refrigerate it.
Students should be able to do all the work for their Element Book in class. If they cannot have students complete the pages at home.
Week 13
Students should be able to do all the work for their Element Book in class. If they cannot have students complete the pages at home.
The lab requires an oven. Try to round up a toaster oven if you need to. This lab is fun and yummy.
Week 14
Students should be able to do all the work for their Element Book in class. If they cannot have students complete the pages at home.
The lab requires an oven and a mixer. A toaster oven will work.
Week 15
Students should be able to do all the work for their Element Book in class. If they cannot have students complete the pages at home.
There are 2 labs for this week.
The lab on page 193 requires a heat source. Have students do it at home if that is a problem. A toaster oven will not work.
Do the lab on pages 195 – 197
Week 16
Students should be able to do all the work for their Element Book in class. If they cannot have students complete the pages at home.
There are 2 labs for this week.
Lab #1 needs to be done as a demonstration. Bleach is too toxic and caustic to risk having a group of students use it.
You will start Lab #2 today and finish it next week. There are a few changes to the procedure so that this lab can be done by all the students. Change the procedure instructions for Procedure 8 in the book to Let the egg sit for 7 full days. Do not refrigerate the egg. Have students make the vinegar solution in a double baggie. If the egg breaks and leaks out of the baggies it will be badly stinky!!! Have students take the baggied egg home and complete the experiment at home the next day. Have them share their observations at the start of next week’s class.
Week 17
Students should be able to do all the work for their Element Book in class. If they cannot have students complete the pages at home. You might even be able to put the books together. If you do not have a refrigerator in class, use an ice chest with ice in it. Perform the experiment while working on the Element Books. Have a balloon for each student to celebrate the end of the unit or just use 1. If you have a balloon for each student, have everyone put their balloon in the cold source at the same time so all the cold air does not get out from being opened repeatedly.
Week 18
There are 3 labs/activities this week. The Lab on page 243 – 245 will be done at the start of next week.
The puzzle pages 233 – 235: You might want to have 1 set of pieces per student pre-cut. If you do consider asking parents or students to bring these pre-cut pieces with them to class.
Lab #1 pages 239 – 241
Week 19
Begin class with the lab page 251, set a timer for 1 hour and make the second observation. I am not sure if this experiment will last over a week. You are going to need to check on it after 24 hours, and take a photo. Then you can wait a week and see. That way your students can use your photo as the final observation if they have to.
Lab page 243 – 245
Worksheet page 249
Week 20
Lab 261 – 264
Have students finish today with the worksheet page 255 – 259. They can complete this at home if you run out of time.
Week 21
Have student complete the poem at home.
Start class with Activity #1 on pages 269 and 271
Have student share poems if they are so inclined.
Have students do Activity #2 on pages 269 – 270 and 273
Week 22
Do pages 275 – 279
Week 23
Do pages 281 – 289: Use a microwave if you have to in order to boil water. An electric tea kettle will also work.
Have the ingredients for Jell-o present, but make a batch of Jell-o ahead of time so students can make observations about the Jell-O in class.
Week 24
Do pages 291 – 300: You have a group of students so why not use them for a density demonstrations. Mark off a space on the ground that will just fit all the students standing as a group. Have the students fill the space 1 by 1. Have the students move around in the marked off area. This will show them how much less space there is to move when more particles (people) occupy the same amount of space.
Week 25
Take a look at the lab on pages 303 to 305. The amount of set up time is perfect. But the lab takes 1 week to complete and you make a hot sugary solution. It is a good lab though.
You have a group: do the group activity on page 304
Week 26
Do pages 307 – 315: Use the slime you saved
Week 27
Do page 317 – 325: To do the lab on page 319 in 1 lab period. Use 3 bottles. Take one bottle and freeze it with the cap off the day before class. Bring the bottle to class, but take a photo in case it starts to melt before class starts. Suggest students put a bottle with the cap off with a dish under it in the freezer overnight to observe the expansion of water for themselves.
Week 28
Pages 327 to 337: There are three activities/labs this week. You should be able to get through them all. You will need a microwave and 1 or more kites. If it isn’t windy, the kite is optional.
Week 29
Pages 339 – 347
Week 30
Pages 353 – 361: You will need pre-frozen Kool-Aid
Week 31
Pages 363 – 371
Week 32
Pages 373 – 379: The indicator should be made at home. Do Step 1 at home and bring the indicator to class. Have kids make the coffee filter pH paper from Step 1 in class. They will use it next week.
Week 33
Pages 381 – 387
Week 34
Pages 389 – 397
Week 35
Pages 399 – 403: Have students make the solution for Day 1. You are going to need to make the same solution the day before so you can do the entire experiment in 1 day. Have students take the solution home in a baggie so they can see the results for their own solution. Alternatively, you could leave it a week and have students make their observations next week.
I received an email asking about how the material list is affected when teaching a co-op with RSO Chemistry 1. I thought it was a question that deserved an answer for RSO Biology 2 as well. My goal with this series is to make it easier for anyone who wants to teach a science co-op. Teaching is a LOT of work. I respect the time and energy you as an educator are taking to teach science and this is my way of making it a little easier for you.
Note 1: You are going to have to match the lab with the week. I changed the weeks where some of the labs are performed for a co-op class from the order they occur in the book.
Note 2: No change means there is no change to the quantities as listed in the Material List in the Student Guide and Teacher’s Guide for that week.
Note 3: I am assuming every student has their own text.
Note 4: Microscope supplies – you will need a quantity of microscope supplies for a class. I bought a box of slides and slide covers at the start of the year, cleaned those that could be cleaned over the course of the year, and disposed of those that couldn’t. At the end of the year I threw them all away. I will assume you have a large enough quantity of general microscope materials each week for your entire class. I will only list changes for materials specific to that experiment.
Week
Changes to Material List
1
The plot study lab: You will want multiples of – tape measures, graph paper, clip boards, markers for plots
2
Microscope techniques: 1 – 3 corks, 1 X-Acto knife per 4 students, 1 syringe per 4 – 6 students, 1 tweezers per 4 – 6 students, 1 plastic spoon per person
3
Cell model: 1 glue per 5 – 6 students, 1 ruler per 5 – 6 students, extra toothpicks
4
Chapter 4: multiple colored pencils, 1 syringe per 4 – 6 students
5
Diffusion: Are you going to teach this as one large experiment for the entire class toobserve or an experiment each student takes home? That affects the material list.
Microscope: 1 corn kernel per person, the same as for above – when you gather multiples of things like syringes make sure they stay in class for the duration of the co-op.
6
Photosynthesis/Cellular respiration: * 1 plant for the group (do not change this), 1 piece of fruit/vegetable per person
7
DNA lab: (LOL people hate or love marshmallow labs! They are cheap. I am sorry if you hate them. Any other ingredient makes this lab much more expensive. I am vegan, so trust me I get the entire anti-marshmallow thing. Just warning you, some parents are sure to complain. I get emails about this ingredient on my material list.) Multiply the number of marshmallows, beads, toothpicks, skewers, and pipe cleaners by the number of students.
8
Mitosis Poster: The supplies list depends on whether students do this at home or in class. If they do it in class, you will need multiples of poster board, marshmallows, pipe cleaners, yarn, and beads.
Microscope 7: 1 sports drink per student, 1 cup or glass per student
9
No change
10
Activity 10: 1 coin per student
Microscope 10: No change
11
Frog dissection: 1 frog per student, 1 set of dissecting tools for every 1 – 2 students*** Not all students will do this dissection. Make sure they will BEFORE purchasing frogs.
12
Plant dissection: 1 plant per student (if students are not working in groups, use 1 plant per student.)
13
Flower dissection: 1 flower per group (if students are not working in groups, use 1 flower per student.)
14
Labs 14 – 1 & 2: Multiply the number of lemons, wire, nails, pennies, calculators by the number of students.
15
15 – 1: As many cardboard nail messages as you can for students (this is a very simple but fun lab), multiple blind folds
Microscope 15: No change
15 – 2: Multiply the number of bottles, coffee filters, gravel, sand, cotton balls by the number of students
16
16 – 1: 1 flashlight per pair of students
17
Microscope 17: 1 needle per person
17 – 2: 2 balloons per student, multiple tape measures or measuring sticks
18
Lab 18: Multiply the number of chicken wings, gloves, and dissection tools by the number of students
19
19 – 1: No change
17 – 1: Multiply the number of bottles, tubing, X-Acto knives by the number of students
20
Microscope 20: Both of these labsrequire some thought about you want to run them for a class. By the time you get to these labs you will have a good idea how best to run them. For the microscope lab, will each student make their own slide and look at the slides of other people? In that case you need 1 insect per student. Or will you make the slides and have students look at them without preparing the slides? In this case the number of insects needed varies from two to as many as you want for comparison.
Lab 20: Where you do this lab determines whether there are changes to the material list. If done outside there are NO changes. If done inside you need 1 set of materials per student. Alternatively you could make the timeline as a mural, with all students working on it together.
21
Microscope 21: No change
Lab 21: Multiply the number of pompoms by the number of people who will be performing the experiment at the same time.
22
Lab 22: Multiply the amounts of supplies by the number of students
Microscope Lab 22: No change
23
Lab 23: Multiply the number of sheets of construction paper by the number of students
Microscope Lab 23: No change
24
Lab 24: Have parents help by bringing in supplies for their student’s project
Microscope Lab 24: No change
25
Lab 25: No change
26
Microscope Lab 25: 1 piece of grass per student
Lab 26: Multiply the amount of materials by the number of students
Microscope Lab 26: No change
27
Microscope Lab 27: No change
Lab 27: a minimum of 1 plant per student, 1 container with a lid for each student to take home the watering solution (I make my own jelly, so I used canning jars which I have a lot of.)
28
Lab 28: Multiple students mean more students making dichotomous key mysteries – there is no change to your materials list
29
Lab 29: No change
30
Lab 30: No change
31
Microscope Lab 30: Enough leaves for students to each make their own slide
Lab 31 and Microscope Lab 31: It would be nice to have 1 set of specimens per student. It is not necessary though.
Start Lab 32: 1 banana for every two students, 1 tsp yeast per student, 2 baggies per student
32
Microscope Lab 32: Multiply the number of mushrooms by the number of students, you also need multiple cutting boards and flashlights
Each week students were expected to do work outside of class.
Outside of class:
Weekly
Read the text
Complete the Famous Science Series
Complete the Show What You Know
When assigned
Lab Reports: not all labs are good lab report labs. Check the Teacher’s Guide t labs I o see which labs I recommend having students write lab reports for. As a former college professor, I strongly recommend having students learn this important skill now. Lab reports are very formulaic to write and yet many college students cannot write them. If a student has trouble with the actual writing of them (separate from what to put in the content) have them get help from a parent. Fine motor skills issues are an example of what I mean.
At the end of each unit
Unit Test
By the end of the school year
Research Paper from chapter 28
As you know from the introduction I am relaxed about who is doing the work outside class. I do however give preference in class when asking questions to those students who have read the material and done the work. At the start of class I have students give me a show of hands as to who has gone over the material. Those are the students I want to hear from when I ask a question, because they are giving me an informed response based on the material that they were responsible for. I wasn’t upset with any student who didn’t do the week’s reading, but I was honest with the students as to why I preferentially called on the students who had done it.
I will only discuss the Theory when I have something to add separate from what is in the Teacher’s Guide.Teacher’s Guide
Terms in this document: Lab refers to general labs that are NOT microscope labs. When referring to microscope labs I specifically call them microscope labs.
Unit 1: Chapter 1
The Theory: Assign the reading before coming to class. It makes for a good introduction. The plot study can take some time to do. You are going to want to get right on it.
The Labs: There are two great labs in Chapter 1. Start with the plot study lab. I think that every general biology class should start with a lab outdoors looking at what’s out there. Take the microscope lab and combine it with the microscope labs from weeks two and three, so that for the second week of class you are working on microscope technique.
Unit 2: Chapter 2
You will be devoting this week to microscope work instead of doing the canning experiment which is difficult in a classroom setting. I suggest buying 2 containers of processed applesauce. Open one and leave the other sealed. Compare the two samples weekly until the opened one needs to be thrown away. Come back and fill out the lab sheet for this lab then.
The Labs: The microscope work for the first three weeks focuses on basic microscope techniques. Take your time with these. I learned that even kids who think they are experienced using microscopes often fall down in the area of making good slides. Just remember THIN SLICES!!! Discuss drawing microscopic specimens on their lab sheets. Demonstrate how to make these drawings by drawing one. Make the drawing while looking at the slide. Have students look at your drawing, and then look at the view of the slide. Have them all draw one of the specimens from one of their slides today.
This is the time to go over rules about microscope care and handling. I have included an explanation in the text. You want to make sure students read it over. You could send a sheet with the rules written on them separately to parents and students and have both the parent and the student sign the sheet saying that they have read them and will respect them. All of the students that I had in my co-op class were careful with the microscopes. Kids are kids though, and sometimes they just didn’t think. That’s why it’s good for them to know that there is a policy for microscope handling and care in place, and make sure that they know what those policies are.
Unit 2: Chapter 3
The Labs: I let students decide if they wanted to make the plant cell model or animal cell model. Plan ahead how you are going to make the organelles. If using Sculpey you need an oven. You might need to make the organelles outside of class. If that is the case you will need to know ahead of time which type of cell students want to make.
Unit 2: Chapter 4
Have students do the activity before coming to class.
Students need access to a computer for today’s lab.
The Labs: Start with the microscope lab. Pay attention to students’ slide making technique. Demonstrate how to make a slide for them before they make one of their own. When the microscope lab is completed have students begin the lab. This is one of the most important labs that your students will do all year. It deals specifically with their nutrition and health.
Unit 2: Chapter 5
The Labs: Start by having students set up the lab so they can monitor it over the course of the two-hour period. After that discuss what it was like following the menu they made last week, and what they learned from it. Next discuss the material for this week. Then do the microscope component. The lab should be monitored for 24 hours or more. I don’t know for sure, but an entire week might be too much time. Optimally, each student should take it home and continue to make observations over the course of 48 hours. If you feel that students will not do this, you should take it home yourself and e-mail your observations to students.
Unit 2: Chapter 6
The Labs: I love this lab. It was inspired by a middle school student who I was tutoring in biology. He’s the adopted son of a friend of mine. LOL, I only teach co-op classes that my son is in, and I only tutor the children of really good friends of mine. My husband would divorce me otherwise. He set these rules a few years back. 🙂 Go over the material as briefly as possible while making sure that kids understand the chemical process. That way you will have more time outside. You might choose to wait and do the microscope lab next week. Do the microscope lab after you do the regular lab to make sure you have enough time for the regular lab. There is enough time to get through everything this week unless somebody is having trouble with the chemistry for photosynthesis and cellular respiration. It took my son more than once through this material to understand it, so I know it can happen.
Unit 3: Chapter 7
The Theory: Be prepared. This unit gives students and their parents so much trouble. Genetics is where biology is at these days. This is not going to go away. To be literate in the field of biology you have to know genetics. Parents find it difficult because most of them did not have it when they studied biology. In part this is because this area of biology has been growing in leaps and bounds as the testing, equipment, and methods have become more and more sensitive and advanced. Don’t let students get discouraged. Prepare them that it’s going to be challenging. If you are going to offer office hours this is the four-week period to do it in. Do not lose sight of the forest for the trees, though. It is not expected that most students will have 100% mastery of this material. At the end of the four weeks your students should have an understanding of the basic vocabulary and knowledge in the area of genetics. Assign videos you like for the class. For some reason for these complicated topics, students and their parents tend to use videos put together by college professors to help their college students. These are not helpful to a middle school student who is struggling with middle school material. These college tutorials discuss vocabulary and concepts that are not discussed in a middle school text.
Chapter 7 has coloring and drawing sections within the chapter. I sometimes hear these called coloring pages by parents. Ironically, when I explain these pages to educators they get excited by this sort of interactive text because when kids interact with the text, like happens in this chapter, it leads to what educators call ownership of the material. I recommend working your way through the chapter with the kids. Ask them to read the text and work through it. Tell them that if they get stuck on anything they can e-mail you, or they can take a Post-it note and write their questions on the Post-it note at the location that stumped them. Give high praise to anyone who seems to have some level of mastery over the material. I would work through the Show What You Know in class. Have students bring it to class completed and go over it, or complete it in class.
The Labs: Do the lab this week and the microscope lab next week.
Unit 3: Chapter 8
The Theory: Use the same system that worked last week, assuming it did work. If it didn’t work and students seem to be struggling with the material try tweaking your system. Don’t forget to assign videos for this week’s material.
The Labs: The lab for this unit is to make a poster. I like having students make their poster over the week and bring them to class. It’s really fun to see the level and energy that some students put into making their poster. Between the theory and looking at posters this should leave about an hour for the chapter 7 microscope lab, which is about the right amount of time. The microscope lab for chapter 7 requires students to go slowly and be careful with their technique. The chapter 8 microscope lab will be done next week.
Unit 3: Chapter 9
The Theory: If you are doing a lot of explaining with this chapter, have students do lab 9 at home. If not it can be done in class. Don’t forget to assign videos for this week’s material. Warning: Students who found mitosis challenging really struggle with meiosis.
The Labs: Do Lab 9 or discuss the work for Lab 9 that students did at home. The two microscope labs that will be done this week use prepared slides. One has students find the phases for mitosis; the other has students find the phases of meiosis. This might seem like it will be a quick pair of labs. It takes time to find the phases. I would set up two microscope stations one for meiosis and one for mitosis. You could pull students aside so it does not get too backed up at the microscopes and go over their Show What You Know work to make sure they understand the two processes. Make sure that the prepared slides come from a good source. Do not use slides that are plastic and not high-quality. Home Science Tools has very nice prepared slides. That is where I got mine.
Unit 3: Chapter 10 – today’s class is jam-packed! It might go over 2 hours. Take your time with it. You could add an extra week to the course for this chapter if you want.
The Theory: On page 211 of the student text is a box with a representative of a chromosome in it. Do this in class together. Make sure students can do the Punnett Squares individually as students are doing the microscope lab. You could have a mini session after class re-doing the Show What You Know Punnett Square, then assign the Extra Practice Punnett Square to students who are having trouble with them. You could even give students extra credit toward the test for the Punnett Squares.
The Labs:
Before class:
Have student’s come to class with the family traits questionnaire on pages 219-220 already completed.
Assign each student a strand of hair to bring to class. During week 9 ask about hair colors at home with students, such as who can get a white hair, who can get a red hair, etc.
It is up to you whether students do the qwitekutesnute activity at home or in class. If they do it at home have them bring their qwitekutesnute and share it. If they are doing it in class, end the day with that activity. The qwitekutesnute activity is a favorite of students. You might be tempted to drop it. I do not recommend that. It does a good job of demonstrating Mendel’s Principles of Genetics.
You will do the lab sheet, page 221, together in class. Give kids time to discuss what they learned. It is fun to discuss the results. Have each student make a slide with the strand of hair they brought.
If you break chapter 10 into 2 weeks:
Week 1 of 2: Family Traits Lab and the microscope lab
Week 2 of 2: Punnett Squares, the qwitekutesnute activity, and a review of the material from all 4 chapters. This is the best plan if you are having students take the end of the unit tests. This is the Unit Test that is the hardest for most students.
Unit 4: Chapter 11 – A dissection!!!
The Labs: Of the nine students in the co-op class I taught, only one made it to the end of this dissection. Only six were willing to even try to do the dissection. The one who made it to the end loved every single minute of it. This student was also an avid fisherman. The five who started the dissection but didn’t finish became nauseous and felt like they would faint; to be honest I began to feel nauseous just watching them try to hold it together. Be prepared for this. Have people bring their laptops so they can do a virtual dissection on-line. There are many, choose one or several before class. Some of your students won’t even want to do that. Those students I had watch a video.
Unit 4: Chapter 12 – Another dissection!!!
The Labs: Do both labs. Poor plants, no one faints when it comes to chopping them to bits. I suggest buying the plants for students and having them work singly or in pairs. It depends on the ratio of students to microscopes. The reason for you buying the plants is so you can make sure you have the right number of plants, and that they will be good plants to dissect. Choose a plant with leaves that make a good slice. I used one plant for each group of three students.
Unit 4: Chapter 13 – And yet another dissection!!!
The Labs: The instructions for this week are the same as last week except for flowers and seeds. While doing the dissection discuss the process of fertilization for angiosperms with students. If you have them in your area, you could bring a pine cone and a leaf from a fern for students to examine.
Unit 4, Chapters 14 – 19: I strongly believe that at the end of middle school biology a student should have a basic working knowledge of human anatomy, physiology, and epidemiology. The epidemiology part has been infused through the text to this point and will continue to be where it is relevant. Now the text brings in the anatomy and physiology parts. That is why other than in chapters 11 – 13 humans are the organism of focus for anatomy and physiology. I had my students download and play with the App, http://www.cdc.gov/mobile/applications/sto/. This is an epidemiology game from the CDC. We all loved it including me. Throughout this unit, I assigned extra reading to students focusing on epidemiology topics. You should choose topics that interest you and your students. For example, my husband has rheumatoid arthritis. When we got to the chapter on the immune system, I had my son read about rheumatoid arthritis.
To deal with before you get to Chapter 16: Chapter 16 has the reproductive system in it. You should talk to parents and the group you are running the co-op thorough to decide if you are going to teach this section or have parents teach it at home. The co-op I taught through chose to have parents teach it at home. I explained this to the parents, with a strong recommendation that it be taught. I realize a lot of parents are uncomfortable with this material but people REALLY need to know it.
Most of these weeks have two organ systems in them. It is quite a bit of material to get through each week.
Unit 4: Chapter 14
The Labs: Chapter 14, Lab 1 is fun to do with a partner. Do both Labs. I had students do a bit of research for Lab 1 before class so they could make the best battery possible.
Unit 4: Chapter 15
The Labs: There are 3 labs this week, if you want to make sure you get through them all this week, warn parents you might run 15 minutes over.
For Chapter 15, Lab 1: You need to have the set-up ready for students before class, so that lab doesn’t take much time.
Next go to Chapter 15, Lab 2: I had students do a bit of research for this lab before class so they could make the best filter possible. I made a contest out of the lab. I sent them a sheet of materials that would be on hand for their use.
Finally do the microscope lab. If you run out of time, start next week with this. It can be hard to get a good sample for this lab. Have one you made on hand in case no one gets one. If you are not teaching the reproductive system then definitely do the microscope lab next week.
Unit 4: Chapter 16
The Labs: Do Chapter 16, Lab 1 as explained. Students should work in groups of two or three, with each student doing all parts of the lab. It helps to have one person doing the experiment, one person writing down the results, and one person timing. Even if you do go over the reproductive section in class, have students do Chapter 16, Lab 2 at home.
Unit 4: Chapter 17
The Labs: There are 3 really good labs this week. Do the microscope lab and Chapter 17, Lab 2 today. Have students work in pairs for Lab 2. Make sure they get results for both students. Some students will struggle with the math for this lab. Go over it after students have gathered results for both people. Remind students NOT to share balloons. As crazy as that sounds some will share if you do not remind them! Students will do Chapter 17, Lab 1 in two weeks.
Unit 4: Chapter 18 – it’s another dissection!
The Labs: Once again not every student will be able to complete this lab. Some students are just not able to handle dissections. That is too bad. This lab is awesome for showing how the skeletal and muscular systems work. You should get a good feel for which students are getting the hang with their microscope technique with this lab. You have to make sure no one hogs the microscope though. there is a lot of cool slides to be made in this lab. If you have time have students play the Game. Otherwise have them play it at home. I had students play it while waiting to use one of the microscopes.
Unit 4: Chapter 19
The Labs: Do Chapter 19, Lab 1 and Chapter 17, Lab 1. Take 15 minutes at start of class to go over the procedure portion of Chapter 19, Lab 2.
Unit 5: Chapter 20, Class today will probably run over in time especially if you do a timeline outdoors.
The Labs: Have each student bring an insect for today, or you can collect them all yourself. Start inside with the microscope lab. For the lab you need to choose a location ahead of time. Your choice of location will decide whether you do this outside or inside on paper.
Unit 5: Chapter 21
The Labs: Have each student bring a sample for the microscope lab, or you can collect them all yourself. You can do Lab 21 with students in teams of two. Each setting up the lab for the other while you have the rest of the students performing the microscope portion. The lab is pretty lively. You are going to want to make sure it stays on track with no peeking from the super competitive students. Done without peeking, this lab does a great job of showing how natural selection works. You might want to ask another parent to help. That way you have one person helping with the microscope lab and another helping with the lab.
Unit 5: Chapter 22
The Labs: Do both lab and microscope lab. You might want to set the microscope lab up with the instructions, “Look at the view, but don’t mess with the microscope.”
Unit 5: Chapter 23
The Theory: This is a shorter day for labs. I suggest taking your time going over the material. Kids find it confusing. If you are having students take the test it might take some time to review the material today.
The Labs: Do both labs. Leave about 1 hour and 15 minutes for the two labs. That should be plenty of time.
Unit 6: Chapter 24
Have students complete the activity before class. This is a really good activity for this chapter. Briefly at the start of class ask what students learned from the activity.
The Labs: Start with the microscope lab. Have students decide on the biome they want to make before they come to class. You are going to need to have the materials on hand for making the biomes. If students do not finish have them take their diorama home to finish. While they are working have anyone who wants to share their Mad Libs poem recite it.
Unit 6: Chapter 25
The Labs: This is an outside lab. Go somewhere where there is a lot is going on ecologically. I live in Southern California. We did this lab at the beach looking at tide pools. Do the microscope lab next week.
Unit 6: Chapter 26
The Labs: You will need to collect or purchase the plants for the lab ahead of time. Do the Chapter 25 and Chapter 26 microscope labs today. Then do the lab.
Unit 6: Chapter 27
The Theory: After going over the material have a discussion about ways students could help themselves and their families reduce their carbon footprint.
The Labs: You will need to have each student do the procedure for the microscope lab the day before class. Before leaving for class, have them observe the differences between the two leaves. Have your own specimens ready to look at with the microscope. Do the microscope lab first. Start the lab today. Have students make the different solutions in class. Part of the goal with this lab is teaching students how to make solutions of varying concentrations, so you should focus on that during class. The results will be collected over the next week or two. Have enough plants for each student to take one home to water at home with 1 type of solution throughout the week. Each student will get one or two plants (depending on the number of students) and 1 type of solution per plant. Make sure students understand that they are responsible for watering correctly to the specifications stated in the procedure, and that they are expected to make daily observations. If they are not able to commit to this, have another student take their plants.
Unit 7: Chapter 28
The Labs: Today you will do both microscope lab and lab. You should go over the medium cladogram with students in class, and have them do the easy and the hard cladograms at home. Make sure students understand the concept of shared derived traits. If you are having students write the research paper, explain what you want from them during today’s class.
Unit 7: Chapter 29
Go over the cladograms from last week and the one from this week from the Show What You Know section.
The Labs: Use the instructions in the Teacher’s Guide to do this experiment in one day instead of two.
Unit 7: Chapter 30
Go over the cladograms from this week’s Show What You Know section.
The Labs: For the lab, have your class meet at the best nursery close to you or at an area with a lot of different types of vegetation. Start next week with the microscope lab from this week.
Unit 7: Chapter 31
Go over the cladograms from this week’s Show What You Know section.
Start the lab for chapter 32 at the end of today’s class. Make sure and tell parents not to throw it out during the week. This happened to over ½ of the students in my class.
The Labs: Start with Microscope Lab 30. You are going to need specimens for the labs this week. Have students collect them, or you can start collecting them early in the year so you have enough. In a pinch use one pair for the entire class. Do Lab 31.
Unit 7: Chapter 32
Go over the cladograms from this week’s Show What You Know section.
The Labs: Start by looking at the bananas. Discuss chemotrophy when you do. This is an unfamiliar feeding strategy for most students so some discussion of it is helpful. Do Lab 32.
In September, 2013 my family moved from the Mammoth Lakes area in California to the San Diego area. One of the reasons for moving was that my then 13-year-old homeschooled son wanted a community of kids who he felt he had more in common with, AKA kids who were also homeschooled. He had friends in the small mountain community where we lived, but all of them attended traditional school. He was beginning to feel like an outsider and different in a way that worried me. We moved to San Diego and soon met homeschooled kids who he liked and identified with. The move has been really good for our whole family. My husband was already down here a lot helping one of his older sons get a business started. We have three older sons who all live in San Diego County with their wives and girlfriends. We even have a granddaughter who is almost 3 years old who lives in San Diego. It’s great being closer to her. I also love the group of homeschooling moms I have met.
My son wanted to take some classes with other kids, something he hadn’t done since kindergarten, his one and only year of attending traditional school. Someone recommended a group in Orange County that had some classes that looked perfect for him. One of the classes that they planned on having was a middle school/high school biology co-op. I signed my son up for this class. He was about to begin his last year of middle school, eighth grade, and had already worked his way through my biology course. He didn’t really need a biology course at that point, but I figured that taking a class with other kids would be a bit distracting for him, so maybe it would be a good fit for him to retake biology while he figured out what it was like to take a class with other kids.
I won’t go into all the details, but suffice to say the teacher that was supposed to teach the class canceled. The woman who runs the group contacted me about potentially teaching the class. I said no way. I need to write Earth and Space 2. She found another biology teacher who also fell through. At the end of it I finally agreed to teach the science co-op class, all for my son. HE SO OWES ME for all I do for him!!! Not that I regret teaching the class even for second. I LOVED!! It! Still he owes me big time, just saying 🙂
I learned quite a bit about using my book for a science co-op too. Things I hadn’t thought of when I wrote it. Things I really want to share with you. I decided to write a series of posts detailing my thoughts about science co-ops in general, and using my book for a biology co-op specifically. This should be thought of as a series of teacher’s notes. It is written for my book, but honestly much of what I learned is general for any science co-op.
We met one time a week for two hours. I provided all supplies.
We went through one chapter’s worth of material from RSO Biology 2 each week.
I e-mailed students telling them the material they were responsible for that week.
When we met for class, there was a 15 to 30 min. session at the start of class with me explaining the material for that week. The rest of the time was used for the lab. The review notes in RSO Biology 2 Teacher’s Guide help make this so much easier.
I was available for help, I still call them office hours, before each week’s class. I just had to know ahead of time.
The Big Surprise
The big surprise was the diversity and eclectic interests of the students in the co-op. I am a big fan of homeschooling. I think the real strength of homeschooling is this diversity and the time, space, and energy to pursue these eclectic interests. But I hadn’t thought what that would mean from a teaching standpoint. I am going to go point by point with the differences and how I handled them.
What do you do when you have students who are being educated using different styles?
I had students who were being de-schooled, unschooled, classically educated, and parents who were flexible to however I wanted to teach. I had to decide how I was going to handle this, and so will you if you are going to teach a science co-op class. There are a couple of different ways that I see to handle this:
I decided to be flexible. That is my personality though. I am a very casual person. I sent the assignments to each student every week. If they did the assignments I graded and reported back to the student. If they didn’t, I was okay with that. A couple of times during the semester I did make sure that the parents knew when the students weren’t doing the assignments. I really left it up to the parents. I assumed that even for those students who were being de-schooled or unschooled that anybody taking my biology class wanted their student to learn biology. I decided to let the parents and the students figure out what that looked like within the framework of the material that I was assigning. The students that did not turn in projects did not get written feedback from me. Of course, I did give them feedback on the work that they did in class. I think the thing to remember in these sorts of flexible situations is that there is a desire to learn that subject. I didn’t have any problem with students being there without participating while they were in class; everyone did the work then. I had teens and tweens so there were a couple of times when I had to bring the attention back to what we were working on, but that would’ve happened either way.
Decide on a structure. Make students responsible for the assignments. If you are going to assign grades you have to have material. If I were going to have all students accountable for turning in all the work, I would sit down with parents before they sign their kids up for the class and make sure that they understand what you are going to require. If you go with this structured approach, you want answer keys to the work. Grading is a LOT of work.
What do you do when you have a range of ages?
I grouped my students by age. I kept the co-op small, nine students. I had three groups of three a younger middle school group, an older middle school group, and a high school group that included my son even though technically he was still in middle school. These three groups worked really well together. A couple of my students who were not doing much of the work did more work any time the group was working together.
I highly recommend having groups of two or three students if you are going to run a lab class.
The members of the groups themselves will help each other if the lab is complicated.
It helps with limited resources like microscopes.
It made it easier for me when labs were complicated having fewer numbers to work with. Instead of working with each student individually, I was able to work with each group.
One of the groups only wanted to work together on some of the projects. I was very flexible with this. That group usually preferred working singly and I let them.
I assigned the older students more work, and I had higher expectations for them. Most of this work was in the form of reading articles and watching videos. I had the high school group focus on epidemiology as it related to the weekly topic throughout the year.
What do you do when you have a range of abilities?
Just because you have a range of ages does not mean you have a range of abilities. One of the first tasks at hand should be determining the overall level of science in your class. For example, my biology textbook has a heavy-duty microscope component. My son was the only person who was experienced in overall technique when it came to the microscope. Even some of the students who had used a microscope before really needed work with their microscope technique. What I learned is that there is an emphasis with looking at things through the microscope, but not an emphasis on learning how to do a good job preparing slides. Those students, even though they understood what they should be seeing, were at a beginner level as far as slide preparation and overall manipulation of the slide on the stage.
If you do have a range of abilities and you’re going to pair people into lab partners you should decide ahead of time whether you’re going to pair students who are at similar levels or disparate levels.
Things You Need for a Science Co-op
The list below is what I think you need to run a science co-op, this is my personal opinion. If you have different thoughts about any of this feel free to comment. In fact, if you have thoughts about anything you read in here I would love to hear from you.
A textbook or some sort of complete reference material
Different students access materials differently. This is one of the most important things to remember when you are teaching any class anywhere. A lot of us are homeschooling because the traditional method in school didn’t work well for our students. As someone running a co-op class you need to be sensitive to the fact that some of your students are going to access material visually, some (in particular in a science class) kinesthetically, some orally, and others will learn using all of these. You need to make sure that students have access to this written component so that they have it to refer to and their parents have it to refer to.
A textbook will help you, the teacher, pace your class and figure out how and what material to present.
If you’re using REAL Science Odyssey Biology 2 the textbook will tell you what labs to use with the theory. I will be posting unit by unit any additions to labs, so that they work for the amount of time allotted. Some of the labs that are in the chapters did not take an hour and a half. I’ll make notes within the posts on this blog explaining what I had students do in the co-op class on those weeks.
You will need permission to take and use photos if students are in the photos. It’s a minor point, but it is one that you might as well deal with at the start of class. Some parents do not care and other parents do not want their children in photos.
A plan: The plan will be aligned with the textbook for the most part, but you should really go through before you teach the class and figure out some of the logistics. Your plan should address things like:
Are you going to take any field trips? If you are, do you need permission slips and will there be an additional fee for those field trips?
How many weeks will the class run? RSO Biology 2 is a 32 week course. Are you going to teach a 32 week course? Or are you going to teach a shorter course? Maybe you are just going to teach evolution, genetics, and anatomy from it. You should figure this out ahead of time. (I am a fan of teaching the complete package, but sometimes there are time constraints.)
Some labs run over in time. You should prepare parents ahead of time when this will happen.
Teaching takes a lot of energy. Make sure you have breaks built into the schedule when you need them.
What is your policy if any kids miss a class?
What is your policy if you, the teacher, cannot teach a class?
Could you use any help? If so, you could have parents rotate once a week helping or you could offer one of the parents some sort of benefit for being the parent helping to teach the class.
This is all I can think of at this time, but knowing me I will continue to edit this. This was dictated using Dragon software. Sometimes weird typos creep in using this. If you notice any do me a favor and let me know. Thanks, Blair
This post contains affiliate links.
Read about what curriculum to use in a science co-op here.