Earth Day Online Scavenger Hunt

Earth Day Online Scavenger Hunt

It’s Earth Day! Normally this is a day when communities have lots of organized activities to help people learn about and improve the environment, but with the current global pandemic that is not an option this year. So, we created this fun and educational online scavenger hunt that families can complete together while sheltering at home. We hope that as you check off all of the challenges on this list, you will learn about important environmental issues and find ways you can reduce your family’s environmental impact & help solve the climate crisis.

1. Find pictures & population data of 5 endangered species.

2. Find an image, video, or article about rain bombs.

3. Find a picture of an invasive species (plant or animal) that has been found in your area and look up information on why it is problematic.

4. Find information about local recycling programs. Make a list of items that can be recycled in your area and hang it near your trash bin as a reminder.

5. Find pictures of healthy coral reefs and pictures of coral reefs affected by ocean acidification. Discuss the differences and the environmental effects of ocean acidification.

6. Use a website like carbonfootprint.com to calculate your household’s carbon footprint. Examine the results and discuss ways you can reduce your carbon footprint.

7. Look up water usage for baths vs showers of various lengths. Calculate how much water your family uses for baths and showers over a week, month, and year.

8. Locate an area impacted by severe drought. List at least 3 ways the region has been impacted by drought beyond water needs.

9. Look up data on sea ice loss since you were born. Find a video or graphic to help you visualize what that loss looks like.

10. Look up information or watch videos about the pressing environmental issues related to disposable and one-time-use plastic products. Take a tour of your home and make a list of plastic products you can commit to replacing with items made of other materials and disposable products you can replace with reusable versions within the next year.


The Other Science Crisis: Climate Change

The Other Science Crisis: Climate Change

Everyone, everywhere is talking about the coronavirus right now and for good reason. But this Earth Day, let us remember that there are at least two major science crises going on right now:

  1. The global warming that is causing the climate crisis
  2. Of course, the coronavirus

The science explaining the coronavirus is not yet well understood. The science explaining climate change is. And there is no time like the present to learn the science of climate change. In part because,

“Scientists have long warned that climate change will impact not just our environment, but also our health by increasing rates of infectious disease.” (Ibrahim AlHusseini)

Long after a vaccine has been developed for the coronavirus, the climate crisis will be an ongoing problem. We need to be working to find solutions for it. The first step to doing that is to understand the science explaining it. Whether your kids are home for a short time (school under teach this issue) or for longer, make this the year your family learns what climate change is, how it happens, and what you can do to help.

To celebrate Earth Day, SEA Publishing has put The Science of Climate Change: A Hands-On Course on sale for almost 80% off (April 22-24, 2020). Check out the book the National Science Teaching Association calls, “a much-needed resource for understanding climate change and gets into the details of climate change in a way that increases understanding for both kids and adults alike. This is a great, user-friendly book for all of us who need to understand the complex issue of climate change.” 

Check out this article from Blair Lee about the melting glaciers of Peru.


Why “Neutral” Science Isn’t Neutral

Why Neutral Science Isn't Neutral - Secular Homeschooling

Why Neutral Science Isn’t Neutral

by Blair Lee

Are there any science types reading this title wondering who I am? Or do you know who I am and think I’ve finally lost it? I am not talking about science as it is practiced and taught at most universities throughout the United States. I’m talking about the special brand of “neutral science” found in the homeschool community and increasingly in public schools in the United States.

The neutral science I’m referring to is science that suffers from omission. These are middle and high school level science courses that leave out the bits they think will offend people because of their faith and philosophy of life, or omit things to obfuscate the importance and acceptance of science principles and theories. Any middle and high school level science course that does not include the main principles and theories that are the foundation of that science is not neutral at all. In fact, they would be the opposite of neutral. “Neutral” science allows for a pernicious form of proselytizing that for the most part goes unnoticed. It allows for groups such as the intelligent design camp to sneak their views and beliefs into texts that look like they only teach science. Texts that are infused with someone’s religious beliefs are actually well-disguised religious treatise and dogma. They are not neutral, and do not represent mainstream science.

If you had told me a decade ago I would be arguing against religious extremism in science I would have thought you were nuts. I am a scientist, not a religious scholar, or a religious philosopher. As such, I write about science not religion and not philosophy. Unfortunately, there are authors of science texts who allow their faith to affect their writings about science. For someone who is a passionate advocate for the teaching of science this is actually offensive to me. It is also disappointing when I see people unwittingly recommend courses that have this sort of religious dogma hidden within them.

Personal beliefs don’t have a place in science courses. It isn’t the job of science to support an individual’s philosophical beliefs. It is the job of science to explain how the natural and physical world works, even when scientific explanations are at odds with the person’s philosophical beliefs. Science by its very nature is neutral. What is neutral for science is to report the facts, accepted principles, and current theories. As a textbook author, I do decide what to include and what not to include in my books. My decisions for this are based on what is taught at well-regarded universities. I choose the best of those courses, look at what they include and how they are structured, and then write courses structured similarly, for the appropriate grade level. This is what you should expect from a course you are using to educate your child.

Why Neutral Science Isn't Neutral candy chromosome

Candy chromosome: Basic genetics is often left out of or under taught in neutral science courses, because a good understanding of genetics leads to an understanding of how evolution occurs.

How can you as a non-scientist figure out what to use? There are some key things to look for in a middle school or high school level science course that is truly neutral:
• The inclusion of evolution: Here is a neutral statement from the science of biology, “Evolution happens.” When we talk about the theory of evolution, the theory part refers to the processes of how evolution works. For example, there are theories about how multi-cellularity and eukaryotic cells evolved; no one knows exactly how either of these evolutionary steps occurred. That evolution occurs is a fact. No neutral middle school or high school biology course would omit it. No neutral biology course would omit how all the organisms on earth came to be here.
• Is the word design used in place of the word evolution? Fashion designers design clothes. Scientific researchers design experiments. Organisms evolve; they are not designed.
• Is the word created or creation used when discussing how organisms, the universe, or matter came into existence? Organisms evolved; they were not created. The universe and matter formed from events starting with the Big Bang; they were not created. There is simply no evidence any of these were created. The only topics and statements that belong in science courses are topics and statements that have evidence supporting them. Topics and statements based on a person’s beliefs with no supporting evidence belong in a philosophy course, not a neutral science course. When scientists do not know the answers to questions, for instance: “how the first organism evolved, and what its exact chemical makeup was” or “what was it like right before the Big Bang,” it is inappropriate to answer with personal beliefs.
• The inclusion of the Big Bang Theory: Here’s a neutral statement from the science of astronomy, “The universe is over 13 and a half billion years old. The best explanation for how it came into existence is the Big Bang Theory. The evidence for the Big Bang Theory grows all the time. The Big Bang Theory explains how all matter and antimatter in the universe came to be, even the matter that makes humans.” This is a scientifically neutral statement. An astronomy course that does not include an explanation similar to that about the Big Bang Theory is not neutral.
• Another neutral statement, “Humans have been burning fossil fuels in increased amounts since the Industrial Revolution. This has led to an increase in carbon dioxide and other molecules in the atmosphere that absorb sunlight in the form of heat. The more heat trapping molecules that are in the atmosphere, the more heat that is trapped, and the warmer the planet becomes. It is simple thermodynamics. The increase in absorbed sunlight is causing climate change on a global scale.” Any geology or environmental science course that does not include this topic is not neutral.
• Does the middle or high school level biology course only teach the old Linnaean system for classifying organisms? This is the system that uses kingdom, phylum, class, order, family, genus, and species. This might seem like a minor point, but scientists and universities only use the Linnaean system for naming organisms. The Linnaean system is popular with courses that are not neutral because it supports the philosophy of the “Great Chain of Being.” The modern method for classifying organisms used by scientists and taught at universities is phylogeny and cladistics.

You might think chemistry and physics are immune and you don’t have to worry about these two subjects. The problem is what is being left out. What key parts of these courses are omitted? As Bob Seger says, “Deadlines and commitments; What to leave in, what to leave out.” If scientists are writing these courses, and I’m not always sure they are, what are they committed to? No scientist committed to adequately educating people in these areas of science would omit these facts and theories. They must be omitting key parts of these science disciplines to further an agenda other than quality science education.

Why Neutral Science Isn't Neutral

Here’s the problem with a chemistry or physics textbook that omits key parts:
• Chemistry is the science that definitively proves evolution occurs.
• Physics is the science that gives the clearest evidence the Big Bang is how the universe came into existence.
• Physical chemistry is the area of science used to study and explain climate change.

Many of the so-called “neutral” science courses omit the parts that provide the evidence supporting these facts and theories. If you use these “neutral” science courses for your middle or high school chemistry and physics courses, your child will be left without the necessary science background to understand evolution, the Big Bang Theory, climate change, and other key science principles. If you use these “neutral“ science courses for middle school and high school biology, astronomy, geology, or environmental science, your child will not even be getting the necessary background in these areas of science to understand that science discipline. I think you’ll agree with me, that isn’t neutral at all.

Blair Lee M.S. is the the founder of Secular, Eclectic, Academic Homeschoolers. When she’s not busy doing these things, she’s busy writing or working on service projects. She is the author of the primary author for the critically acclaimed and award winning Real Science Odyssey Series, Microbiology and The Science of Climate Change from SEA Publishing, and Project-Based Learning. She has degrees in chemistry and biology.

Blair Lee


Lecture Series on Teaching Evolution

Lectures on Teaching Evolution

Lecture Series on Teaching Evolution

SEA Homeschoolers is partnering with the Teacher Institute for Evolutionary Science (TIES), a division of the Richard Dawkins Foundation, to offer a series of lectures for our homeschool community.  Filled with great information on teaching evolution to middle schoolers, these lectures are suitable for all ages.  Attend and ask questions from your own computer absolutely free!

Visit the TIES website for tons of links to free resources on teaching evolution.

This is the first time that TIES has collaborated to bring these resources to homeschoolers, and we are thrilled to be a part of it.  Spread the word and be sure to register for these great lectures!

Register now for the following lectures:

Wednesday, September 12, 2018
8:00 pm – 9:30 pm EDT
“Meeting Naledi – The Discovery of Our Nearest Human Relative”
Join SEA Homeschoolers as TIES teacher John Mead shares with us a presentation about the greatest human fossil discovery since Lucy! This presentation for all ages will cover how these fossils were recovered and studied.  For more details and to register for free, visit the registration page.

In September of 2013, dedicated amateur cavers in South Africa exploring beyond the edges of the well-known Rising Star Cave came across a collection of human looking bones. Over the following months, a remarkable team building effort led to the discovery of the richest early human fossil site on the African continent and the naming of a new species – Homo naledi. TIES teacher John Mead will share his experience getting to know and work with the team and detailing the once-in-a-lifetime experience of how these new fossils were recovered and studied. If you do not know about the greatest human fossil discovery since Lucy, then please join us for John’s presentation.


Wednesday, September 26, 2018
8:00 pm – 9:00 pm EDT
“The Evolution of Human Skin Color”
Join SEA Homeschoolers as Dr. Leslie Jones deconstructs the misconception that “race” has any biological basis in this presentation, and take away lessons you can use with your learners.  For more details and to register for free, visit the registration page.

Genomic technologies have recently led to a dramatic increase in our understanding of relationships among early members of our species. With access to genetic markers that distinguish different populations, we have been able to reconstruct a much more accurate picture of migration out of Africa and the various paths our ancestors took on the way to the colonization of most of the world. As a biologist who is committed to using science education to deconstruct the widely held notion that “race” has any biological basis, Dr. Jones has developed lessons on human evolution that explain visible diversity within our species. The centerpiece of this approach is why skin color, the ultimate marker for racist distinctions, varies within indigenous populations. These lessons are always coupled with explicit instruction on the history of how racial categories were fallaciously invented to justify European imperialism and the social construction of race.

These sessions can fill up, so be sure to reserve your spot right away.

Watch for details on future TIES lectures:

Date to be announced: Classifying Life (Phylogeny and Cladistics)
Date to be announced: The Theory of Evolution Explained

Check out our review of Pandia Press Astronomy 1 here.


Passionately Engaged: A Scientist’s Journey

Woman in Science Blair Lee - Scientist

Passionately Engaged: A Scientist’s Journey

Women in Science: Why I Became A Scientist

by Blair Lee, M.S.

My journey to becoming a scientist is one a homeschooler can appreciate. I became a scientist by falling down a rabbit hole while pursuing an interest that grew into a passion. I come from an entrepreneurial family. One that, for the most part, thinks the only reason to get a science degree is to become a medical doctor. I have always loved to read and write and if you’d asked my family what I was going to be when I grew up most of them, including me, would have said that I would become a book editor, attorney, or author. Science was not on my radar before college.

When I went to college I had no idea what I wanted to major in. So I took five classes in five disciplines my first semester: math, speech, science, English, and history. I very quickly fell in love with science. There is something about how the real world works that captivated my imagination. Take chemistry for instance, when you look at the relationship between energy, matter, and atomic particles it borders on magical. Except that it’s real.

The area I found the most captivating was how small changes on the molecular, atomic, and subatomic level can have large ranging consequences. Topics like evolution, the Big Bang, the destruction of the ozone hole, and radioactive decay are fascinating. I challenge anyone to look at how atomic particles behave, interact, change, and make matter to not be intellectually engaged. It is just so cool! When it comes to sheer coolness factor, Harry Potter and his cohorts have nothing on science.

Another thing I love about science is its changing nature. For example the theory of evolution, Darwinian evolution focuses on observations but doesn’t include genetics, because Darwin didn’t know about genetics.  Now that scientists understand the mechanism driving evolution, genetic variability and mutation, genetics has become the centerpiece of evolutionary biology. I love how in science that the more we understand, the more we know what we don’t know. There is no end to what is left to be discovered. Studying science is endlessly engaging as your brain keeps having new information to work through and to include for a deeper understanding, but you never get to the end of what there is to learn.

One of the side notes to having very little science knowledge when I started college was that I had to spend a lot of extra study time learning the basics. During the first year, I was cramming all the time and making myself a pest during my professor’s office hours. My need to go back to the basics and learn not just science concepts and facts but also how science worked is how I came to write the style of science books that I write, where there is a focus on foundational fundamentals and basics and on how science is best learned not just as a discipline but as an active endeavor.

I graduated with two bachelors, an Ecology, Behavior, and Evolution degree from the biology department and a general chemistry degree. I was officially a scientist. After that I went to graduate school. This was a turning point in my life, and one of the most angst filled. I had planned and dreamed of graduate school. It turned out that I did not like the day-to-day grind working in a lab. What I did love was the teaching I was doing as required by the chemistry department for their first year graduate students. But… I had never wanted to be a teacher! Maybe after I got my PhD… but before… NO!

It took a serious bout of reflection about what was important. Was my doctorate more important or was it more important to be passionately engaged? So, I got out with a master’s degree in chemistry. While I was in the process of doing this, I received a phone call from a professor I had. He had taken over the chemistry department at a local community college. He offered me a job. I knew I made the right choice almost right away when I started teaching.

You might be wondering why I didn’t switch from a PhD in environmental chemistry to getting a PhD in science education. It didn’t occur to me to do that for years. I actually wrote a query letter to two PhD programs after I finished R.E.A.L. Science Odyssey Biology 2, and was offered a spot at one of them. In the intervening years since retiring from teaching I have focused on affecting the conversation and methodology surrounding how science is best learned. I started writing science courses, because I think if you are going to discuss how things should be different you should give solid, practical examples. After being accepted into a PhD program I had a decision to make. I decided to turn the spot down and keep writing science courses and pushing for change within the secular homeschool community. I think there is a revolution in education happening right now, and much of the energy for it is coming from this community!

I think it’s really important that science literacy becomes a focus of education. You don’t have to look further than climate change denial to understand how important science literacy is. At this point in my working career I am devoting my time to developing materials that give a solid foundation in basic science concepts, where the focus is on how science is best learned as an active endeavor where a concept is presented and immediately followed by a direct application of that concept. Through this work I’m hoping that more people will have ownership over how the natural and physical world works.

Science is a discipline where the answers are open ended. It is the discipline that explains the fabric of how the natural and physical world work. Scientifically it makes no sense that you would be more fascinated by science if you have an X and Y chromosome as opposed to two X chromosomes.

As an undergraduate and graduate student in college, I was the only female in some of my science classes. I was in those classes because the discipline fascinated me. It didn’t matter to me what the gender of the other students was. Probably because of how interested I was in the material, by an overwhelming majority, my male colleagues, professors and students, were welcoming and encouraging. But if they hadn’t been it would not have bothered me.

My advice to any female who wants to become a scientist is to go for it. If you choose a physical science such as chemistry, you will find that most of your fellow classmates are males. As happened to me on a handful of occasions, you might even run into men who wonder why you, a female, are pursuing science. The best advice I can give you is to ignore them. If they don’t know why you are there, then they probably don’t find the topic as fascinating as you do. A better question would be what they are doing pursuing science.

Other posts by Blair Lee

A Science Lab in Your Home
Why Neutral Science Isn’t Neutral


Blair Lee A Science Lab in Your Home? It Really Isn’t that Hard. Trust Me, I’m a Chemist.

A Science Lab in Your Home, Blair Lee, Saber Tooth, Orce Spain

A Science Lab in Your Home? I am always caught off guard when homeschoolers worriedly ask me about setting up for and performing labs at home. It makes me think of how I came to write my first book, R.E.A.L. Science Odyssey Chemistry 1I asked a good friend of mine, who was also homeschooling, what 3rd grade chemistry looked like. She told me it was terrible. She couldn’t find any good resources and was struggling with labs and how to structure the topics. I started rattling off how I would do it. Her response, “That’s easy for you to say. You are a chemist who taught chemistry!” The purpose of this talk is to help you get over your concerns about having your child perform lab science at home. I promise you, it is easier than you think.

A Science Lab in Your Home? It Really Isn’t that Hard. Trust Me, I’m a Chemist


Blair Lee M.S. is the founder of SEA Homeschoolers and author for the critically acclaimed R.E.A.L. Science Odyssey Series. Blair has been handcrafting the education of her non-linear thinker for over 11 years. During that time, she has learned as much about how learning happens from him as he has learned from her. Blair is a passionate advocate of innovative academics using secular materials. Through her speaking and writing, her goal is to empower homeschoolers to dare to be innovative and create something unique and academically-rich when handcrafting their child’s journey through learning. You can follow her at SEAHomeschoolers.com. You can learn more about Blair Lee’s “Evolution in Homeschooling” here.


Choosing an Educational Game

Game

Choosing an Educational Game

If you decide that educational games might be useful for your child, it might seem like there are way too many things to consider. How popular they are, what themes and subjects to focus on, how recommended they are and so on. And while there are a lot of educational games out there, I hope I can help you narrow down your options — not based on what the games seem like on the surface, but on what type of learning your child will experience when they’re playing.

What is your Child Actually Doing while Playing?

One of the most important things to keep in mind is what your child will actually be doing when they play a game. A lot of educational products have rewarding elements like character customization, pets, apartments, etc., but obviously this shouldn’t be where your child is spending all their time in a game. So it’s good to ask: Are they spending their time problem-solving? Are they engaging deeply on educational subjects? Not just memorizing content, but actually participating in it?

The following story illustrates this quite clearly:

“A teacher once told me that for a fourth-grade unit on the Underground Railroad he had his students bake biscuits, because this was a staple food for runaway slaves. He asked what I thought about the assignment. I pointed out that his students probably thought for forty seconds about the relationship of biscuits to the Underground Railroad, and for forty minutes about measuring flour, mixing shortening, and so on. Whatever students think about is what they will remember.” (Willingham)

Of course, if the teacher’s goal is to practice measuring and cooking, that’s great.  But if their goal was learning about the Underground Railroad, they fell short.  This is because of the key concept: “Memory is the residue of thought.”  This is one of the biggest takeaways from Willingham’s book, “Why Don’t Students Like School: A Cognitive Scientist Answers Questions About How the Mind Works and What It Means for the Classroom,” which I highly recommend!

So with any material, consider what your child is actually going to be thinking about. What are they going to spend time doing? Because that’s what they’re going to get out of it.

Lower-Order Practice vs. Higher-Order Conceptual

I generally categorize educational games into two groups: Lower-Order Practice and Higher-Order Conceptual Learning. Both have their functions in a child’s learning, so let’s take a closer look:

Lower-Order Practice

Lower-Order Practice is the kind of learning where children answer questions and practice remembering content, but don’t actually learn the concepts or do anything particularly unique with them. For example, a child has to be taught how to do the math problem before they do a math-themed version of this type of game. A Lower-Order Practice game isn’t great for learning the content for the first time or helping them understand the concepts behind it.

And we’ve all seen this type of activity before: glorified worksheets with better-than-average behavioral and motivational science behind them.

I use the term Lower-Order in reference to Bloom’s Taxonomy of educational goals. In Lower-Order Practice games, the activities take place in the lower half of thinking skills:

  • Remember what they’ve learned by recognizing and recalling information;
  • Understand by classifying, comparing, or other activities;
  • Apply by using what they’ve learned on other problems, sometimes in new contexts or slightly harder examples.

I should emphasize that there’s nothing inherently wrong with Lower-Order Practice, because we do need to practice these skills and be able to memorize information. All the hype about how we don’t need to memorize information anymore because we can look everything up on Google is just that — hype.

Math is an easy way to explain why this is important: in general, people can only hold 5-9 items in working memory at a time. Therefore, if you don’t memorize your times tables by the time you get to algebra, it’s hard to have to constantly pause in the middle of solving a problem to do multiplication, as you end up dropping items out of your working memory. In the exact same sense, we can’t perform higher-order thinking skills like creating, connecting points, and being creative unless we already know the basics. So there’s definitely a need for practice and repetition to make sure the basics are mastered.

This form of educational gaming works well across several types of devices: mobile, tablets, and computers, though most Lower-Order Practice games are apps or web-based for quick, in-and-out sessions lasting for a relatively short period of time. For example, the games available at Coolmath.com, Funbrain.com, and ABCya.com are largely simple practice games. I’ve had teachers tell me that these types of games generally retain their students’ interest for about 10 minutes.

Higher-Order Conceptual Learning

Games with Higher-Order Conceptual Learning use systems, problem-solving, and more in-depth types of gameplay to help the player develop a strong conceptual understanding, and they often use a constructivist approach to learning.

These type of games really take advantage of the power of what games can do, with potentially open-ended systems that let players experiment and get a much better, deeper understanding.

So in Bloom’s Taxonomy, Higher-Order Conceptual Learning has children:

  • Analyze by differentiating, organizing, and attributing as players problem-solve;
  • Evaluate by checking and judging to make decisions;
  • Create to generate hypotheses, plan, design, and produce solutions.

For example, in our game, Tyto Online, players engage in an ecosystem-building Sandbox. They use the basics they’ve learned to analyze their ecosystem, evaluate the evidence to decide what’s causing issues (like, “Why are my jackrabbits dying so quickly?!”), generate a hypothesis (“They have too many predators, or not enough food”), and then produce a solution. Players go through an engaging, iterative cycle of problem-solving and the scientific method constantly during gameplay.

Some of my favorite examples of Higher-Order math games include Motion Math’s games where children do conceptual activities like exploring a number line at various scales; and Dragonbox Learning, where players start by developing the concepts of algebra with balancing puzzles, and then work their way into replacing the symbols with letters and numbers until they’re solving full algebraic equations in the game.

There are even educational games that can enable types of learning that are difficult or impossible to do in real life as a child: build a spaceship with Kerbal Space Program, play with the universe’s physical variables with Universe Sandbox, or create an ecosystem from scratch with Tyto Online.

Session times in Higher-Order educational games are often a lot longer, depending on the game and what your child is exploring. Therefore it makes more sense to use computer installed games or tablets, or at least a setup where your child will feel comfortable playing for 30-60 minutes instead of 10.

Conclusion

For the practical side of timing and devices, consider:

Are you going for “instant” or “active” gaming? One of the most helpful workshops I attended divided mobile & tablet gaming into “instant gaming,” and computer & console gaming into “active gaming.”

  • Instant Gaming: on mobile devices, educational games are grab-and-go, and session times often average only 5 minutes. This can be great for quick reinforcement or other activities.
  • Active Gaming: on consoles or computers, the act of getting set up to play the game can take as long as the entire Instant Gaming experience! Therefore, these sessions are usually much longer and made for replayability, sometimes hours, and can be great for deeper and conceptual learning as players experiment, iterate, and create during their gameplay.

And finally, to assess if a game is right for your child, the main thing I would suggest is:

Consider the outcome you want and compare it to what your child will actually spend their time doing in the game. Are you using the game for practice and review? Do you want to help develop conceptual understanding? Do you want to improve their “21st Century skills,” like problem-solving and collaboration? Does the game help them reach that outcome?

There’s no “one size fits all” approach when it comes to knowing if an educational game is right for your child with so many options out there that fill many different potential needs. While we mainly focus on developing Higher-Order thinking with Tyto Online, we’ve also built in repetition and opportunities for children to understand the basic knowledge they need in order to get the full experience of the game.

To read more about the learning mechanics we use in Tyto Online, head over to our blog post outlining our approach.

 [button link=”https://seahomeschoolers.com/tyto-online-group-buy/” type=”big” newwindow=”yes”] Tyto Online Group Buy[/button]

Find out more:

Immersed Games (the studio): www.immersedgames.com

Tyto Online (the game): www.tytoonline.com

Lindsey Tropf’s personal twitter: @ltropf

About the Author

Game

Lindsey Tropf, Founder & CEO of Immersed Games, was a doctoral candidate at the University of Florida in School Psychology, with a specialization in Program Evaluation and a Minor in Research & Evaluation Methodology, with expertise in data-based decision making. Her background has led to an expertise in teaching & learning, children’s development, social-emotional health, behavioral management, and executive functions. She now works on strategy and vision, product development, business development, marketing, and anywhere else she is needed at Immersed Games.


When Experiments Don’t Work, That’s When the Science Really Gets Fun!

Homeschool Science by Blair Lee

We have all been there, even me. It is the situation where your child and you set up and perform a science experiment only to have it fail. For most people this is frustrating. When this happens parents often wonder if their children are learning from it. As a scientist, I find it interesting that our response is frustration and doubt instead of delight. R. Buckminster Fuller said it best when he said, There is no such thing as a failed experiment, only experiments with unexpected outcomes. Unexpected outcomes should be treated with a sense of wonder. You have just been handed a logic puzzle that requires the scientific method to try to solve it.

Unexpected outcomes from an experiment are when you get to practice real science like scientists do. Most if not all the experiments in the courses you are using have been performed successfully or they would not be assigned. That means that the experiments in science book have expected outcome predicated on the consistent results from the huge number of times the experiment has been performed. If you get an unexpected outcome, you and your child get to brainstorm to figure out what set of conditions changed.

For most of us the first thing we do is question whether it was us. We pore over the experiment’s set up, procedure, and materials to ensure that we didn’t miss anything or make a mistake. If we didn’t make any mistakes, we conclude that the problem must be with the experiment itself.  This series of steps is exactly what you should do if the experiment yields unexpected results. While looking over the written instructions and troubleshooting your procedure discuss the learning goals for the experiment. Ask your child if the learning goals were met since the experiment didn’t give the expected results. If the answer is that they were not met, why not? What do you need to do to meet those learning goals?

One of the main learning goals for all scientific experiment is that kids begin, through use, to come to an intuitive understanding of the scientific method. It helps to focus on the scientific method when troubleshooting an experiment. A hypothesis is an educated guess. When a scientist makes a hypothesis, they are basing it on the observations and results their fellow scientists and they themselves have conducted. When scientists get results that are not consistent with previous experiments before rethinking a hypothesis they look over the procedure used to see if anything was changed. That should be you next step as well.

While poring over how the experiment was conducted there are several questions to ask with regard to the procedure. Is it possible that there is a typo in the procedure? Maybe you missed a step? Perhaps there are multiple ways to interpret one of the steps? Sometimes there is a step that is very finicky and needs to be followed exactly. When that happens it can make the experiment more complicated to duplicate than the author realized. Do not be shy about contacting the publisher or author of the lab. They should welcome the feedback and will often try to help you duplicate his or her results. I have been contacted several times about experiments that weren’t working in my science courses.

I start troubleshooting with the materials. Problems with materials are the most common cause of unexpected results in an experiment. This is the observation phase of the scientific method as applied to the situation. It’s important to focus on each ingredient. In my science courses there have been three instances where experiments failed because of materials. I have learned that cornstarch can absorb a lot of moisture in very humid environments, and that this can cause problems for some experiments. It turns out that in the last five years manufacturers have begun putting an ingredient called hi-float into balloons before they fill them with helium so that the balloons will lose helium more slowly. Did you know that in some states it takes a much higher concentration of bleach to turn food color in water colorless than in other states. We went ingredient by ingredient observing how each was behaving in the experiment to determine what was causing the unexpected results. It was a lot of fun and great science practice both at the same time. 🙂

At the end of this you might or you might not know what gave the unexpected results. Either way it is good to discuss the results and observations and come up with some conclusions from the experiment. Good statements to include in the conclusion of all lab reports is how this experiment could be improved on to meet the learning goals of the experiment. This is especially important in an experiment where you got unexpected results.

I’m hoping that most of your experiments go the way they are intended. The next time an experiment gives unexpected results, instead of getting frustrated, I hope you realize how much fun and learning can happen by applying the scientific method to logically deduce what led to the results. I promise you, you do not have to be a scientist to enjoy the process.

More Secular Homeschool Science Posts by Blair Lee & SEA

Teaching the Science of Climate Change to Middle Schoolers
Vetting Science Curriculum
A Science Lab in Your Home


The Scientific Method: Defined, Applied, Learned

Scientific Method

The Scientific Method: Defined

The scientific method is an investigative method based on experimentation, observation, and deductive reasoning. The purpose of this investigation is to explain a phenomena occurring in the natural and physical world.

The hypothesis is an educated prediction. The word “educated” is a key word in this sentence. When a scientist makes a hypothesis their prediction is not guessing in the way you might guess the outcome of a coin toss. They are basing their prediction on what they know about the area of science the experiment focuses on. This is one reason it is critical to understand the foundational fundamentals of a scientific discipline. It is also why it is necessary that science courses begin at the beginning and very clearly build from there with a thoughtful increase in the level of skill required to conduct the experiments.

The procedure is a list of the steps needed to conduct the experiment. The procedure should not include techniques that are too advanced or complicated for students to understand. The procedure in a science experiment is very important.

“A scientific theory is a widely accepted explanation of something observed in science. Theories are based on experimentation, observation, and reasoning—the scientific method. Before something can be called a scientific theory, it must be tested many times by different researchers, who get results that are consistent with that theory.” R.E.A.L. Science Odyssey Biology 2

If the procedure is not well written or not conducted in the same way every time, an experimenter can get “results that are not consistent with that theory”. Because scientific theories depend on many different researchers getting results that are consistent with that theory, it is essential the procedure be written and understood clearly.

Once the experiment is set up, it is time to conduct the experiment. While they are conducting the experiment, students will make observations. Observations are the collected data from the experiment. Observations made during an experiment lead to a better understanding of how the natural and physical world works.

It is necessary that scientists and science students be able to report their observations in a meaningful and cohesive manner. The data and results component of the scientific method is where the data, calculations, and observations are written, calculated, and explained.

When deductive reasoning is applied to the data and results, a conclusion is determined that supports the observations. If many different scientists conduct an experiment and get the same conclusion based on their analysis of the data and results, the observations made during the experiment can change or support scientific theories and scientific models.

“A scientific model is a simplified representation of a real system. Scientific models are based on the scientific method. Scientific models make it possible to study large, complex scientific principles and systems.” R.E.A.L. Science Odyssey Astronomy and Earth Science 2

The Scientific Method: Applied

When students determine their hypothesis they are applying their understanding of basic science principles with respect to the experiment.

When a student conducts an experiment the procedure is applied in two different ways. As a student reads through the procedure they are reading a set of instructions explaining techniques used in science. Since all scientific theories and models are based on experimentation, a basic understanding of the techniques used in science is a far-reaching component of the foundational fundamentals of science. The second way the procedure is applied is by conducting the experiment. Understandings in science come about through experimentation. It takes countless hours of laboratory work to develop a scientific theory or model. Learning science without conducting experiments is like learning to sew without actually sewing. Science is an active endeavor, not a static one.

The observations and data are applied by using them to determine the results of the experiment. Making observations, collecting data, and using these to determine results are a meaningful application of applied math as it relates to science. The ability to use math applications is an essential skill in science in the same way punctuation and spelling are essential skills for the craft of writing.

The final step when applying the scientific method to an experiment is to use deductive reasoning to determine a conclusion for the experiment. This synthesis of information and application of the foundational fundamentals that should be in the conclusion are more than just an application of the scientific method. It is also a natural and intuitive lesson in logical thinking.

The Scientific Method: Understood

Most of the time students and educators do not pay enough attention to the hypothesis other than to write it or make sure it is written. A student’s hypothesis should be evaluated critically, but not with criticism, to look for how well the student understands the science the experiment is based on. A good strategy to use when your student writes a hypothesis is to ask them what scientific principles or knowledge they are basing their hypothesis on. When this is done students will come to understand how scientists arrive at their hypotheses based on educated guesses.

When students read and then work through the steps of an experiment they come to understand some of the basic procedures real scientists use when conducting experiments. They also come to understand at an intuitive level that scientific theories and models are determined and developed through the application and manipulation of science practices.

Observations made while experiments are conducted are the basis for the data and results that are used to develop scientific theories and models. Students spend a lot of their school time learning math. Using data and observations to determine results helps students understand how math is used to help explain how the natural and physical world works. When experiments are well paired with theory, observations made while conducting experiments greatly increase and add to a student’s understanding of the theory taught. Making observations, collecting data, and then using these to determine results also leads to a better understanding of the work scientists do and the type of deductive reasoning and analysis used for their conclusions that lead to the development of scientific theories and models.

Scientific theories and models are a synthesis of conclusions from many different scientific experiments. It is through conducting experiments in academic situations that students come to understand how conclusions determined using the scientific method can explain how the natural and physical world works.


The Scientific Method: Learned

When science is learned in a manner where theory is carefully paired with experiments chosen so they relate closely to that theory, the scientific method is learned through reasoning and observation. It is also learned intuitively. Instead of relying on a rote memorization of terms and their definitions to explain the scientific method, students understand in a meaningful way how the scientific method works, how scientific theories, models, and principles are developed. Most importantly they learn how these theories, models, and principles are used to explain how the natural and physical world works

This article first appeared on the Pandia Press blog: http://www.pandiapress.com/blog-post-list/


Science and the Secular Homeschooler

Science and the Secular Homeschooler

Science and the Secular Homeschooler

I live in Southern California. I taught science at community college, and now I write about it. Those two sentences convey a lot of information about how easy it is for me to negotiate my way through the homeschool community.

Where I live in California, there are many large secular or inclusive homeschool groups. In my experience in California, unless a group states that it is faith-based, it is understood that it isn’t. With one exception, the religious homeschoolers I have met in California have never seemed put-off by my stance about science or my being secular. I once overheard a homeschooler I knew to be a Young Earther tell another homeschooler, who had just explained to me that dinosaurs didn’t really go extinct, because dinosaurs were lizards and lizards still exists, “She taught science at a college. You know how scientists are.” This was the first time, but not the last being a scientist earned me a free pass to participate in activities with religious homeschoolers without my secularity being an issue. I admit though, when I socialize, I don’t talk science with people who don’t want to talk about it.

In 2013, after homeschooling for seven years, my eyes were opened to what it might be like for secular homeschoolers, who are not scientists living in areas with large secular communities. That is the year my biology course came out. It is one thing to be a homeschooling scientist who lives in California. It is quite another to be a homeschooling scientist, who lives in California, and publishes materials that say, “It is a fact that evolution occurs. The theory part is how it happens.” On May 22, 2013 the first review of my Biology book was posted on Amazon. It was 3-stars; the complaint was that it “Teaches Evolution and global warming”. I have always felt fortunate it wasn’t 1-star. Then in June of 2013, I was at a homeschool convention in California and was approached by someone who wanted to argue that any science text that did not include a discussion of the book of Genesis, when explaining evolution, was flawed and biased. One of the conference organizers overheard and put a stop to the conversation, telling the person they were at a secular conference. See what I mean about secular homeschooling in California.

Despite these two occurrences, I continued living in my “California bubble,” thinking it was similar for other secular homeschoolers. Then in September, 2014, I traveled to Georgia for the National Alliance of Secular Homeschoolers, NASH, Conference. It was there I realized how different it was for secular homeschoolers in other parts of the country. It was then that I came to understand how important it is for those of us in areas where we can comfortably tell others we are secular homeschoolers to provide support for homeschoolers in areas less tolerant of their secular homeschooling neighbors. I met homeschoolers who lived in communities where there was not another secular homeschooler. I met homeschoolers who had to make the choice between finding groups where their children could socialize versus being honest about the fact that those children learned from secular materials. I also met homeschoolers who were willing to brave the storm and isolation, and admit that they were secular homeschoolers. That is hard to do. It really is.

Before attending the NASH conference, I understood the importance of writing science materials for the homeschool community that include topics like evolution and the human causes for climate change. That did not mean I understood the importance for those of us living in areas where the consequences for doing it are negligible, of standing up, raising a hand, and saying, “I am a secular homeschooler”. Homeschooling by its very nature can be isolating. When you live in a community where being secular isolates you further, it can get lonely. What can our global community of science-loving secular homeschoolers do?

  1. If you live in one of those areas, start a science co-op. You do not need to be an expert or a scientist to start one. All you need are good reference materials, one or more people to run it, and a location.

Science is not the only academic discipline with fault lines drawn between secular and non-secular homeschoolers, but it is where most of the problems arise. That is because some of the well-established facts and theories of science are at odds with a literal interpretation of religious doctrine from several different faiths. There is continued agitation by some to change science to fit religious doctrine. The problem is science doesn’t work that way. When you change or omit science facts and theories to fit your philosophy, and then teach using those changes or omissions, you are no longer teaching science. I suppose you are teaching religious philosophy with some science woven through it. Scientists take issue with this for two main reasons. First, it is a denial of some of the foundational and fundamental principles all science is based on. For a scientist, this is incredibly frustrating and seriously misrepresentative of how the natural and physical world works. Scientists obviously care a lot about science, or they wouldn’t spend all those years in college studying it. 🙂 Second, the people and users of these non-secular materials continue to call it science while these materials clearly, at least to a scientist, are not really science.

No homeschooler would be surprised by the statistic Gallup released in 2014 stating that 42% of Americans believe God created humans in their present form 10,000 years ago. That is certainly a dismal figure, but it has a good side too. 58% do not believe that. And while it is true that many of the people who do believe that are homeschoolers, there is no way ALL the people who do not believe God created humans in their present form 10,000 years ago live in California 😉 Starting a science co-op is a great way to find the other members of your local homeschooling community who understand the difference between philosophy and science. In addition, running a secular science co-op provides an important service by promoting science literacy.

  1. Join secular Facebook groups and forums. When you live in areas where there is not a good-sized secular community, it can be hard to find discussion about good secular materials, especially science. Online secular groups and forums can be a great place to get information about and recommendations for secular academic materials.
  2. Those of us who are in areas where we can do it, or who feel comfortable doing it no matter where we live, need to make sure we stand up and be counted as secular homeschoolers. It might not seem important in a state like California, but it is important to recognize your advocacy and support might resonate in places you have never been and with people you have never met. It seems part of the human condition to want a group to belong to and a community where we feel understood. I think we evolved that way 😉

For more homeschooling tips, check out the FREE SEA Homeschoolers Magazine here!


Learning Science

Learning Science, Secular Science Homeschooling

 Homeschooling and Science

A Winning Combination

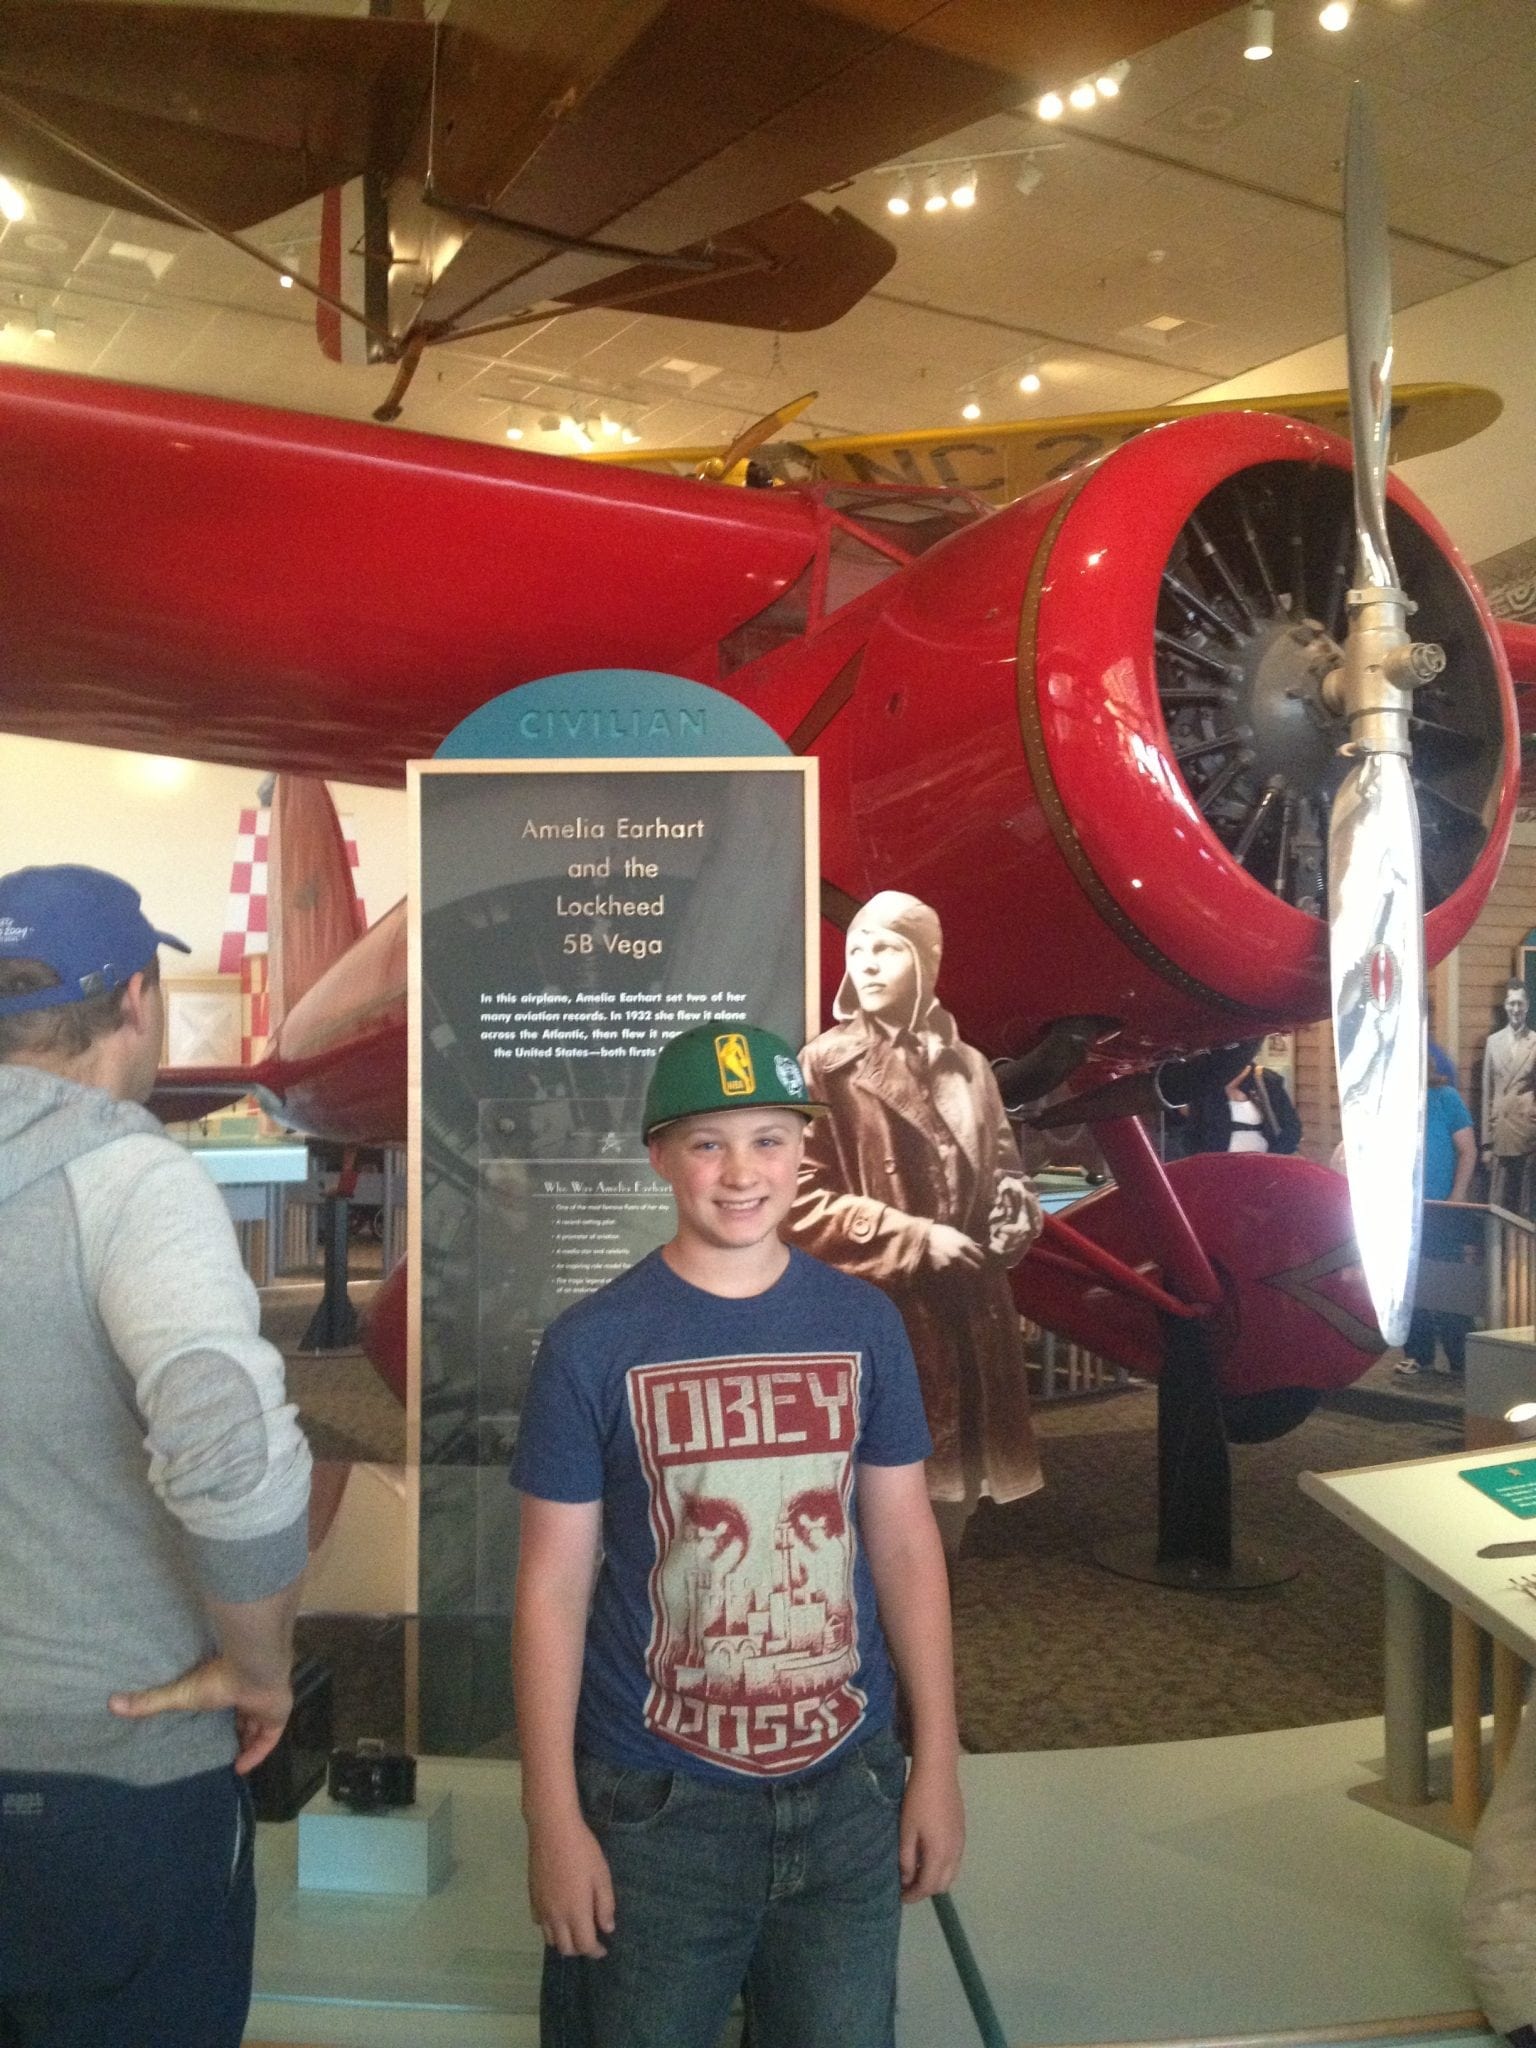
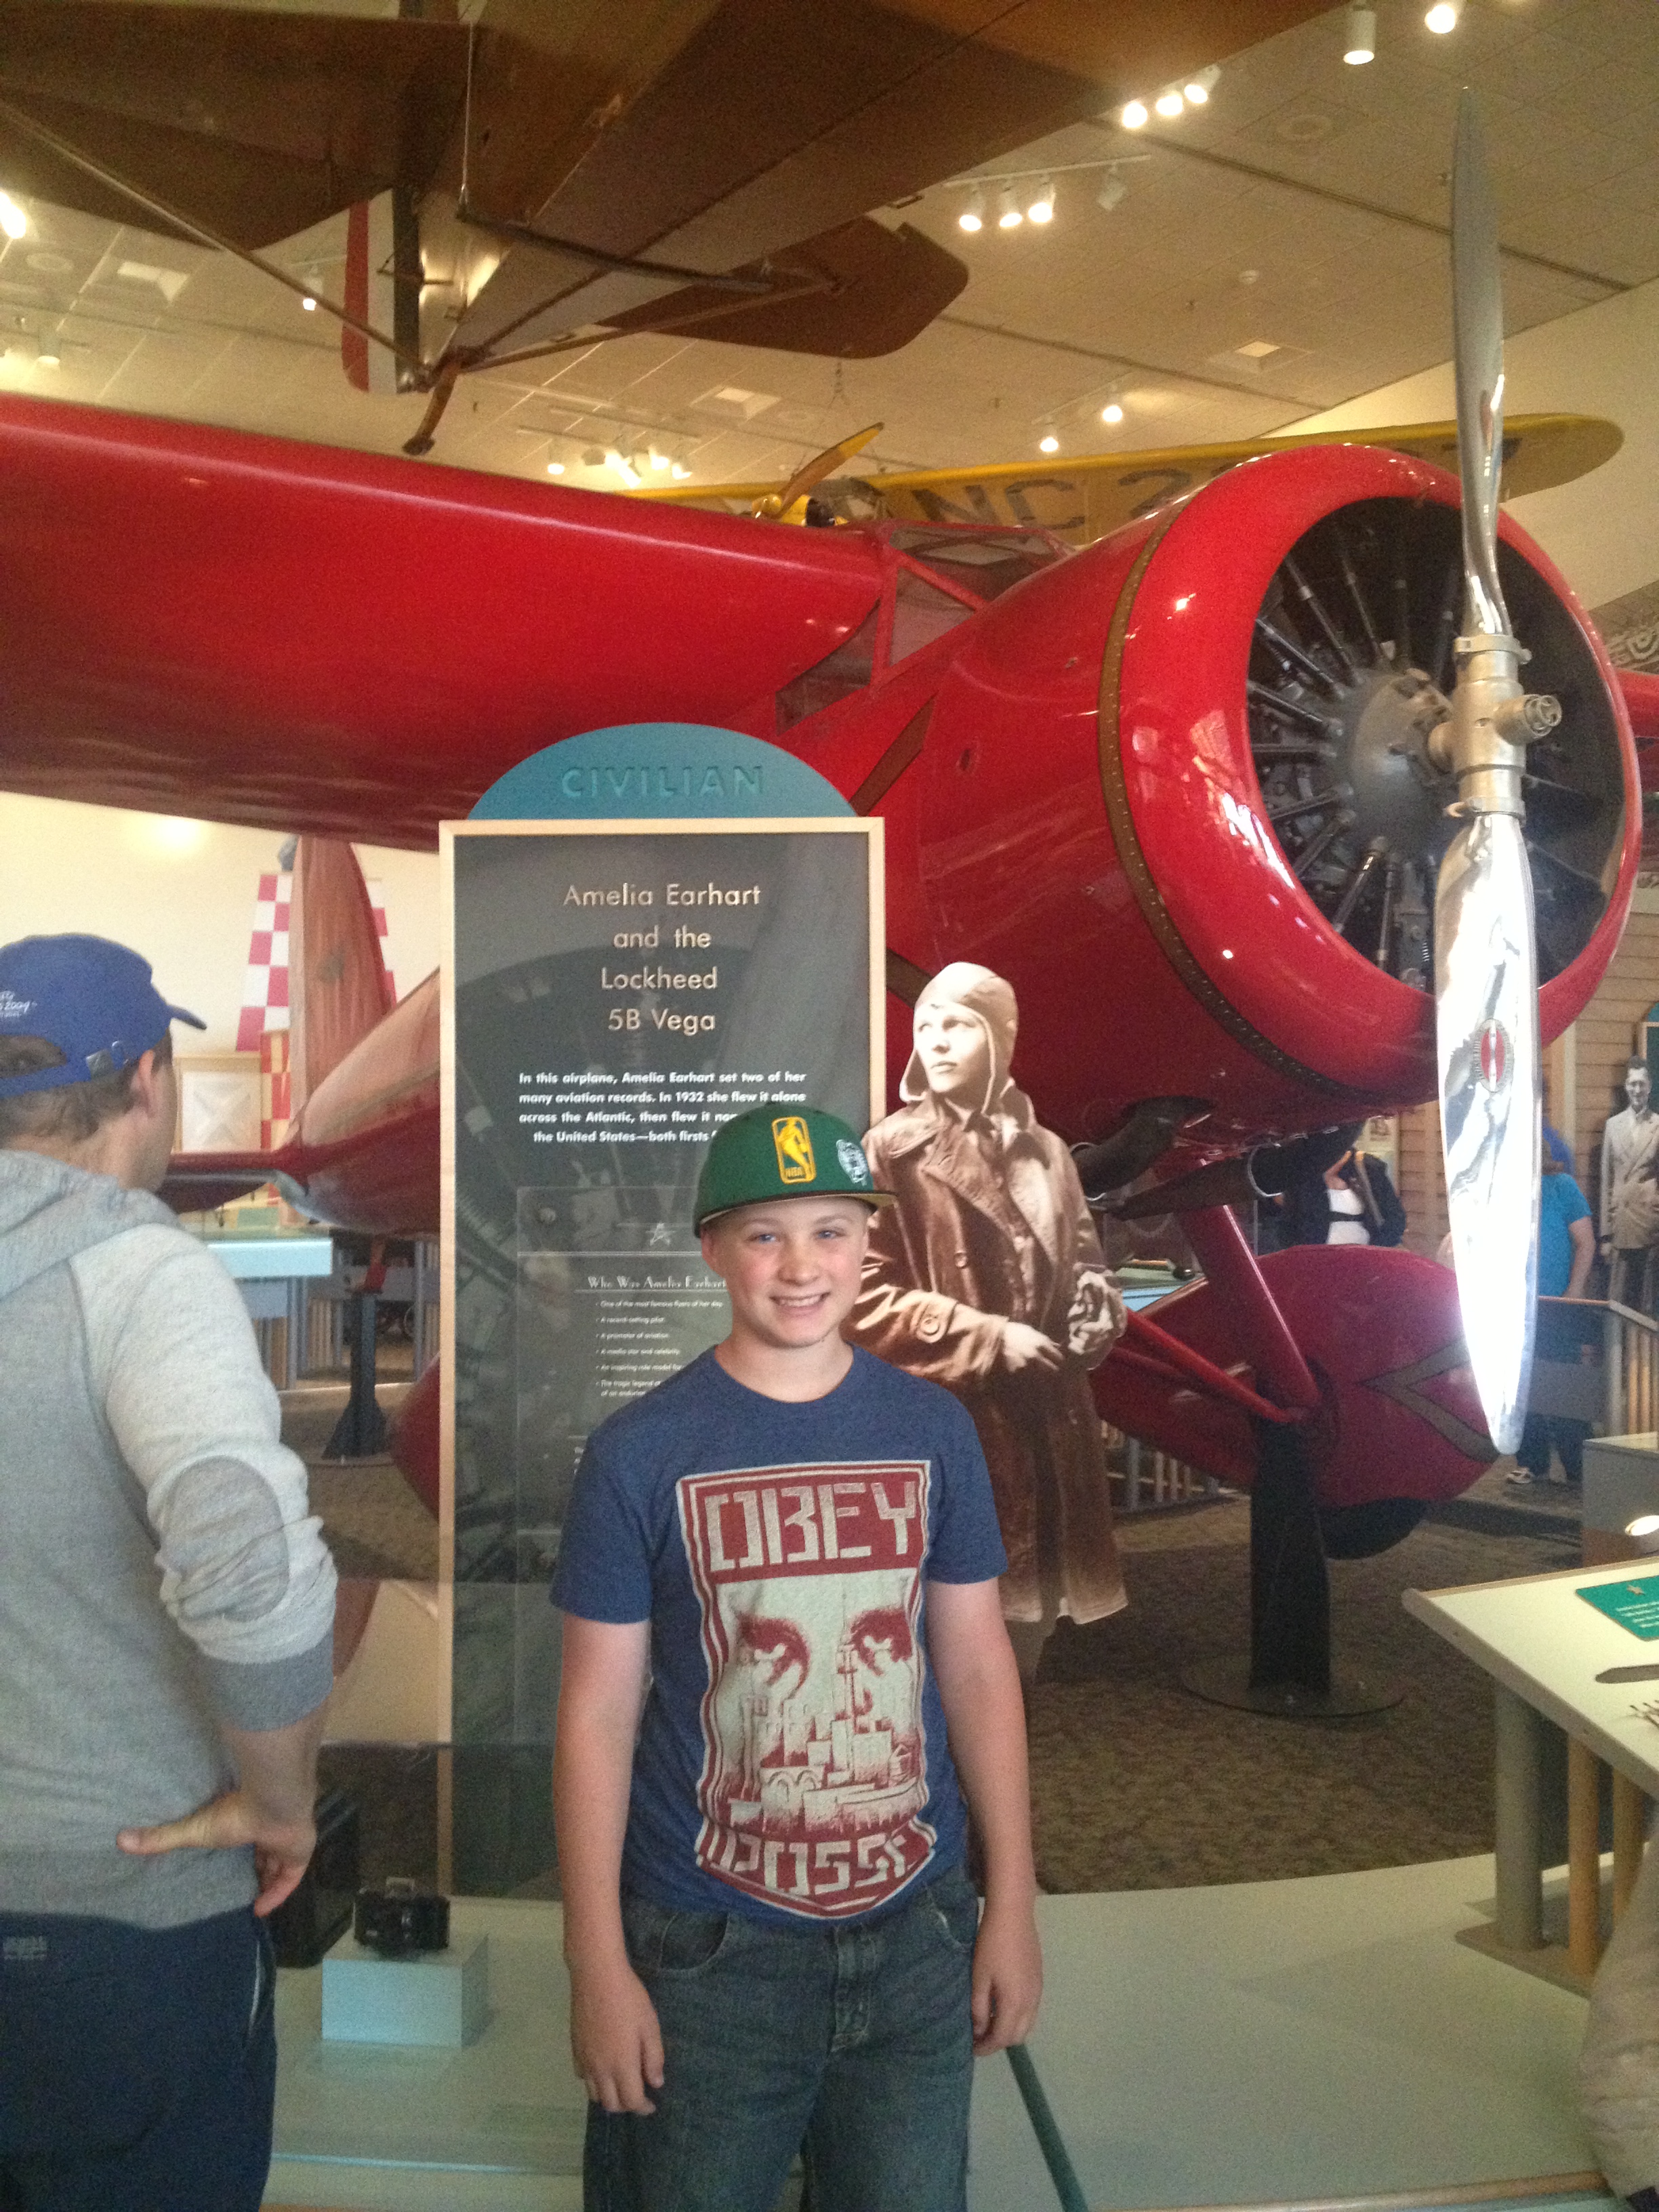
Sean Lee learning about the science of aviation.

I am reposting this article in response to an article in the New York Times. There is a link to that article at the bottom of this post.  The article validates what I am detailing below about how science is best learned!

Learning science is something I have spent 24 years working at in one aspect or another. Today I want to talk about what I have learned over these years educating in various venues and to a broad range of age groups. This is the text from a talk I gave at the California Homeschool Network Convention, CHN Family Expo, in June, 2014.

I was a college professor, teaching chemistry and biology at community colleges before retiring to homeschool my son. I also write secular science textbooks for the Real Science Odyssey series. This is a series of textbooks that have been written primarily for use in a homeschool or small co-op setting. As you can imagine, at our house, we definitely take time to learn science. In the school year 2013/2014, these two areas, facilitating my son’s science education and my textbooks, combined when I taught a homeschool science co-op using the REAL Science Odyssey Biology 2 Course I wrote. I learned some things teaching this co-op. I will touch on some of those things today, but if you want more, you should go to my articles in my blog where there is information detailing what I learned about teaching a science co-op for homeschoolers.

First I would like to ask a question. Have you ever had a great science course? If you have, what made it great? I doubt that even one person thought of a science class that only had reading text and listening to lectures! People approach me all the time worried about the job they are doing teaching science. So many people have had a bad experience in school when it came to science. Those same people want their children to learn science but they do not know what a good science course looks like.

When I think about what a great science course looks like, I recognize that the elements for it are best met with the type of environment we have in the homeschool community, whether in our own home or in a small co-op. I’ve come to understand that the homeschooling environment is absolutely the best environment for learning science.

So how can I say this? There are many people, notable scientists among them (Bill Nye comes to mind at the top of the list), who believe the exact opposite.

Of all academic subjects, science is the one that is the best fit for the homeschooling environment. Why? Because science is best taught where there is the time and space to ponder, research, explore, and get up and experiment. With the right tools and support you don’t need a science degree either. All you need is a willingness and desire to have your child learn how the natural and physical world works.

Start early:

  • Serious subjects are taught beginning in grade school.
  • Why isn’t the subject that teaches how the natural and physical world works serious enough to start teaching early?
  • Starting early allows for more depth and complexity.
  • I hear from people that they can wait to teach science, that kids are not ready to be taught science in grade school. I don’t understand the logic behind this. Science explains how the natural and physical world works. Why isn’t grade school the perfect time to begin teaching science? It’s sad, because kids want to know about plants and butterflies, stars and planets, how cooking works, atoms and energy. Young children are fascinated by these things. I actually think a big part of the problem with science education is that parents are not fascinated by it anymore, and it’s really a shame. Adults are not fascinated by it because their science education was so poor. We as homeschoolers can change that.
  • Recently I volunteered at the Intel International Science and Education Fair, the Intel ISEF. It is a huge international science fair. They consider it a science talent search with thousands of high school students from across the globe competing for a total of $4 million in prize money. I always enjoy myself immensely at these gatherings because it’s the only time I get to sit around with a whole bunch of scientists and talk science. At lunch time I happened to sit down with 6 female scientists. Three of them were, or had been, high school science teachers and one was a community college teacher who taught people how to teach science. We all got to talking about what we did or had done and of course it came to homeschooling science when they wanted to know what I did. It was very interesting. You might think this group would not be proponents of homeschooling. I did. You and I would be wrong. These women had been to many science fairs as volunteers and what they saw, again and again, was that increasingly often the best science fair projects were from homeschooled students. I was told that more often than not the homeschooled kids are the ones that win the science fairs. I was curious to find out why they thought homeschooled kids were doing a superior job of learning and experimenting with science. They said to me that the problem stems from when traditional schools begin teaching science. According to them, science is being taught later and later in schools. This is due to the current state of public education and the testing which affects a school’s funding. Schools pour time and money into language arts and math, because if test scores are low in those areas a school’s funding is cut.
  • Teachers focus all their energy and resources on math and language arts to the detriment of science. If kids are lucky enough to get science before high school it is as a component of language arts. It isn’t science for the sake of science. Now this touches on several things I want to talk about in a minute. But when science is a component of language arts, it’s about reading science. It’s not about doing science and there’s a big difference. It’s why a lot of adults think science is boring. So what happens when you don’t start science until high school is that you have students who come into high school weak in science. Therefore the science teachers have to start teaching at a much more basic level then they were teaching in years past.
  • If you’re curious to see the difference in levels, go to the Pandia Press website and look at the difference in REAL Science Odyssey Life 1, Chemistry 1, and Biology 2. RSO Life 1 is written for early grade school, Chemistry 1 is written for late grade school, and Biology 2 is written for middle school. You can look at them in the ‘Try It before You Buy It’ section. I really encourage you to look at them side by side. I encourage you to compare the two biology texts and to look at the progression within these books. There’s a big change. There’s a certain amount of knowledge that you begin to anticipate and expect that students are going to have. Students who start a new school year with some knowledge have an advantage. This is similar to what is done in math or language arts. You do not want to be teaching high school students phonics or basic spelling chunks. You want to be discussing literature with them.
REAL Science Odyssey Chemistry 1, Blair Lee M.S.
REAL Science Odyssey Chemistry 1, Blair Lee M.S. http://www.pandiapress.com/?page_id=86

Focus on the fundamentals:

  • Scientific Method
  • Good Foundation means a good grasp of how the various pieces relate
  • Good Foundation allows for a better understanding of new concepts
  • Good Foundation leads to a better ability to analyze data, models, and theories about how the natural and physical world works
  • When I talk about fundamentals, I am talking about the underlying principles that are the root knowledge required for a more advanced understanding of a subject. These are things that high school students in traditional schools are no longer coming into the science classroom knowing.
  • Scientific Method: An important aspect of learning science is learning how to use the scientific method. Using the scientific method depends on knowing the basic facts of science. The absolute best way to learn the scientific method is through applying it. The scientific method is based on experimentation, observation, and deductive reasoning. One reason that the homeschool environment is superior is because homeschoolers are given the time and space for experimentation, making observations, and deductive reasoning. It really is the best environment for learning science. Teasing out the answer to a problem is not something you can set a time limit for accomplishing. Schools, by their very nature, are forced into giving students time limits to learn and apply science concepts.   This doesn’t lend itself to a practical understanding of how the scientific process really works.
  • A solid foundation in the basic fundamentals of science will result in students who have a good grasp of how the various pieces in science relate, which leads to a better understanding of new concepts. A strong focus on the foundational fundamentals also leads to a better ability to analyze more complex data, models, and theories for how the natural and physical world works
  • There are certain fundamental principles that are the basic building blocks for understanding science concepts. For example atoms; all matter is made of atoms. Every single science principle where we explain how the natural and physical world works at its core is talking about atoms. Even a graduate student studying complicated scientific principles and theories must understand the basics of atoms. An understanding of atoms is one of the foundational fundamental principles in all of science and is necessary to understand how other pieces of scientific information relate.
  • I think it is a problem that often there is not a focus on the basic fundamentals for two reasons. The first is that the students’ knowledge base is not complete. The second thing I see happening in middle school and high school texts and classes is that concepts that are too complicated are brought in before there is an understanding of the underlying principles. This leads to spotty knowledge which results in people thinking they’re not good in science when it is actually the quality of their education that’s not good. In these situations, some students will learn the new material, but most students will just breeze right over it. I like to use foreign language as an example here. If you’re sitting in a restaurant and you overhear someone speaking a language you don’t know you tune the speaker out. But if you know a little of that language you will listen, try to understand what they’re saying, maybe even start a conversation with them. It’s the same thing with science. If I start talking about polarity and water molecules and you don’t even understand the basics of what a molecule is, you don’t know what I’m talking about and your brain glazes over or moves on to something else. If you do have some knowledge of molecules and polarity, you will pay attention and engage in the conversation, adding to your knowledge base.

Learn each discipline as a single subject:

  • Does not create artificial boundaries
  • Allows for an in-depth understanding of the foundational fundamentals, instead of a “Jack of all Trades, Master of None” approach
  • Mastery of each science discipline is superior for that discipline and for making connections across disciplines
  • On the face of it, it might sound like spending an entire year every four years on a single subject creates artificial boundaries between science disciplines. While it is important that the material you use to teach points out and makes connections between the different disciplines, the best approach is to learn the fundamentals of each discipline and make connections once the basics are understood. This creates a cohesive body of knowledge which enhances a student’s ability to make connections between the disciplines.
  • Often science is learned with a grab bag approach, which I call the smattering approach. When I told the gals at the Intel ISEF fair that I was not a fan of the smattering approach they said that in the past they would have agreed with me. But that now, the state of the science being taught is in such a shabby state that they would even like it if people went back to the smattering approach. It turns out that the smattering approach for learning science is better than not learning it at all. So I guess if it’s between the smattering approach and nothing at all, the smattering approach is okay to use. Otherwise, any good science teacher will tell you you’re better off teaching science as a single subject, just as we do every other academic subject we care about our children learning.
  • This really goes back to teaching the foundational fundamentals. You start to build on concepts, creating a firm foundation, adding more and more complicated material on top of it. Anyone who has worked with their child in math knows exactly what I’m talking about. There is no other subject that we take seriously that we do not teach as a single subject. There is a reason for that.

Rely on one or more good textbooks:

Real Science Odyssey Biology 2
RSO Biology 2 http://www.pandiapress.com/?page_id=82#level2
  • Comprehensive
  • It helps to have a guide, someone who is an expert in that field, to help you figure out the scope and sequence of the material to cover.
  • Different students access information differently.
  • Focus on the fundamentals.
  • Make sure the text is secular teaching the theories and models that are central to each science discipline.
  • Don’t teach a co-op class without a text.
  • I write science textbooks that are long and complete. I do not write fluffy science. So it should not surprise people that I am a fan of having some sort of guide and guidance to follow for each subject that I’m having my child study over the course of the year. I learned my lesson with first grade biology that even someone who is very knowledgeable in the field could use some direction. When I homeschooled my son in first grade I had a guide and reference material for every subject he was learning, except biology. I thought, “How hard will it be? I taught biology at community college. I have a biology degree from UCSD. Biology is going to be a piece of cake.” It turns out, with all the other subjects he was working on I was overwhelmed when it came to planning and figuring out a course of study as I went along. In fact, when my son was in second grade I had him work through RSO Life 1 and Earth and Space 1!
  • I will be honest; my reference material is not always a textbook. In history we use video courses and material where someone else has put together a complete package. Science is a little different than history though, because you are still going to need lab sheets, material lists, and I really think it’s good for students to be able to read the information if they need it.
  • Choose texts that are comprehensive and do not skip over the basics, introducing advanced topics and language with a focus on the fundamentals. I do not think it matters which science discipline you start with, but I would suggest waiting until 3rd grade for chemistry and physics. When your child is ready for their multiplication tables they are ready for chemistry. It has to do with the abstract nature of chemistry.
  • Every area of science has a lot of information to it. It helps to have a guide, someone who is an expert in that field, help you figure out the scope and sequence of the material to cover. I believe there is no way to teach the foundational fundamentals or to teach science as a year-long single subject without a textbook. In every science class I have ever taught, I have been handed a stack of textbooks. I was given the teacher’s textbook, the lab manual, the answer key, and test making software, because a committee of people at the community college where I was teaching decided that was what the course was going to look like that year. Perhaps this sounds limiting, but I did not find it so. You can use the textbooks as a touch point if you want, but it is essential to have a guide so that the material is covered in a complete fashion.
  • The other important thing about having a good textbook is that students access information in various ways. I learned how important it is to have reference material when I taught a co-op class this year. Based on my experience, I wouldn’t have my son take a science co-op class if there wasn’t a textbook because if the subject gets complicated your child needs something to reference, not the Internet either. I think it is important to have something they can hold in their hands, something they can underline, highlight, and make notes from. A source that you can both go to.
  • Along the lines of accessing information I’ve actually been thinking about making some videos for my text and putting them on my blog for kids who are struggling with some of the more complicated concepts. The genetics unit in my biology textbook, for instance, is an area kids find very difficult. I think if students had me lecture out of the book to them, those kids who were feeling challenged by the concepts would be able to understand the information better. I’m very into making sure there are multiple ways to access information.

 Carefully pair theory with labs and activities

  • All theory and no labs, what a bore
  • All labs and no theory, teach cooking instead 

Let’s be clear about what I’m talking about when I call something a good science course. I am not talking about sitting in your seats. I am talking about getting up and moving around, getting your hands dirty. I’m talking about taking those foundational fundamentals and applying them to real-world labs and activities that relate well to the theory. This is where science becomes fun.

  • When scientific theories are paired well with labs and activities it enhances an understanding of the scientific method and science learning. It demonstrates through use and practice how hypotheses are formed and conclusions determined based on science facts that are presented in the text.
  • Sometimes I see science being taught where it is all theory with no labs or activities. The science theory is the science information in the written text. Other times I see science being taught with all labs and activities but no theory. Neither is adequate.
  • Honestly all theory with no labs and activities, why bother. That’s where science gets a bad name. For parents I know that the labs and activities are work. I know you do not always feel like setting them up. I know this because I teach my child science, and I don’t always feel like setting them up, but I do it because it’s important to me that my son gets a good science education. A good science education has labs and activities that are carefully paired with the text and theory.
  • All lab and activities with no theory might be fun, but you are not learning science cohesively. You’re not learning the foundational fundamentals. For example, how many of you understand the complicated process that occurs when you bake a cake? By this I mean the physics and chemistry involved in the baking process. To bake a cake you don’t need to know the underlying science because that is not your reason for baking it. It is about making a yummy treat for your family. In order for it to be called science you would need to understand the physics and chemistry of the process. And to know and understand the science you need to have studied the theory and then done the experiments. That way it all ties together.
  • When this is done; the pairing of the theory with the labs and activities, no place outside a college lab that is thoughtfully paired with a lecture course can match the homeschool community. It might be another reason why we are winning all of those science fairs.

5 Steps to a Great Science Education

  1. Start Early
  2. Focus on the Fundamentals
  3. Single Subject
  4. Good Textbook &/or Reference Materials
  5. Carefully Paired Theory and Labs & Activities

I hope that this helps any of you who are worried about your children’s learning of science, and that this doesn’t sound complicated to you. All you need to facilitate your child learning science is a desire and the resources to make it happen. I want to close with, “Science is so much fun to do, to share and interact. I really hope you take the time to explore science with your child. Who knows, maybe the next time someone asks you if you have had a great science course you will raise your hand, because the years of science you did while homeschooling your child were just that good!”

Update: In December of 2014 the New York Times published an article about college reinventing how science is taught and better learned using the principles and methods I am advocating here!

http://www.nytimes.com/2014/12/27/us/college-science-classes-failure-rates-soar-go-back-to-drawing-board.html?_r=0

This post contains affiliate links.

Check out this list for materials to use for your own homeschool science co-op here and read some of my Lunar Ramblings here.


A question in the Co-op: Scientific Theories

What happens to scientific theories when definitions change or new information comes to light? 
I love this exchange, and I thought many of you would too. There has been quite a bit of interest about homeschooling science co-ops based on the number of hits the co-op blog posts on this site are getting. This is an email I received recently from someone who is teaching one. I have also included my reply. 
Email to me Tue, 16 Sep 2014 20:41:45 -0400
I just started teaching biology for my co-op out of your book (thanks for the notes on your blog on teaching it in a co-op btw), and I’ve had the kids watch the full program of BBC hidden universe, secret life of a cell https://www.youtube.com/watch?v=FFrKN7hJm64 which pretty much convinced the kids that viruses were alive, which meant that during the debate on whether viruses were alive or not, they decided that the definition of living was outdated and needed to be changed.
The very big problem was chapter 2 – this week, right after I explained the difference between a scientific theory and non-scientific theories, we came to cell theory, and one of the students pointed out that if viruses are alive, cell “theory” isn’t true. Please help, I’m sure there is a good explanation I can give the kids, I just don’t know it. I’ve looked through a bunch of internet articles, and the consensus seems to be that a virus is definitely not a cell, and there may be a new classification of alive.
Scientific Theories: The theory of natural selection as it relates to frog size.
Read about using RSO Chemistry 1 for a science co-op here.


Using REAL Science Odyssey Chemistry 1 for a Co-op

REAL Science Odyssey Chemistry 1 is a great choice for a science co-op, however because it was designed to be done 2 days a week it presents some scheduling challenges when conducting the labs in 1 day. You might want to teach this class 2 days per week, if you do, follow the format in the book as laid out on pages 14 – 16 of RSO Chemistry 1. If you don’t, some weeks will require parents to do work at home. This schedule is for doing the class 1 day per week.

REAL Science Odyssey Chemistry 1, Blair Lee M.S.
Chemistry Co-Op: RSO Chemistry 1, Blair Lee M.S. RSO Chemistry 1

Note: The page numbers below are for the written text. If you have an e-book these page numbers will be a little off. Refer to the schedule in the book if there is any confusion about page numbers.

For more general information about teaching a science co-op read my blog article, Using REAL Science Odyssey for a Homeschool Co-op: General Notes.

Unless noted I recommend the following format for your class each week:

In class

  1. Read the theory
  2. Conduct the lab

At Home

  1. Crossword Puzzle, when there is one
  2. Some assignments and projects, as indicated below


Week 1

The first week of class can be a bit hectic. I suggest you divide the week up this way

In class: Lab #2 pages 27 – 30

*** It is very important you go over the process you are using when conducting this lab. Discuss the scientific method, what it means, and how it is being applied.

At home: Lab #1 and the crossword puzzle pages 23 – 25, 31


Week 2

Each week discuss the parts to the scientific method. These are on the lab sheets for most labs. By the end of the year you want students to be fluent in the vocabulary used when applying the scientific method.

Lab #1 pages 37 – 39

Lab #2 pages 43 – 44


Week 3

At home: Read over pages 46 – 47 and Make Parts poster page 47

In class:

  1. Do the Parts! Lab: 49 – 51 next week
  2. Types! Lab: pages 54 – 61, There will be plenty of time for students to do this individually, but you could have students work on this together, so that the entire class makes this on a large table building one element at a time. If you do, make sure everyone participates (maybe put the labels in a hat and have students choose one, and make that element when it is his or her turn; if you have more than 10 students have students work in pairs for the larger elements like neon).


Week 4

There is a lot of sitting around today so I would suggest breaking it up by

  1. Read pages 66 – 67
  2. Do Parts! Lab: 49 – 51: Have an extra balloon for each student to take home, so they can share this demonstration with their family. Ask students to teach their family what is happening in this experiment.
  3. Do The Alphabet Lab #1 pages 69 – 73: Work through this methodically with your students. Students will be using this periodic table for several more chapters DO NOT let them take it home!!!

Have student do pages 75 – 79 at home, unless you have time at the end of class in which case have them do page 75 in class

Week 5

There are three parts to the Atomic Numbers section

  1. Atomic Numbers Lab #1 can be done as a demonstration or individually it is up to you
  2. While you wait the 20 minutes for the final observation for Lab #1: Read over page 81 and have students fill in the atomic numbers section on their periodic table.
  3. Atomic Numbers Lab #2 start in class, if students don’t finish it have them finish it at home


Week 6

In class:

  1. Read over pages 95 – 96 and have students fill in the assigned section on their periodic table
  2. Do Massive Matters Lab #2

At home: Massive Matters Lab #1


Week 7

  1. Read over page 105 and have students fill in the assigned section on their periodic table
  2. Do the Lab, page 111
  3. Save the worksheet page 109 for last in case you need to have students do it at home


Week 8

In class:

  1. Read over page 113 – 115 and have students fill in the atomic numbers section on their periodic table
  2. Do Lab 119 – 122; take your time with this lab. It is a really good one

At home: page 117


Week 9

The lab on page 129 – 131 requires an oven. If this is a problem for you:

  1. Fill in worksheet pages 125 – 127
  2. Have students (with parental supervision) do the lab at home and bring the muffins in for a tasting party. If you do this have student mix in berries or chocolate chips (assign this individually) so you have some variation in the muffins.
  3. You should have completed periodic tables to put on walls or desks for students to show off to their parents. This is the end of Unit 3, so it is a good place to take the time to do this.


Week 10

Over the next 9 weeks students will be creating a book for the first three rows of the periodic table going across by group. There is some drawing to be done each week. Class time for this can be problematic because some students will take 5 minutes to do the same task another student take 55 minutes on.

Each week for the next 8 weeks: Read over the For My Notebook page and make notes about the elements in the spaces on the pages for the Element Book.

I will give you my advice each week, but you might need to tweak it.

  • Recruit 1 or a group of parents to do the work on pages 139 – 140 for each student

This week In class:

  1. Read page 136: have students follow along on their periodic table
  2. Fill out page 137 and glue it to their book. Do not let students take this home.
  3. Read page 141: have students fill in the Facts section on page 149. This and every other week, have students work on the rest of the page at home.
  4. Do Lab page 143 – 145
  5. Read page 142: have students fill in the Facts section on page 151. This and every other week, have students work on the rest of the page at home.


Week 11

The Lab for this week< Crystal Creation, is short and will not be completed until next week. Students should be able to do all the work for their Element Book including decorating it in class.


Week 12

  1. Make observations for the Crystal Creation Lab page 157.
  2. Expect a fun mess with the lab today! Save some of this for week 26. It will stay good if you refrigerate it.
  3. Students should be able to do all the work for their Element Book in class. If they cannot have students complete the pages at home.


Week 13

  1. Students should be able to do all the work for their Element Book in class. If they cannot have students complete the pages at home.
  2. The lab requires an oven. Try to round up a toaster oven if you need to. This lab is fun and yummy.


Week 14

  1. Students should be able to do all the work for their Element Book in class. If they cannot have students complete the pages at home.
  2. The lab requires an oven and a mixer. A toaster oven will work.


Week 15

  1. Students should be able to do all the work for their Element Book in class. If they cannot have students complete the pages at home.
  2. There are 2 labs for this week.
  • The lab on page 193 requires a heat source. Have students do it at home if that is a problem. A toaster oven will not work.
  • Do the lab on pages 195 – 197


Week 16

  1. Students should be able to do all the work for their Element Book in class. If they cannot have students complete the pages at home.
  2. There are 2 labs for this week.
  • Lab #1 needs to be done as a demonstration. Bleach is too toxic and caustic to risk having a group of students use it.
  • You will start Lab #2 today and finish it next week. There are a few changes to the procedure so that this lab can be done by all the students. Change the procedure instructions for Procedure 8 in the book to Let the egg sit for 7  full days. Do not refrigerate the egg. Have students make the vinegar solution in a double baggie. If the egg breaks and leaks out of the baggies it will be badly stinky!!! Have students take the baggied egg home and complete the experiment at home the next day. Have them share their observations at the start of next week’s class.


Week 17

Students should be able to do all the work for their Element Book in class. If they cannot have students complete the pages at home. You might even be able to put the books together. If you do not have a refrigerator in class, use an ice chest with ice in it. Perform the experiment while working on the Element Books. Have a balloon for each student to celebrate the end of the unit or just use 1. If you have a balloon for each student, have everyone put their balloon in the cold source at the same time so all the cold air does not get out from being opened repeatedly.


Week 18

There are 3 labs/activities this week. The Lab on page 243 – 245 will be done at the start of next week.

  1. The puzzle pages 233 – 235: You might want to have 1 set of pieces per student pre-cut. If you do consider asking parents or students to bring these pre-cut pieces with them to class.
  2. Lab #1 pages 239 – 241


Week 19

  1. Begin class with the lab page 251, set a timer for 1 hour and make the second observation. I am not sure if this experiment will last over a week. You are going to need to check on it after 24 hours, and take a photo. Then you can wait a week and see. That way your students can use your photo as the final observation if they have to.
  2. Lab page 243 – 245
  3. Worksheet page 249


Week 20

  1. Lab 261 – 264
  2. Have students finish today with the worksheet page 255 – 259. They can complete this at home if you run out of time.


Week 21

  1. Have student complete the poem at home.
  2. Start class with Activity #1 on pages 269 and 271
  3. Have student share poems if they are so inclined.
  4. Have students do Activity #2 on pages 269 – 270 and 273


Week 22

Do pages 275 – 279


Week 23

  1. Do pages 281 – 289:  Use a microwave if you have to in order to boil water. An electric tea kettle will also work.
  2. Have the ingredients for Jell-o present, but make a batch of Jell-o ahead of time so students can make observations about the Jell-O in class.


Week 24

Do pages 291 – 300: You have a group of students so why not use them for a density demonstrations. Mark off a space on the ground that will just fit all the students standing as a group. Have the students fill the space 1 by 1. Have the students move around in the marked off area. This will show them how much less space there is to move when more particles (people) occupy the same amount of space.


Week 25

Take a look at the lab on pages 303 to 305. The amount of set up time is perfect. But the lab takes 1 week to complete and you make a hot sugary solution. It is a good lab though.

You have a group: do the group activity on page 304


Week 26

Do pages 307 – 315: Use the slime you saved


Week 27

Do page 317 – 325: To do the lab on page 319 in 1 lab period. Use 3 bottles. Take one bottle and freeze it with the cap off the day before class. Bring the bottle to class, but take a photo in case it starts to melt before class starts. Suggest students put a bottle with the cap off with a dish under it in the freezer overnight to observe the expansion of water for themselves.


Week 28

Pages 327 to 337: There are three activities/labs this week. You should be able to get through them all. You will need a microwave and 1 or more kites. If it isn’t windy, the kite is optional.


Week 29

Pages 339 – 347


Week 30

Pages 353 – 361: You will need pre-frozen Kool-Aid


Week 31

Pages 363 – 371


Week 32

Pages 373 – 379: The indicator should be made at home.  Do Step 1 at home and bring the indicator to class. Have kids make the coffee filter pH paper from Step 1 in class. They will use it next week.


Week 33

Pages 381 – 387


Week 34

Pages 389 – 397


Week 35

Pages 399 – 403: Have students make the solution for Day 1. You are going to need to make the same solution the day before so you can do the entire experiment in 1 day. Have students take the solution home in a baggie so they can see the results for their own solution. Alternatively, you could leave it a week and have students make their observations next week.

Week 36

Pages 405 – 411

Read about using RSO Biology 2 here.


Materials List for a REAL Science Odyssey Biology Co-op

Biology co-op

Bio-L2-Cover

Pandia Press

I received an email asking about how the material list is affected when teaching a co-op with RSO Chemistry 1. I thought it was a question that deserved an answer for RSO Biology 2 as well. My goal with this series is to make it easier for anyone who wants to teach a science co-op. Teaching is a LOT of work. I respect the time and energy you as an educator are taking to teach science and this is my way of making it a little easier for you.

Note 1: You are going to have to match the lab with the week. I changed the weeks where some of the labs are performed for a co-op class from the order they occur in the book.

Note 2: No change means there is no change to the quantities as listed in the Material List in the Student Guide and Teacher’s Guide for that week.

Note 3: I am assuming every student has their own text.

Note 4: Microscope supplies – you will need a quantity of microscope supplies for a class. I bought a box of slides and slide covers at the start of the year, cleaned those that could be cleaned over the course of the year, and disposed of those that couldn’t. At the end of the year I threw them all away. I will assume you have a large enough quantity of general microscope materials each week for your entire class. I will only list changes for materials specific to that experiment.

Week Changes to Material List
1 The plot study lab: You will want multiples of – tape measures, graph paper, clip boards, markers for plots
2 Microscope techniques: 1 – 3 corks, 1 X-Acto knife per 4 students, 1 syringe per 4 – 6 students, 1 tweezers per 4 – 6 students, 1 plastic spoon per person
3 Cell model: 1 glue per 5 – 6 students, 1 ruler per 5 – 6 students, extra toothpicks
4 Chapter 4: multiple colored pencils, 1 syringe per 4 – 6 students
5 Diffusion: Are you going to teach this as one large experiment for the entire class toobserve or an experiment each student takes home? That affects the material list.

Microscope: 1 corn kernel per person, the same as for above – when you gather multiples of things like syringes make sure they stay in class for the duration of the co-op.

6 Photosynthesis/Cellular respiration: * 1 plant for the group (do not change this), 1 piece of fruit/vegetable per person
7 DNA lab: (LOL people hate or love marshmallow labs! They are cheap. I am sorry if you hate them. Any other ingredient makes this lab much more expensive. I am vegan, so trust me I get the entire anti-marshmallow thing. Just warning you, some parents are sure to complain. I get emails about this ingredient on my material list.) Multiply the number of marshmallows, beads, toothpicks, skewers, and pipe cleaners by the number of students.
8 Mitosis Poster: The supplies list depends on whether students do this at home or in class. If they do it in class, you will need multiples of poster board, marshmallows, pipe cleaners, yarn, and beads.

Microscope 7: 1 sports drink per student, 1 cup or glass per student

9 No change
10 Activity 10: 1 coin per student

Microscope 10: No change

11 Frog dissection: 1 frog per student, 1 set of dissecting tools for every 1 – 2 students*** Not all students will do this dissection. Make sure they will BEFORE purchasing frogs.
12 Plant dissection: 1 plant per student (if students are not working in groups, use 1 plant per student.)
13 Flower dissection: 1 flower per group (if students are not working in groups, use 1 flower per student.)
14 Labs 14 – 1 & 2: Multiply the number of lemons, wire, nails, pennies, calculators by the number of students.
15 15 – 1: As many cardboard nail messages as you can for students (this is a very simple but fun lab), multiple blind folds

Microscope 15: No change

15 – 2: Multiply the number of bottles, coffee filters, gravel, sand, cotton balls by the number of students

16 16 – 1: 1 flashlight per pair of students
17 Microscope 17: 1 needle per person

17 – 2: 2 balloons per student, multiple tape measures or measuring sticks

18 Lab 18: Multiply the number of chicken wings, gloves, and dissection tools by the number of students
19 19 – 1: No change

17 – 1: Multiply the number of bottles, tubing, X-Acto knives by the number of students

20 Microscope 20: Both of these labsrequire some thought about you want to run them for a class. By the time you get to these labs you will have a good idea how best to run them. For the microscope lab, will each student make their own slide and look at the slides of other people? In that case you need 1 insect per student. Or will you make the slides and have students look at them without preparing the slides? In this case the number of insects needed varies from two to as many as you want for comparison.

Lab 20: Where you do this lab determines whether there are changes to the material list. If done outside there are NO changes. If done inside you need 1 set of materials per student. Alternatively you could make the timeline as a mural, with all students working on it together.

21 Microscope 21: No change

Lab 21: Multiply the number of pompoms by the number of people who will be performing the experiment at the same time.

22 Lab 22: Multiply the amounts of supplies by the number of students

Microscope Lab 22: No change

23 Lab 23: Multiply the number of sheets of construction paper by the number of students

Microscope Lab 23: No change

24 Lab 24: Have parents help by bringing in supplies for their student’s project

Microscope Lab 24: No change

25 Lab 25: No change
26 Microscope Lab 25: 1 piece of grass per student

Lab 26: Multiply the amount of materials by the number of students

Microscope Lab 26: No change

27 Microscope Lab 27: No change

Lab 27: a minimum of 1 plant per student, 1 container with a lid for each student to take home the watering solution (I make my own jelly, so I used canning jars which I have a lot of.)

28 Lab 28: Multiple students mean more students making dichotomous key mysteries – there is no change to your materials list
29 Lab 29: No change
30 Lab 30: No change
31 Microscope Lab 30: Enough leaves for students to each make their own slide

Lab 31 and Microscope Lab 31: It would be nice to have 1 set of specimens per student. It is not necessary though.

Start Lab 32: 1 banana for every two students, 1 tsp yeast per student, 2 baggies per student

32 Microscope Lab 32: Multiply the number of mushrooms by the number of students, you also need multiple cutting boards and flashlights

Pandia Press Biology 2

This post contains an affiliate link.

Read about teaching a science co-op here.


Teaching a homeschool science co-op: General Notes

In September, 2013 my family moved from the Mammoth Lakes area in California to the San Diego area. One of the reasons for moving was that my then 13-year-old homeschooled son wanted a community of kids who he felt he had more in common with, AKA kids who were also homeschooled. He had friends in the small mountain community where we lived, but all of them attended traditional school. He was beginning to feel like an outsider and different in a way that worried me. We moved to San Diego and soon met homeschooled kids who he liked and identified with. The move has been really good for our whole family. My husband was already down here a lot helping one of his older sons get a business started. We have three older sons who all live in San Diego County with their wives and girlfriends. We even have a granddaughter who is almost 3 years old who lives in San Diego. It’s great being closer to her. I also love the group of homeschooling moms I have met.

My son wanted to take some classes with other kids, something he hadn’t done since kindergarten, his one and only year of attending traditional school. Someone recommended a group in Orange County that had some classes that looked perfect for him. One of the classes that they planned on having was a middle school/high school biology co-op. I signed my son up for this class. He was about to begin his last year of middle school, eighth grade, and had already worked his way through my biology course. He didn’t really need a biology course at that point, but I figured that taking a class with other kids would be a bit distracting for him, so maybe it would be a good fit for him to retake biology while he figured out what it was like to take a class with other kids.

I won’t go into all the details, but suffice to say the teacher that was supposed to teach the class canceled. The woman who runs the group contacted me about potentially teaching the class. I said no way. I need to write Earth and Space 2. She found another biology teacher who also fell through. At the end of it I finally agreed to teach the science co-op class, all for my son. HE SO OWES ME for all I do for him!!! Not that I regret teaching the class even for second. I LOVED!! It! Still he owes me big time, just saying 🙂

I learned quite a bit about using my book for a science co-op too. Things I hadn’t thought of when I wrote it. Things I really want to share with you. I decided to write a series of posts detailing my thoughts about science co-ops in general, and using my book for a biology co-op specifically. This should be thought of as a series of teacher’s notes. It is written for my book, but honestly much of what I learned is general for any science co-op.

Science Co-op
Science co-op: RSO Chemistry 1 Click here to visit Pandia Press.

The Structure

  1. We met one time a week for two hours. I provided all supplies.
  2. We went through one chapter’s worth of material from RSO Biology 2 each week.
  3. I e-mailed students telling them the material they were responsible for that week.
  4. When we met for class, there was a 15 to 30 min. session at the start of class with me explaining the material for that week. The rest of the time was used for the lab. The review notes in RSO Biology 2 Teacher’s Guide help make this so much easier.
  5. I was available for help, I still call them office hours, before each week’s class. I just had to know ahead of time.

The Big Surprise

The big surprise was the diversity and eclectic interests of the students in the co-op. I am a big fan of homeschooling. I think the real strength of homeschooling is this diversity and the time, space, and energy to pursue these eclectic interests. But I hadn’t thought what that would mean from a teaching standpoint. I am going to go point by point with the differences and how I handled them.

  • What do you do when you have students who are being educated using different styles?

I had students who were being de-schooled, unschooled, classically educated, and parents who were flexible to however I wanted to teach. I had to decide how I was going to handle this, and so will you if you are going to teach a science co-op class. There are a couple of different ways that I see to handle this:

  1. I decided to be flexible. That is my personality though. I am a very casual person. I sent the assignments to each student every week. If they did the assignments I graded and reported back to the student. If they didn’t, I was okay with that. A couple of times during the semester I did make sure that the parents knew when the students weren’t doing the assignments. I really left it up to the parents. I assumed that even for those students who were being de-schooled or unschooled that anybody taking my biology class wanted their student to learn biology. I decided to let the parents and the students figure out what that looked like within the framework of the material that I was assigning. The students that did not turn in projects did not get written feedback from me. Of course, I did give them feedback on the work that they did in class. I think the thing to remember in these sorts of flexible situations is that there is a desire to learn that subject. I didn’t have any problem with students being there without participating while they were in class; everyone did the work then. I had teens and tweens so there were a couple of times when I had to bring the attention back to what we were working on, but that would’ve happened either way.
  2. Decide on a structure. Make students responsible for the assignments. If you are going to assign grades you have to have material. If I were going to have all students accountable for turning in all the work, I would sit down with parents before they sign their kids up for the class and make sure that they understand what you are going to require. If you go with this structured approach, you want answer keys to the work. Grading is a LOT of work.
  • What do you do when you have a range of ages?
  1. I grouped my students by age. I kept the co-op small, nine students. I had three groups of three a younger middle school group, an older middle school group, and a high school group that included my son even though technically he was still in middle school. These three groups worked really well together. A couple of my students who were not doing much of the work did more work any time the group was working together.
  2. I highly recommend having groups of two or three students if you are going to run a lab class.
    • The members of the groups themselves will help each other if the lab is complicated.
    • It helps with limited resources like microscopes.
    • It made it easier for me when labs were complicated having fewer numbers to work with. Instead of working with each student individually, I was able to work with each group.
    • One of the groups only wanted to work together on some of the projects. I was very flexible with this. That group usually preferred working singly and I let them.
  3. I assigned the older students more work, and I had higher expectations for them. Most of this work was in the form of reading articles and watching videos. I had the high school group focus on epidemiology as it related to the weekly topic throughout the year.
  • What do you do when you have a range of abilities?
  1. Just because you have a range of ages does not mean you have a range of abilities. One of the first tasks at hand should be determining the overall level of science in your class. For example, my biology textbook has a heavy-duty microscope component. My son was the only person who was experienced in overall technique when it came to the microscope. Even some of the students who had used a microscope before really needed work with their microscope technique. What I learned is that there is an emphasis with looking at things through the microscope, but not an emphasis on learning how to do a good job preparing slides. Those students, even though they understood what they should be seeing, were at a beginner level as far as slide preparation and overall manipulation of the slide on the stage.
  2. If you do have a range of abilities and you’re going to pair people into lab partners you should decide ahead of time whether you’re going to pair students who are at similar levels or disparate levels.

Things You Need for a Science Co-op

  • The list below is what I think you need to run a science co-op, this is my personal opinion. If you have different thoughts about any of this feel free to comment. In fact, if you have thoughts about anything you read in here I would love to hear from you.
  1. A textbook or some sort of complete reference material
    • Different students access materials differently. This is one of the most important things to remember when you are teaching any class anywhere. A lot of us are homeschooling because the traditional method in school didn’t work well for our students. As someone running a co-op class you need to be sensitive to the fact that some of your students are going to access material visually, some (in particular in a science class) kinesthetically, some orally, and others will learn using all of these. You need to make sure that students have access to this written component so that they have it to refer to and their parents have it to refer to.
    • A textbook will help you, the teacher, pace your class and figure out how and what material to present.
    • If you’re using REAL Science Odyssey Biology 2 the textbook will tell you what labs to use with the theory. I will be posting unit by unit any additions to labs, so that they work for the amount of time allotted. Some of the labs that are in the chapters did not take an hour and a half. I’ll make notes within the posts on this blog explaining what I had students do in the co-op class on those weeks.

      Science co-op
      Science co-op: RSO Biology 2 Click here to visit Pandia Press.
  2. You will need permission to take and use photos if students are in the photos. It’s a minor point, but it is one that you might as well deal with at the start of class. Some parents do not care and other parents do not want their children in photos.
  3. A plan: The plan will be aligned with the textbook for the most part, but you should really go through before you teach the class and figure out some of the logistics. Your plan should address things like:
    • Are you going to take any field trips? If you are, do you need permission slips and will there be an additional fee for those field trips?
    • How many weeks will the class run? RSO Biology 2 is a 32 week course. Are you going to teach a 32 week course? Or are you going to teach a shorter course? Maybe you are just going to teach evolution, genetics, and anatomy from it. You should figure this out ahead of time. (I am a fan of teaching the complete package, but sometimes there are time constraints.)
    • Some labs run over in time. You should prepare parents ahead of time when this will happen.
    • Teaching takes a lot of energy. Make sure you have breaks built into the schedule when you need them.
  4. What is your policy if any kids miss a class?
  5. What is your policy if you, the teacher, cannot teach a class?
  6. Could you use any help? If so, you could have parents rotate once a week helping or you could offer one of the parents some sort of benefit for being the parent helping to teach the class.

This is all I can think of at this time, but knowing me I will continue to edit this. This was dictated using Dragon software. Sometimes weird typos creep in using this. If you notice any do me a favor and let me know. Thanks, Blair

This post contains affiliate links.

Read about what curriculum to use in a science co-op here.