Handcrafting High School: Year 1, The First Four Months: Language Arts

Language Arts, SEA Online Class, SEA Teen Book Club, SEA Tween Book Club

Language Arts: How We Came to Be Homeschoolers

My son Sean was an early reader; I was an early reader; my father was an early reader; my paternal grandfather was an early reader. We all started reading at about the same age, between three and four years old. I’ve been told by someone who seemed to know what they were talking about that early reading, just like early walking and early talking, is a trait that runs in families. In addition to coming from a long line of early readers, I love to read. When people remember me as a child, the thing they’re the most likely to remember is what a bookworm I was. I still am. When Sean looks back on his childhood, one of the things he will probably remember is all the time I spent reading to him. I would still read to him even now, but he would rather read to himself these days. 😉 You might think that being an early reader would make kindergarten at a traditional school easy. If you think that, you would be right and wrong. Any class is easy if the other students are learning what you already know how to do, but you miss out on the essential skill of learning how to learn, which to me is the most important thing to learn during your school years. If you don’t learn how to learn, when you do get to subjects that are hard, you will not know how to learn the material in them. I volunteered in Sean’s classroom and was bothered when the teacher would call the rest of the class up to the front to do work and would leave Sean sitting working on a coloring page. I didn’t blame her. When Sean started school No Child Left Behind was the law of the land, and she was doing what she had to do. No other child in his class knew how to read. Obviously that was where her attention needed to go. From my standpoint though, Sean didn’t need any more work on coloring. At the first parent-teacher conference his teacher told me, “Well, you have nothing to worry about.” Whether that was true or not was a matter of perspective. His teacher was pretty awesome actually, don’t get me wrong. She followed that comment up with a discussion of what she would do to develop some academic tasks that were meaningful for Sean. At the second parent-teacher conference his teacher said to me, “Aren’t you a stay-at-home mom? Why aren’t you homeschooling? If I didn’t need to work, I would’ve homeschooled my kids.” Before going on I should digress a bit and tell you that I had thought about homeschooling Sean, but I got cold feet worrying that I would fail him somehow, so I put him in traditional school instead. I owe Sean’s kindergarten teacher a debt of gratitude. She is the person that gave me the courage I needed to homeschool Sean.

That Was Then. What about Now?

        I break language arts into two main categories, the mechanics and the craft. The mechanics includes spelling, grammar, and writing. The craft includes writing and reading.

The Mechanics: The least favorite, the most favorite, and something new
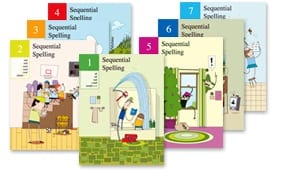
Sequential Spelling
Language Arts: Sequential Spelling

Spelling, the least favorite subject for both of us: Over the past 9 years I have come to HATE‼ spelling. I hate this academic subject with so much passion, heavy sigh just thinking about it. 🙁 Being a strong reader does not guarantee you will be strong at spelling. My guess is that most high school students do not have spelling as a separate class. Sean still does. We have been working through Sequential Spelling for the past four years, and I highly recommend it if spelling is a problem area for your child. It has greatly helped to improve Sean’s spelling. Even with this effective spelling program his spelling is just okay though. Do not use the IPad App btw. It is terrible, and is coupled with even worse customer service. The DVDs are much superior.
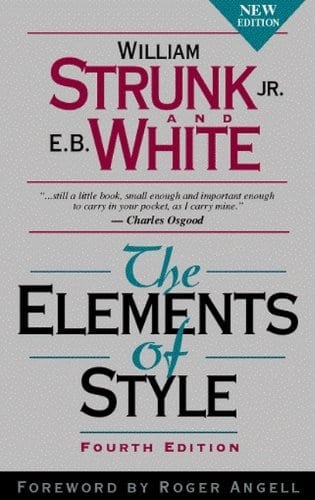
Strunk and White's The Elements of Style
Language Arts: Strunk and White’s The Elements of Style

Grammar, the most favorite of one of us: Grammar is Sean’s favorite subject of all time. The laugh is on me, because this was my least favorite subject (until I started homeschooling my son in spelling that is)! Sean has always loved diagramming sentences. Grammar this year started with Sean reading through The Elements of Style by Strunk and White. Sean reviewed the rules for punctuation. “Where is the diagramming, Mom?” “Sorry Sean, there isn’t any this year.” Going forward he will only work on grammar as it relates to punctuation. He does miss the diagramming, but I noticed at the end of last year that he was weak on some of the punctuation rules. I know he misses diagramming sentences, but that particular skill wasn’t improving his punctuation!

The Mechanics of Writing, something new: Sean is incredibly creative with his writing. In the past he has fought any type of writing program that did not focus almost entirely on the creative side of writing. I have been fine with this. The craft of writing, in my opinion, is much harder to learn than the mechanics of writing, but you do need the mechanics. In the past Sean used Michael Clay Thompson’s language arts series and Bravewriter, both of which he (and I) loved and learned a lot from. This is not to say these programs do not focus on the mechanics of writing, but I do not think that is their primary focus. At the beginning of December, Sean and I discussed what to do to make sure he has a good understanding of the mechanics of writing. He needs to make sure he has the skills necessary for the writing portion of the SAT and for his college classes. I was really worried and was going to do something really structured. Sean talked me into compromising and letting what was supposed to a three paragraph essay be a three page story. It turned out my worrying was for naught! The paper was great. LOL! I could have worse problems; I am sure some of you are not sympathetic at all! The Craft: Two beloved academic pursuits The Craft of Writing benefits greatly from a focus on reading: Writing and reading are intertwined at our house. I tease them apart to think of the scope and specifics, such as what books Sean will read, then weave them back together. Writing to me is an artistic endeavor. It is individual, meaningful, and fulfilling. It is also hard. Writing something that others want to read is harder than chemistry! I think it is the hardest subject we work on in school. It is hard to assess as an educator too. Like science, I think the homeschool setting is the best academic environment to work on the craft of writing. To improve your craft with writing, you need time to write without artificial deadlines. I think working on becoming skilled at timed writing (which we are going to work on over the next school year) is a ridiculous waste of time. It is an essential skill because of the SAT, but an irrelevant skill when it comes to crafting writing pieces worth reading! My absolute favorite book about the craft of writing is Wondrous Words by Katie Wood Ray if you are into that sort of reading. So what did we use these past 4 months, you are probably wondering…

  • Comics and Graphic Novels (CGN): This is a Coursera Course, https://www.coursera.org/course/comics. Someone recommended it on the Secular Homeschool Teens Facebook group. This course turned out to be much more than I expected. When I signed Sean up for the class, I thought it would be a filler class to get him started. The class turned out to be much more in-depth and meaningful than that. It was an excellent course. Sean and I both really liked the teacher, William Kuskin. Sean spent the first four months of the school year reading the comics and graphic novels recommended in the course.

https://www.youtube.com/watch?v=yLytwSqUReI

The specifics of why I was so impressed with this course. It focused on

  • Structure: All good writing has structure. I do not mean, though, that it is formulaic. I mean, all good writing has a structured reasoning for what goes where. Writing is art, so the structure might not be obvious. I have always loved the poems of e. e. Cummings because of the artistry with his structuring of the words he writes. With Sean my favorite author to use when we discuss structure is Gary Paulsen. He is an absolute master at structuring words and sentences to enhance the story. Kuskin spent part of the course discussing topics like the weaving of the illustrations with the words, the panels, the gutters, and shading and the use of color. Then CGN had Sean analyze specific pages of text from comic books and write about what he noticed about their structure. Sean hit his groove with this, noticing things that I did not pick up on until Sean pointed them out. Sean is much more in tune with visual art than I am. I come from a family of visual artists. I am the only writer in the family. Growing up, my family considered me the least creative member of it. My number one fan, my husband Jim, begs to differ with them, LOL!
  • The evolution of the genre: Genres of writing evolve and change. This is not easy to show with most genres. CGN is a modern enough genre that the change and growth, the history, can be studied effectively over a four month period. I think it is good for young writers to learn organically that there is growth and development in all writing including their own.
  • Literature analysis: There was also a discussion of different genres within the larger, more encompassing, genre of comics and graphic novels. This coupled with the focus on structure led to a decent amount of literature analysis in this course, at least the way we studied it. Sean and I read and discussed several comics and graphic novels over the four months. Some, such as Maus, Planetary, and Hush, he loved. Others, such as Saga and Funhouse, he felt more neutral about. I thought they were all great. He just likes certain genres of CGN better than others.
  • Editing the work of his classmates: Many of the students in the class wrote their own short comics as a final project. I printed them out and have had Sean, he is still working on this, critically evaluate each as he reads them.

Don’t just take it from me. This link will take you to other reviews of this course: http://www.coursetalk.com/coursera/comic-books-and-graphic-novels

  • My writing: There is nothing quite as satisfying to Sean as to go through and critically edit my writing. I make sure and save an early draft. I have read many times that the best writing teachers write. I use my science texts unless he gets stuck. When that happens I write along with him in the genre he is writing until he gets unstuck.
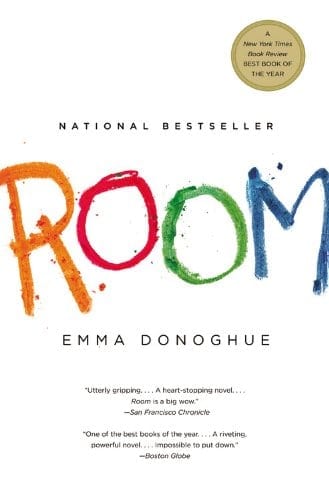
LA 4 Room
Language Arts: Room
  • Reading the books I love this year: This summer Sean picked up a book from my night stand that I had not yet read. I was working through my stack and had not gotten to it. It was Room, by Emma Donahue. Sean loved the book. He insisted I read it right away, it was so good! When I did I realized I would NEVER have given it to my 14 year old to read.

But it did get me thinking about reading choices this year. I decided to depart from a scripted list of books for him and have him read the books I read and love over the year. That is how Sean came to read The Martian. He is about to start reading Me before You, by Jojo Moyes. He reads them, and then we discuss them. I have him send me one email about a technique he notices and likes each day that he reads. It is quite fun and enlightening for both of us! It is very possible none of these books will “stand the test of time as modern classics”, but they will all be really good reads.
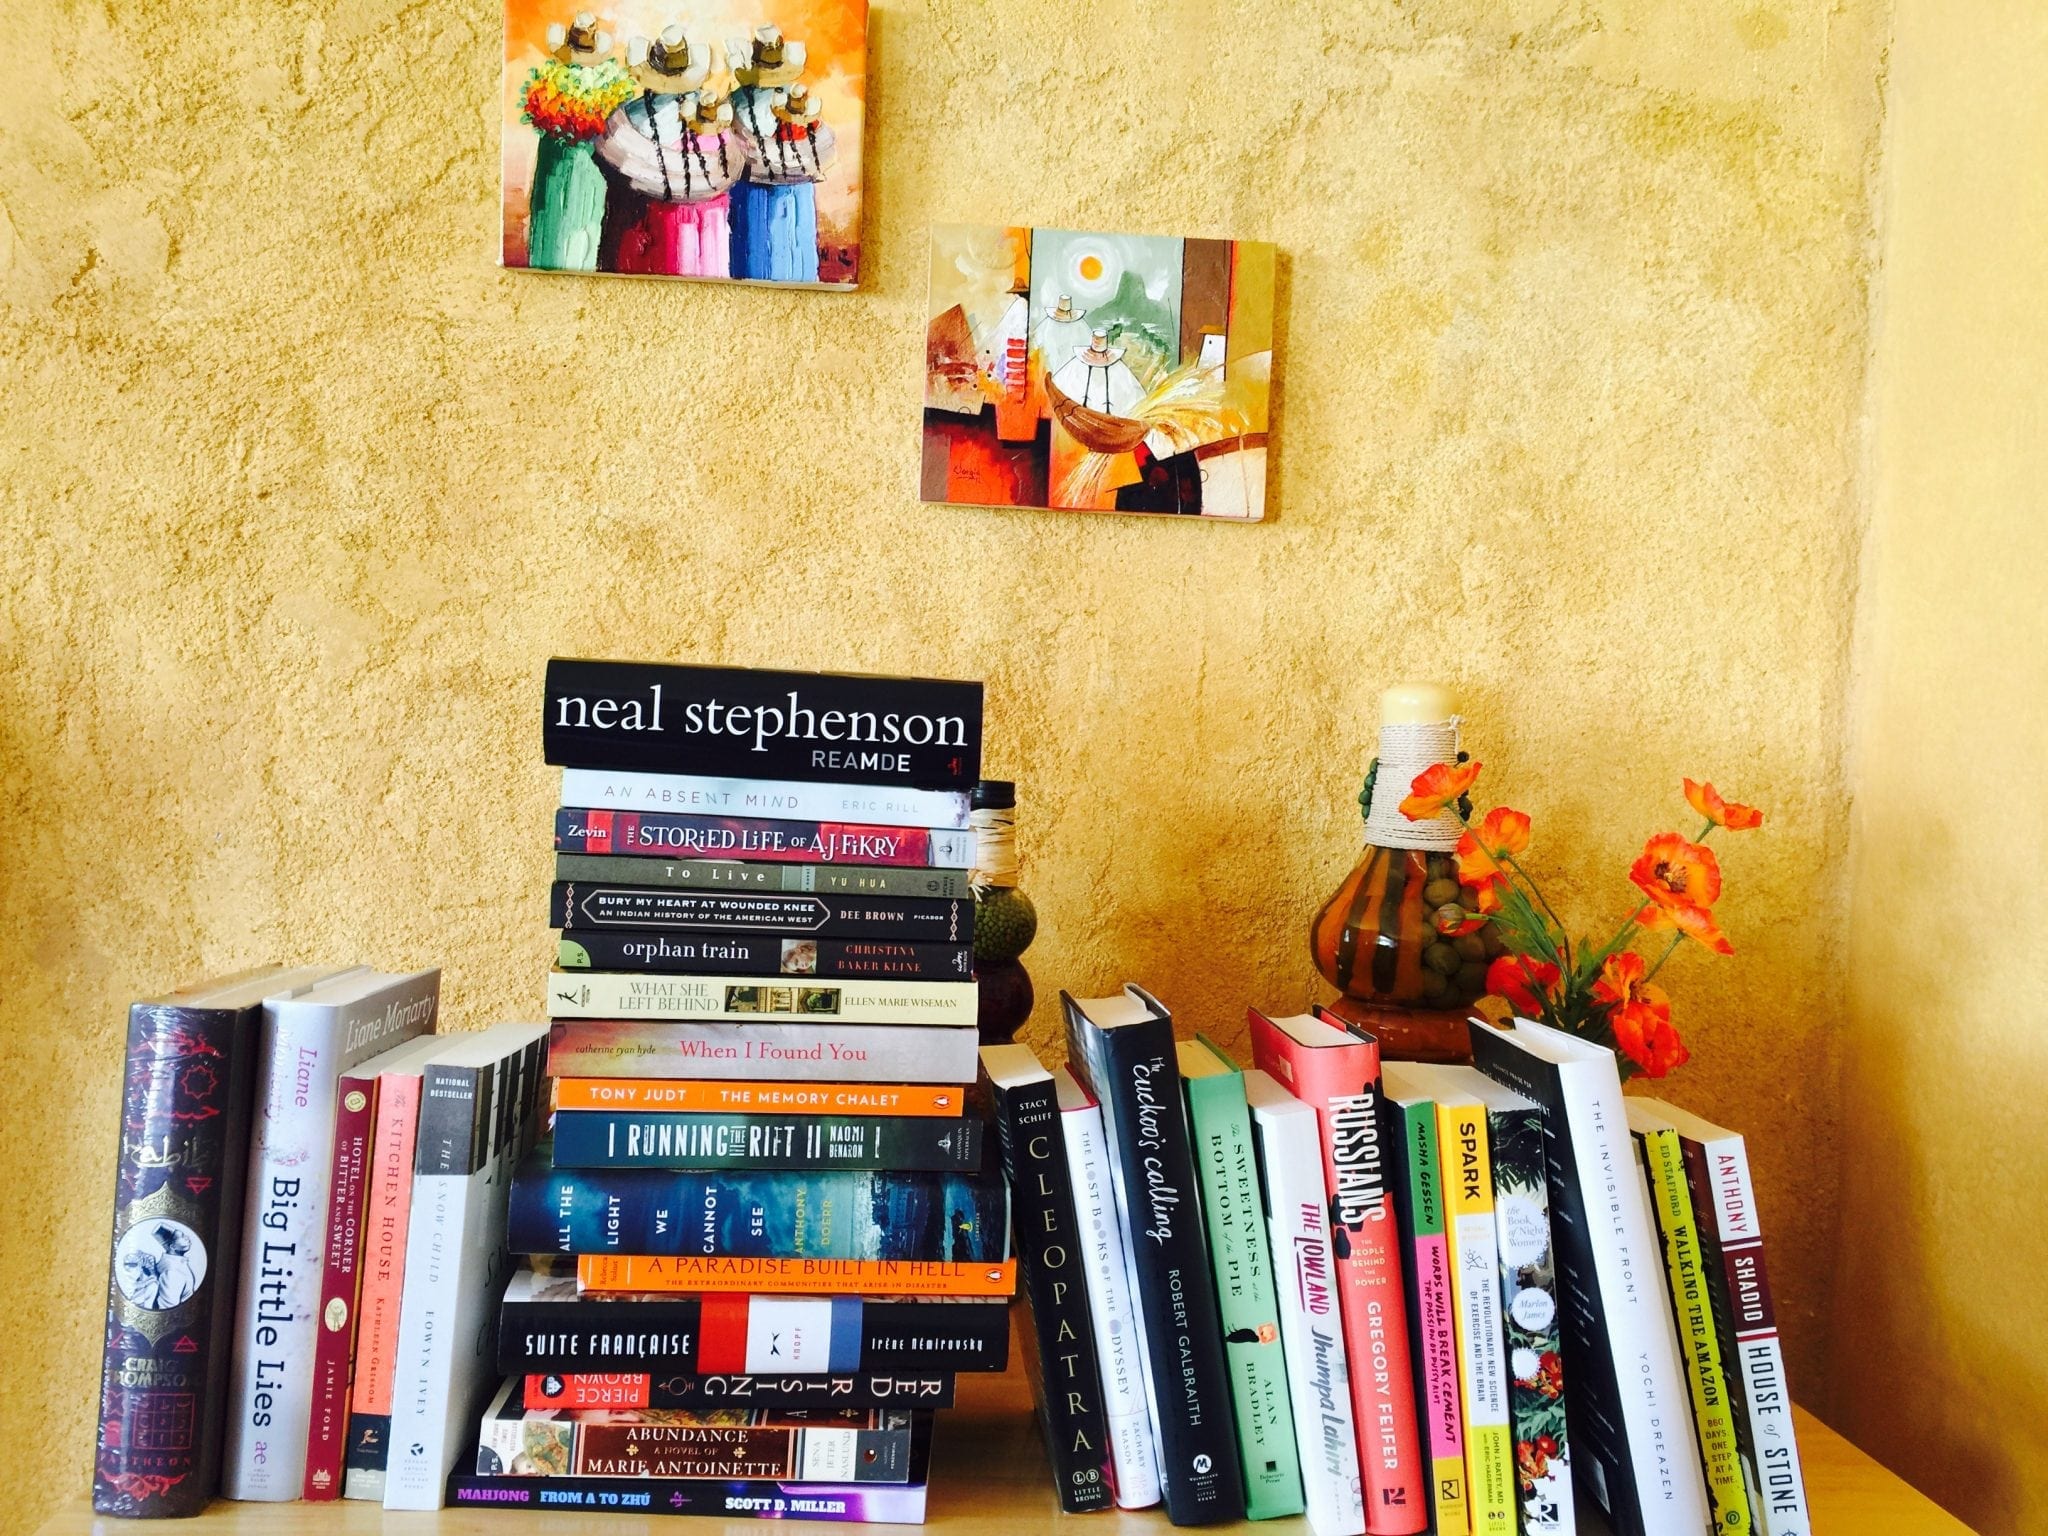
LA 5 Blair's Book Pile
Language Arts

This is my book pile for this year. Sean will not read all these, but I will. Sean will only read the best of the best. That part is very subjective. I will be the one to decide which are the best of the best, someone else might disagree with me. How this pile is selected is that all year, when I hear of a book that sounds particularly interesting to me, I put it on my Amazon wish list. At Christmas time I go through this list and choose books from it. My big present from my husband is the stack of books from the wish list that I decide I want to read over the course of the year. This year I was surprised to find so many books on the list. It was because we spent last December in India, and I didn’t get any books from last year’s wish list. I ordered some from that list too. Some of these books are even from three years ago. We moved about a year and a half ago and some of these books were packed instead of read. I found the box at Christmas time and added them to the pile to be read this year. I love to read. Did I say that already? I will put the names of the books at the end of this for those of you who are curious about the titles. The reason for getting these books in print, not as e-books, is that when books are great I like to share them with my friends, and I hope many of these are great.

Decoded by Jay Z
Language Arts: Decoded by Jay Z

Sean and I particularly like writers (and singers) who are what we call wordsmiths. One of my favorite books for this discussion is Jay Z’s book Decoded, where he decodes the meanings, stylistic nuances, and history of hip-hop music as well as telling some of his own history. Decoded contains some adult themes. I did let Sean read it, but if you would not let your child listen to rap music, this book might not be a good fit. You could always download a sample of the e-book and see what you think. This link will take you to a two page spread of a song that he decodes.

http://online.wsj.com/media/JayZDecoded2.pdf

Blair’s Book Pile from left to right:

Habibi by Craig Thompson

Big Little Lies by Liane Moriarity

Hotel on the Corner of Bitter and Sweet by Jamie Ford

The Kitchen House by Kathleen Grissom

The Snow Child by Eowyn Ivey

Reamde by Neal Stephenson

An Absent Mind by Eric Rill

The Storied Life of A. J. Fikry by Gabrielle Zevin

To Live by Yu Hua

Bury My Heart at Wounded Knee by Dee Brown

Orphan Train by Christina Baker Kline

What She Left Behind by Ellen Marie Wiseman

When I Found You by Catherine Ryan Hyde

The Memory Chalet by Tony Judt

Running the Rift by Naomi Benaron

All the Light We Cannot See by Anthony Doerr

A Paradise Built in Hell by Rebecca Solnit

Suite Francaise by Irene Nemirovsky

Red Rising by Pierce Brown

Ill Fares the Land by Tony Judt

Abundance a Novel of Marie Antoinette by Sena Jeter Naslund

Mahjong from A to Zhu by Scott D. Miller (Sean gave me a Mahjong Set for Christmas.)

Cleopatra by Stacy Schiff

The Lost Books of the Odyssey by Zachary Mason

The Cuckoo’s Calling by Robert Galbraith

The Sweetness at the Bottom of the Pie by Alan Bradley

The Lowland by Jhumpa Lahiri

Russians, the People behind the Power by Gregory Fiefer

Words Will Break Cement the Passion of Pussy Riot by Masha Gessen

Spark, the Revolutionary New Science of Exercise and the Brain by John J. Ratney M.D.

The Book of Night Women by Marlon James

The Invisible Front by Yochi Dreazen

Walking the Amazon by Ed Stafford

House of Stone by Anthony Shadid

Check out our post on teaching history here and check out Sean’s Physical Education here.


Handcrafting High School: Year 1, The First Four Months: History

History

History: A Repeat of a Favorite Class and Volunteering

The Course: A Brief History of Humankind: This is a Coursera course, https://class.coursera.org/humankind-002, that repeats regularly. It is the best history course I have ever taken. The instructor, Dr. Yuval Noah Harari, from the Hebrew University in Jerusalem comes across as brilliant, even as he makes history accessible to a lay person! There is a book as well, but Sean did not use it. I did though, http://www.ynharari.com/sapiens-the-book/short-overview/. I read it, referred to it, and made a series of questions from it to accompany each lecture. Sean got a lot more out of the class that way. I did not have him write the answers, instead we would discuss them. Some of these questions took us far afield. It was a thought provoking quarter for history. The class is about the big picture not the memorization of dates and facts. Most people I know do not remember much history, probably because they just learned it for the test. History taught the way Dr. Harari teaches it is memorable.

This was the second time Sean has taken this class. I was surprised when Sean asked to take it again at the start of this year. He took it a year ago! He wanted to work on the skill of note taking, and he felt he could get more out of this class a second time. His main reason though was that he liked this class that much! After giving it some thought, I decided that it would be like rereading a book you loved. You do get much more out of the book the second time reading. Both Sean and I have gotten much more out of this class the second time through.

The course is free so even with the book this is very affordable. There are quizzes for the class on the Coursera site. (Sean is working on the skill of test taking this year. Sean is not an experienced test taker, and suffers from pretty severe test anxiety, so he needs to work on that skill.) http://www.ynharari.com/

The text that I used to help me prepare questions. It was a great read!
History: The text that I used to help me prepare questions. It was a great read!

I thought about having Sean write 4 research papers for history over the 4 months that he took to complete A Brief History of Humankind. I opted for him to volunteer instead. There are only so many hours in the day, and he didn’t have time for both. The way we scheduled the class, without a writing component, was not time intensive. Sean and I watched the video lectures in the car on the way to crew practice. We discussed the salient points covered in the lectures using the guided questions I had put together. We (yes we) took the quizzes. By the way, I read over the quizzes when I was making the guided questions, after I had taken the quiz myself, to make sure we covered everything, and that Sean was very familiar with the terms Dr. Harari tested. I felt it important that I take this class with Sean so that he had someone to talk with about what he was learning. I think history lends itself to intellectual discussion, and this provided a way for us to have intellectual discussions about topics I did not know much more about than Sean did.

Volunteering: We feel strongly about volunteering at our house. We have volunteered for an animal rescue organization (http://www.projectwildlife.org/), helping kids learn to speak English in Delhi, India (http://www.crossculturalsolutions.org/), and now on a re-election campaign.

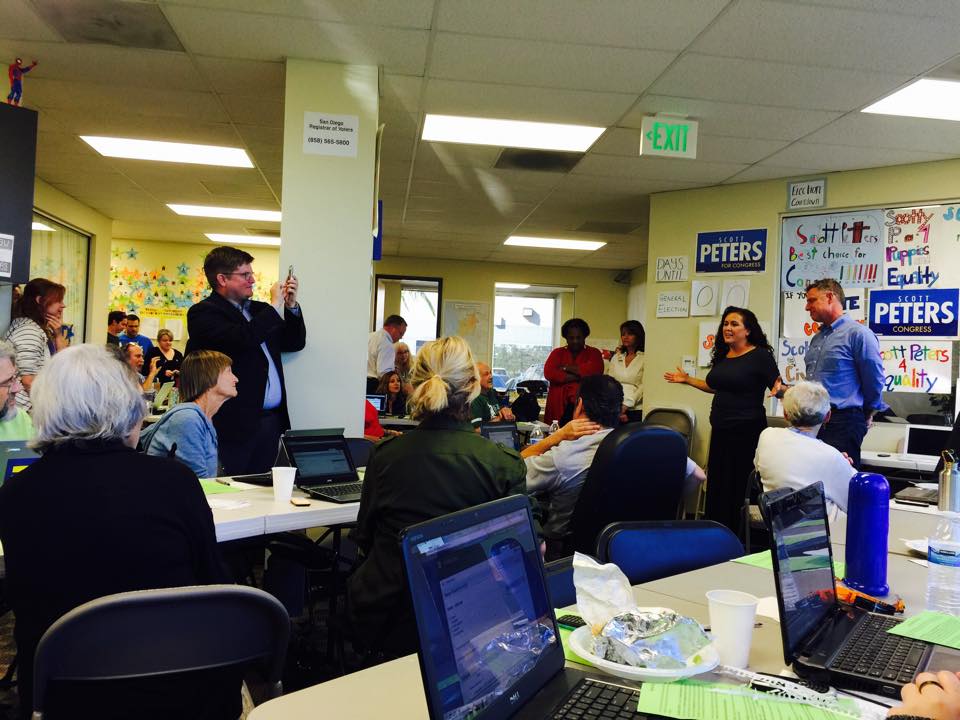
We worked on Scott Peters re-election campaign.
History: We worked on Scott Peters’ re-election campaign.

Every election cycle we include the election in our history. I have been corrected by some people that politics are civics not history, but I do not agree with that distinction. Aren’t our political choices a big part of what drives history?

We feel strongly about voting at our house. I think it is important to raise Sean in an environment where he is aware of what is going on in politics. I am raising a voter. I am also trying to raise him to be a critical thinker. I am not looking for him to agree with me on everything, or even vote as I do. I want him to come to his own understandings and beliefs about what is the best course. Democracies work best when all citizens vote. The issues and candidates you support might not win every time, but you will live in a more equitable and peaceful nation, because the majority of the people living in it voted, which means the majority of the people spoke about what and who they wanted for their nation.

I could not wait to vote as I approached the age of 18. I grew up in a family whose members voted, often for different parties and differently on issues. We discussed our reasons, we talked about the issues, and we did not let it become divisive when we disagreed about them. I have voted every voting cycle since I was 18 years old, except for one when I could not make it to the polls in time. I want Sean to take voting as seriously as Jim (my husband) and I do.

Sean is listening to the candidate speak.
History: Sean is listening to the candidate speak.

I think the best way to make sure Sean cares about voting and the issues facing our country is by participating in the process. This year Sean, Jim, and I volunteered on the campaign for a candidate running to keep his house seat. We watched the debates, learned about the issues, and paid attention to the results of the election. It made a difference to volunteer for a campaign because we were much more vested in the results.

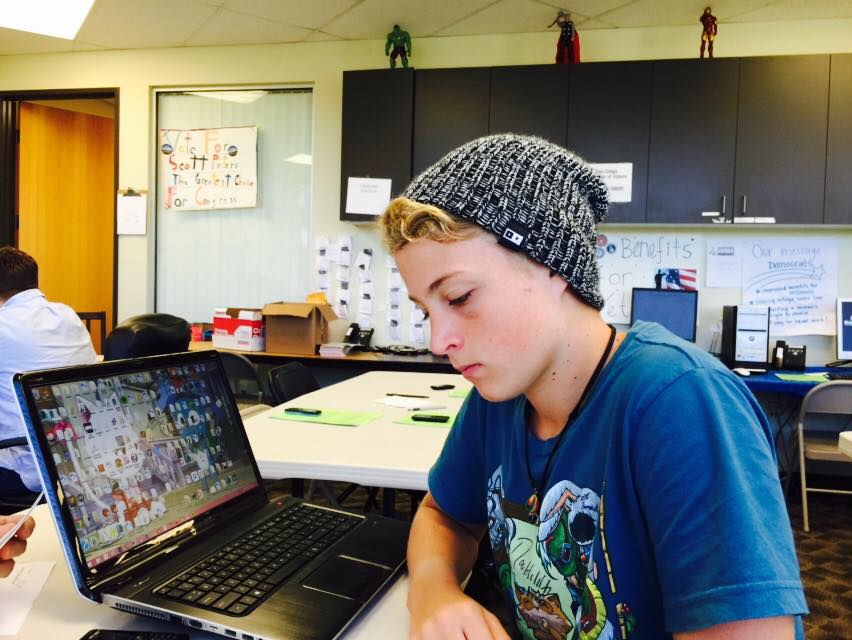
Sean is working the phone banks. This was a tough job. Most people do not want to speak on the phone to strangers about their political choices.
History: Sean is working the phone banks. This was a tough job. Most people do not want to speak on the phone to strangers about their political choices.


Check out our post on handcrafting science here.


Handcrafting High School: Year 1, The First Four Months: Science

Science: A Parent’s Passion

        I LOVE science‼ My son likes science. This is the main area of handcrafting Sean’s education that has focused on the passions of someone in his family besides him. (My husband’s and my other passions are shared by Sean.) I am a scientist, and I know a lot of science. Even though he doesn’t have my strong passion for science, my son is good at science. He has had the benefit of a good science education. I am a passionate proponent of people learning how the natural and physical world works. I do not think of science as an ancillary subject, and I believe strongly that the treatment by our academic institutions of science as ancillary has led to a lot of the problems our world is facing right now.

Stars are being born here. This is from the Hubble Telescope. It is easy to understand how captivating it is to study astronomy.
Science: Stars are being born here. This is from the Hubble Telescope. It is easy to understand how captivating it is to study astronomy. Photo from, http://hubblesite.org/gallery/album/

I want to come clean with you; I did something I caution other parents against doing. I am using my middle school science textbook for high school. I made sure Astronomy and Earth Science was far enough along so that I could use it with Sean this year. Let me start by telling you, it is a middle school text. I am beefing it up by adding more math to it, having him write regular lab reports, and having him read relevant periodicals, books, and on-line articles to go along with the weekly theory, but I am not significantly changing my text. I am calling this course Applied Chemistry and Physics, which it is, on Sean’s high school transcript to make it easier for the colleges where he applies to recognize the coursework this class entails.

It might make me sound a bit like a control freak (I am not btw), but here are my reasons for using my text even if it is a middle school text. My choices of texts and courses are severely limited when it comes to those that are sold to the homeschool community because:

  • I will not use a course that excludes or misrepresents scientific facts, principles, models, or theories that are considered core ideas in the field. I am a scientist. I am not going to play silly games about what constitutes good science. I care too much about it. It pains me to admit it, but most of the science materials developed specifically for the homeschool community play this game of omission and/or misrepresentation with many of the core established understandings of science. When I see this it is a signal to me that the person responsible for the material does not have the same passion I do for teaching people how the natural and physical world works, and I just cannot use their stuff.
  • I find many public school texts available for homeschoolers to be dry, arcane, and full of advanced topics without enough grounding in the foundational fundamentals.
  • Many texts have an inadequate or thoughtless pairing of labs with the theory.
  • Often with public school texts, there is just too much material to get through in a year, with too much emphasis on facts that could easily be looked up using your phone (which is what we all do!).
  • Most public school texts assume the material is going to be taught by a teacher, so the fit isn’t easy if you are not prepared to teach from it. And even I would rather not put together a yearlong series of lectures for just one student from someone else’s text. That is one reason my texts are written to the student as a really complete series of lecture notes. (That is how I think of my texts.) I consider each chapter in my text to be one (occasionally two) lecture’s worth of material written in a conversational manner. It is also why the Teacher’s Guide has a Text Review. Those would be my lecture notes if I were teaching from my book. It is much easier for me, the author, to write the lecture notes, than for parents who are using my texts.

This does make me sound like a control freak about science doesn’t it?!? LOL!

I have my reasons for using my text, but even so, a year ago it would have made me nervous to use this course for high school. Then two unrelated events happened that made me take a harder look at the science many consider high school level.

  1. I signed Sean up for a science co-op class to take along with this one. The class met the University of California a to g requirement for a high school science class. The class only met once a month! The labs did not seem to be carefully paired with the theory. They felt more like a hodgepodge of laboratory techniques crammed together. I concluded that if this class met the UC System requirements, then we were doing above and beyond that with my middle school courses.
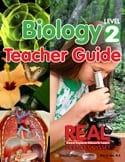
  2. Early in the 2014/2015 school year, I was contacted by a parent who is using RSO Biology 2. They had recently moved to New York State. Here is her statement from a review she wrote about RSO Biology 2 on Amazon, “I’m now using this book to teach a science co-op in NY. According to the White Plains school district, the labs in this book can be used to qualify for the biology/living environment Regents Exam.” In a separate email, I learned that to graduate from high school in New York State you must take certain classes and then pass the Regent’s Exam for those classes. After reviewing the material in RSO Biology 2, the White Plains School District told the homeschooling parent that as long as they saved the records from the biology labs this course would satisfy the high school requirement for a year of biology/living environment. The irony was the parent was not trying to get them to approve this as a high school level course. Her daughter was in middle school. When she moved to the White Plains school district they wanted to look at the materials she was using before giving their approval that she could homeschool her daughter! She shared the topics and labs from RSO Biology 2 to get them to approve this book for use in middle school. Instead the school district approved the book for high school (and middle school). Her daughter and the other students at the co-op are getting credit for both, I guess. there was also a comment in a similar vein from a different reviewer on Amazon. This is a quote from their comment, “P.S. I suppose I should mention that before this program, he scored in the 69th percentile on science (7.3 GE) according to a national, standardized test for fifth-graders. This year he scored in the 90th percentile in science (13+ GE) on the same national, standardized test given to sixth-graders. What does that mean? It means he’s got mastery of the content more than anything.”
RSO Biology 2
Science: RSO Biology 2 http://www.pandiapress.com/?page_id=82

When RSO Biology 2 first came out, people contacted me about using it for high school. My standard response was that it was not written to be a high school level text and there were things that were left out that I would have included in a high school level course. For example, I left out the electron transport chain during the discussion of photosynthesis. I left out a probability exercise showing the number of different combinations of chromosomes that can be made during meiosis and then recombined at fertilization for two diploid organisms with 3 chromosomes in their karyotype. (I did write this though. My publisher wisely had me remove it. It really was advanced even for most high school students. 😉 ) There would be more chemistry woven into the biology. Next school year Sean will study chemistry. I will have to make sure he gets the important biochemistry then.

I spent some time thinking (mildly obsessing my husband and publisher would say, LOL!) about the situation with the Regent’s Exam, and I think I know why the school district felt RSO Biology 2 qualifies as a high school level course. Good science programs are moving away from a focus on memorizing facts and to a focus on science practices. In most cases, the basic concepts and foundational fundamentals are the same for a high school and middle school text. Maybe middle school courses do not check every single box for the more complicated concepts, but there is no way for middle school and high school students to practice most of the more advanced concepts anyway. Very few texts have a strong focus on the application and practice of the science concepts being taught. RSO Biology 2 (and Astronomy and Earth Science 2) have that as a primary focus. There is a focus in these courses on learning the foundational fundamentals and then applying them. A focus on the application and practice of science concepts and foundational fundamentals translates to a focus on using the scientific method in a meaningful way, the way scientists actually use it.  It is one of the reasons I have students make their own slides in RSO Biology 2. If you buy prepared slides, you will get a better view of the specimen than if you prepare your own slides. I guarantee it! But if you do that you will never become good at making slides, and studying science should not just be about looking at what others have done. Studying science should include you interacting with the natural and physical world to come to a better, more complete understanding of how it works.

Science
Science: Lunar eclipse, 10/7/2014

I would have used Astronomy and Earth Science 2 even without these two things happening, but I would have obsessed more, making sure I covered the specific facts I am leaving out of the middle school text that I would not leave out in a high school text. I have a confession to make about last year too. I used my biology text as a high school level biology course in 8th grade. Sean wanted to do biology again in 8th grade. The sequence for Sean’s science during middle school was 5th grade: middle school biology, 6th grade: physics, 7th grade: chemistry, 8th grade: high school biology. He hasn’t had astronomy or earth science since 2nd grade.

So far this has been a great year of science. The sequence of topics in the text is astronomy, geology, hydrology, the atmosphere and meteorology, and environmental science. Sean has only gotten through the astronomy portion. Sean is loving science this year. Astronomy has really captured his interest and imagination. I have to be careful when Sean looks at the supplementary videos and articles, because he can lose a day that way. Not that I mind, it is just that I have to make sure there is nothing pressing when he starts science!

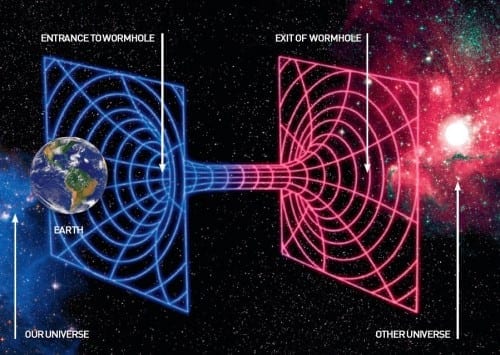
The Parallel Universe Theory has captivated Sean's imagination.
Science: The Parallel Universe Theory has captivated Sean’s imagination. Illustration from, http://www.tip-day.com/parallel-universe-myth-reality-new-hypothesis/

In addition to using my course, Sean has read the following:

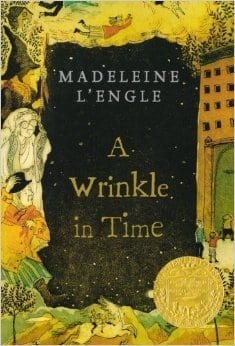
A Wrinkle in Time
Science: A Wrinkle in Time
  • A Wrinkle in Time by Madeleine L’Engle – The reading level was a little young for him, but I coupled the reading with a discussion of Einstein’s Theories and how there could be “wrinkles” in time. (A topic that isn’t too young for him or anyone else!) Sean loved this. In addition to his studies, he has taken the time to learn MUCH‼ more than I know about parallel universe theories!
A Brief History of Nearly Everything
Science: A Short History of Nearly Everything
  • A Short History of Nearly Everything by Bill Bryson – This book along with my course, I feel, took Astronomy and Earth Science 2 up to the high school level! Sean has loved parts of this book and been lukewarm about others. I should probably state here, my son will enter college with a level of science that will enable him to do well in his science courses. Sean knows more science than most adults, but most adults do not have much science knowledge. Unless Sean changes his mind, Sean’s focus in high school science will not be at the AP science level. If your student’s focus is at the AP science level, this is not a rigorous enough course for you. But because of the focus on the foundational fundamentals, Sean is able to make connections across the science disciplines that are deep and nuanced

.

The Martian
Science: The Martian
  • The Martian by Andy Weir – I read this book in two days. It took Sean a week. This book is science, science fiction, action, and a nail biter. Each day that Sean read this, I had him email me a writing technique he noticed and liked that the author had used, I also had him email me 1 science fact from the book.

I know many of you want to get your hands on this text NOW!! I am peddling as fast as I can, I promise!


Check out our post on teaching computer science in home schooling high school here.


Handcrafting High School: Year 1, The First Four Months: Computer Science

Homeschooling Coding: A Student’s Passion

        I have been very thoughtful handcrafting this academic area. I will go through the process of how I did it, so you can see what I mean when I say I am handcrafting Sean’s education. I do not know much about coding, so when it comes to homeschooling coding, I have had to rely on others for how it is best learned and advice on the best course of study. Because of this, I think it will make it more meaningful for you to see how I went about handcrafting this area versus a subject area like science.

Why this has a central place in Sean’s core education: I think computer science, coding, should be mandatory and not treated as an elective. I pay a lot of attention to current events, academics, and how both should be merged for Sean’s education because of where the world is headed. Based on my observations, learning to code should not be treated as optional! At this time, no other academic discipline leads to as many different options for meaningful career opportunities. Traditional schools as a whole are behind the ball on doing a good job of teaching this too. You almost have to homeschool if you want your child to have a good education in computer science.

Three years ago, I bought a canned curriculum designed to teach kids to code. Sean hated it. I made him stick with it for 6 weeks. He never stopped hating it, so I let him quit. But I never stopped believing that learning to code was so important he would have to study it again at some point.

Homeschooling Coding: This is the high score from a game Sean designed. He decided playing games was more fun the designing them.

Two years ago Sean told me he wanted to learn to design computer games. Yeah! His interest was piqued‼ This was where it all started. I found a camp he could go to for two weeks during the upcoming summer focused on designing computer games. I also got lucky at about the same time. I was on the lookout, you see. I read an article in my alumni newsletter about a group at UCSD that was starting a Sunday program where kids could go and learn coding. The name of the group is ThoughtSTEM. Sean began attending the Sunday ThoughtSTEM sessions. He also went to the summer camp and learned, as he told me, “It is more fun to play video games than to make them.”

ThoughtSTEM  http://www.thoughtstem.com/home

      All along I immersed him in everything ThoughtSTEM had to offer. I made a point of talking to the people running it, emailing them when I had thoughts or questions, and getting the most I could out of their program for Sean. They became Sean’s and my mentors for how to learn coding. The take home message here is that I thought it was important for him to learn coding, so I worked hard at making it happen.

Homeschooling Coding: Sean at ThoughtSTEM with his pug Jez.

Sean took a high school level class through ThoughtSTEM last year in App Development. He also went through an internship program with them, where they trained him to teach young kids to code. He interned 1 week at a camp in the spring and 1 week at a camp in the summer for them. He participated in a coding faire they put on at UCSD. This year his training turned into a job. Sean works about 9 hours a month teaching coding to kids.

Throughout the 2013/2014 school year, Sean worked on designing websites with ThoughtSTEM. He also learned Photoshop and 3-D design with Maya and 3-D Studio Max. These last were not with ThoughtSTEM; they were through other programs. I learned that Sean likes to code and work with computers to create art.

The focus of this year: This summer I asked our mentors at ThoughtSTEM what they thought Sean should study for the 2014/2015 school year. They suggested Sean learn the foundational fundamentals of coding. Things like algorithms. (This is very ironic if you follow my science posts.)

I talked to Sean about how he wanted to proceed with this and he wanted to learn how to code C/C++. I did some research and decided the best way to make this happen was to put him in a series of coding classes at UCSD Extension. I decided on an extension, not a community college, because the extension classes are 3 hour classes once a week over 9 weeks. That fits much better with our schedule than 2 or 3 times a week over 16 weeks as is the schedule for most community college classes. I signed him into the first of a 5-course series to learn to code C/C++. The first course was called, An Introduction to Computer Programming with Java.

A hoop to jump through first: When I contacted UCSD Extension they told me he could only enroll if a counselor or other administrator from our school district okayed it. They would not take my word that he was ready, even though the only prerequisite was access to a computer with an internet connection. I explained that I was the sole director, administrator, and educator at our home school, and the only person from his “school” who could substantiate that he was ready for this class was me, his mother. They actually told me I was incorrect, and that by law I must be working with someone from the school district where we live. I knew they were incorrect, but I wasn’t sure how to respond. I gave it some thought, because homeschooling coding was going to happen this year! Luckily, I contacted a state homeschool group I am a member of, The Homeschool Association of California (HSC) http://www.hsc.org/home-page.html for advice. They forwarded the issue to their legal department, and within 12 hours an attorney sent a letter to me to forward to UCSD Extension. In addition to them being incorrect about how homeschooling works in California, they were discriminating against Sean because he was homeschooled.

My message to you is, have a state homeschool group you can go to. If you had told me that I was ever going to need legal help at any point while homeschooling Sean, I would have thought you were nuts! But guess what, I did. Thank goodness I had someone I could go to. There are two great homeschooling groups in California, HSC and California Homeschool Network (CHN) http://www.californiahomeschool.net/. I am a member of both. It was also good that I did not give up. I did not get mad at UCSD, but I did stick with it. I wanted to put Sean in that class and I worked at it until he was in. http://extension.ucsd.edu/

Some surprises were in store: Sean was in! Now for the real work. This was a college class. It didn’t occur to me, but Sean did not know that you should take notes, ask questions in class, or use the book and highlight the text or make notes in the book. I had to work with Sean so he learned these skills while he was taking the class. Also, he was intimidated by the fact that he was the only person under the age of 22. Sean thought all the people were between the ages of 22 and mid 40’s. I do not know. I never went into his class with him. He would only ask the instructor questions via e-mail, which bugged me, but did not seem to bother his instructor.

Homeschooling Coding: An image for the game Sean has been writing the code for.

As I told you earlier, one of Sean’s passions is coding to make art. He loves to design web sites. He does not love to code to make programs that are not visual. For him, Google Doodles are captivating; writing a program to calculate the tip and change for a restaurant bill is not. This class was work for him because it focused on the areas that he is not passionate about. At one point, he told me he was done with coding after this class. My response, “Darn, just when it stopped being optional.” That to me is the heart of child-led learning. My child’s passion and my own belief that homeschooling coding was important led us here, but when he stopped being passionate about it, I did not let him walk away. Like I told him, “If I thought when you were 30 you were going to say it was a mistake to stick with coding at the age of 14, I would let you quit. But you won’t say that. I am sure of it.”

Sean is a little more keen on this class now. He graduated the class with 104% in it. He worked hard and got an A+. The teacher sent him an email congratulating him, telling him, “He had succeeded where others had failed!” Do not get the wrong impression that Sean is particularly gifted at this. I just made sure he had the time to work on the programs and get them debugged and turned in before the due date. No procrastination was allowed. When he got stuck he emailed the teacher and got the help he needed.

In case you are wondering, I am not using this class so that Sean can attend college early. Sean will attend college in 3 ½ years. I just couldn’t find any good classes to teach the foundational fundamentals of coding outside of a college setting. I had to find a class for this because I did not want to learn computer programming. 🙂

The plan going forward: Sean has 4 more classes to take focused on programming with C/C++. At the end of that, he will earn a certificate in Programming with C/C++. http://extension.ucsd.edu/programs/index.cfm?vAction=certDetail&vCertificateID=23&vStudyAreaID=14 He will be finished by this time in 2015. In 2016, he plans on starting a series of classes to earn a certificate in Graphics and Digital Design. (He will get back to his passion after picking up some foundational fundamentals!) He will complete the C/C++ Series. I am treating those classes as a mandatory part of his core classes. It is through this series that he will learn the foundational fundamentals for computer programming. It is just one language, but that seems to be how it works with computer science. The Graphic and Design classes are planned but can be changed if Sean finds another area of computer related courses he would rather take. This sounds good to Sean now, but we will have to see where he is at a year from now.

When I read over this post, it seems messy, wandering, and a bit chaotic. I was going to shorten it and clean it up for readability, but decided to leave it so you would get a feel for the messy, wandering, chaotic process I use for handcrafting Sean’s education. This process is the journey, and it is a very personal one. We tried some things that worked better for him than others. Some of the things we tried took fortitude and hard work before he liked them. Some things he loved so much he had trouble tearing himself away from them. Some things he never liked. There is simply no way of knowing before embarking on the journey what it will look like while you are taking it. So far the journey has led to a place where Sean has completed a college level computer coding class in which he learned a lot of the foundational fundamentals of coding, and he has a part time job working in a field he loves. Who knows where it will lead from here, he is still on the journey. This is the academic area he is the most passionate about, but only specific parts of it. He is 15. Who knows where it will lead. And that’s okay, as long he enjoys the journey!

Read our handcrafting high school article for math here.


Handcrafting High School: Year 1, The First Four Months: Homeschooling Math

Homeschooling Math: How a Weakness Became a Strength

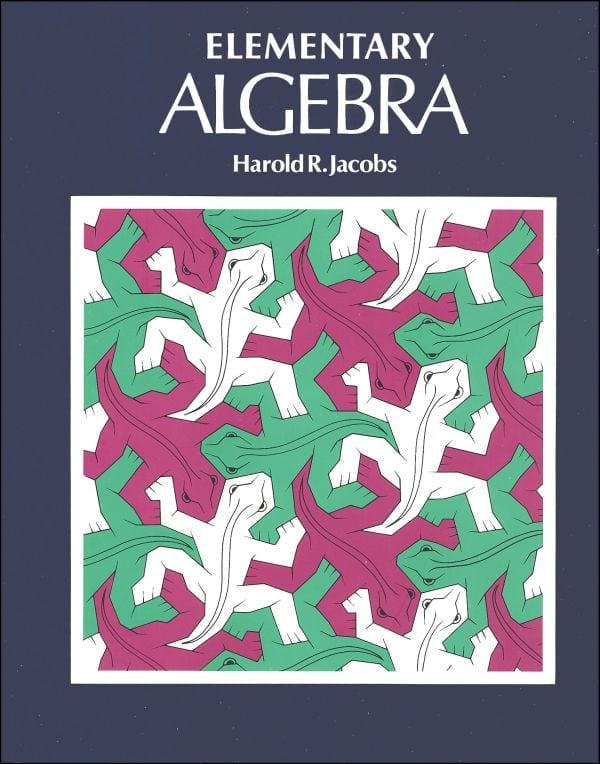
The Textbook: Harold Jacobs Elementary Algebra: This text is well thought out and thorough. It is the best high school algebra text I looked at, especially if you have a child who might be taking advanced math classes, such as calculus, in the future. Math is a strong suit of mine though, so I am not sure it is the right course for homeschooling math for a parent who is not strong in this subject.

Homeschooling Math
Homeschooling Math: The Algebra Course we are using for 9th grade.

My son always felt that he was bad at math until this year. Math has been the source of so much frustration for the two of us! I could see that he was good at the high level thinking side of math. Where my son struggles is the simple arithmetic side. He also struggles with spelling, but not the rest of language arts. I bet there is a connection between these two, spelling and arithmetic. Maybe they use a similar cognitive path?

We have worked long and hard again and again on simple math facts. They just do not stick with him. This summer (2014) we used the on-line program CTC Math, and that helped with this more than anything else we tried, but it did not entirely solve the problem. (If math is not your strong suit, give CTC a look. We liked it. My son loved the Australian accent.) We moved to Elementary Algebra in September, 2014 because Sean needs help from me in math. I find it much easier to give help if there is a text we can both refer to. I have yet to see an on-line course that makes it easy for the parent/teacher to refer to or use when the student needs additional help. FYI, overall I am not a fan of on-line only programs. Don’t let my bias affect you though if you like them.

All went very well, except for the occasional calculational issue. They were better, but still a source of frustration. I was at a park day and started up a conversation with a person who runs homeschool math co-ops and tutors math. I told this story to her and she said she sees this with homeschooled kids sometimes. She gave me the advice that turned math around for us. She suggested I buy Sean a good calculator, one he could still use in college, and have him use it for calculations! The SAT allows calculators, so why not! Overnight, using a calculator, Sean began acing math tests and homework sets!

I am a bit conflicted about math (even though it was and still is my absolute favorite subject). I think math is taught to the detriment of other subjects because it is the most easily testable subject, and that bothers me. There are only so many hours in the day, and I truly believe there should be less time spent on math and more time spent on learning the craft of writing, learning how the natural and physical world works (AKA science), and computer science. I have voiced this to several friends who work in the public school system and they agree with this assessment. But if you think your child might go to college, especially if they are interested in computer coding or science, including medicine, make sure they get the math they need. When I was attending and then teaching college there were two disciplines I observed that weeded students out, keeping some people from realizing their dreams of an intended career. They were math and chemistry! I actually had a friend who was a theater major at San Diego State who ended up dropping out without her degree because she could not pass her math classes. A year of college algebra was the only thing that kept her from obtaining her bachelor’s degree.

Check out the first post in this series here.


Handcrafting High School: Introduction

Handcrafting High School

Handcrafting High School: Year 1, September, October, November, December

         I am the homeschooling mom of a recently turned 15 year-old. I have been handcrafting his education for 9 years. The thing about handcrafting is that there are continuous tweaks to be made. Since I am in the thick of it, I am figuring it out as I go along. I am not sure what these posts will look like. Handcrafting high school will take a lot of planning, much of it to be done as we go along.

This is the first of a series of posts about what we did for the first 4 months of the 2014/2015 school year. I had planned on this just being one post but each core subject has its own story. As I wrote about each one, this post became longer… and longer… and way too long for one post, so I am going to give each of the core subjects its own post. Next quarter, which starts January, 2015 has some new classes. After this series I plan on posting monthly through high school. In each post, I will tell you what we have used and done so far this year. There will be occasional tips and advice, use them if they help, ignore them if they don’t.  I will tell you what materials we have used. I will tell you what I think about the materials we used, but if something works or doesn’t work for us it does not mean anything more than that. I have paid for every single program we used. (HMMN, unfortunately – LOL!)

The Core Subjects: Year 1 – 1st Quarter  
Math Algebra
Computer Science Introduction to Programming with Java
Science Applied Chemistry and Physics
Language Arts Spelling, Grammar, The Mechanics of Writing, The Craft of Writing, Reading/Literary Analysis
P.E. Crew (Rowing)
History World History

         For more information about my philosophy of how we learn in our house refer to my previous posts on Handcrafting an Education. This is the run down on the core for this quarter. Sean’s core subjects are what I refer to as the “coffee” in our recipe. If this looks to you like a school at home schedule, in a way it is. How we implement it and the actual work are more innovative, directed, and dynamic than in traditional school. As I have written before, I am not a labels person and I do not like it when homeschoolers label each other. One size fits all… does not! That is why most of us are homeschooling in the first place! What we have been doing this year has worked very

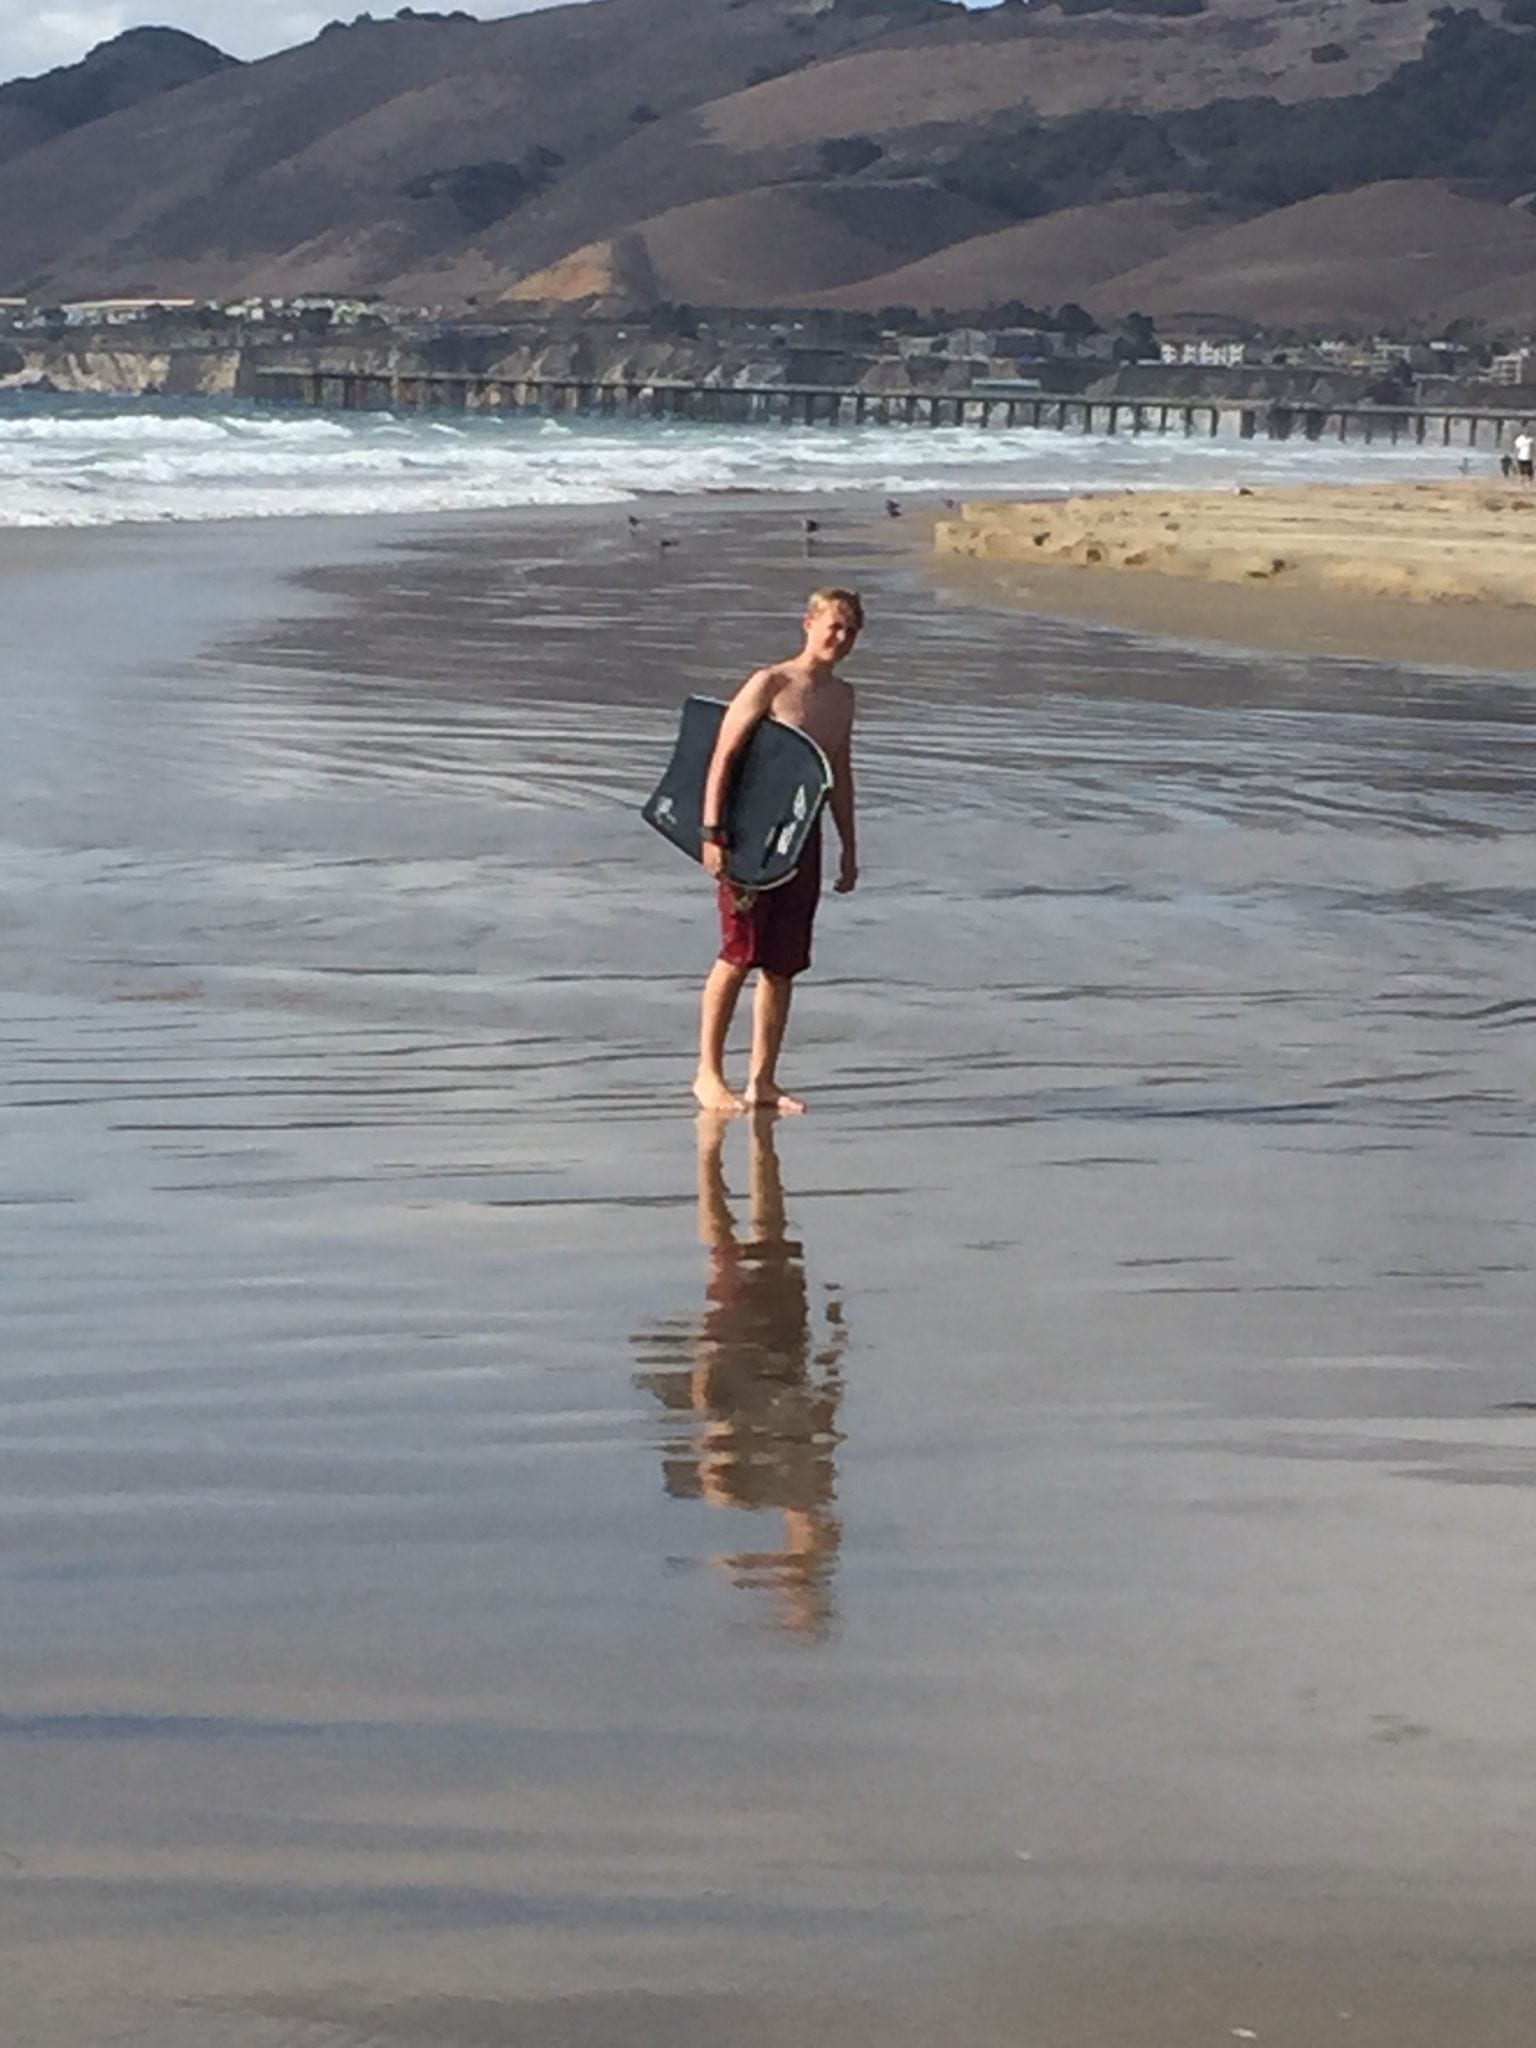
Sean takes time out in October to go camping for a week at Pismo Beach with HSC with over 100 homeschoolers.
Handcrafting High School: Sean takes time out in October to go camping for a week at Pismo Beach with HSC with over 100 homeschoolers.

well for us. That’s all that matters to me.

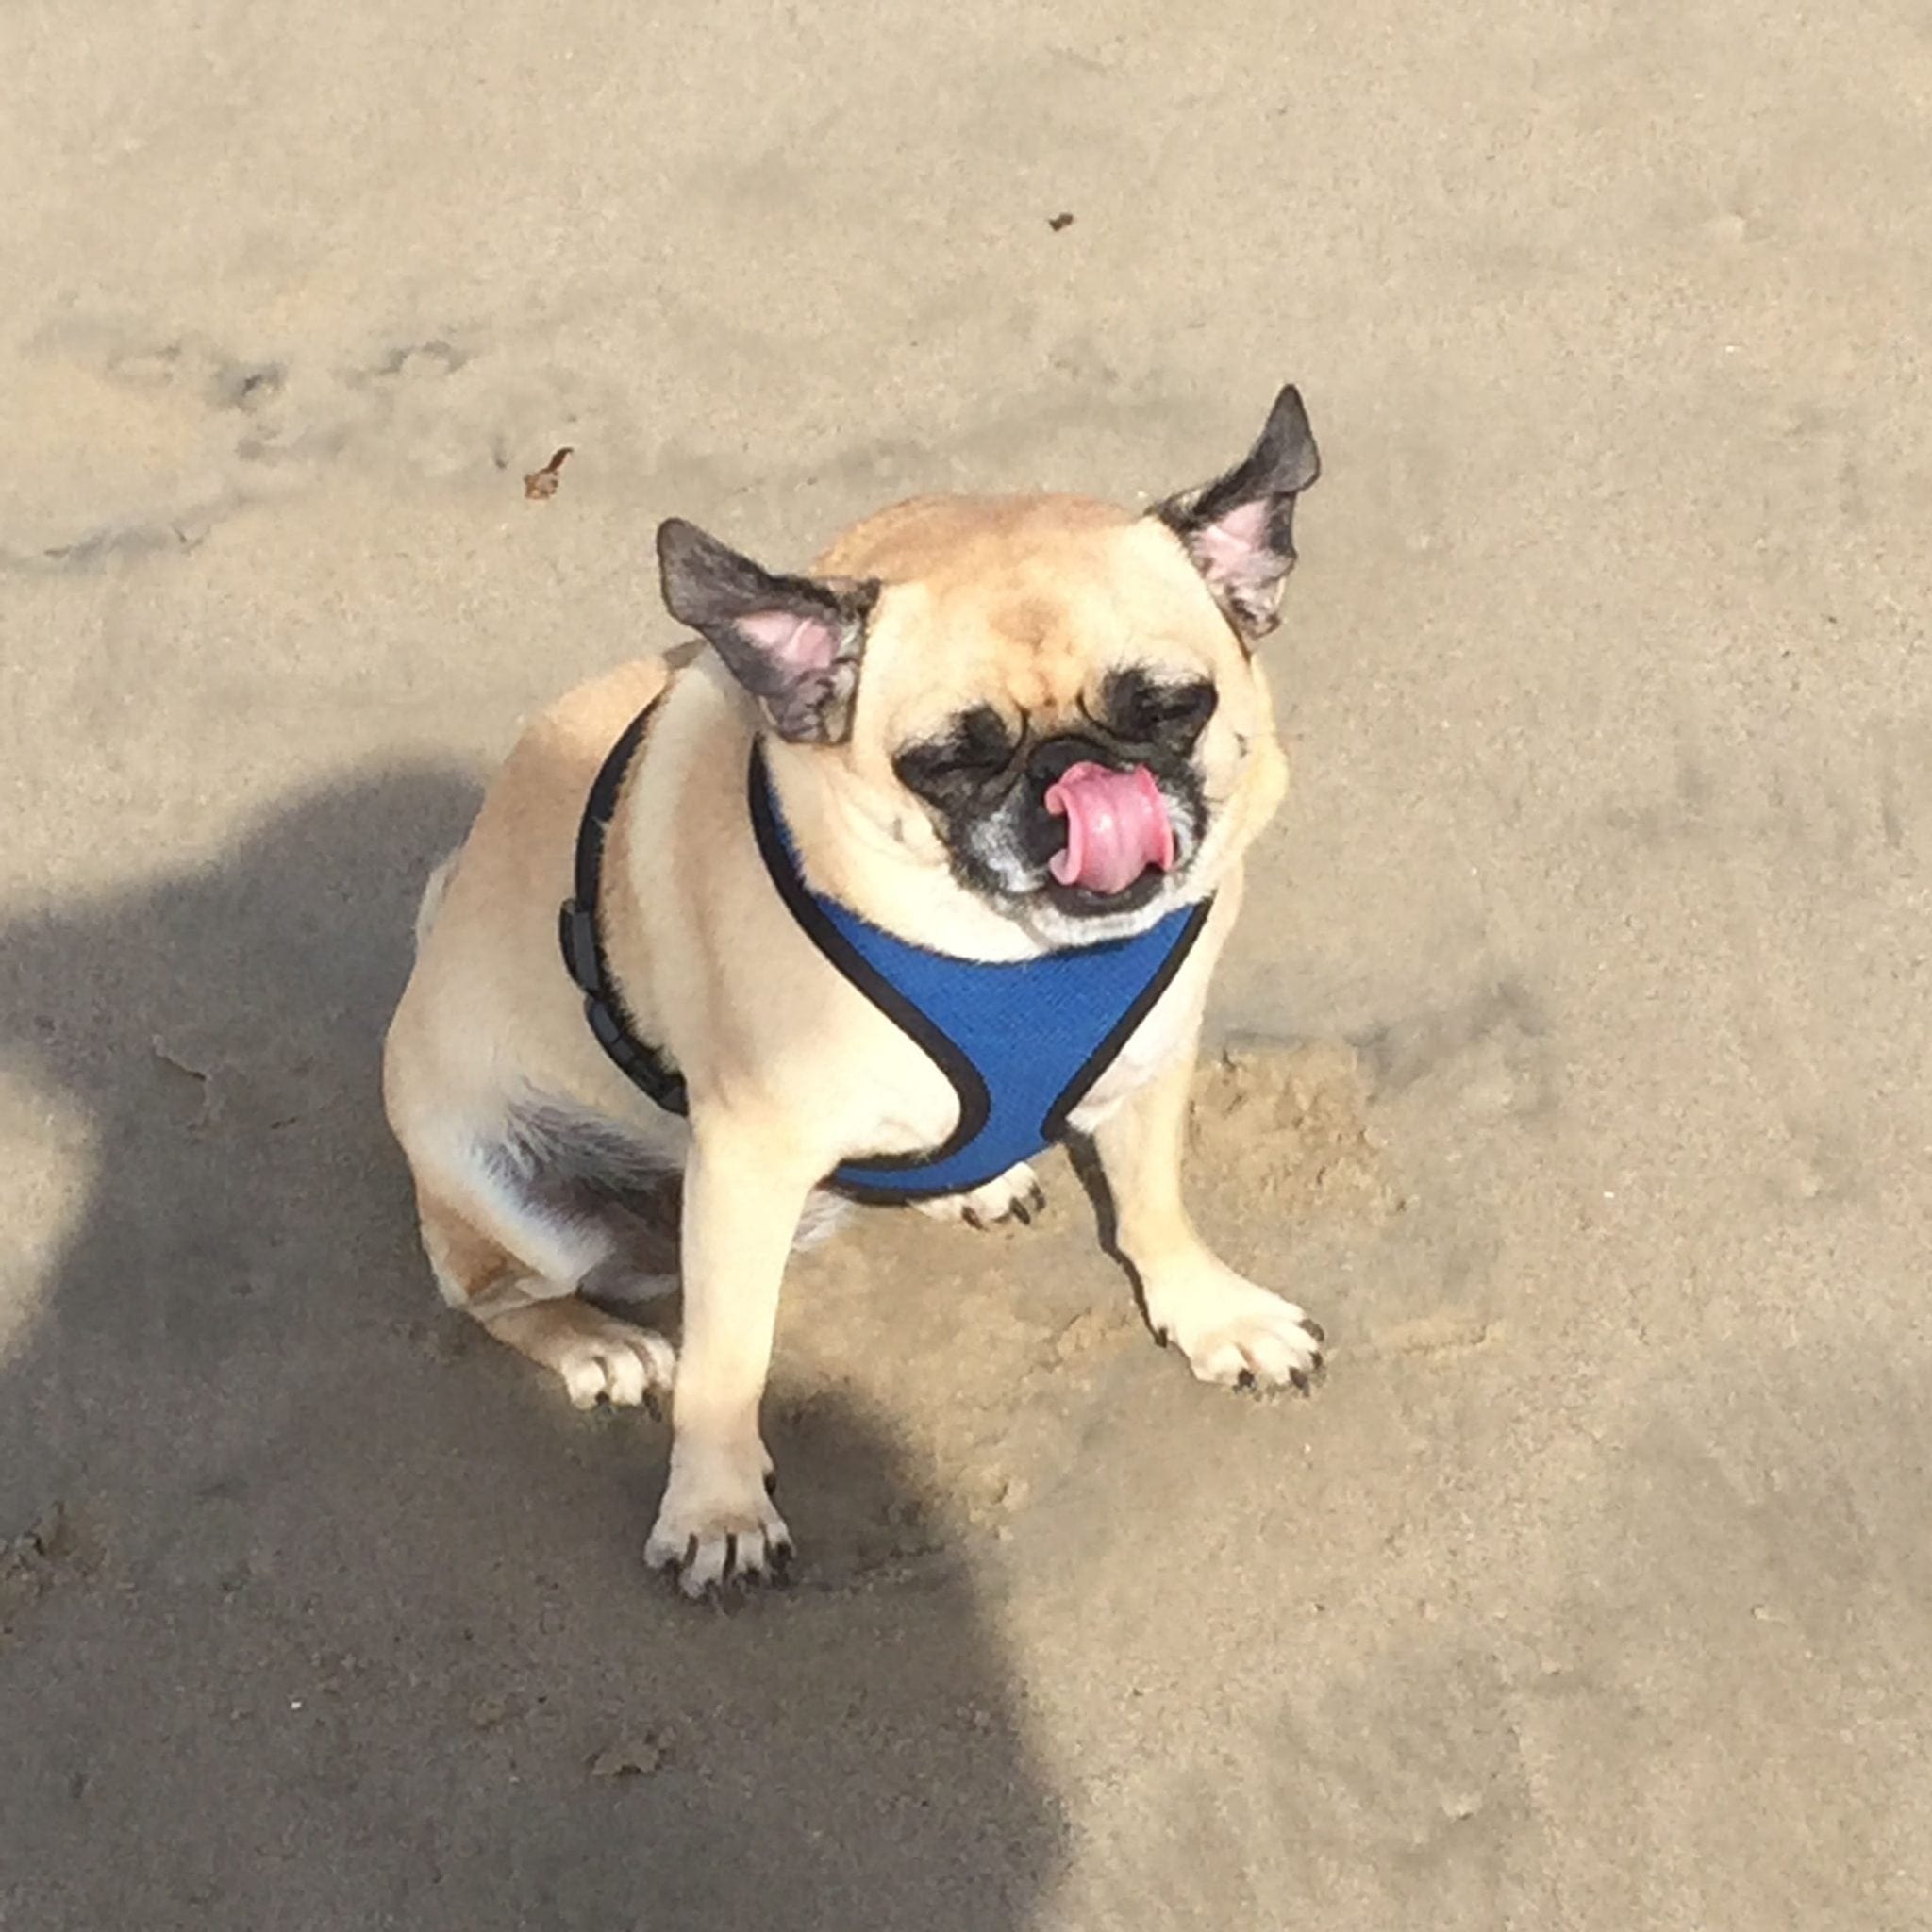
Of course the beloved pug Jezzie came camping with us!
Handcrafting High School: Of course the beloved pug Jezzie came camping with us!

My son works at his academics 4 to 5 days a week. He has plenty of time for field trips, camping trips, hanging out with friends, texting, skyping, playing computer games,

and other forms of socialization. He wakes up between 8:30 and 10 and works steadily at his academics until 2:40 when he gets ready for crew. We often listen to a Coursera class in the car on the way to rowing or he reads. He does not have academics to work on in the evenings after crew except for reading or an evening class he attends once a week.

Record Keeping through High School: I highly recommend you begin keeping track of grades, courses, assignments, and extras (like volunteer work and sports accomplishments) at the start of 9th grade if you think your student will apply to 4-year colleges. It will make your life so much easier 3 ½ years later!

I am not a very good record keeper. Part of it is the sheer number of projects I have going on at any one time. That presents a problem for a parent whose child will most likely be applying to 4-year institutions for college. What a headache if I didn’t get control of it though, I would be stuck trying to put everything together at the last minute! I had the good fortune this summer to be speaking at a conference where the vendor MyHomeschoolGrades.com had a booth. I was a bit skeptical about needing their program when I saw the booth and went home without purchasing it. A few days into 9th grade I decided I needed something for record keeping though, so I called John Echols the owner up and bought the program. I am really glad I did. Not only is it really easy to use to keep track of Sean’s classes and grades, but John has helped me in other ways as well. He suggested I keep track of all Sean’s medal from his crew events on his site so they will be included in Sean’s transcript. He had me go back and put in volunteer work Sean had done in 8th grade. He told me about concurrent enrollment. (No I really didn’t know about it, even though I had Sean in an extension course!) On top of all that the customer service is superb. https://myhomeschoolgrades.com/

Check out our blog about how to teach a homeschool science co-op here.


Learning Science

Learning Science, Secular Science Homeschooling

 Homeschooling and Science

A Winning Combination

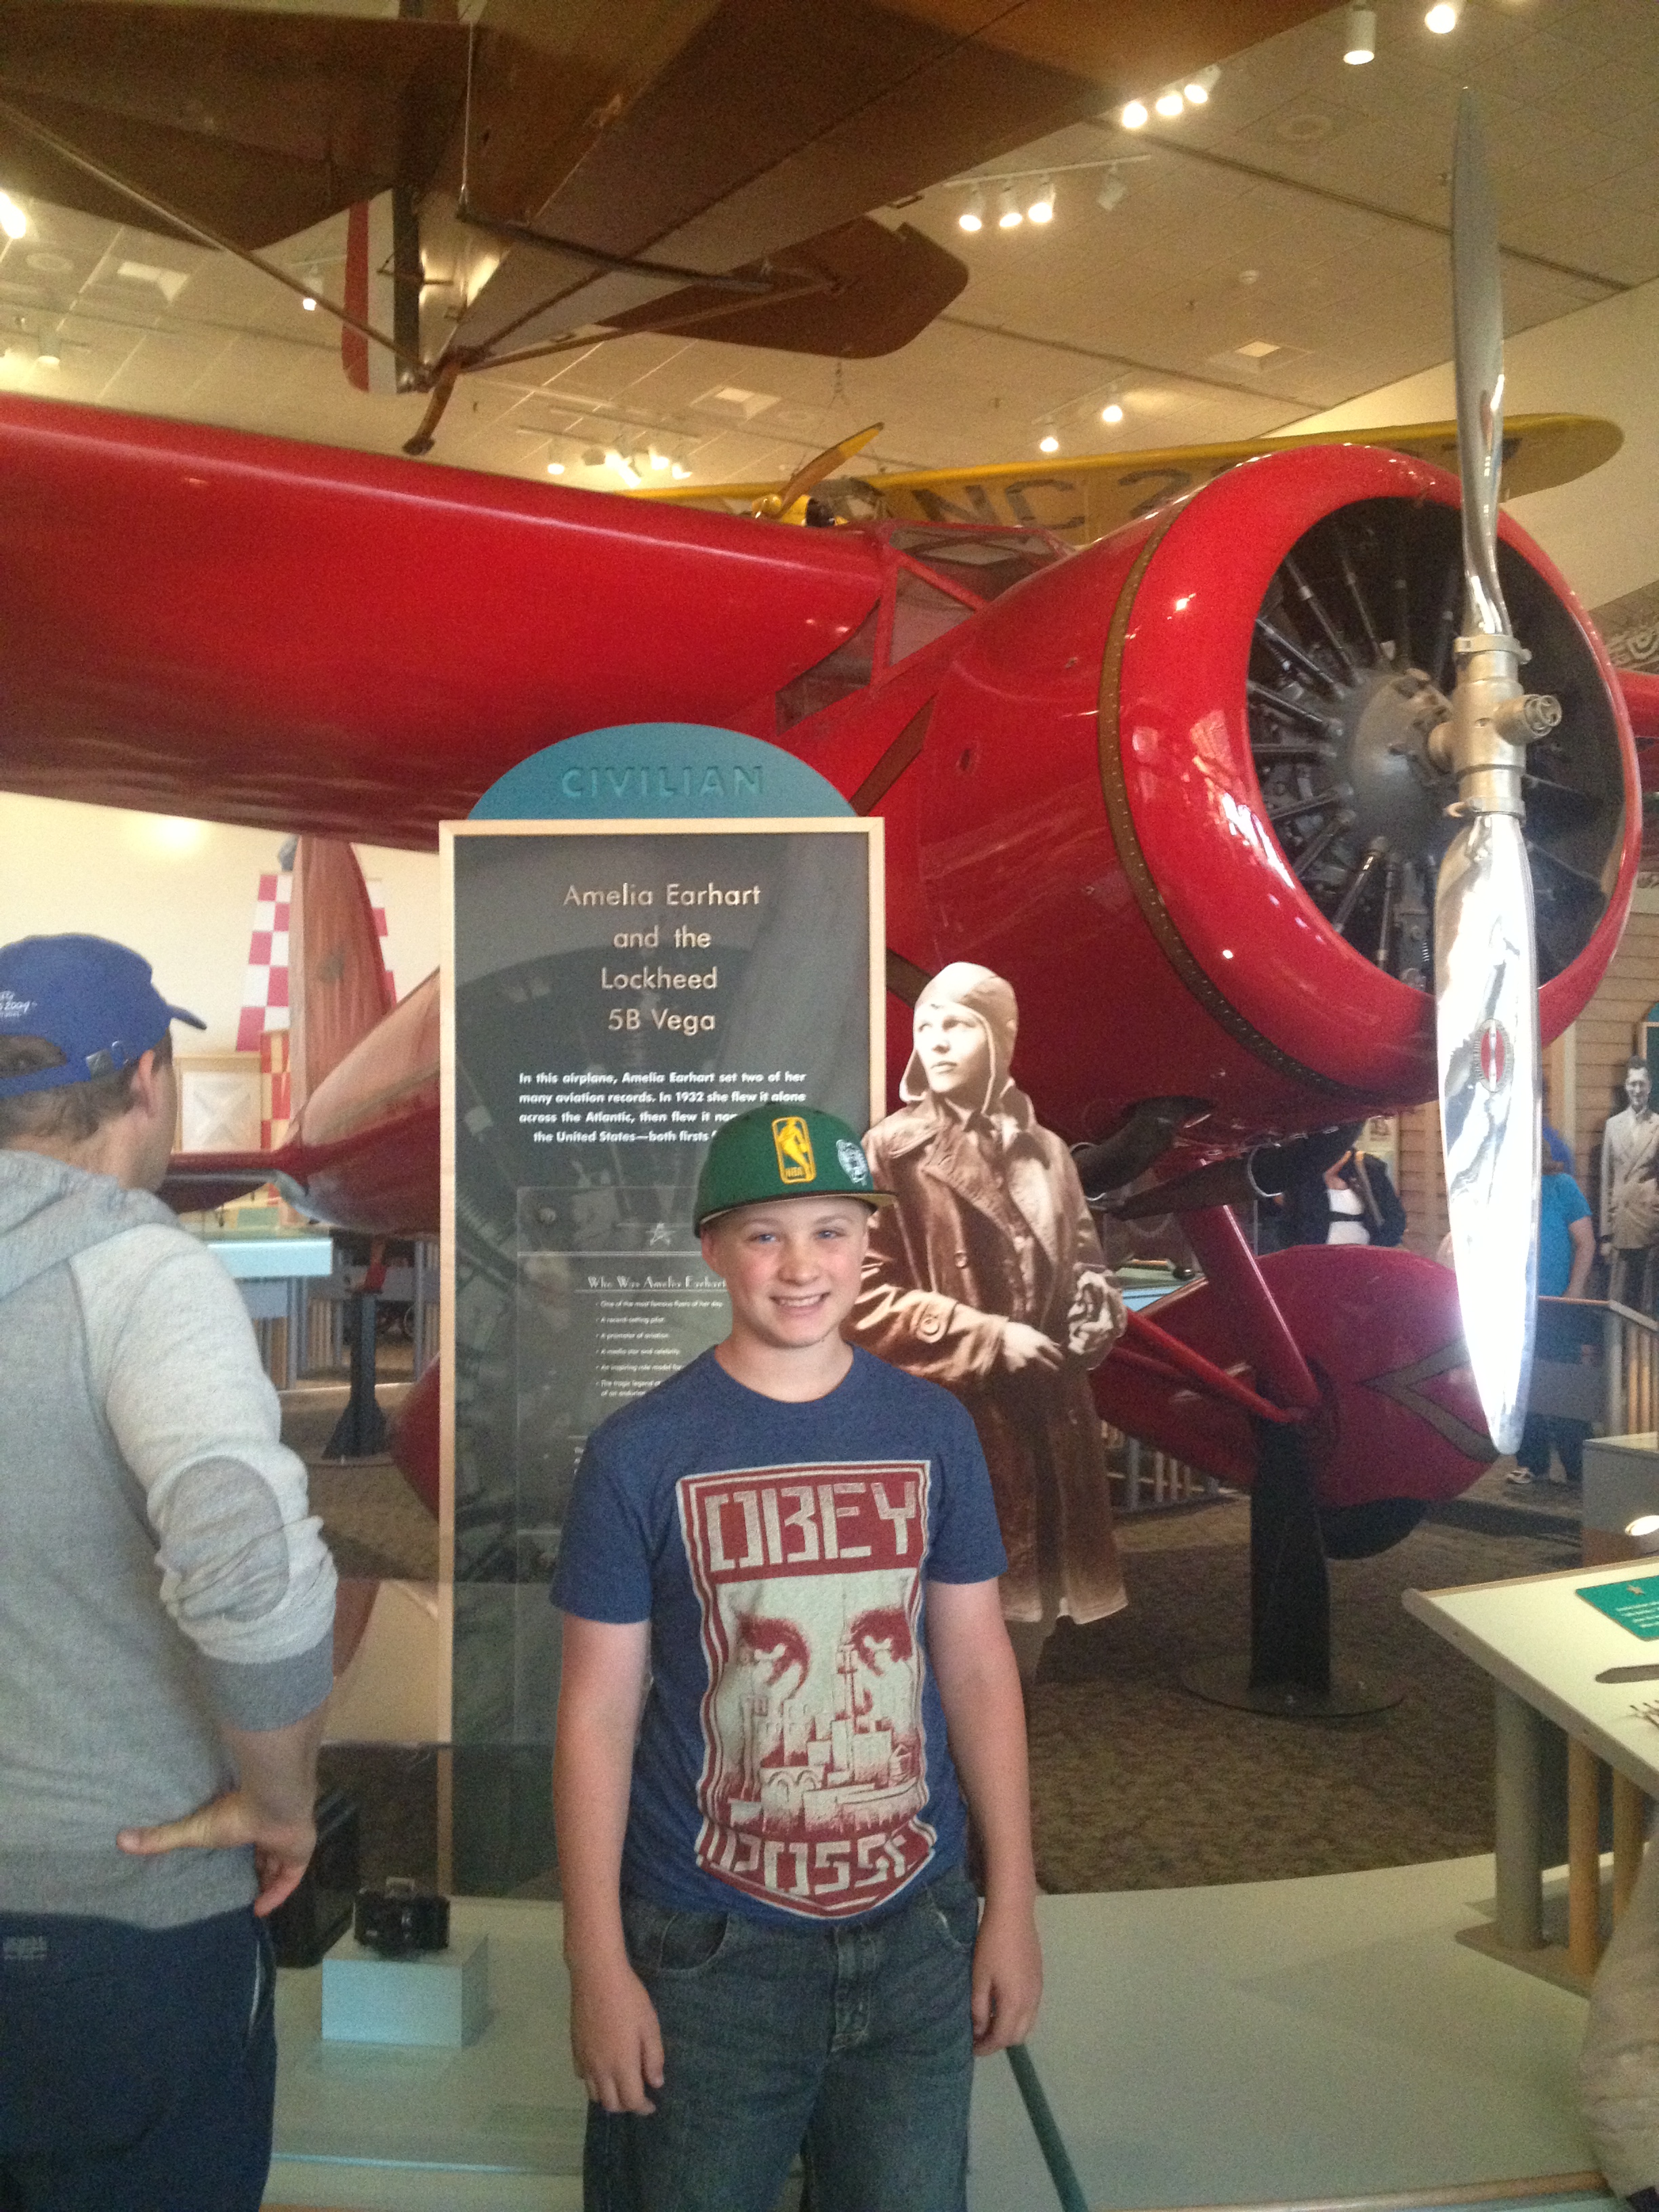
Sean Lee learning about the science of aviation.

I am reposting this article in response to an article in the New York Times. There is a link to that article at the bottom of this post.  The article validates what I am detailing below about how science is best learned!

Learning science is something I have spent 24 years working at in one aspect or another. Today I want to talk about what I have learned over these years educating in various venues and to a broad range of age groups. This is the text from a talk I gave at the California Homeschool Network Convention, CHN Family Expo, in June, 2014.

I was a college professor, teaching chemistry and biology at community colleges before retiring to homeschool my son. I also write secular science textbooks for the Real Science Odyssey series. This is a series of textbooks that have been written primarily for use in a homeschool or small co-op setting. As you can imagine, at our house, we definitely take time to learn science. In the school year 2013/2014, these two areas, facilitating my son’s science education and my textbooks, combined when I taught a homeschool science co-op using the REAL Science Odyssey Biology 2 Course I wrote. I learned some things teaching this co-op. I will touch on some of those things today, but if you want more, you should go to my articles in my blog where there is information detailing what I learned about teaching a science co-op for homeschoolers.

First I would like to ask a question. Have you ever had a great science course? If you have, what made it great? I doubt that even one person thought of a science class that only had reading text and listening to lectures! People approach me all the time worried about the job they are doing teaching science. So many people have had a bad experience in school when it came to science. Those same people want their children to learn science but they do not know what a good science course looks like.

When I think about what a great science course looks like, I recognize that the elements for it are best met with the type of environment we have in the homeschool community, whether in our own home or in a small co-op. I’ve come to understand that the homeschooling environment is absolutely the best environment for learning science.

So how can I say this? There are many people, notable scientists among them (Bill Nye comes to mind at the top of the list), who believe the exact opposite.

Of all academic subjects, science is the one that is the best fit for the homeschooling environment. Why? Because science is best taught where there is the time and space to ponder, research, explore, and get up and experiment. With the right tools and support you don’t need a science degree either. All you need is a willingness and desire to have your child learn how the natural and physical world works.

Start early:

  • Serious subjects are taught beginning in grade school.
  • Why isn’t the subject that teaches how the natural and physical world works serious enough to start teaching early?
  • Starting early allows for more depth and complexity.
  • I hear from people that they can wait to teach science, that kids are not ready to be taught science in grade school. I don’t understand the logic behind this. Science explains how the natural and physical world works. Why isn’t grade school the perfect time to begin teaching science? It’s sad, because kids want to know about plants and butterflies, stars and planets, how cooking works, atoms and energy. Young children are fascinated by these things. I actually think a big part of the problem with science education is that parents are not fascinated by it anymore, and it’s really a shame. Adults are not fascinated by it because their science education was so poor. We as homeschoolers can change that.
  • Recently I volunteered at the Intel International Science and Education Fair, the Intel ISEF. It is a huge international science fair. They consider it a science talent search with thousands of high school students from across the globe competing for a total of $4 million in prize money. I always enjoy myself immensely at these gatherings because it’s the only time I get to sit around with a whole bunch of scientists and talk science. At lunch time I happened to sit down with 6 female scientists. Three of them were, or had been, high school science teachers and one was a community college teacher who taught people how to teach science. We all got to talking about what we did or had done and of course it came to homeschooling science when they wanted to know what I did. It was very interesting. You might think this group would not be proponents of homeschooling. I did. You and I would be wrong. These women had been to many science fairs as volunteers and what they saw, again and again, was that increasingly often the best science fair projects were from homeschooled students. I was told that more often than not the homeschooled kids are the ones that win the science fairs. I was curious to find out why they thought homeschooled kids were doing a superior job of learning and experimenting with science. They said to me that the problem stems from when traditional schools begin teaching science. According to them, science is being taught later and later in schools. This is due to the current state of public education and the testing which affects a school’s funding. Schools pour time and money into language arts and math, because if test scores are low in those areas a school’s funding is cut.
  • Teachers focus all their energy and resources on math and language arts to the detriment of science. If kids are lucky enough to get science before high school it is as a component of language arts. It isn’t science for the sake of science. Now this touches on several things I want to talk about in a minute. But when science is a component of language arts, it’s about reading science. It’s not about doing science and there’s a big difference. It’s why a lot of adults think science is boring. So what happens when you don’t start science until high school is that you have students who come into high school weak in science. Therefore the science teachers have to start teaching at a much more basic level then they were teaching in years past.
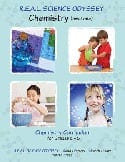
  • If you’re curious to see the difference in levels, go to the Pandia Press website and look at the difference in REAL Science Odyssey Life 1, Chemistry 1, and Biology 2. RSO Life 1 is written for early grade school, Chemistry 1 is written for late grade school, and Biology 2 is written for middle school. You can look at them in the ‘Try It before You Buy It’ section. I really encourage you to look at them side by side. I encourage you to compare the two biology texts and to look at the progression within these books. There’s a big change. There’s a certain amount of knowledge that you begin to anticipate and expect that students are going to have. Students who start a new school year with some knowledge have an advantage. This is similar to what is done in math or language arts. You do not want to be teaching high school students phonics or basic spelling chunks. You want to be discussing literature with them.
REAL Science Odyssey Chemistry 1, Blair Lee M.S.
REAL Science Odyssey Chemistry 1, Blair Lee M.S. http://www.pandiapress.com/?page_id=86

Focus on the fundamentals:

  • Scientific Method
  • Good Foundation means a good grasp of how the various pieces relate
  • Good Foundation allows for a better understanding of new concepts
  • Good Foundation leads to a better ability to analyze data, models, and theories about how the natural and physical world works
  • When I talk about fundamentals, I am talking about the underlying principles that are the root knowledge required for a more advanced understanding of a subject. These are things that high school students in traditional schools are no longer coming into the science classroom knowing.
  • Scientific Method: An important aspect of learning science is learning how to use the scientific method. Using the scientific method depends on knowing the basic facts of science. The absolute best way to learn the scientific method is through applying it. The scientific method is based on experimentation, observation, and deductive reasoning. One reason that the homeschool environment is superior is because homeschoolers are given the time and space for experimentation, making observations, and deductive reasoning. It really is the best environment for learning science. Teasing out the answer to a problem is not something you can set a time limit for accomplishing. Schools, by their very nature, are forced into giving students time limits to learn and apply science concepts.   This doesn’t lend itself to a practical understanding of how the scientific process really works.
  • A solid foundation in the basic fundamentals of science will result in students who have a good grasp of how the various pieces in science relate, which leads to a better understanding of new concepts. A strong focus on the foundational fundamentals also leads to a better ability to analyze more complex data, models, and theories for how the natural and physical world works
  • There are certain fundamental principles that are the basic building blocks for understanding science concepts. For example atoms; all matter is made of atoms. Every single science principle where we explain how the natural and physical world works at its core is talking about atoms. Even a graduate student studying complicated scientific principles and theories must understand the basics of atoms. An understanding of atoms is one of the foundational fundamental principles in all of science and is necessary to understand how other pieces of scientific information relate.
  • I think it is a problem that often there is not a focus on the basic fundamentals for two reasons. The first is that the students’ knowledge base is not complete. The second thing I see happening in middle school and high school texts and classes is that concepts that are too complicated are brought in before there is an understanding of the underlying principles. This leads to spotty knowledge which results in people thinking they’re not good in science when it is actually the quality of their education that’s not good. In these situations, some students will learn the new material, but most students will just breeze right over it. I like to use foreign language as an example here. If you’re sitting in a restaurant and you overhear someone speaking a language you don’t know you tune the speaker out. But if you know a little of that language you will listen, try to understand what they’re saying, maybe even start a conversation with them. It’s the same thing with science. If I start talking about polarity and water molecules and you don’t even understand the basics of what a molecule is, you don’t know what I’m talking about and your brain glazes over or moves on to something else. If you do have some knowledge of molecules and polarity, you will pay attention and engage in the conversation, adding to your knowledge base.

Learn each discipline as a single subject:

  • Does not create artificial boundaries
  • Allows for an in-depth understanding of the foundational fundamentals, instead of a “Jack of all Trades, Master of None” approach
  • Mastery of each science discipline is superior for that discipline and for making connections across disciplines
  • On the face of it, it might sound like spending an entire year every four years on a single subject creates artificial boundaries between science disciplines. While it is important that the material you use to teach points out and makes connections between the different disciplines, the best approach is to learn the fundamentals of each discipline and make connections once the basics are understood. This creates a cohesive body of knowledge which enhances a student’s ability to make connections between the disciplines.
  • Often science is learned with a grab bag approach, which I call the smattering approach. When I told the gals at the Intel ISEF fair that I was not a fan of the smattering approach they said that in the past they would have agreed with me. But that now, the state of the science being taught is in such a shabby state that they would even like it if people went back to the smattering approach. It turns out that the smattering approach for learning science is better than not learning it at all. So I guess if it’s between the smattering approach and nothing at all, the smattering approach is okay to use. Otherwise, any good science teacher will tell you you’re better off teaching science as a single subject, just as we do every other academic subject we care about our children learning.
  • This really goes back to teaching the foundational fundamentals. You start to build on concepts, creating a firm foundation, adding more and more complicated material on top of it. Anyone who has worked with their child in math knows exactly what I’m talking about. There is no other subject that we take seriously that we do not teach as a single subject. There is a reason for that.

Rely on one or more good textbooks:

Real Science Odyssey Biology 2
RSO Biology 2 http://www.pandiapress.com/?page_id=82#level2
  • Comprehensive
  • It helps to have a guide, someone who is an expert in that field, to help you figure out the scope and sequence of the material to cover.
  • Different students access information differently.
  • Focus on the fundamentals.
  • Make sure the text is secular teaching the theories and models that are central to each science discipline.
  • Don’t teach a co-op class without a text.
  • I write science textbooks that are long and complete. I do not write fluffy science. So it should not surprise people that I am a fan of having some sort of guide and guidance to follow for each subject that I’m having my child study over the course of the year. I learned my lesson with first grade biology that even someone who is very knowledgeable in the field could use some direction. When I homeschooled my son in first grade I had a guide and reference material for every subject he was learning, except biology. I thought, “How hard will it be? I taught biology at community college. I have a biology degree from UCSD. Biology is going to be a piece of cake.” It turns out, with all the other subjects he was working on I was overwhelmed when it came to planning and figuring out a course of study as I went along. In fact, when my son was in second grade I had him work through RSO Life 1 and Earth and Space 1!
  • I will be honest; my reference material is not always a textbook. In history we use video courses and material where someone else has put together a complete package. Science is a little different than history though, because you are still going to need lab sheets, material lists, and I really think it’s good for students to be able to read the information if they need it.
  • Choose texts that are comprehensive and do not skip over the basics, introducing advanced topics and language with a focus on the fundamentals. I do not think it matters which science discipline you start with, but I would suggest waiting until 3rd grade for chemistry and physics. When your child is ready for their multiplication tables they are ready for chemistry. It has to do with the abstract nature of chemistry.
  • Every area of science has a lot of information to it. It helps to have a guide, someone who is an expert in that field, help you figure out the scope and sequence of the material to cover. I believe there is no way to teach the foundational fundamentals or to teach science as a year-long single subject without a textbook. In every science class I have ever taught, I have been handed a stack of textbooks. I was given the teacher’s textbook, the lab manual, the answer key, and test making software, because a committee of people at the community college where I was teaching decided that was what the course was going to look like that year. Perhaps this sounds limiting, but I did not find it so. You can use the textbooks as a touch point if you want, but it is essential to have a guide so that the material is covered in a complete fashion.
  • The other important thing about having a good textbook is that students access information in various ways. I learned how important it is to have reference material when I taught a co-op class this year. Based on my experience, I wouldn’t have my son take a science co-op class if there wasn’t a textbook because if the subject gets complicated your child needs something to reference, not the Internet either. I think it is important to have something they can hold in their hands, something they can underline, highlight, and make notes from. A source that you can both go to.
  • Along the lines of accessing information I’ve actually been thinking about making some videos for my text and putting them on my blog for kids who are struggling with some of the more complicated concepts. The genetics unit in my biology textbook, for instance, is an area kids find very difficult. I think if students had me lecture out of the book to them, those kids who were feeling challenged by the concepts would be able to understand the information better. I’m very into making sure there are multiple ways to access information.

 Carefully pair theory with labs and activities

  • All theory and no labs, what a bore
  • All labs and no theory, teach cooking instead 

Let’s be clear about what I’m talking about when I call something a good science course. I am not talking about sitting in your seats. I am talking about getting up and moving around, getting your hands dirty. I’m talking about taking those foundational fundamentals and applying them to real-world labs and activities that relate well to the theory. This is where science becomes fun.

  • When scientific theories are paired well with labs and activities it enhances an understanding of the scientific method and science learning. It demonstrates through use and practice how hypotheses are formed and conclusions determined based on science facts that are presented in the text.
  • Sometimes I see science being taught where it is all theory with no labs or activities. The science theory is the science information in the written text. Other times I see science being taught with all labs and activities but no theory. Neither is adequate.
  • Honestly all theory with no labs and activities, why bother. That’s where science gets a bad name. For parents I know that the labs and activities are work. I know you do not always feel like setting them up. I know this because I teach my child science, and I don’t always feel like setting them up, but I do it because it’s important to me that my son gets a good science education. A good science education has labs and activities that are carefully paired with the text and theory.
  • All lab and activities with no theory might be fun, but you are not learning science cohesively. You’re not learning the foundational fundamentals. For example, how many of you understand the complicated process that occurs when you bake a cake? By this I mean the physics and chemistry involved in the baking process. To bake a cake you don’t need to know the underlying science because that is not your reason for baking it. It is about making a yummy treat for your family. In order for it to be called science you would need to understand the physics and chemistry of the process. And to know and understand the science you need to have studied the theory and then done the experiments. That way it all ties together.
  • When this is done; the pairing of the theory with the labs and activities, no place outside a college lab that is thoughtfully paired with a lecture course can match the homeschool community. It might be another reason why we are winning all of those science fairs.

5 Steps to a Great Science Education

  1. Start Early
  2. Focus on the Fundamentals
  3. Single Subject
  4. Good Textbook &/or Reference Materials
  5. Carefully Paired Theory and Labs & Activities

I hope that this helps any of you who are worried about your children’s learning of science, and that this doesn’t sound complicated to you. All you need to facilitate your child learning science is a desire and the resources to make it happen. I want to close with, “Science is so much fun to do, to share and interact. I really hope you take the time to explore science with your child. Who knows, maybe the next time someone asks you if you have had a great science course you will raise your hand, because the years of science you did while homeschooling your child were just that good!”

Update: In December of 2014 the New York Times published an article about college reinventing how science is taught and better learned using the principles and methods I am advocating here!

http://www.nytimes.com/2014/12/27/us/college-science-classes-failure-rates-soar-go-back-to-drawing-board.html?_r=0

This post contains affiliate links.

Check out this list for materials to use for your own homeschool science co-op here and read some of my Lunar Ramblings here.


Lunar Ramblings

Lunar Ramblings

As I watched the lunar eclipse, I had what I call lunar ramblings are thinking about my homeschool journey with my son .

Once again I woke my family up in the middle of the night. Sean does a better job of waking up than Jim, and the only dog that wakes up well is Sean’s pug Jezzie. The other two dogs would rather sleep even when I go outside. I have been waking the entire family up for almost two years now as I have been writing REAL Science Odyssey Astronomy 2. They have been waking up to see meteor showers, alignments of the planets, and finally a lunar eclipse. I say finally because the other two were hidden by clouds. I didn’t wake them up for those. Jezzie and I were the only two who got up and went back to bed after giving Jezzie a treat of course.

Sean and his pug, Jezabel, Lunar Ramblings
Sean and his pug, Jezzie.

The Cliffs of Moher
The Cliffs of Moher

Sometimes Jezzie prefers to ride. Don't you agree isn't it fun to see cool things, like pugs who ride in backpacks!, lunar ramblings
Sometimes Jezzie prefers to ride. Don’t you agree isn’t it fun to see cool things, like pugs who ride in backpacks!

We went outside to watch the eclipse about 20 minutes before the total eclipse. As we watched Earth’s shadow block more and then more of the sunlight that would have reflected off the moon, I felt the same way I do when I travel. There are so many cool and amazing things to see on and from this planet. I wish my atoms gave me a memory of all the things, living and not, they had been a part of before being part of me. I wish reincarnation were real, with you being able to remember all your past lives; I wish I could travel to every corner of Earth and see what is there; and I wish I could have seen the world as it has been over all of geological history. Although if that could happen I would probably be dead in a short amount of time after being exposed to a virus or bacteria I have never encountered before.

Sometimes you do not have to go very far to see coolness. This is on the campus of UCSD, my alma mater.

I was at a group retreat once. There were about 50 adults and we were asked a series of questions. We wrote down the answers and then everyone shared theirs. One of the questions was what is your dream birthday? I didn’t hesitate; I knew the answer immediately, my 100th. LOL, I was the only person who answered in that vein. Ah well, I just do not ever want to stop seeing the amazingly cool things the world has to offer.

This house built into a rock face is in France across from Leonardo Da Vinci's house.
This house built into a rock face is in France across from Leonardo Da Vinci’s house.

There are cool places to see without leaving the planet, lunar ramblings
There are cool places to see without leaving the planet

Bad Water in Death Valley

While I was watching the moon it occurred to me if you could travel back and forth in time your best bet would be if you encountered people who were more curious than they were superstitious. Although maybe that wouldn’t matter; the Jain people in India had their superstitions but you would probably be safe if you traveled back in time to a Jain civilization.

Jain Temple

These fanciful things were what I was thinking about as my 14-year-old fell asleep in my lap while I watched the moon come out of its eclipse. This is an interesting age for a parent who has been as close to their child as I am to this one. He is growing up and away, as he should be. I have worked hard to make sure he has the skills he needs to go out in the world without me holding his hand. But still… He doesn’t fall asleep in my lap very often any more. When he was little he used to get in bed with me every morning. Life is a journey. His and mine are entering a new phase.

Sean injured himself skiing and rode horseback on the Santa Teresa Trail, lunar ramblings
Sean injured himself skiing and rode horseback on the Santa Teresa Trail

The rest of us hiked

to Machu Picchu, lunar ramblings
to Machu Picchu

Watching the eclipse was a visceral reminder that our life’s journey is on a ball that is hurtling through space. Isn’t it all just amazing when you think about it? Sean informed me the other day that given the chance of exploring the universe he would do it, even if it meant never returning to Earth and never seeing his family again. He wondered if I would do the same. I would do it with him, I replied. “No Mom,” he said, “you would have to leave all your family behind, and you would never see any of us again, including me.” I told him, “No way. Watching you grow up is not something I would ever give up, not for any adventure.” I guess I am just going to have to get up in the middle of the night every once in a while and imagine what is out there instead.

eclipse, lunar ramblings
Lunar eclipse, 10/7/2014

What happens to scientific theories when definitions change or new information comes to light? Read here.


A question in the Co-op: Scientific Theories

What happens to scientific theories when definitions change or new information comes to light? 
I love this exchange, and I thought many of you would too. There has been quite a bit of interest about homeschooling science co-ops based on the number of hits the co-op blog posts on this site are getting. This is an email I received recently from someone who is teaching one. I have also included my reply. 
Email to me Tue, 16 Sep 2014 20:41:45 -0400
I just started teaching biology for my co-op out of your book (thanks for the notes on your blog on teaching it in a co-op btw), and I’ve had the kids watch the full program of BBC hidden universe, secret life of a cell https://www.youtube.com/watch?v=FFrKN7hJm64 which pretty much convinced the kids that viruses were alive, which meant that during the debate on whether viruses were alive or not, they decided that the definition of living was outdated and needed to be changed.
The very big problem was chapter 2 – this week, right after I explained the difference between a scientific theory and non-scientific theories, we came to cell theory, and one of the students pointed out that if viruses are alive, cell “theory” isn’t true. Please help, I’m sure there is a good explanation I can give the kids, I just don’t know it. I’ve looked through a bunch of internet articles, and the consensus seems to be that a virus is definitely not a cell, and there may be a new classification of alive.
Scientific Theories: The theory of natural selection as it relates to frog size.
Read about using RSO Chemistry 1 for a science co-op here.


A Science Fair in Your Co-op Class

A science fair in a co-op class? You bet! Actually, I am calling this a science fair, but it isn’t like any science fair you have ever seen.  I gave students a question from an area we had studied. They had to design an experiment looking at that question, conduct the experiment in class using their fellow students, collect data, and explain how they would analyze the data. I did this with my co-op class last year, and it was one of the highlights of the class! You do not need to have a large co-op class to make this work, either. In fact, if you are going to get through all the experiments in the allotted time, you don’t want too many experiments. This is the last of my co-op posts. I am not teaching a co-op this year, even though I have had some very tempting offers. I am too busy writing Earth and Space 2, which my guinea pig… I mean my son… is using and loving. I have to stick with it for the rest of you!

http://www.pandiapress.com/

Lucky for us there is one more co-op post coming from Karen. At the end of this year she will share her suggestions for extra-super extra-curricular resources! Have you ever noticed I love exclamation points! If you met me you would see that they are the punctuation mark that best describes my personality‼‼ An exclamation point with a smiley face at the bottom! (I would definitely not be a comma. Commas make me crazy. My commas make my editor crazy too. I put them in the wrong places and leave them out of the right ones. No one can be good at everything. If you ever find a typo of mine that bothers you, send me the correction, and I will fix it.) 😉

What You Will Need

  • Two to four parents (no more, no less – less is too few, and more is not always better)
  • A scoring rubric
  • My students furnished their own supplies for this, but I offered to do so. I told them I needed at least 24 hour notice, but no one took me up on it.

Be Thoughtful about the Amount of Help Needed

        You should assume that no student in your co-op has ever participated in a science fair, or designed their own experiment. I did not want my students to be lost or intimidated by the process. I sent them a couple of e-mails during the week to make sure they were on track with their experiments.

Decide if You Want Students to Work in Groups or Individually

I started the students in groups, but one of the groups wanted to split up for this and design their experiment individually. The other two groups preferred to work in groups. This resulted in there being five experiments at the fair.

Real Science Odyssey Biology 2
RSO Biology 2 http://www.pandiapress.com/?page_id=82#level2

The Senses

I asked each group to design an experiment dealing with a specific sense. I chose this because the five senses is an area that everyone has experience with. If you want originality with the experiments, you should choose an area that kids really understand. It is easier to get real creativity if your students are not bogged down figuring out details of the science involved. Could you imagine if I did this with a focus on genetics!

Here is the text I gave to my students:

Labs this week

I have asked each of the groups to work together to create an experiment. Since I do not want only 1 sense getting all the attention, each group will be given a different sense. I want to see you all do your best, there might be a clear winner or not. If more than one team wins that is great. There are experiments out there that test all of these things. Try to develop your own experiment first before getting on the internet. Only get on the internet if you absolutely cannot think of anything, and please contact me before you do that. I will help you if you need guidance.

I want to hear from each team on or before Monday about your planned experiment. These are some of the elements you need to think about

  1. How will the results from my experiment answer the issue I am studying?
  2. Did I create an experiment that is unbiased?
  3. How will I collect and analyze the data from my experiment?

Group 1: Create an experiment testing if the color of food affects the sense of taste.

Group 2: Create an experiment testing if you need your sense of smell to taste.

Group 3: Create an experiment testing if your sense of touch is affected by your age.

The groups need to figure out the experiments together. One person should not do all the work!

Group 2 was the group that did three experiments all looking at the same issue. The three students created three very different experiments.

The Night before the Fair

  1. Contact your students to make sure they have everything they need and ask them to be a little early to set up. (Make sure parents know this lab could run late. We did not do it, because I did not think of it, but what would be really great is to have the parents go through the experiments after class. Make sure everyone has enough material if you decide to do this.)
  2. Contact parents who are judging and remind them to be there.
  3. Make sure you have a rubric printed for them. Here was mine.

Use the scale from 1 to 10, 10 being the best; circle your answer

  • How well does the experiment answer the question? 1 2 3 4 5 6 7 8 9 10
  • Was the presentation and procedure coherent and well thought out? 1 2 3 4 5 6 7 8 9 10
  • Can the group explain their methodology and what they are testing? 1 2 3 4 5 6 7 8 9 10
  • How unbiased is the method used for conducting the experiment? 1 2 3 4 5 6 7 8 9 10
  • Uniqueness and creativity? 1 2 3 4 5 6 7 8 9 10
  • How good was the group’s system for collecting data? 1 2 3 4 5 6 7 8 9 10
  • How will the group analyze the data? 1 2 3 4 5 6 7 8 9 10
  • Do you think the group will be able to make meaningful conclusions from this experiment? 1 2 3 4 5 6 7 8 9 10

The experiment my son thought was the best did not win, because the person conducting it forgot to collect data, and could not answer the question of how he would analyze the data if he did collect it!

The Day of the Fair

  1. Get there early. Some of you students will be nervous, and most students will need help setting up.
  2. Give each judge a copy of the rubric.
  3. Your judges might want to be test subjects or they might want to watch. Let them decide how they want to proceed. The judges should decide on values for the rubric independent of each other.
  4. Have students conduct the experiments.
  5. You need to have students cycle through to be test subjects as well as presenters. You will have to figure out the logistics of this as you go, but be prepared. You will have to be on top of this. Some experiments are quick to conduct and some are not.
  6. Have the judges tally the results. Ties are awesome. There are no winners or losers on a day as fun as this one!

Check out our post on the homeschool history project here.


Using REAL Science Odyssey Chemistry 1 for a Co-op

REAL Science Odyssey Chemistry 1 is a great choice for a science co-op, however because it was designed to be done 2 days a week it presents some scheduling challenges when conducting the labs in 1 day. You might want to teach this class 2 days per week, if you do, follow the format in the book as laid out on pages 14 – 16 of RSO Chemistry 1. If you don’t, some weeks will require parents to do work at home. This schedule is for doing the class 1 day per week.

REAL Science Odyssey Chemistry 1, Blair Lee M.S.
Chemistry Co-Op: RSO Chemistry 1, Blair Lee M.S. RSO Chemistry 1

Note: The page numbers below are for the written text. If you have an e-book these page numbers will be a little off. Refer to the schedule in the book if there is any confusion about page numbers.

For more general information about teaching a science co-op read my blog article, Using REAL Science Odyssey for a Homeschool Co-op: General Notes.

Unless noted I recommend the following format for your class each week:

In class

  1. Read the theory
  2. Conduct the lab

At Home

  1. Crossword Puzzle, when there is one
  2. Some assignments and projects, as indicated below

For more general information about teaching a science co-op read my blog article, Using REAL Science Odyssey for a Homeschool Co-op: General Notes.

Unless noted I recommend the following format for your class each week:

In class

  1. Read the theory
  2. Conduct the lab

At Home

  1. Crossword Puzzle, when there is one
  2. Some assignments and projects, as indicated below


Week 1

The first week of class can be a bit hectic. I suggest you divide the week up this way

In class: Lab #2 pages 27 – 30

*** It is very important you go over the process you are using when conducting this lab. Discuss the scientific method, what it means, and how it is being applied.

At home: Lab #1 and the crossword puzzle pages 23 – 25, 31


Week 2

Each week discuss the parts to the scientific method. These are on the lab sheets for most labs. By the end of the year you want students to be fluent in the vocabulary used when applying the scientific method.

Lab #1 pages 37 – 39

Lab #2 pages 43 – 44


Week 3

At home: Read over pages 46 – 47 and Make Parts poster page 47

In class:

  1. Do the Parts! Lab: 49 – 51 next week
  2. Types! Lab: pages 54 – 61, There will be plenty of time for students to do this individually, but you could have students work on this together, so that the entire class makes this on a large table building one element at a time. If you do, make sure everyone participates (maybe put the labels in a hat and have students choose one, and make that element when it is his or her turn; if you have more than 10 students have students work in pairs for the larger elements like neon).


Week 4

There is a lot of sitting around today so I would suggest breaking it up by

  1. Read pages 66 – 67
  2. Do Parts! Lab: 49 – 51: Have an extra balloon for each student to take home, so they can share this demonstration with their family. Ask students to teach their family what is happening in this experiment.
  3. Do The Alphabet Lab #1 pages 69 – 73: Work through this methodically with your students. Students will be using this periodic table for several more chapters DO NOT let them take it home!!!

Have student do pages 75 – 79 at home, unless you have time at the end of class in which case have them do page 75 in class

Week 5

There are three parts to the Atomic Numbers section

  1. Atomic Numbers Lab #1 can be done as a demonstration or individually it is up to you
  2. While you wait the 20 minutes for the final observation for Lab #1: Read over page 81 and have students fill in the atomic numbers section on their periodic table.
  3. Atomic Numbers Lab #2 start in class, if students don’t finish it have them finish it at home


Week 6

In class:

  1. Read over pages 95 – 96 and have students fill in the assigned section on their periodic table
  2. Do Massive Matters Lab #2

At home: Massive Matters Lab #1


Week 7

  1. Read over page 105 and have students fill in the assigned section on their periodic table
  2. Do the Lab, page 111
  3. Save the worksheet page 109 for last in case you need to have students do it at home


Week 8

In class:

  1. Read over page 113 – 115 and have students fill in the atomic numbers section on their periodic table
  2. Do Lab 119 – 122; take your time with this lab. It is a really good one

At home: page 117


Week 9

The lab on page 129 – 131 requires an oven. If this is a problem for you:

  1. Fill in worksheet pages 125 – 127
  2. Have students (with parental supervision) do the lab at home and bring the muffins in for a tasting party. If you do this have student mix in berries or chocolate chips (assign this individually) so you have some variation in the muffins.
  3. You should have completed periodic tables to put on walls or desks for students to show off to their parents. This is the end of Unit 3, so it is a good place to take the time to do this.


Week 10

Over the next 9 weeks students will be creating a book for the first three rows of the periodic table going across by group. There is some drawing to be done each week. Class time for this can be problematic because some students will take 5 minutes to do the same task another student take 55 minutes on.

Each week for the next 8 weeks: Read over the For My Notebook page and make notes about the elements in the spaces on the pages for the Element Book.

I will give you my advice each week, but you might need to tweak it.

  • Recruit 1 or a group of parents to do the work on pages 139 – 140 for each student

This week In class:

  1. Read page 136: have students follow along on their periodic table
  2. Fill out page 137 and glue it to their book. Do not let students take this home.
  3. Read page 141: have students fill in the Facts section on page 149. This and every other week, have students work on the rest of the page at home.
  4. Do Lab page 143 – 145
  5. Read page 142: have students fill in the Facts section on page 151. This and every other week, have students work on the rest of the page at home.


Week 11

The Lab for this week< Crystal Creation, is short and will not be completed until next week. Students should be able to do all the work for their Element Book including decorating it in class.


Week 12

  1. Make observations for the Crystal Creation Lab page 157.
  2. Expect a fun mess with the lab today! Save some of this for week 26. It will stay good if you refrigerate it.
  3. Students should be able to do all the work for their Element Book in class. If they cannot have students complete the pages at home.


Week 13

  1. Students should be able to do all the work for their Element Book in class. If they cannot have students complete the pages at home.
  2. The lab requires an oven. Try to round up a toaster oven if you need to. This lab is fun and yummy.


Week 14

  1. Students should be able to do all the work for their Element Book in class. If they cannot have students complete the pages at home.
  2. The lab requires an oven and a mixer. A toaster oven will work.


Week 15

  1. Students should be able to do all the work for their Element Book in class. If they cannot have students complete the pages at home.
  2. There are 2 labs for this week.
  • The lab on page 193 requires a heat source. Have students do it at home if that is a problem. A toaster oven will not work.
  • Do the lab on pages 195 – 197


Week 16

  1. Students should be able to do all the work for their Element Book in class. If they cannot have students complete the pages at home.
  2. There are 2 labs for this week.
  • Lab #1 needs to be done as a demonstration. Bleach is too toxic and caustic to risk having a group of students use it.
  • You will start Lab #2 today and finish it next week. There are a few changes to the procedure so that this lab can be done by all the students. Change the procedure instructions for Procedure 8 in the book to Let the egg sit for 7  full days. Do not refrigerate the egg. Have students make the vinegar solution in a double baggie. If the egg breaks and leaks out of the baggies it will be badly stinky!!! Have students take the baggied egg home and complete the experiment at home the next day. Have them share their observations at the start of next week’s class.


Week 17

Students should be able to do all the work for their Element Book in class. If they cannot have students complete the pages at home. You might even be able to put the books together. If you do not have a refrigerator in class, use an ice chest with ice in it. Perform the experiment while working on the Element Books. Have a balloon for each student to celebrate the end of the unit or just use 1. If you have a balloon for each student, have everyone put their balloon in the cold source at the same time so all the cold air does not get out from being opened repeatedly.


Week 18

There are 3 labs/activities this week. The Lab on page 243 – 245 will be done at the start of next week.

  1. The puzzle pages 233 – 235: You might want to have 1 set of pieces per student pre-cut. If you do consider asking parents or students to bring these pre-cut pieces with them to class.
  2. Lab #1 pages 239 – 241


Week 19

  1. Begin class with the lab page 251, set a timer for 1 hour and make the second observation. I am not sure if this experiment will last over a week. You are going to need to check on it after 24 hours, and take a photo. Then you can wait a week and see. That way your students can use your photo as the final observation if they have to.
  2. Lab page 243 – 245
  3. Worksheet page 249


Week 20

  1. Lab 261 – 264
  2. Have students finish today with the worksheet page 255 – 259. They can complete this at home if you run out of time.


Week 21

  1. Have student complete the poem at home.
  2. Start class with Activity #1 on pages 269 and 271
  3. Have student share poems if they are so inclined.
  4. Have students do Activity #2 on pages 269 – 270 and 273


Week 22

Do pages 275 – 279


Week 23

  1. Do pages 281 – 289:  Use a microwave if you have to in order to boil water. An electric tea kettle will also work.
  2. Have the ingredients for Jell-o present, but make a batch of Jell-o ahead of time so students can make observations about the Jell-O in class.


Week 24

Do pages 291 – 300: You have a group of students so why not use them for a density demonstrations. Mark off a space on the ground that will just fit all the students standing as a group. Have the students fill the space 1 by 1. Have the students move around in the marked off area. This will show them how much less space there is to move when more particles (people) occupy the same amount of space.


Week 25

Take a look at the lab on pages 303 to 305. The amount of set up time is perfect. But the lab takes 1 week to complete and you make a hot sugary solution. It is a good lab though.

You have a group: do the group activity on page 304


Week 26

Do pages 307 – 315: Use the slime you saved


Week 27

Do page 317 – 325: To do the lab on page 319 in 1 lab period. Use 3 bottles. Take one bottle and freeze it with the cap off the day before class. Bring the bottle to class, but take a photo in case it starts to melt before class starts. Suggest students put a bottle with the cap off with a dish under it in the freezer overnight to observe the expansion of water for themselves.


Week 28

Pages 327 to 337: There are three activities/labs this week. You should be able to get through them all. You will need a microwave and 1 or more kites. If it isn’t windy, the kite is optional.


Week 29

Pages 339 – 347


Week 30

Pages 353 – 361: You will need pre-frozen Kool-Aid


Week 31

Pages 363 – 371


Week 32

Pages 373 – 379: The indicator should be made at home.  Do Step 1 at home and bring the indicator to class. Have kids make the coffee filter pH paper from Step 1 in class. They will use it next week.


Week 33

Pages 381 – 387


Week 34

Pages 389 – 397


Week 35

Pages 399 – 403: Have students make the solution for Day 1. You are going to need to make the same solution the day before so you can do the entire experiment in 1 day. Have students take the solution home in a baggie so they can see the results for their own solution. Alternatively, you could leave it a week and have students make their observations next week.

Week 36

Pages 405 – 411

Read about using RSO Biology 2 here.


Materials List for a REAL Science Odyssey Biology Co-op

Biology co-op

Bio-L2-Cover

Pandia Press

I received an email asking about how the material list is affected when teaching a co-op with RSO Chemistry 1. I thought it was a question that deserved an answer for RSO Biology 2 as well. My goal with this series is to make it easier for anyone who wants to teach a science co-op. Teaching is a LOT of work. I respect the time and energy you as an educator are taking to teach science and this is my way of making it a little easier for you.

Note 1: You are going to have to match the lab with the week. I changed the weeks where some of the labs are performed for a co-op class from the order they occur in the book.

Note 2: No change means there is no change to the quantities as listed in the Material List in the Student Guide and Teacher’s Guide for that week.

Note 3: I am assuming every student has their own text.

Note 4: Microscope supplies – you will need a quantity of microscope supplies for a class. I bought a box of slides and slide covers at the start of the year, cleaned those that could be cleaned over the course of the year, and disposed of those that couldn’t. At the end of the year I threw them all away. I will assume you have a large enough quantity of general microscope materials each week for your entire class. I will only list changes for materials specific to that experiment.

Week Changes to Material List
1 The plot study lab: You will want multiples of – tape measures, graph paper, clip boards, markers for plots
2 Microscope techniques: 1 – 3 corks, 1 X-Acto knife per 4 students, 1 syringe per 4 – 6 students, 1 tweezers per 4 – 6 students, 1 plastic spoon per person
3 Cell model: 1 glue per 5 – 6 students, 1 ruler per 5 – 6 students, extra toothpicks
4 Chapter 4: multiple colored pencils, 1 syringe per 4 – 6 students
5 Diffusion: Are you going to teach this as one large experiment for the entire class toobserve or an experiment each student takes home? That affects the material list.

Microscope: 1 corn kernel per person, the same as for above – when you gather multiples of things like syringes make sure they stay in class for the duration of the co-op.

6 Photosynthesis/Cellular respiration: * 1 plant for the group (do not change this), 1 piece of fruit/vegetable per person
7 DNA lab: (LOL people hate or love marshmallow labs! They are cheap. I am sorry if you hate them. Any other ingredient makes this lab much more expensive. I am vegan, so trust me I get the entire anti-marshmallow thing. Just warning you, some parents are sure to complain. I get emails about this ingredient on my material list.) Multiply the number of marshmallows, beads, toothpicks, skewers, and pipe cleaners by the number of students.
8 Mitosis Poster: The supplies list depends on whether students do this at home or in class. If they do it in class, you will need multiples of poster board, marshmallows, pipe cleaners, yarn, and beads.

Microscope 7: 1 sports drink per student, 1 cup or glass per student

9 No change
10 Activity 10: 1 coin per student

Microscope 10: No change

11 Frog dissection: 1 frog per student, 1 set of dissecting tools for every 1 – 2 students*** Not all students will do this dissection. Make sure they will BEFORE purchasing frogs.
12 Plant dissection: 1 plant per student (if students are not working in groups, use 1 plant per student.)
13 Flower dissection: 1 flower per group (if students are not working in groups, use 1 flower per student.)
14 Labs 14 – 1 & 2: Multiply the number of lemons, wire, nails, pennies, calculators by the number of students.
15 15 – 1: As many cardboard nail messages as you can for students (this is a very simple but fun lab), multiple blind folds

Microscope 15: No change

15 – 2: Multiply the number of bottles, coffee filters, gravel, sand, cotton balls by the number of students

16 16 – 1: 1 flashlight per pair of students
17 Microscope 17: 1 needle per person

17 – 2: 2 balloons per student, multiple tape measures or measuring sticks

18 Lab 18: Multiply the number of chicken wings, gloves, and dissection tools by the number of students
19 19 – 1: No change

17 – 1: Multiply the number of bottles, tubing, X-Acto knives by the number of students

20 Microscope 20: Both of these labsrequire some thought about you want to run them for a class. By the time you get to these labs you will have a good idea how best to run them. For the microscope lab, will each student make their own slide and look at the slides of other people? In that case you need 1 insect per student. Or will you make the slides and have students look at them without preparing the slides? In this case the number of insects needed varies from two to as many as you want for comparison.

Lab 20: Where you do this lab determines whether there are changes to the material list. If done outside there are NO changes. If done inside you need 1 set of materials per student. Alternatively you could make the timeline as a mural, with all students working on it together.

21 Microscope 21: No change

Lab 21: Multiply the number of pompoms by the number of people who will be performing the experiment at the same time.

22 Lab 22: Multiply the amounts of supplies by the number of students

Microscope Lab 22: No change

23 Lab 23: Multiply the number of sheets of construction paper by the number of students

Microscope Lab 23: No change

24 Lab 24: Have parents help by bringing in supplies for their student’s project

Microscope Lab 24: No change

25 Lab 25: No change
26 Microscope Lab 25: 1 piece of grass per student

Lab 26: Multiply the amount of materials by the number of students

Microscope Lab 26: No change

27 Microscope Lab 27: No change

Lab 27: a minimum of 1 plant per student, 1 container with a lid for each student to take home the watering solution (I make my own jelly, so I used canning jars which I have a lot of.)

28 Lab 28: Multiple students mean more students making dichotomous key mysteries – there is no change to your materials list
29 Lab 29: No change
30 Lab 30: No change
31 Microscope Lab 30: Enough leaves for students to each make their own slide

Lab 31 and Microscope Lab 31: It would be nice to have 1 set of specimens per student. It is not necessary though.

Start Lab 32: 1 banana for every two students, 1 tsp yeast per student, 2 baggies per student

32 Microscope Lab 32: Multiply the number of mushrooms by the number of students, you also need multiple cutting boards and flashlights

Pandia Press Biology 2

This post contains an affiliate link.

Read about teaching a science co-op here.


Using REAL Science Odyssey Biology 2 for a Co-op Class


RSO Biology 2 Blair Lee M.S.
RSO Biology 2 co-op plan: Student guide Click here to visit Pandia Press.

Each week students were expected to do work outside of class.

Outside of class:

Weekly

  1. Read the text
  2. Complete the Famous Science Series
  3. Complete the Show What You Know

When assigned

  1. Lab Reports: not all labs are good lab report labs. Check the Teacher’s Guide t labs I o see which labs I recommend having students write lab reports for. As a former college professor, I strongly recommend having students learn this important skill now. Lab reports are very formulaic to write and yet many college students cannot write them. If a student has trouble with the actual writing of them (separate from what to put in the content) have them get help from a parent. Fine motor skills issues are an example of what I mean.

At the end of each unit

  1. Unit Test

By the end of the school year

  1. Research Paper from chapter 28

As you know from the introduction I am relaxed about who is doing the work outside class. I do however give preference in class when asking questions to those students who have read the material and done the work. At the start of class I have students give me a show of hands as to who has gone over the material. Those are the students I want to hear from when I ask a question, because they are giving me an informed response based on the material that they were responsible for. I wasn’t upset with any student who didn’t do the week’s reading, but I was honest with the students as to why I preferentially called on the students who had done it.

RSO Biology 2 Teacher's Guide
RSO Biology 2 co-op plan: Teacher’s Guide Click here to visit Pandia Press.

I will only discuss the Theory when I have something to add separate from what is in the Teacher’s Guide.  Teacher’s Guide

Terms in this document: Lab refers to general labs that are NOT microscope labs. When referring to microscope labs I specifically call them microscope labs.

Unit 1: Chapter 1

The Theory: Assign the reading before coming to class. It makes for a good introduction. The plot study can take some time to do. You are going to want to get right on it.

The Labs: There are two great labs in Chapter 1. Start with the plot study lab. I think that every general biology class should start with a lab outdoors looking at what’s out there. Take the microscope lab and combine it with the microscope labs from weeks two and three, so that for the second week of class you are working on microscope technique.

Unit 2: Chapter 2

You will be devoting this week to microscope work instead of doing the canning experiment which is difficult in a classroom setting. I suggest buying 2 containers of processed applesauce. Open one and leave the other sealed. Compare the two samples weekly until the opened one needs to be thrown away. Come back and fill out the lab sheet for this lab then.

The Labs: The microscope work for the first three weeks focuses on basic microscope techniques. Take your time with these. I learned that even kids who think they are experienced using microscopes often fall down in the area of making good slides. Just remember THIN SLICES!!! Discuss drawing microscopic specimens on their lab sheets. Demonstrate how to make these drawings by drawing one. Make the drawing while looking at the slide. Have students look at your drawing, and then look at the view of the slide. Have them all draw one of the specimens from one of their slides today.

This is the time to go over rules about microscope care and handling. I have included an explanation in the text. You want to make sure students read it over. You could send a sheet with the rules written on them separately to parents and students and have both the parent and the student sign the sheet saying that they have read them and will respect them. All of the students that I had in my co-op class were careful with the microscopes. Kids are kids though, and sometimes they just didn’t think. That’s why it’s good for them to know that there is a policy for microscope handling and care in place, and make sure that they know what those policies are.

Unit 2: Chapter 3

The Labs: I let students decide if they wanted to make the plant cell model or animal cell model. Plan ahead how you are going to make the organelles. If using Sculpey you need an oven. You might need to make the organelles outside of class. If that is the case you will need to know ahead of time which type of cell students want to make.

Unit 2: Chapter 4

Have students do the activity before coming to class.

Students need access to a computer for today’s lab.

The Labs: Start with the microscope lab. Pay attention to students’ slide making technique. Demonstrate how to make a slide for them before they make one of their own. When the microscope lab is completed have students begin the lab. This is one of the most important labs that your students will do all year. It deals specifically with their nutrition and health.

Unit 2: Chapter 5

The Labs: Start by having students set up the lab so they can monitor it over the course of the two-hour period. After that discuss what it was like following the menu they made last week, and what they learned from it. Next discuss the material for this week. Then do the microscope component. The lab should be monitored for 24 hours or more. I don’t know for sure, but an entire week might be too much time. Optimally, each student should take it home and continue to make observations over the course of 48 hours. If you feel that students will not do this, you should take it home yourself and e-mail your observations to students.

Unit 2: Chapter 6

The Labs: I love this lab. It was inspired by a middle school student who I was tutoring in biology. He’s the adopted son of a friend of mine. LOL, I only teach co-op classes that my son is in, and I only tutor the children of really good friends of mine. My husband would divorce me otherwise. He set these rules a few years back. 🙂 Go over the material as briefly as possible while making sure that kids understand the chemical process. That way you will have more time outside. You might choose to wait and do the microscope lab next week. Do the microscope lab after you do the regular lab to make sure you have enough time for the regular lab. There is enough time to get through everything this week unless somebody is having trouble with the chemistry for photosynthesis and cellular respiration. It took my son more than once through this material to understand it, so I know it can happen.

Unit 3: Chapter 7

The Theory: Be prepared. This unit gives students and their parents so much trouble. Genetics is where biology is at these days. This is not going to go away. To be literate in the field of biology you have to know genetics. Parents find it difficult because most of them did not have it when they studied biology. In part this is because this area of biology has been growing in leaps and bounds as the testing, equipment, and methods have become more and more sensitive and advanced. Don’t let students get discouraged. Prepare them that it’s going to be challenging. If you are going to offer office hours this is the four-week period to do it in. Do not lose sight of the forest for the trees, though. It is not expected that most students will have 100% mastery of this material. At the end of the four weeks your students should have an understanding of the basic vocabulary and knowledge in the area of genetics. Assign videos you like for the class. For some reason for these complicated topics, students and their parents tend to use videos put together by college professors to help their college students. These are not helpful to a middle school student who is struggling with middle school material. These college tutorials discuss vocabulary and concepts that are not discussed in a middle school text.

Chapter 7 has coloring and drawing sections within the chapter. I sometimes hear these called coloring pages by parents. Ironically, when I explain these pages to educators they get excited by this sort of interactive text because when kids interact with the text, like happens in this chapter, it leads to what educators call ownership of the material. I recommend working your way through the chapter with the kids. Ask them to read the text and work through it. Tell them that if they get stuck on anything they can e-mail you, or they can take a Post-it note and write their questions on the Post-it note at the location that stumped them. Give high praise to anyone who seems to have some level of mastery over the material. I would work through the Show What You Know in class. Have students bring it to class completed and go over it, or complete it in class.

The Labs: Do the lab this week and the microscope lab next week.

Unit 3: Chapter 8

The Theory: Use the same system that worked last week, assuming it did work. If it didn’t work and students seem to be struggling with the material try tweaking your system. Don’t forget to assign videos for this week’s material.

The Labs: The lab for this unit is to make a poster. I like having students make their poster over the week and bring them to class. It’s really fun to see the level and energy that some students put into making their poster. Between the theory and looking at posters this should leave about an hour for the chapter 7 microscope lab, which is about the right amount of time. The microscope lab for chapter 7 requires students to go slowly and be careful with their technique. The chapter 8 microscope lab will be done next week.

Unit 3: Chapter 9

The Theory: If you are doing a lot of explaining with this chapter, have students do lab 9 at home. If not it can be done in class. Don’t forget to assign videos for this week’s material. Warning: Students who found mitosis challenging really struggle with meiosis.

The Labs: Do Lab 9 or discuss the work for Lab 9 that students did at home. The two microscope labs that will be done this week use prepared slides. One has students find the phases for mitosis; the other has students find the phases of meiosis. This might seem like it will be a quick pair of labs. It takes time to find the phases. I would set up two microscope stations one for meiosis and one for mitosis. You could pull students aside so it does not get too backed up at the microscopes and go over their Show What You Know work to make sure they understand the two processes. Make sure that the prepared slides come from a good source. Do not use slides that are plastic and not high-quality. Home Science Tools has very nice prepared slides. That is where I got mine.

Unit 3: Chapter 10 – today’s class is jam-packed! It might go over 2 hours. Take your time with it. You could add an extra week to the course for this chapter if you want.

The Theory: On page 211 of the student text is a box with a representative of a chromosome in it. Do this in class together. Make sure students can do the Punnett Squares individually as students are doing the microscope lab. You could have a mini session after class re-doing the Show What You Know Punnett Square, then assign the Extra Practice Punnett Square to students who are having trouble with them. You could even give students extra credit toward the test for the Punnett Squares.

The Labs:

Before class:

  1. Have student’s come to class with the family traits questionnaire on pages 219-220 already completed.
  2. Assign each student a strand of hair to bring to class. During week 9 ask about hair colors at home with students, such as who can get a white hair, who can get a red hair, etc.
  3. It is up to you whether students do the qwitekutesnute activity at home or in class. If they do it at home have them bring their qwitekutesnute and share it. If they are doing it in class, end the day with that activity. The qwitekutesnute activity is a favorite of students. You might be tempted to drop it. I do not recommend that. It does a good job of demonstrating Mendel’s Principles of Genetics.

You will do the lab sheet, page 221, together in class. Give kids time to discuss what they learned. It is fun to discuss the results. Have each student make a slide with the strand of hair they brought.

If you break chapter 10 into 2 weeks:

Week 1 of 2: Family Traits Lab and the microscope lab

Week 2 of 2: Punnett Squares, the qwitekutesnute activity, and a review of the material from all 4 chapters. This is the best plan if you are having students take the end of the unit tests. This is the Unit Test that is the hardest for most students.

Unit 4: Chapter 11 – A dissection!!!

The Labs: Of the nine students in the co-op class I taught, only one made it to the end of this dissection. Only six were willing to even try to do the dissection. The one who made it to the end loved every single minute of it. This student was also an avid fisherman. The five who started the dissection but didn’t finish became nauseous and felt like they would faint; to be honest I began to feel nauseous just watching them try to hold it together. Be prepared for this. Have people bring their laptops so they can do a virtual dissection on-line. There are many, choose one or several before class. Some of your students won’t even want to do that. Those students I had watch a video.

Unit 4: Chapter 12 – Another dissection!!!

The Labs: Do both labs. Poor plants, no one faints when it comes to chopping them to bits. I suggest buying the plants for students and having them work singly or in pairs. It depends on the ratio of students to microscopes. The reason for you buying the plants is so you can make sure you have the right number of plants, and that they will be good plants to dissect. Choose a plant with leaves that make a good slice. I used one plant for each group of three students.

Unit 4: Chapter 13 – And yet another dissection!!!

The Labs: The instructions for this week are the same as last week except for flowers and seeds. While doing the dissection discuss the process of fertilization for angiosperms with students. If you have them in your area, you could bring a pine cone and a leaf from a fern for students to examine.

Unit 4, Chapters 14 – 19: I strongly believe that at the end of middle school biology a student should have a basic working knowledge of human anatomy, physiology, and epidemiology. The epidemiology part has been infused through the text to this point and will continue to be where it is relevant. Now the text brings in the anatomy and physiology parts. That is why other than in chapters 11 – 13 humans are the organism of focus for anatomy and physiology. I had my students download and play with the App, http://www.cdc.gov/mobile/applications/sto/. This is an epidemiology game from the CDC. We all loved it including me. Throughout this unit, I assigned extra reading to students focusing on epidemiology topics. You should choose topics that interest you and your students. For example, my husband has rheumatoid arthritis. When we got to the chapter on the immune system, I had my son read about rheumatoid arthritis.

To deal with before you get to Chapter 16: Chapter 16 has the reproductive system in it. You should talk to parents and the group you are running the co-op thorough to decide if you are going to teach this section or have parents teach it at home. The co-op I taught through chose to have parents teach it at home. I explained this to the parents, with a strong recommendation that it be taught. I realize a lot of parents are uncomfortable with this material but people REALLY need to know it.

Most of these weeks have two organ systems in them. It is quite a bit of material to get through each week.

Unit 4: Chapter 14

The Labs: Chapter 14, Lab 1 is fun to do with a partner. Do both Labs. I had students do a bit of research for Lab 1 before class so they could make the best battery possible.

Unit 4: Chapter 15

The Labs: There are 3 labs this week, if you want to make sure you get through them all this week, warn parents you might run 15 minutes over.

For Chapter 15, Lab 1: You need to have the set-up ready for students before class, so that lab doesn’t take much time.

Next go to Chapter 15, Lab 2: I had students do a bit of research for this lab before class so they could make the best filter possible. I made a contest out of the lab. I sent them a sheet of materials that would be on hand for their use.

Finally do the microscope lab. If you run out of time, start next week with this. It can be hard to get a good sample for this lab. Have one you made on hand in case no one gets one. If you are not teaching the reproductive system then definitely do the microscope lab next week.

Unit 4: Chapter 16

The Labs: Do Chapter 16, Lab 1 as explained. Students should work in groups of two or three, with each student doing all parts of the lab. It helps to have one person doing the experiment, one person writing down the results, and one person timing. Even if you do go over the reproductive section in class, have students do Chapter 16, Lab 2 at home.

Unit 4: Chapter 17

The Labs: There are 3 really good labs this week. Do the microscope lab and Chapter 17, Lab 2 today. Have students work in pairs for Lab 2. Make sure they get results for both students. Some students will struggle with the math for this lab. Go over it after students have gathered results for both people. Remind students NOT to share balloons. As crazy as that sounds some will share if you do not remind them! Students will do Chapter 17, Lab 1 in two weeks.

Unit 4: Chapter 18 – it’s another dissection!

The Labs: Once again not every student will be able to complete this lab. Some students are just not able to handle dissections. That is too bad. This lab is awesome for showing how the skeletal and muscular systems work. You should get a good feel for which students are getting the hang with their microscope technique with this lab. You have to make sure no one hogs the microscope though. there is a lot of cool slides to be made in this lab. If you have time have students play the Game. Otherwise have them play it at home. I had students play it while waiting to use one of the microscopes.

Unit 4: Chapter 19

The Labs: Do Chapter 19, Lab 1 and Chapter 17, Lab 1. Take 15 minutes at start of class to go over the procedure portion of Chapter 19, Lab 2.

Unit 5: Chapter 20, Class today will probably run over in time especially if you do a timeline outdoors.

The Labs: Have each student bring an insect for today, or you can collect them all yourself. Start inside with the microscope lab. For the lab you need to choose a location ahead of time. Your choice of location will decide whether you do this outside or inside on paper.

Unit 5: Chapter 21

The Labs: Have each student bring a sample for the microscope lab, or you can collect them all yourself. You can do Lab 21 with students in teams of two. Each setting up the lab for the other while you have the rest of the students performing the microscope portion. The lab is pretty lively. You are going to want to make sure it stays on track with no peeking from the super competitive students. Done without peeking, this lab does a great job of showing how natural selection works. You might want to ask another parent to help. That way you have one person helping with the microscope lab and another helping with the lab.

Unit 5: Chapter 22

The Labs: Do both lab and microscope lab. You might want to set the microscope lab up with the instructions, “Look at the view, but don’t mess with the microscope.”

Unit 5: Chapter 23

The Theory: This is a shorter day for labs. I suggest taking your time going over the material. Kids find it confusing. If you are having students take the test it might take some time to review the material today.

The Labs: Do both labs. Leave about 1 hour and 15 minutes for the two labs. That should be plenty of time.

Unit 6: Chapter 24

Have students complete the activity before class. This is a really good activity for this chapter. Briefly at the start of class ask what students learned from the activity.

The Labs: Start with the microscope lab. Have students decide on the biome they want to make before they come to class. You are going to need to have the materials on hand for making the biomes. If students do not finish have them take their diorama home to finish. While they are working have anyone who wants to share their Mad Libs poem recite it.

Unit 6: Chapter 25

The Labs: This is an outside lab. Go somewhere where there is a lot is going on ecologically. I live in Southern California. We did this lab at the beach looking at tide pools. Do the microscope lab next week.

Unit 6: Chapter 26

The Labs: You will need to collect or purchase the plants for the lab ahead of time. Do the Chapter 25 and Chapter 26 microscope labs today. Then do the lab.

Unit 6: Chapter 27

The Theory: After going over the material have a discussion about ways students could help themselves and their families reduce their carbon footprint.

The Labs: You will need to have each student do the procedure for the microscope lab the day before class. Before leaving for class, have them observe the differences between the two leaves. Have your own specimens ready to look at with the microscope. Do the microscope lab first. Start the lab today. Have students make the different solutions in class. Part of the goal with this lab is teaching students how to make solutions of varying concentrations, so you should focus on that during class. The results will be collected over the next week or two. Have enough plants for each student to take one home to water at home with 1 type of solution throughout the week. Each student will get one or two plants (depending on the number of students) and 1 type of solution per plant. Make sure students understand that they are responsible for watering correctly to the specifications stated in the procedure, and that they are expected to make daily observations. If they are not able to commit to this, have another student take their plants.

Unit 7: Chapter 28

The Labs: Today you will do both microscope lab and lab. You should go over the medium cladogram with students in class, and have them do the easy and the hard cladograms at home. Make sure students understand the concept of shared derived traits. If you are having students write the research paper, explain what you want from them during today’s class.

Unit 7: Chapter 29

Go over the cladograms from last week and the one from this week from the Show What You Know section.

The Labs: Use the instructions in the Teacher’s Guide to do this experiment in one day instead of two.

Unit 7: Chapter 30

Go over the cladograms from this week’s Show What You Know section.

 The Labs: For the lab, have your class meet at the best nursery close to you or at an area with a lot of different types of vegetation. Start next week with the microscope lab from this week.

Unit 7: Chapter 31

Go over the cladograms from this week’s Show What You Know section.

Start the lab for chapter 32 at the end of today’s class. Make sure and tell parents not to throw it out during the week. This happened to over ½ of the students in my class.

The Labs: Start with Microscope Lab 30. You are going to need specimens for the labs this week. Have students collect them, or you can start collecting them early in the year so you have enough. In a pinch use one pair for the entire class. Do Lab 31.

Unit 7: Chapter 32

Go over the cladograms from this week’s Show What You Know section.

The Labs: Start by looking at the bananas. Discuss chemotrophy when you do. This is an unfamiliar feeding strategy for most students so some discussion of it is helpful. Do Lab 32.

This post contains affiliate links.


Choosing a Curriculum for Your Science Co-op

Choosing the right curriculum makes a big difference for the success of a science co-op class, both for the student and the teacher. There are certain elements like labs paired with the theory that are important to the success of the class. As the co-op teacher/facilitator you have a responsibility to bring the level of science up for your students over the course of the co-op. Well-chosen curriculum makes this job much less work and more attainable. I taught at community college before retiring to homeschool my son. The better the curriculum that went with the class the easier the class was to teach and the more my students learned.

I would not consider teaching a science co-op that did not have curriculum to go along with it. Teaching is a lot of work. You want something to use as a guideline and a reference. I will be honest I wouldn’t pay for my child to take a science course that didn’t have some type of written material. Students also need material to reference. If students get stuck on a concept, curriculum gives parents something to reference too.

REAL Science Odyssey Chemistry 1, Blair Lee M.S.
Science Co-op: RSO Chemistry 1 Click here to visit Pandia Press.

Recently, I had a couple of people ask me for  guidance with a science co-op they were going to teach. Their problem, they didn’t have curriculum that had labs and lectures that were well-paired and they were having trouble planning their classes.

You would expect that I think REAL Science Odyssey is a good choice to use when teaching a science co-op, and you would be right. I do! Granted, I am biased about it as a science curriculum, not just as one of the authors for the series but also as a science teacher. What I want to do for you here is go through the elements of what make it a good choice for a science co-op. These are elements that you should look for in any science curriculum that you are going to use to teach a science co-op.

Elements in a good curriculum for a science co-op

  1. The careful pairing of labs with theory

You need a text that presents the theory in a manner and at a reading level that is accessible to the grade level you are teaching. There should be labs or activities that accompany the theory. Do not teach a science class to people below the college level that does not have labs in it! This is what gives science a bad name! Science should be the most fun and dynamic class outside of P.E. that students engage in.

  1. Labs that are an appropriate length of time

This point is how I came to be writing this series of articles. A few of the labs/activities in my book were not a good length for the co-op class I was teaching. I have posted a schedule detailing how to change the labs around a bit to make them work for the time frame of a co-op.

  1. Make sure the text has enough material to run the length of the time allotted for the co-op. 
RSO Biology 2 Blair Lee M.S.
Science Co-op: RSO Biology 2 Click here to visit Pandia Press.

Science Co-op:

The text can cover more material than you are going to teach, but it is problematic and more work for you if it is too short. A text that covers or goes beyond the entire time frame is more likely to be cohesive and to follow a logical progression. The cohesiveness is very important to the actual learning of science. Too often science is taught in a scattered grab-bag approach. This does not encourage an understanding of the foundational fundamentals of science, and it makes it more difficult to make connections to other areas of science.

  1. Choose a text with a teacher’s guide and, if you are going to assign them, tests and problem sets. This is for you as much as it is for the students. TEACHING IS HARD WORK!
RSO Biology 2 Teacher's Guide
Science Co-op: RSO Biology 2 Teacher’s Guide Click here to visit Pandia Press.

5.   Choose curriculum that covers good solid, mainstream science, with material that has been well-researched, and contains science just science.

If you do not choose a text like that and your course is not taught that way, parents should be informed ahead of time before they sign up for the class.

6.   Choose a text written at a reading level that is at grade level and is conversational.

This is so you know students can read it themselves outside of class.

7.   Choose a text that can be used with a range of ages and abilities.

You will get a range of ages and abilities. You want a text that can be challenging for your older or more than students but still accessible for your younger or less advanced students. This is one of the more difficult aspects to get from a textbook. It helps to have a textbook with a teacher’s guide that gives you advice on supplementary material to help with this range.

8.   Did I already mention labs with the theory!!!

9.   It doesn’t hurt to use a text that has notes on how to use it to teach a co-op.

Coming soon to help you and your students even more: A series of YouTube-like videos where I explain concepts students and their parents found complicated in REAL Science Odyssey Biology 2. (Genetics will be the first unit I explain!!!) I initially thought of this for homeschool students not in a co-op, but these will help co-op teachers as well. It will leave you with more time for labs since it should help with the number of questions students have about these complicated topics.

Check out our post about how to teach a science co-op here.

This post contains affiliate links.


Teaching a homeschool science co-op: General Notes

In September, 2013 my family moved from the Mammoth Lakes area in California to the San Diego area. One of the reasons for moving was that my then 13-year-old homeschooled son wanted a community of kids who he felt he had more in common with, AKA kids who were also homeschooled. He had friends in the small mountain community where we lived, but all of them attended traditional school. He was beginning to feel like an outsider and different in a way that worried me. We moved to San Diego and soon met homeschooled kids who he liked and identified with. The move has been really good for our whole family. My husband was already down here a lot helping one of his older sons get a business started. We have three older sons who all live in San Diego County with their wives and girlfriends. We even have a granddaughter who is almost 3 years old who lives in San Diego. It’s great being closer to her. I also love the group of homeschooling moms I have met.

My son wanted to take some classes with other kids, something he hadn’t done since kindergarten, his one and only year of attending traditional school. Someone recommended a group in Orange County that had some classes that looked perfect for him. One of the classes that they planned on having was a middle school/high school biology co-op. I signed my son up for this class. He was about to begin his last year of middle school, eighth grade, and had already worked his way through my biology course. He didn’t really need a biology course at that point, but I figured that taking a class with other kids would be a bit distracting for him, so maybe it would be a good fit for him to retake biology while he figured out what it was like to take a class with other kids.

I won’t go into all the details, but suffice to say the teacher that was supposed to teach the class canceled. The woman who runs the group contacted me about potentially teaching the class. I said no way. I need to write Earth and Space 2. She found another biology teacher who also fell through. At the end of it I finally agreed to teach the science co-op class, all for my son. HE SO OWES ME for all I do for him!!! Not that I regret teaching the class even for second. I LOVED!! It! Still he owes me big time, just saying 🙂

I learned quite a bit about using my book for a science co-op too. Things I hadn’t thought of when I wrote it. Things I really want to share with you. I decided to write a series of posts detailing my thoughts about science co-ops in general, and using my book for a biology co-op specifically. This should be thought of as a series of teacher’s notes. It is written for my book, but honestly much of what I learned is general for any science co-op.

Science Co-op
Science co-op: RSO Chemistry 1 Click here to visit Pandia Press.

The Structure

  1. We met one time a week for two hours. I provided all supplies.
  2. We went through one chapter’s worth of material from RSO Biology 2 each week.
  3. I e-mailed students telling them the material they were responsible for that week.
  4. When we met for class, there was a 15 to 30 min. session at the start of class with me explaining the material for that week. The rest of the time was used for the lab. The review notes in RSO Biology 2 Teacher’s Guide help make this so much easier.
  5. I was available for help, I still call them office hours, before each week’s class. I just had to know ahead of time.

The Big Surprise

The big surprise was the diversity and eclectic interests of the students in the co-op. I am a big fan of homeschooling. I think the real strength of homeschooling is this diversity and the time, space, and energy to pursue these eclectic interests. But I hadn’t thought what that would mean from a teaching standpoint. I am going to go point by point with the differences and how I handled them.

  • What do you do when you have students who are being educated using different styles?

I had students who were being de-schooled, unschooled, classically educated, and parents who were flexible to however I wanted to teach. I had to decide how I was going to handle this, and so will you if you are going to teach a science co-op class. There are a couple of different ways that I see to handle this:

  1. I decided to be flexible. That is my personality though. I am a very casual person. I sent the assignments to each student every week. If they did the assignments I graded and reported back to the student. If they didn’t, I was okay with that. A couple of times during the semester I did make sure that the parents knew when the students weren’t doing the assignments. I really left it up to the parents. I assumed that even for those students who were being de-schooled or unschooled that anybody taking my biology class wanted their student to learn biology. I decided to let the parents and the students figure out what that looked like within the framework of the material that I was assigning. The students that did not turn in projects did not get written feedback from me. Of course, I did give them feedback on the work that they did in class. I think the thing to remember in these sorts of flexible situations is that there is a desire to learn that subject. I didn’t have any problem with students being there without participating while they were in class; everyone did the work then. I had teens and tweens so there were a couple of times when I had to bring the attention back to what we were working on, but that would’ve happened either way.
  2. Decide on a structure. Make students responsible for the assignments. If you are going to assign grades you have to have material. If I were going to have all students accountable for turning in all the work, I would sit down with parents before they sign their kids up for the class and make sure that they understand what you are going to require. If you go with this structured approach, you want answer keys to the work. Grading is a LOT of work.
  • What do you do when you have a range of ages?
  1. I grouped my students by age. I kept the co-op small, nine students. I had three groups of three a younger middle school group, an older middle school group, and a high school group that included my son even though technically he was still in middle school. These three groups worked really well together. A couple of my students who were not doing much of the work did more work any time the group was working together.
  2. I highly recommend having groups of two or three students if you are going to run a lab class.
    • The members of the groups themselves will help each other if the lab is complicated.
    • It helps with limited resources like microscopes.
    • It made it easier for me when labs were complicated having fewer numbers to work with. Instead of working with each student individually, I was able to work with each group.
    • One of the groups only wanted to work together on some of the projects. I was very flexible with this. That group usually preferred working singly and I let them.
  3. I assigned the older students more work, and I had higher expectations for them. Most of this work was in the form of reading articles and watching videos. I had the high school group focus on epidemiology as it related to the weekly topic throughout the year.
  • What do you do when you have a range of abilities?
  1. Just because you have a range of ages does not mean you have a range of abilities. One of the first tasks at hand should be determining the overall level of science in your class. For example, my biology textbook has a heavy-duty microscope component. My son was the only person who was experienced in overall technique when it came to the microscope. Even some of the students who had used a microscope before really needed work with their microscope technique. What I learned is that there is an emphasis with looking at things through the microscope, but not an emphasis on learning how to do a good job preparing slides. Those students, even though they understood what they should be seeing, were at a beginner level as far as slide preparation and overall manipulation of the slide on the stage.
  2. If you do have a range of abilities and you’re going to pair people into lab partners you should decide ahead of time whether you’re going to pair students who are at similar levels or disparate levels.

Things You Need for a Science Co-op

  • The list below is what I think you need to run a science co-op, this is my personal opinion. If you have different thoughts about any of this feel free to comment. In fact, if you have thoughts about anything you read in here I would love to hear from you.
  1. A textbook or some sort of complete reference material
    • Different students access materials differently. This is one of the most important things to remember when you are teaching any class anywhere. A lot of us are homeschooling because the traditional method in school didn’t work well for our students. As someone running a co-op class you need to be sensitive to the fact that some of your students are going to access material visually, some (in particular in a science class) kinesthetically, some orally, and others will learn using all of these. You need to make sure that students have access to this written component so that they have it to refer to and their parents have it to refer to.
    • A textbook will help you, the teacher, pace your class and figure out how and what material to present.
    • If you’re using REAL Science Odyssey Biology 2 the textbook will tell you what labs to use with the theory. I will be posting unit by unit any additions to labs, so that they work for the amount of time allotted. Some of the labs that are in the chapters did not take an hour and a half. I’ll make notes within the posts on this blog explaining what I had students do in the co-op class on those weeks.

      Science co-op
      Science co-op: RSO Biology 2 Click here to visit Pandia Press.
  2. You will need permission to take and use photos if students are in the photos. It’s a minor point, but it is one that you might as well deal with at the start of class. Some parents do not care and other parents do not want their children in photos.
  3. A plan: The plan will be aligned with the textbook for the most part, but you should really go through before you teach the class and figure out some of the logistics. Your plan should address things like:
    • Are you going to take any field trips? If you are, do you need permission slips and will there be an additional fee for those field trips?
    • How many weeks will the class run? RSO Biology 2 is a 32 week course. Are you going to teach a 32 week course? Or are you going to teach a shorter course? Maybe you are just going to teach evolution, genetics, and anatomy from it. You should figure this out ahead of time. (I am a fan of teaching the complete package, but sometimes there are time constraints.)
    • Some labs run over in time. You should prepare parents ahead of time when this will happen.
    • Teaching takes a lot of energy. Make sure you have breaks built into the schedule when you need them.
  4. What is your policy if any kids miss a class?
  5. What is your policy if you, the teacher, cannot teach a class?
  6. Could you use any help? If so, you could have parents rotate once a week helping or you could offer one of the parents some sort of benefit for being the parent helping to teach the class.

This is all I can think of at this time, but knowing me I will continue to edit this. This was dictated using Dragon software. Sometimes weird typos creep in using this. If you notice any do me a favor and let me know. Thanks, Blair

This post contains affiliate links.

Read about what curriculum to use in a science co-op here.


From Jodhpur to Delhi for our Last Day in India

It is an 11 hour drive from Johdpur to Delhi. We flew instead. We needed to be at the airport at noon. Before we left Johdpur Sodhi picked us up to take me shopping for spices. People kept telling me to buy my spices there. I had already bought a few spices in Dubai and Jaipur, but I waited to do most of my spice buying here. I bought the spices then checked on the US Customs website to make sure I could bring them home. That was a backwards way of doing it. Yes! I can! I fell in love with Indian cooking. I really cannot wait to start experimenting with it. I also bought myself an Indian vegetarian cookbook.

The spice merchant told me he has 3 grades of spices, Indian, medium, and American/European. His rating system is based on heat. According to him even American/European’s who like heat can only stand the medium. I took the American/European version of everything except the ginger. I like my ginger as hot as an Indian person we found out. When he found out how much I like to cook he invited me to his house so that his wife and mother could cook for me. Bummer, we are leaving today. He is the third person to invite me home to cook for me. Every time we could not do it for one reason or another 🙁

This is the clock tower in downtown Jodhpur.

We got back in the car, and Sodhi asked if we wanted to see fabric or antiques, or something I was not quite sure, but said yes, of course. At first we were surprised by what looked like a big warehouse or fabric store. It ended up being really fun and different than anything else we went to on the trip.

There was just no way Jim was going to agree to my bringing any of these big pieces home. The prices were amazing though. We walked downstairs through a lot of fabric items, too many to name really.

They began laying out bedspreads. Here they are one on top of the other.

This is Khush, the person who helped us. It was fun to sit and have them show us the different things they make and discuss the techniques. I could not believe the prices either. Yes, we did shop a bit here. Now I have to buy another suitcase for sure.

I did not buy this, but thought I would show it to you. This is the piece women put on their head so they can carry things on it.

Sodhi took us to the plane. Then he began the long drive back to Delhi. He stopped at our hotel in Delhi to drop off our new purchases.

We started to line up for the plane. One of the guards told me, “No, not line up.” Okay, so we moved over. Once they started boarding it was sort of a free for all to get on the plane. It didn’t matter because we all had assigned seats.

We are spending two nights in Delhi, then heading home. We decided to stay somewhere nice for those two nights. Prices on really nice hotels are very good by American standards. I checked out Delhi hotels on TripAdvisor and chose the Oberoi. Oh my goodness, did it turn out to be nice. When we got to the gate of the Oberoi they checked under the car with mirrored sticks. Then they checked our bags before letting us into the hotel. It is a beautiful hotel and the service is over the top great.

This was waiting for us when we got up to our room.

We decided to eat at the Asian restaurant upstairs at the hotel. I ordered a dish I had never heard of. It was an appetizer called crispy spinach. They gave me the recipe when I told them how much I liked it.

After that bed, in a really comfortable bed. Tomorrow we have to get up early to go see the people at Vidya Munirka one last time.

Ingredients

Chopped spinach

Little bit of sugar

Little bit of salt

Aromats, which is something with a small amount of MSG

flash fry this 10-15 seconds in a wok with nicely heated sesame oil

Serve immediately

Check out yesterdays post here and read about our drive to Jaisalmer here.


Jodhpur, India

Today we got up and drove to Jodhpur. We are spending one night in Jodhpur, then flying to Delhi. A few kilometers outside of Jaisalmer we passed a long procession of people and animals. Jim thinks there were a couple of thousand people in it.

Jodhpur: Procession out of town

First came the people with camels

Jodhpur: On the road

He is pushing a cart and pulling a camel

Jodhpur

That is pulling a wagon

With people walking behind the loaded wagon

At first the groups of people were small

Interspersed with elephants, camels, goats, sheep, and cows

I am embarrassed to say, this is the best photo we have of our driver Sodhi. He helped make our trip as great as it was.

Oh yes and horses

Then kilometers of people

“Sodhi, I really need a photo of a free range camel.” That was all I wanted before leaving Jaisalmer. We had seen them everyday for the past 4 days, but I had yet to get a photo of one. I was told these camels are not wild, that people just let them out then collect them again.

Jodhpur: Camels

In addition to driving us where we ask him to, Sodhi is a big help in choosing what we see. Sometimes we have something specific we want him to take us to, but often we just ask him what he thinks we should see. When we got to Jodhpur we checked into our hotel. Sodhi told us he would pick us back up in 45 minutes. Then he took us to another fort. You might think we would be done with forts by now, but each one has been different from the others. We have enjoyed them all. I will never read another story about a fort the same way again. Another issue we deal with is whether to get a guide or not. Sean prefers not to have a guide because the guide sets the pace when we go through, not us. I usually prefer to have a guide, because I get more out of the site when we have one. This is not a guided group tour, those I dislike as much as Sean does. A personal guide is almost always worth it. Our guide’s name was Pawan.

The walls of the City fort in Jodhpur are 180 meters high

Jodhpur: City fort

and 10 kilometers long.

Jodhpur: The view from the wall
Jodhpur: Another view

You can still see where cannon balls struck the wall, and I am not very impressed with the amount of damage either. I think arrows dipped in pitch and sent flaming over the walls would be much worse. The cannon balls were fired during a war between Jodhpur and Jaipur. Both were part of the Sun Dynasty. Jaisalmer and Bhati are the only areas in Rajasthan ruled by another dynasty. They were both ruled by the Moon Dynasty. Or what about a vat of boiling oil? That would do serious damage in Jaisalmer or Jodhpur, except it might cool down too much by the time it reached the attackers below. Here is a thought, you have a bunch of human feces right next to the outside wall, what about just throwing that, deadly no, but it is not something to run toward either, LOL.

Building on the City Fort started in 1459 and took 350 years to complete.

The word falsa means gate. This gate was built sometime during the 15th century.

It used to be a custom for someone to sacrifice their life prior to the construction of forts and palaces. This person would be buried alive. This was done to protect the building in perpetuity. The person sacrificing their life volunteered for this so they would obviously be very loyal to the person it was being built for. This loyal spirit would stay at the site protecting it. This stone is in commemoration of the person who was buried alive sacrificing their life to protect the City Fort of Jodhpur.

This is called the Iron Gate. The turn is so no one can get a running start to ram the gate when attacking.

This is the suttee wall. Suttee is the practice where widows throw themselves on their husband’s funeral pyre while it is burning. The widows subsequently burn to death. This wall is meant to discourage suttee. The British banned suttee in 1814.

This is called a peeking palace, because ladies would hide behind screens and gates and peek out through the grillwork looking down at events. We have heard a few times that the segregation of women comes from the Muslim influence.

Palanquins are used to carry people by people.

These are elephant saddles.

This man gave us a demonstration on the practice of smoking opium, which is against the law, but alive and well as far as practice goes.

In addition to demonstrating the technique used to smoke opium, they were giving a turban wrapping demonstration here.

Often in Indian art the faces are in profile. This is a stylistic thing. I would breeze by much of the art, Sean is the reason we spend time checking it all out. He finds it very interesting. He would much rather go to an art museum than a history museum. In fact he has dragged me into two art shops this trip just to look at what they had on display.

These are the last three kings of Jodhpur. The last one is on the bottom. Doesn’t he look a lot like Prince?

I hate to break it to the restaurant where we ate a marvelous vegetarian dinner, but lamb piccata is definitely not a western dish 😉


The Desert Safari near Jaisalmer, India

Desert Safari

I imagined riding a camel would be similar to riding a horse. Camels are a lot taller than horses, but there are some similarities. They way you move on them. You also turn them using the same method of hand control. You squeeze them with your legs to speed them up. You can kick them or use a crop like thing or the reins to get them to move faster. I didn’t do any of these things. I know these things because I asked one of our guides. I am not actually complaining about this either. Camels are a LOT taller than horses! Oh, I admit I did have one stupid second of disappointment when it became obvious I was going to be led by a guide. The entire rest of the time though I was happy about it.

My camel is the brightly decorated one. His name is Michael Jackson. Michael Jackson has bells all over so he jingles when he walks. I asked the guides about camel racing. They all think it is a fine sport, but as you would expect none of these camels are racing camels. 

Here I am on Michael Jackson. It was fun when the camel stood up. If you wonder if I have a different standard for camels than I do for elephants, I don’t think so. The camels are similar to horses from the guide’s perspectives. If you have thoughts to the contrary let me know. Sean is on Rocket. We met a great father and daughter during the safari, Pooja is the daughter. Pooja lives in Pennsylvania. She was so much fun. Pooja is 21 years old. Sean and Pooja really hit it off.


I have layers of clothes on. It was too warm for 15 minutes. The rest of the time all the layers were perfect. I debated about bringing warm gear or not. I was glad for most of the trip I didn’t bring all that cold weather gear, but this night it was cold.

(I am sitting here writing this at breakfast on 12/31). I was really excited when I saw soy milk which meant I could have coffee with soy milk! Yeah! Then I ordered masala tea without milk (actually nahee dhood) instead. Oh yes and make it extra gingery. I like my ginger as hot as Indian people do. This is something I have learned on this trip. I also learned that I do like some spicy in food. I have come to the conclusion that I do not like jalapeños. It is not the heat it is what is used to get that heat.

The way the safari works is that groups of people are brought out on the camels to the dunes successively to watch the sun set. There were 4 groups. We were the first group. At first I wasn’t sure which number group you would want to be, but at the end I realized the first group is the best group to be in.

The guides leave us to go get another group.

Carat, Jim, Pooja, and me

The first group gets pristine dunes to play on and to photograph.

It was fun to run around in the fine sand.

Hi to you, from the desert outside Jaisalmer, India

Then we watched the sunset.


The first group to the dunes is also the first group to leave the dunes. The minute the sun went over the horizon (hmmm, which is technically not correct)… The minute the earth rotated enough that the sun was no longer visible from where we were, just doesn’t have the same ring though. Does it? Anyway, it became cold when the sun vanished.

I was never so glad to see Michael Jackson before, and honey, I am a Michael Jackson fan from way back. 5th grade in fact,: 1,2,3 it’s as easy as A, B, C.. Oh yeah! I even own his greatest hits CD.

Camel feet are cool.

If you are the first to the camels, you are the first to the camp, too. It was a wonderful night, filled with great food, good company, dancing, and singing.

Here are the singers. We were told they sang some songs in Hindi and some songs in Gujarati.

I took a video of them playing. They are giving me their email address so I could send it to them when I get back to the States and have an email connection that will allow me to do that. There was only one problem, they did not know how to write or read Romanized letters (the letters used for the English language). They only knew the Hindi alphabet, or maybe it was Gujarati.

There we met Nellika (I am so sorry if I misspelled that). Nellika is from the Netherlands. She has been on the road for the past 8 months, 6 weeks of that time at the Damodra Desert Safari. Damodra Desert Safari is the outfit we booked our desert safari with. They picked us up at our hotel, took us sightseeing through the desert, provided the guides, camels, and location, then brought us back to their camp where we were spending the night. At the camp were tents, food, and entertainment. Nellika was one of the people at the campsite. She has been working for the past 8 months all over the place in Europe and now here in India. She finds jobs through a site called workaway.info. At workaway.info businesses post jobs they have. Interested people contact the businesses about the jobs. If hired, it is for a limited time, you receive room and board but no salary or travel fees. Nellika has used this to travel these past 8 months. She was a secretary in the Netherlands and wanted something different. She wanted that something different to include travel, but she coundn’t afford traveling. Now she is traveling and working her way around the globe.

After everyone got there, the dancers began. It was beautiful to watch the native dancing under the stars with live music.

In between the dancers’ numbers there was a man doing acrobatic routines. He began taking mouthfuls of kerosene and breathing fore. It was spectacular and difficult to watch at the same time.

Spectacular… But the chemist/biologist side of my brain doesn’t sleep. I kept saying things like, “That is so carcinogenic.”

I felt conflicted, because here someone is giving a bit of them self (literally and figuratively) for your entertainment, but what they are doing is harmful to their health.

When the dancers came back out, they asked people from the audience to dance with them. I got up. What do you know so did Sean. Good for him.

Sean has had a persistent cough. One of the staff made him a local cough remedy that had a little rum. Sean drank it over the course of the evening, and did cough a lot less. He was a bit crispy from it, but very, very funny. I went to bed on that note. Sean stayed up and hung out with Pooja.

It was cold in the desert. I wore every article of clothing I had with me to sleep that night. Most of my clothes were back at 1st Gate, the homestay we were going backp to in Jaisalmer. As I lay snuggled between Sean and Jim in our tent, I realized this was as close to a scene from Arabian Nights as I was likely to ever get.

Check out part one here and two here.


The Road to the Indian Desert Safari

Indian Desert Safari

We are driving to an Indian desert safari for the night. Jaisalmer is surrounded by little villages. Some of the villages have people in them and some do not. Some are crumbling, and some have been fixed up. The first village we went to was not welcoming. The adults hid and the kids followed us around asking for money. These villages probably get tired of tourists showing up. They are very small, more like collections of a few houses with a wall around the complex.

This is a view in so you get the idea of what I mean about the structure of the village. This is the traditional style house in this area.

Cricket! This is a cricket obsessed country.

We saw more and more goats. Some were unattended and some, like these, had a shepherd with them. We were picked up at our hotel by a driver in a jeep. There was another group, a father and his daughter, already in the jeep. Their names were Carat and Pooja. We lucked out they were Indians from American. Lucked out because we hit it off right away, and Carat spoke Hindu and perfect English.

The experience in this village was completely different. The woman in pink looked over the edge and waved us in to the village. When she caught my eye she said, “Lady you come in, please.”

Look at that roof. Perhaps this is the type of village the man who wants to come work in American is from. Actually it must be a village similar to this one. At least these were the only type of villages I saw surrounding Jaisalmer.

The group of women and kids who invited us in. They were all warm and welcoming. They invited us through an entrance into a courtyard with a few buildings in the courtyard.

Sean loves kids and animals. They are drying clothes in the sun, check out the solar panel.

The two baby goats were being kept under the domes structure, penned in.

The bangles from elbow to shoulder mean these women are married. Years ago ivory was used for this, now the bangles are made from plastic. We just started seeing the bangles in Udaipur, but only occasionally. They are more common in the villages outside Jaisalmer.

I asked the woman in green where she cooked. She brought me into her house to see this. It was not smoky smelling inside like you might think it would be.

Many times kids have asked us to take their photo so they can look at the image. This is taken inside the house, note the floor, walls, roof, and shelving.

This is used to grind grain and beans like dal. Indian people use a lot of different grains and even some beans in their breads and crackers. Many of their breads are unleavened so gluten content is not an issue. (Yeast breads rise better when the gluten content is high. Gluten is naturally found in wheat and some other grains.)

Here is a nice example of a nose ring. We have not seen them very often. They have ranged from small hoops to huge hoops. They are more common if I include studs. Here I just mean actual rings.

Here is the roof of their house.

Then we were driven to this “lake”. The lake was surrounding by funky unnatural piles of dried mud. “Really. Why are we here?” All the Americans wanted to know. This small open body of water is used as the water source for 15 or 16 villages. The water is sucked into the blue water tank, then it is driven to the village. The piles were from dredging to make the lake.

We would drive a while through the desert landscape, then all of the sudden something would be up ahead.

Here is a fort that is being reconstructed so it is more interesting at a distance. There were peacocks EVERYWHERE!!!

India - Secular Homeschooling

India - Secular Homeschooling

The fort is being reconstructed in what looks like the crumbling ruins of a village.

This was lying on the ground.

Jim and Carat wandered off, and I handed candy out to local kids who showed up asking us for rupees.

How did they live? Why did they leave this village? What would it be like to have so few people in your life? But to know them so well?  Have you ever heard the story of how Alexander the Greek, LOL, met Roxanne? The tribal woman that he married. I wonder if she came from a village like this, except one that was in the mountains. A town filled with love, and life, and dancing, and brilliant colors; now filled with peacocks, dust, and solitude.

Check out part one here and part three here.


Daydreams and Fairytales in Jaisalmer, India

Jaisalmer

Here is a secret you don’t know about me. I am a daydreamer, an over the top, lose myself in my own head, fantastical daydreamer. It used to drive my mother wild. I was forever getting lost, because I would begin to daydream and just lose my way and everyone else too. I have many memories of being lost on streets and in department stores as a child. I would come out of my reverie in a panic, because I was lost and even felt a little lost as I went from the dream reality in my head to the place where I actually was. My sister is probably the only living person who knows that about me. What even she probably doesn’t know is that I am just as big a daydreamer today. I have schooled myself a bit out of politeness, but I can still get lost in my own head. I still have it in me to drift off in the middle of a conversation or abruptly change the subject. I work on that because it is rude to the person I am talking to, but when it happens it is because either that person or something around us triggered a dream or stray thought that sticks with me and I follow it away from the conversation. Traveling triggers so many daydreams for me. The fort at Jaisalmer was definitely going to do that! I didn’t know it until I woke up this morning and there it was perched on top of a hill looking even more impressive than it had the night before. We also went on a desert safari, which will be covered in post 2 from today. Of course that had daydreaming written all over it too. Both the fort and the safari made me think of many of the books I have read.

Why this fort more so than others we have seen? The fort at Jaisalmer is still in use. The fort at Jaisalmer is about 900 years old. It has been in continuous use that entire time. Because it is still in use, it is right there for you to see how areas are used and it has been kept up, not reconstructed, which sometimes loses something in the reconstruction. It was full of people in traditional dress, dogs, cats, a mouse, cows, and even a couple of goats. There are shops and restaurant, temples and priests, trash and poop. It is all there. All the perks and all the detritus too.

There were 3,000 people living inside this fort at one time. When I was in my teens I realized that not everyone can be the king or the queen. When people imagine themselves living in the past or dream about who they were reincarnated from (as some people like to do), they always imagine themselves as Queen Elizabeth or the King of the region, never as the the lowest scullery maid. I used to try to imagine myself somewhere in the middle. Now I don’t imagine being one person at all, I try to get a feel for the activity and the lives overall. These first photos show the hustle and bustle on the way up to the top of the fort. We are inside the first wall.

The first time we saw stairs like these was in Macchu Picchu. I wonder about the steps going across, what were they used for?

People used to dump slops out their windows. You would have to be careful walking up to the fort that nothing gross was thrown out of a window and landed on you. I wonder if people used to customarily yell something before they dumped things out the windows, something that has been lost as a part of history.

We have reached the top of sunny Jaislamer. Finally I need the hat I have dragged all over India.

It is 3.5 kilometers around the entire perimeter. We had about 3 hours to explore the fort today, which was not going to be enough time, because we were getting picked up to go on the desert safari at 2. We decided to go straight to the Jain Temple today. Tomorrow after we get back we will explore the fort more.

There were so many people trying to get into the temple that Jim and Sean let me go by myself. I walked up and in. It was crowded to get in but was not crowded once inside. We found out when we tried to get into the next temple that I was supposed to have had a ticket to get in to the first temple.
Here I am being told by the man in the turban that I need a ticket to see the inside of the Jain Temples, oops.

We were really lucky when we did buy the tickets to the temple, that is when we met Lavi, the person who taught me what I know about the Jain faith. Lavi owns a shop with his father right next to the temple. After viewing the temple, we sat in his shop while he shared tea with us, taught us about Jainism, and talked about how he wants to do business a different way, with better quality stock and without all the bargaining/haggling.

The Jain Temples were built at the fort with the permission of a Muslim King. The Jain faith comes out of Hinduism so why would a Muslim King agree to this huge Jain temple being built. One reason is back then it wasn’t about whether you were Muslim, or Hindu, or even Christian. The main problems with Muslims and Hindus came out of the separation into Pakistan and India.

Then it was about your allegiance to the ruler of the location you were at. There are 7 Jain Temples here. 5 of them are interconnected and it is interesting to go from one to the next…

looking at the artistry in the intricate carvings, and walking on the smooth, huge stone floors.

They were built over 17 years during the 14th or the 15th century. When it was built Jaisalmer was on the silk route. The Jains were big silk merchants. Because they paid such high taxes to the king, when they asked to build a temple he king allowed it. It was dangerous to build outside of forts in those days.

There was a scarcity of water in those days which made it difficult to make mortar. The Jains invented an interlocking style of architecture, where the stones stayed together without mortar. The Jain complex is named after the Muslim King, King Laxman, who gave them permission to build it. That is pretty cool if you think about it.

Jainism has no God. They believe that God lies within. I thought this was interesting and not sure I had it right so I went searching for a more complete statement. Here it is. “Jainism rejects the idea of a creator deity that could be responsible for the manifestation, creation, or maintenance of this universe. According to Jain doctrine, the universe and its constituents (soul, matter, space, time, and principles of motion) have always existed. All the constituents and actions are governed by universal natural laws and an immaterial entity like God cannot create a material entity like the universe….Jains believe that to attain enlightenment and ultimately liberation from all karmic bonding, one must practice the ethical principles not only in thought, but also in words (speech) and action.” http://en.wikipedia.org/wiki/God_in_Jainism

A Jain priest with a statue of Mahaveer

Jainism was founded by the prophet Lord Mahaveer also called Adinath. He founded the religion 2064 years ago. Jainism is older than Buddhism which started 40 years later. At this point in the conversation I had one of those random thoughts. “What must have been going on in the world about 2050 + or – a decade or two years ago? Three major faiths started at the same time, Christianity, Buddhism, and Jainism. All three of these faiths have as major tenets of their faith tolerance to all. If you look at what the three prophets Christ, Buddha, and Lord Mahaveer were preaching, it is about how to have a better more tolerant relationship with others, including at least for Buddhists and Jains non-human others. What was the catalyzing force causing this all to happen at that time? I wish I knew. Were they good times or bad times that led to these prophets’ messages? Were they aware of each other’s philosophies in which case they spurred each other on or were they figuring it out tabla rasa? Did they think of themselves and each other as philosophers or religious zealots?” I don’t know the answers to any of these questions. My initial thinking/bias is to find out if there were any environmental factors going on at the time, a decade long drought or mini ice age perhaps. Sean would argue that Buddhism and probably Jainism as well are not religions, but rather philosophies about how you should live your life. Sean does not believe atheism and Buddhism are mutually exclusive and I agree with him. I will have to get his take about whether an atheist can be a Jain.

Lord Mahaveer was the prophet who started Jainism. A God is someone no one has ever seen. A prophet is a person who sees a new way. Some people are enlightened by a prophet and some are not.

Jain is the Hindu word meaning pure. Jainism is based on 2 main principles.

1.) non-violence – this extends to hurting or negativity in any way. Jains do not believe it is okay to kill even a small ant. Accidentally is okay, but on purpose, no, that is not okay.

2.) pure vegetarianism – even root vegetables are not okay to eat because while plucking out these vegetables you might kill little animals that live around the roots.

The Jain community is divided into two parts, Shwetamber and Digamber. The Shwetamber Jains, the monks wear clothes in the temple, the Digamber Jains, the monks do not wear clothes in the temple. The Jain priests wear yellow and red. Jain women cover their heads and Jain men wear white suits. Jain people bathe before going in to temple and then change into their temple clothes.

Here is the area where Jain men clean themselves before going to temple. Both Jain temple complexes we have been to had big courtyards with showers off of them.

These lockers store clothes for people going to the Jain temple when they change into the clothes they wear inside.

There are feet stones with holes in the bottom of the stones. People clean their feet with holy water, then they collect the water, and use it to bless with.

There are small doors and gates in the temple, this is to force you to bow down to the gods.

The dragons on the steps and columns are to scare the evil out of any people with bad intentions in their heart. The last photo is a shot taken straight on looking at the dragons. See the teeth and little legs. There were lots of dragon shots, because I was surprised to see them. And you know, the whole fairytale dreamer mood I was in this day.

There is a bell when you enter Jain temples. The bell tells God you are there.

Statues of Buddha and Mahaveer look similar. There are differences.

Here is an illustration copied from the Internet for comparison. This is Buddha. No one really knows what Buddha looked like. The real man who was Buddha would not let an image of himself be copied because he did not want people worshipping an image. I guess we don’t really know what any of these men looked like at this late date, do we? But this is a common depiction of Buddha.

1.) Buddha sits in several different positions, Lord Mahaveer always sits in the same position.

2.) Lord Mahaveer is always naked

3.) Lord Mahaveer has his eyes open

4.) Lord Mahaveer has a lotus in the center of his chest

5.) all statues of Lord Mahaveer have a cobra on them.

6.) the top knots are different

There are 6,666 statues in Jain temples. 6 is an important number for Jains. There were 6*4 = 24 Jain prophets; all from a different era. The 24th prophet is their 1st prophet, Lord Mahaveer. The 1st prophet is the most recent prophet from sometime in the 18th century.

All this is very interesting but we need to eat lunch and go on a desert safari!

This is Lavi in his shop. Stop by if you are in Jaisalmer. Lavi speaks perfect English. We really enjoyed meeting him. Lavi’s father is a man with foresight. About 30 years ago (I hope I got that number correct) he opened his store directly across from the Jain Temple in Jaisalmer. It is a prime location. He also made sure his son could speak really good English. Lavi went to school to get a degree so that he could incorporate businesses, something an attorney would do in the US. He is now working in the family business.

Here is the view from our hotel, 1st Gate, while we ate lunch. Now where is Sean, we need to go.

There you are 😉

Check out part two here and part three here.