The idea that math…of all things…is fun, well, who would have thought it! Lilac Mohr’s self-published book, Math and Magic in Wonderland is a whimsical story where math and science are interwoven with literary prose. It is both engaging to read and at the same time, it is educational. We often talk about the journey through learning at SEA Homeschoolers and this book fits that sentiment. It is a fitting tribute to the Carroll masterpiece upon which it is styled.
Mohr’s degrees in Engineering and Computer Information Systems provide a solid basis for her educational and insightful offering while keeping the interest of students and parents alike. The educational aspects should not be overlooked simply because this book is so entertaining. The journey in the book is much like life’s journey. You learn as you go, and the only way to move forward is to solve your current problem.
The rich eloquent flow of the author’s prose will transfix readers from the first line. And don’t let the Math in the title intimidate you. The answers are included, and the process is clearly explained for all. To quote my son, “Mom, it isn’t REALLY math, it is puzzles and stuff. You know fun, not like math!” So, it is math, but not really.
If you adhere to the left vs right brain theory, you will particularly like Math and Magic in Wonderland. This book allows for creative and unique ways to develop pathways between these opposite sides of the brain. It is difficult at times to apply literature this way. By teaching different modalities and weaving subjects together and applying them in a real-life way, you create an excellent project-based learning unit that weaves math, science, and literature. The experience is further enriched by the free unit study available on the SEA Homeschoolers’ website which ties in the science component seamlessly. The unit study really brings the lessons from the book up several notches. I often find it hard to apply math to real world situations in ways that my children find engaging. With the pairing of the science unit study and Math and Magic in Wonderland, Mohr does it for her readers. My children and I are fans of this book, and we all hope she writes more of these types of books and unit studies.
This unique and clever book is a must read for all ages. It is one of those rare books to be treasured and shared within generations, not just for the intrinsic educational value of the book itself, but for the delightful story that unfolds as you are transported via Mrs. Magpie’s Magical World. I enjoyed reading and working through this with my 9 and 14-year-old children.
This review contains an affiliate link.
Check out our post on a home school dad’s service trip to Guatemala here.
Be Naturally Curiousspecializes in science mini-courses. Each of these mini-courses focuses on a different scientific concept written by a different Naturally Curious expert. Each mini-course includes a beautifully illustrated story, a craft or manipulable, a game, and an experiment or outdoor field activity.
Subject Area: Science
Type of Course: Unit Study each expected to take your child 5 to 10 hours.
My son, who is 12, helped me work through a few courses of Be Naturally Curious. He loves the desert and desert animals so we started with the course on Life in the Desert. My son is older than the recommended age, but even he was drawn in by the artwork and the story. Together we read through the whole unit. The beginning introduced deserts and went over important concepts and vocabulary. Then the course switched to animals in the desert and here is where my son had a lot of fun. My son is a very creative kid, and he decided he and I would read the next part like a play with each of us taking different parts. This works because the story is set up almost like a tv show which allows for kids to get creative in their reading while at the same time learning the concepts.
Here is an excerpt of the text to illustrate my point:
“Sure, Sandy. Well, as you can see behind me, there’s a lot of sand in the Sahara Desert. In fact, there isn’t much of anything other than sand in many places. Sometimes it gets really windy here, and the sand blows all around. We camels have some great structural adaptations that protect us from the sand. First, check out my amazing nostrils! I can close them to keep out sand. Can you do that, Sandy?”
“Er, uh—Calvin, I’m a plant. I don’t have nostrils.”
“Oh, yeah. Sorry about that. Anyway, now check out my long, gorgeous eyelashes. I have two rows of eyelashes that help keep sand out of my eyes. How many rows do you have, Sandy?”
“Calvin—I’m a plant! I don’t have eyelashes.”
After reading through the text we came to the activities. There are 4 activities per course, and the activities are there to reinforce the concepts while being fun for the kids. For the desert unit there is a game, a craft and journal activity, a hands-on activity that allows the kids to act out what they have learned, and an experiment that can easily be done with materials you have at home. The activities are well thought out and there to reinforce what is learned in the course. The parent will need to print out the materials for the activities and have time to go over them prior to the lesson. This is especially true for the games in the courses. These games are not simple games you can throw together in a minutes notice. You will have to print out the pieces and the board, do some cutting, and read all the instructions.
The mini-courses all end with a Curiosity Corner which is a page of links to other sites that reinforce the concepts of the unit. My son and I clicked through all of them in the desert unit and the links all worked and went to sites that were worth our time. I was very happy with this feature. Next is the Tools for your Toolkit section which reviews vocabulary and concept for the student. In addition there are tool icons that the student can glue or tape to their toolkit. The mini-courses end with a glossary of terms.
I thoroughly enjoyed working through these units and would have loved to have these when my kids were younger. Be Naturally Curious is very engaging for a variety of ages with wonderful illustrations and clever stories. The activities support the concepts in a fun way. Even though my son and I are over the recommended ages, we had a blast working through them. The only negative is that it is for a variety of ages, so some of the activities might be too hard or too easy for certain students depending on their age and/or skill level.
I would also like to add that I think these mini-courses would be wonderful to use with twice-exceptional students. The material is engaging, which this group of students would love. The illustrations and story will draw these students in, and the activities are fun and at a high level especially for younger elementary students or for older students working at a lower level. The courses are also short, which is a help for twice-exceptional students and their parents.
The only drawback of Be Naturally Curious is that it is for a variety of ages, so some of the activities might be too hard or too easy for certain students depending on their skill level. Also for some older kids the stories may seem young to them although with my own son this was not an issue.
Blair Lee’s Review –
I saw this engaging and highly educational collection of unit studies covering a range of science topics at a conference a couple of years ago. There are twelve books in the series. Each book could be used as a stand-alone mini-course or could be incorporated in with another course. These books would work very well in a science co-op or in a home setting, although you will want to make some minor adjustments for the group activities.
Each book starts with an explanation of the theory. This is the science knowledge kids need to know about the science topic that is the focus of the book. This section, including the illustrations, is well written and the science in it is good.
There are a nice range of activities, including labs with data sheets, that follow. Each activity illustrates a different concept or builds on the previous activities. The activities do a nice job of highlighting specific concepts presented in the theory portion. This pairing of theory with labs and activities is something I look for in science material. It is essential to pair these two for a good understanding of how the scientific method works. The materials needed to complete the activities are inexpensive and easy to find things you probably already have laying around your home. Many of these activities will require parent help. Many are group activities so it will take some thought to turn these into activities to be done with just your child and you.
The activities are followed by a section called Curiosity Connector. This section has links to other resources to learn more about each topic. This is followed by a section called Tools for Your Tool Kit. In this section there are a small number of questions and badges that kids can add to a toolkit which comes with each book. This is a nice way for parents to keep track of what kids have learned. It also gives kids a sense of mastery by highlighting the concepts they have learned. The last section of each unit study is a glossary. I think glossaries are very important in a course used by homeschoolers. It tells users of the material the specific definitions used by the author for each science term. This is important when kids aren’t sure of a word and definition.
I highly recommend these unit studies. I did have a few minor quibbles, but they were very minor. These unit studies are good for a range of ages. That is sometimes a problem, because the text and activities do not always match exactly with the intended age. If you are using these with multiple children of varying ages however, that could be a plus. In most cases, with parental involvement, this slight issue could easily be dealt with.
I also thought the drawings of the atoms and molecules in the two chemistry unit studies were a bit confusing. I emailed the author about these and I have included Valerie Grosso’s replies to my questions.
In one of the illustrations in The Adventures of Carbon, one of the oxygen atoms in carbon dioxide is drawn missing 2 of its valence electrons, but in another they are there. (If you are wondering about the reason there are only 6 valance electrons in the correct drawing, Google carbon dioxide resonance.) Valerie’s reply,
“You have a good eye! The lack of two valence electrons in the bottom image on pg. 4 of the Carbon mini-course is, in fact, a typo. Or, to be more accurate, a slip with the illustration. It is on the list to be fixed but part of the issue is that the illustrations for this particular mini-course were originally done in watercolor, so correcting isn’t as easy as it seems! 🙂 But it most certainly will be corrected in the near future.”
The author of these unit studies also gives atoms of the same element that are in molecules and the same parts of the atoms different names. Since every electron is an electron and every oxygen atom is an oxygen atom, I would prefer that they have the same name. (For chemistry buffs, yes I know this ignores isotopes and ions). From a scientist’s point of view I worry this will make the subject a bit confusing, and it something a parent will want to be aware of in case your kids have questions. Valerie’s reply,
“Our feeling was that having the atoms have different names (Ollie Oxygen, etc.) made it easier for kids to track these discrete “units” through the Carbon Cycle…same applies to the Molecules mini-course. In the latter case, we wanted kids to be able to focus on individual electrons (to allow them to envision the pairing up process) and thought that having distinct names would make that a lot easier. Hopefully that is the case!”
I thought this might be the case. Like I said, these are minor points. It is with pleasure that I highly recommend these wonderful science materials.
Check out our post on SEA Homeschoolers LGBTQ here.
I live in Southern California. I taught science at community college, and now I write about it. Those two sentences convey a lot of information about how easy it is for me to negotiate my way through the homeschool community.
Where I live in California, there are many large secular or inclusive homeschool groups. In my experience in California, unless a group states that it is faith-based, it is understood that it isn’t. With one exception, the religious homeschoolers I have met in California have never seemed put-off by my stance about science or my being secular. I once overheard a homeschooler I knew to be a Young Earther tell another homeschooler, who had just explained to me that dinosaurs didn’t really go extinct, because dinosaurs were lizards and lizards still exists, “She taught science at a college. You know how scientists are.” This was the first time, but not the last being a scientist earned me a free pass to participate in activities with religious homeschoolers without my secularity being an issue. I admit though, when I socialize, I don’t talk science with people who don’t want to talk about it.
In 2013, after homeschooling for seven years, my eyes were opened to what it might be like for secular homeschoolers, who are not scientists living in areas with large secular communities. That is the year my biology course came out. It is one thing to be a homeschooling scientist who lives in California. It is quite another to be a homeschooling scientist, who lives in California, and publishes materials that say, “It is a fact that evolution occurs. The theory part is how it happens.” On May 22, 2013 the first review of my Biology book was posted on Amazon. It was 3-stars; the complaint was that it “Teaches Evolution and global warming”. I have always felt fortunate it wasn’t 1-star. Then in June of 2013, I was at a homeschool convention in California and was approached by someone who wanted to argue that any science text that did not include a discussion of the book of Genesis, when explaining evolution, was flawed and biased. One of the conference organizers overheard and put a stop to the conversation, telling the person they were at a secular conference. See what I mean about secular homeschooling in California.
Despite these two occurrences, I continued living in my “California bubble,” thinking it was similar for other secular homeschoolers. Then in September, 2014, I traveled to Georgia for the National Alliance of Secular Homeschoolers, NASH, Conference. It was there I realized how different it was for secular homeschoolers in other parts of the country. It was then that I came to understand how important it is for those of us in areas where we can comfortably tell others we are secular homeschoolers to provide support for homeschoolers in areas less tolerant of their secular homeschooling neighbors. I met homeschoolers who lived in communities where there was not another secular homeschooler. I met homeschoolers who had to make the choice between finding groups where their children could socialize versus being honest about the fact that those children learned from secular materials. I also met homeschoolers who were willing to brave the storm and isolation, and admit that they were secular homeschoolers. That is hard to do. It really is.
Before attending the NASH conference, I understood the importance of writing science materials for the homeschool community that include topics like evolution and the human causes for climate change. That did not mean I understood the importance for those of us living in areas where the consequences for doing it are negligible, of standing up, raising a hand, and saying, “I am a secular homeschooler”. Homeschooling by its very nature can be isolating. When you live in a community where being secular isolates you further, it can get lonely. What can our global community of science-loving secular homeschoolers do?
If you live in one of those areas, start a science co-op. You do not need to be an expert or a scientist to start one. All you need are good reference materials, one or more people to run it, and a location.
Science is not the only academic discipline with fault lines drawn between secular and non-secular homeschoolers, but it is where most of the problems arise. That is because some of the well-established facts and theories of science are at odds with a literal interpretation of religious doctrine from several different faiths. There is continued agitation by some to change science to fit religious doctrine. The problem is science doesn’t work that way. When you change or omit science facts and theories to fit your philosophy, and then teach using those changes or omissions, you are no longer teaching science. I suppose you are teaching religious philosophy with some science woven through it. Scientists take issue with this for two main reasons. First, it is a denial of some of the foundational and fundamental principles all science is based on. For a scientist, this is incredibly frustrating and seriously misrepresentative of how the natural and physical world works. Scientists obviously care a lot about science, or they wouldn’t spend all those years in college studying it. 🙂 Second, the people and users of these non-secular materials continue to call it science while these materials clearly, at least to a scientist, are not really science.
No homeschooler would be surprised by the statistic Gallup released in 2014 stating that 42% of Americans believe God created humans in their present form 10,000 years ago. That is certainly a dismal figure, but it has a good side too. 58% do not believe that. And while it is true that many of the people who do believe that are homeschoolers, there is no way ALL the people who do not believe God created humans in their present form 10,000 years ago live in California 😉 Starting a science co-op is a great way to find the other members of your local homeschooling community who understand the difference between philosophy and science. In addition, running a secular science co-op provides an important service by promoting science literacy.
Join secular Facebook groups and forums. When you live in areas where there is not a good-sized secular community, it can be hard to find discussion about good secular materials, especially science. Online secular groups and forums can be a great place to get information about and recommendations for secular academic materials.
Those of us who are in areas where we can do it, or who feel comfortable doing it no matter where we live, need to make sure we stand up and be counted as secular homeschoolers. It might not seem important in a state like California, but it is important to recognize your advocacy and support might resonate in places you have never been and with people you have never met. It seems part of the human condition to want a group to belong to and a community where we feel understood. I think we evolved that way 😉
Sean woke me up early. “Mom, I have broken out in a bad rash, or bites, or something all over!” Well, that will get a mother up and going! We could not figure it out. No one else had any bumps. Could it be that Sean was allergic to the detergent used when we washed clothes, or maybe it was the 30 to 40 nispero (fruits from the tree in the backyard) he ate over the course of 1&1/2 days? We still are not sure. In two itchy, scratchy days they were gone. It did get us going earlier than expected though.
The night before we finally planned the last bit of our trip. We would spend 1 night getting there, then stay in Sitges for three days. Sitges is a small beach community just south of Barcelona and north of Tarragona. The last night we would stay at an airport hotel in Barcelona. Today we would drive to Orce, Spain and sleep where the wind took us as long as it was in the direction of Sitges.
You might think the pronunciation of Orce is ors, but it is orth, with the th drawn out. Early in our trip. Jim noticed it sounded as if people were saying grathious instead of gracious. At first he thought it was a lisp. He quickly realized the entire population of Spain most likely did not have a lisp. When he asked about it, it was explained to him that the c is often (but not always) pronounced as th.
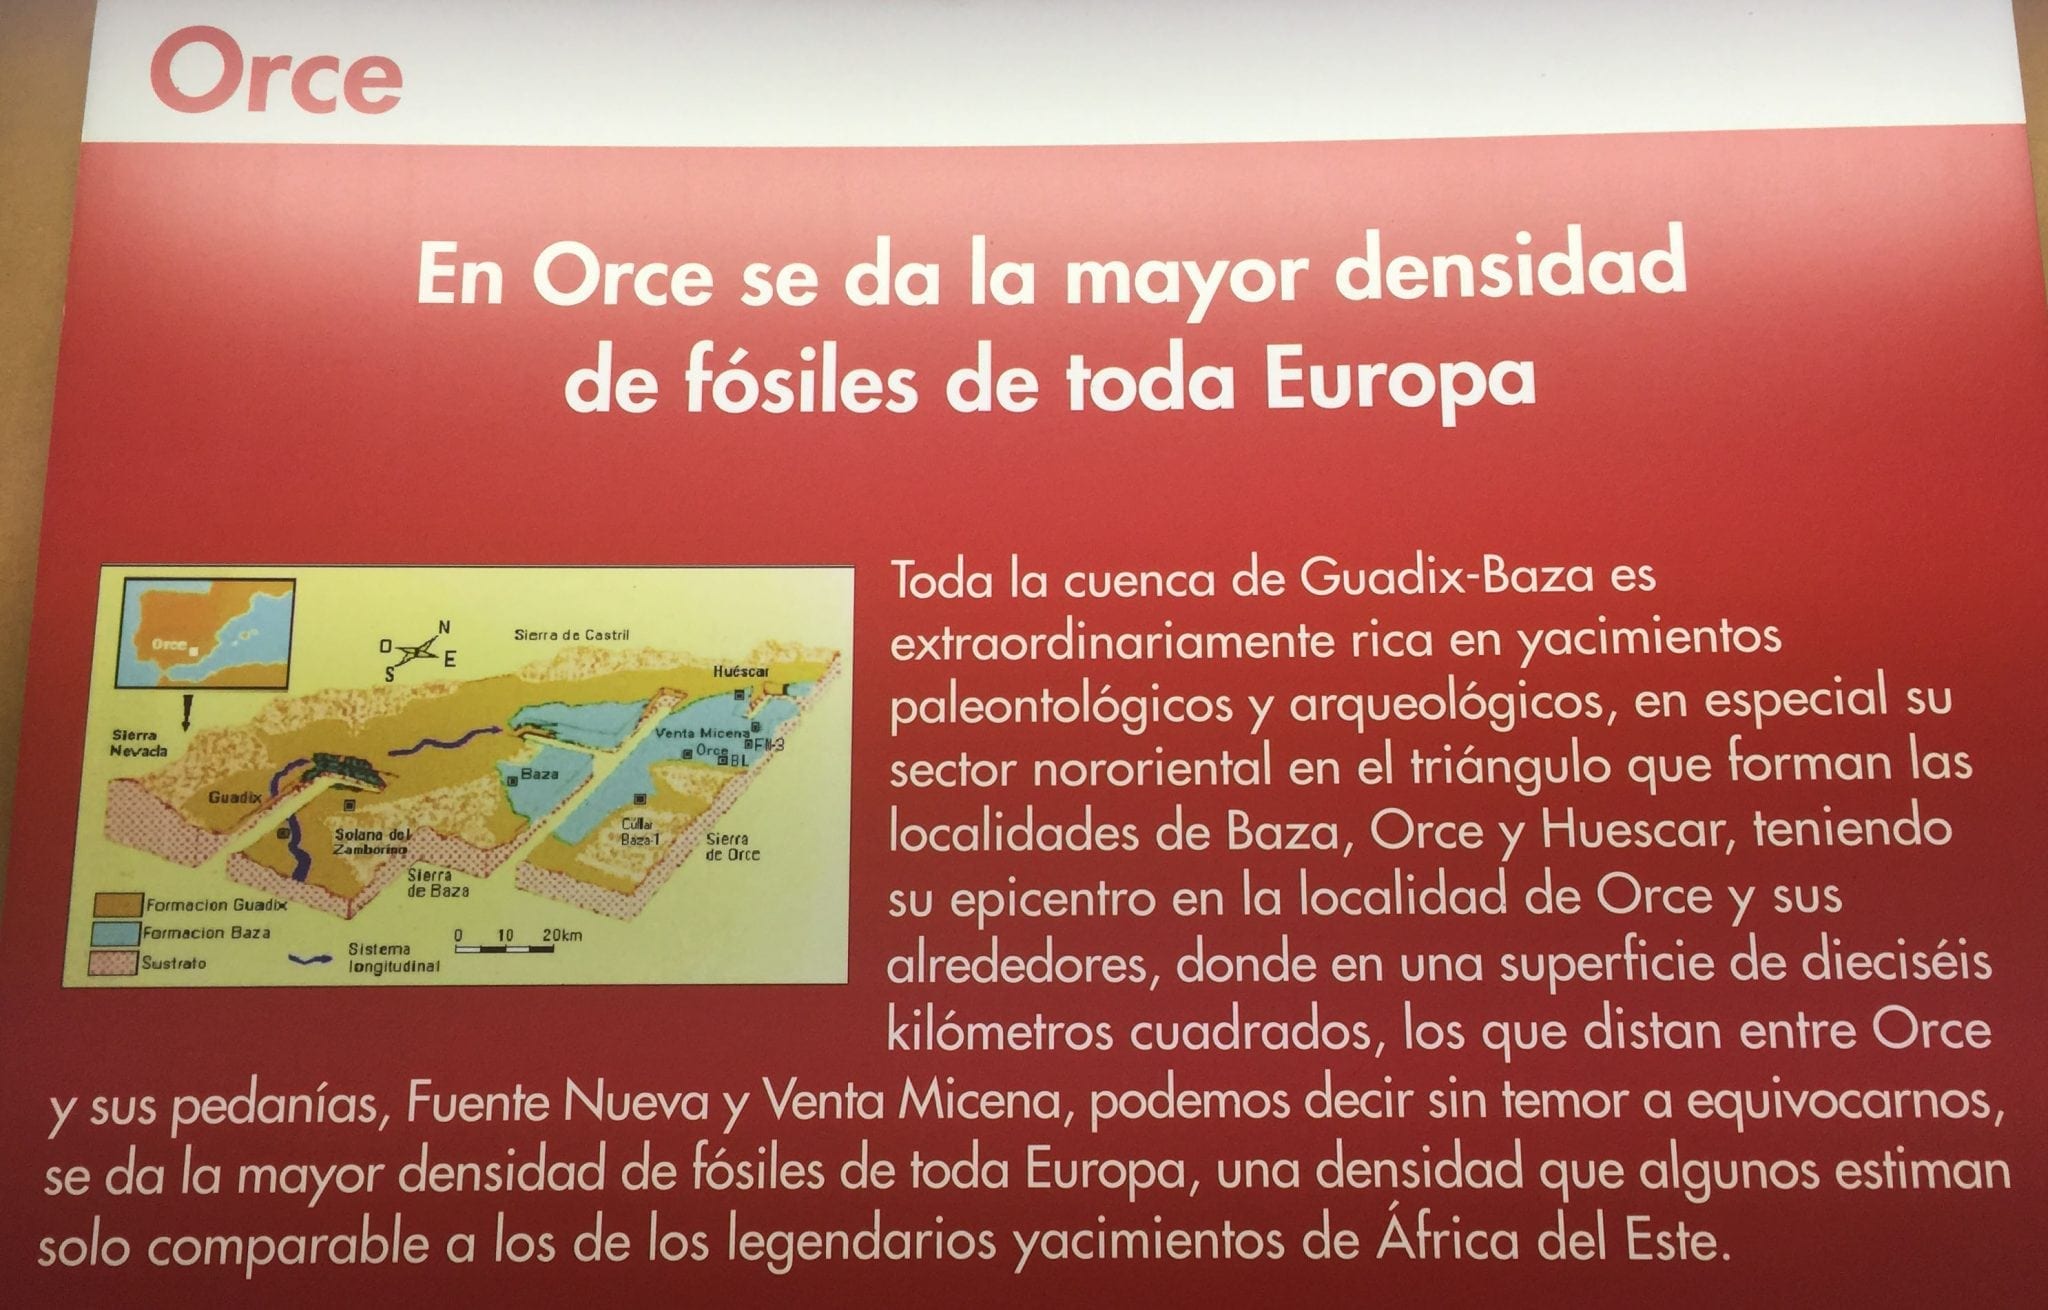
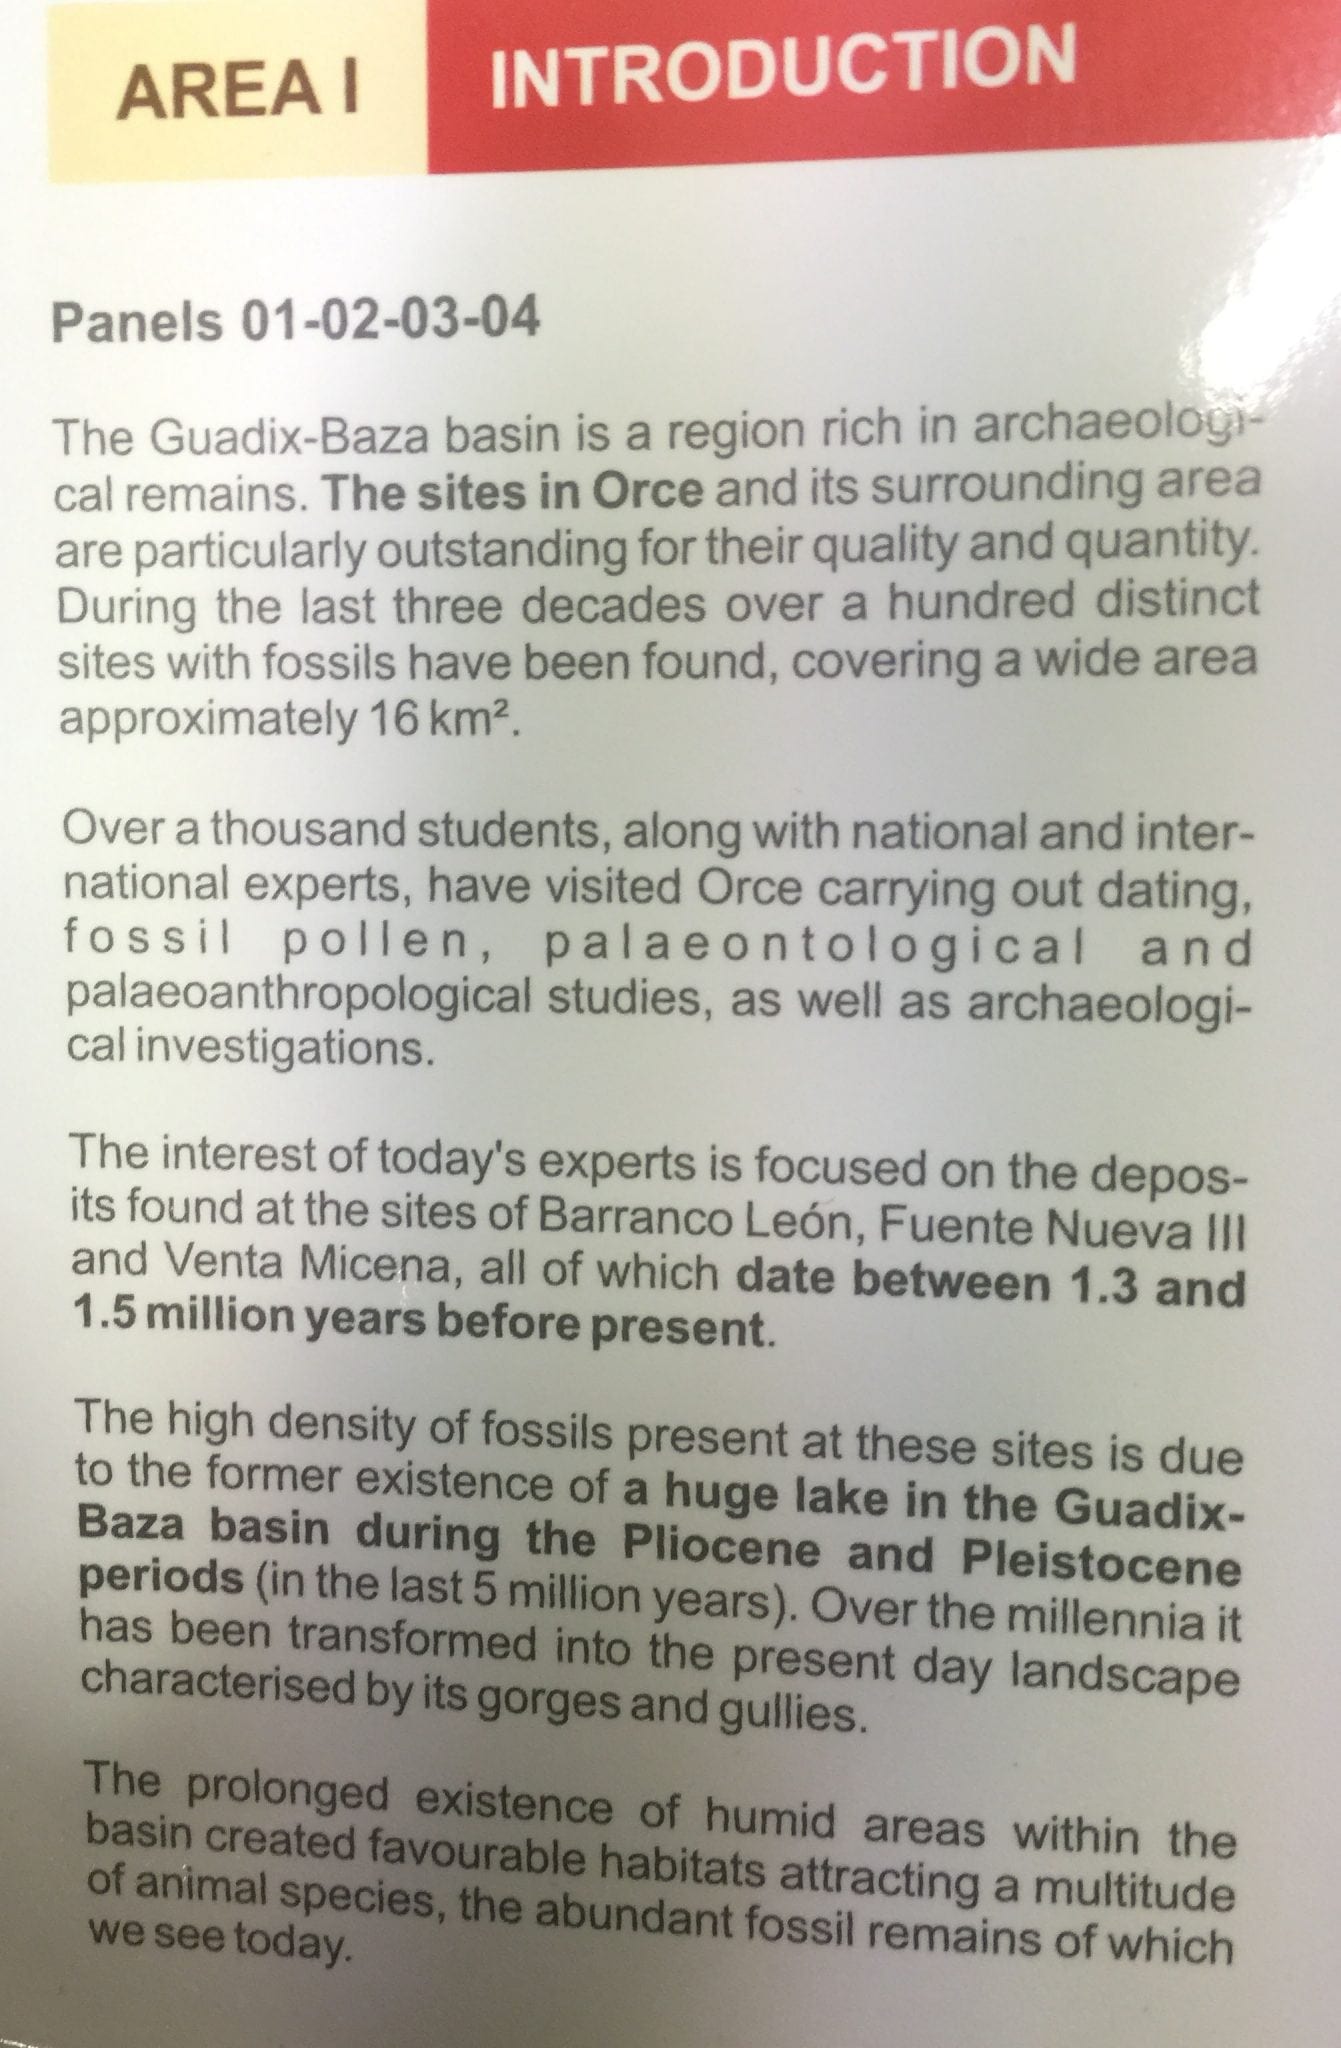
When I heard there were mammoth fossils being excavated in the Granada area, I Googled it right away. Not only have they found mammoth fossils, but they found the remains of humans dated to over a million years old. This sort of detour is why we prefer to travel like we do. It does mean that sometimes we cannot get the tickets to a palace we would otherwise visit, but it also means we have the flexibility to take an unplanned detour to see fossils.
Traveler’s Tip: If you visit the Orce area between July 6 to September 7, you can visit one of the digs with people working at them. If you read about it here and go, I want photos! I will be super jealous, but I still want to hear about it!
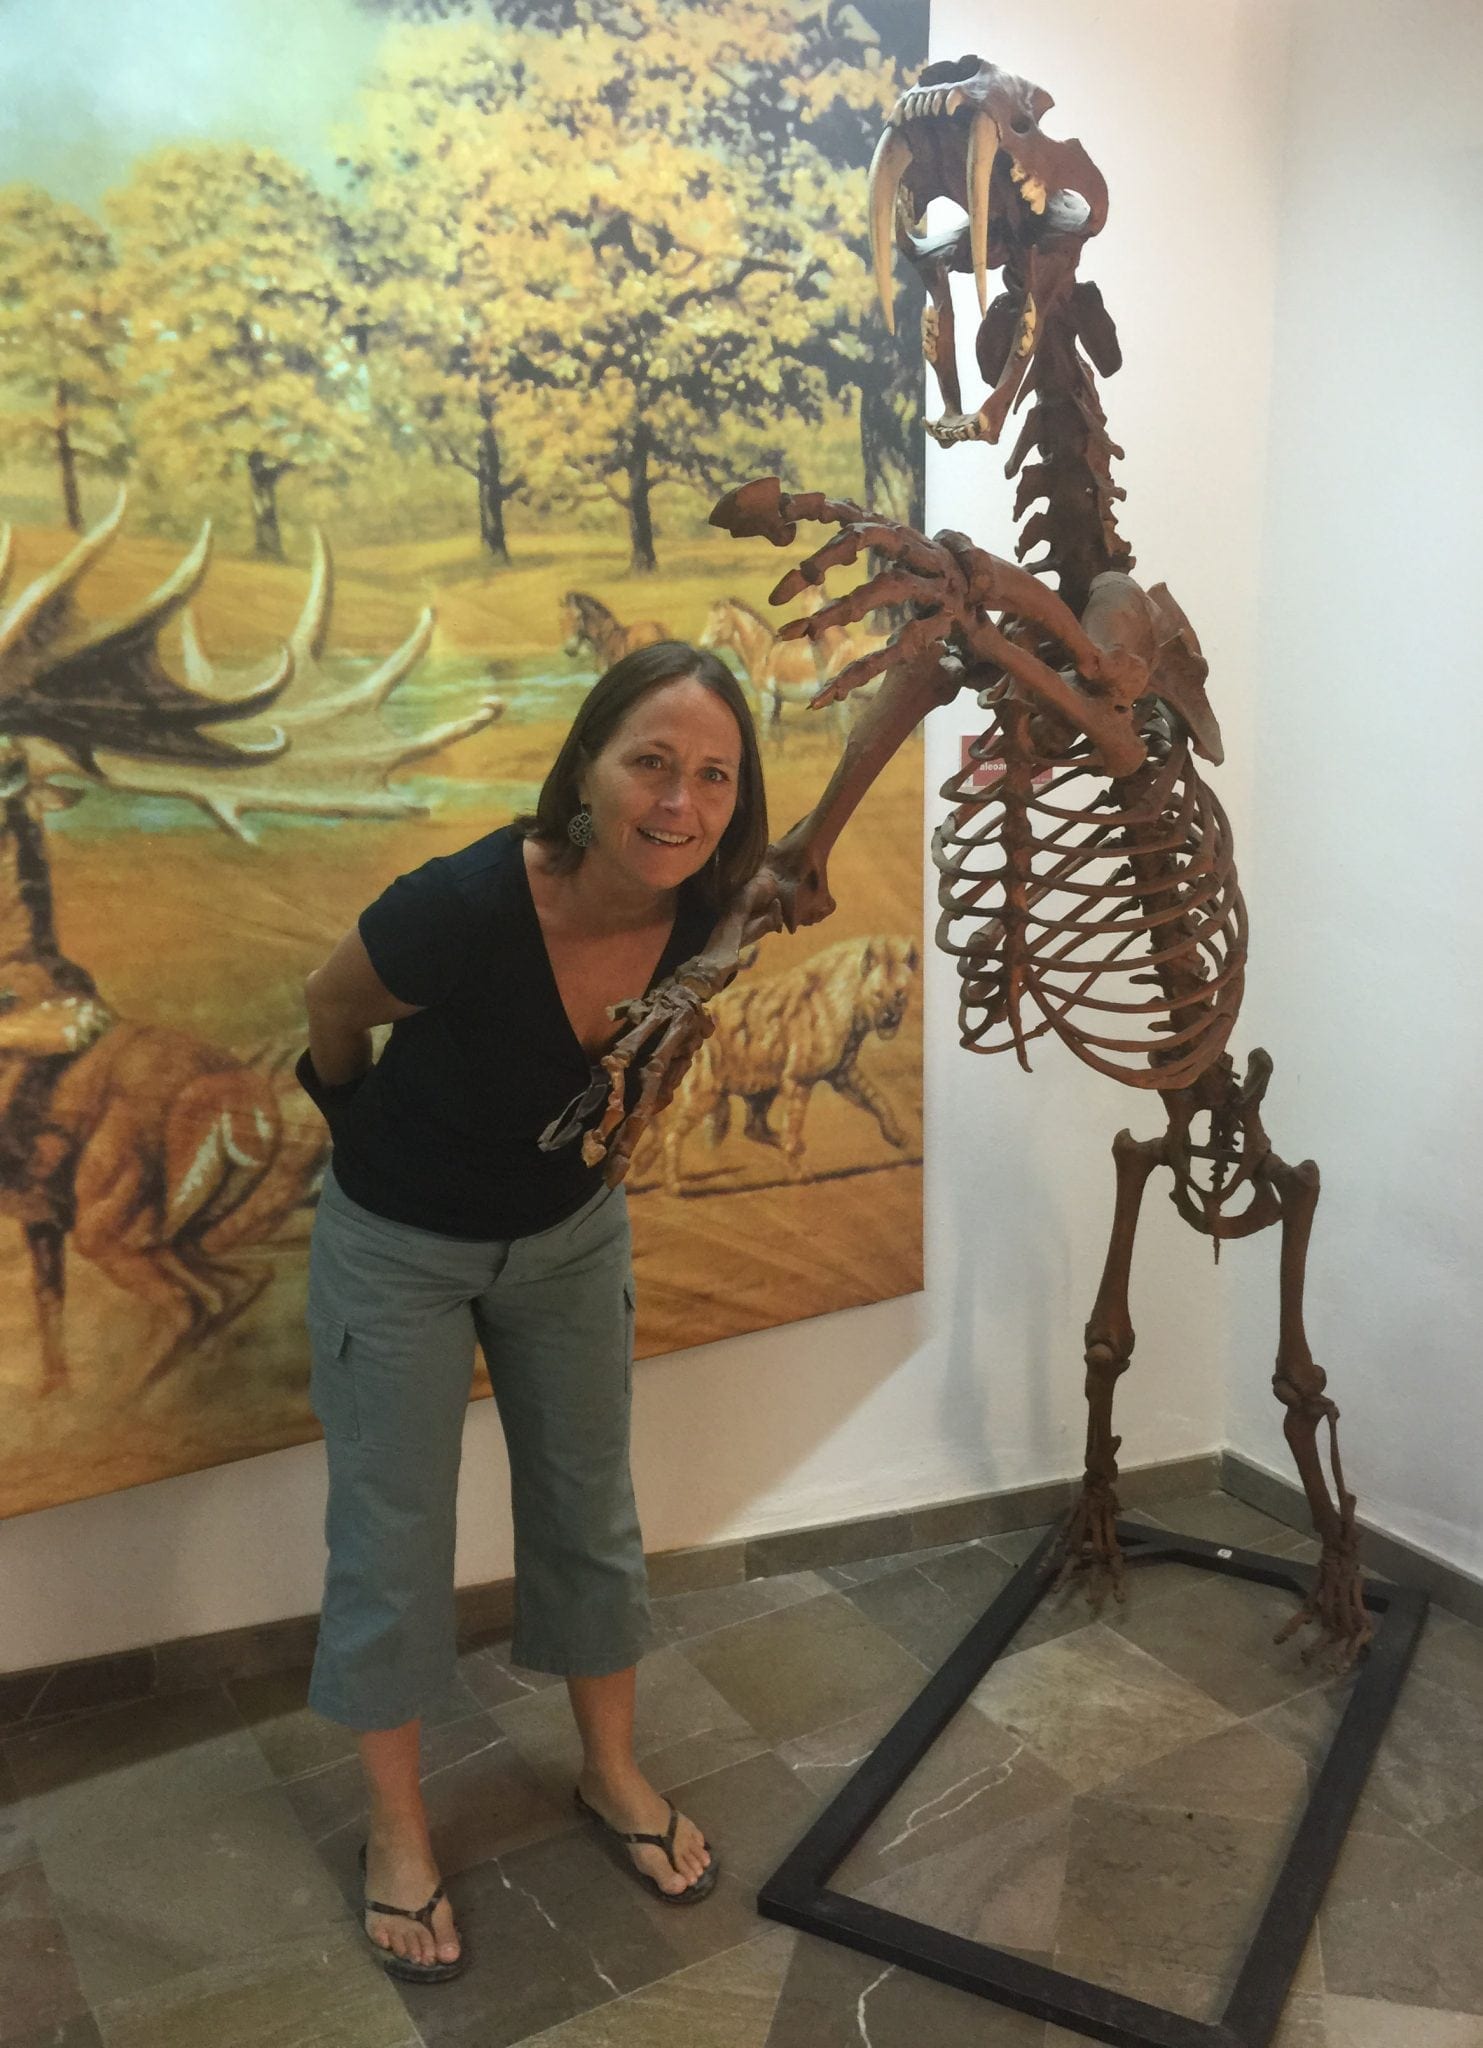
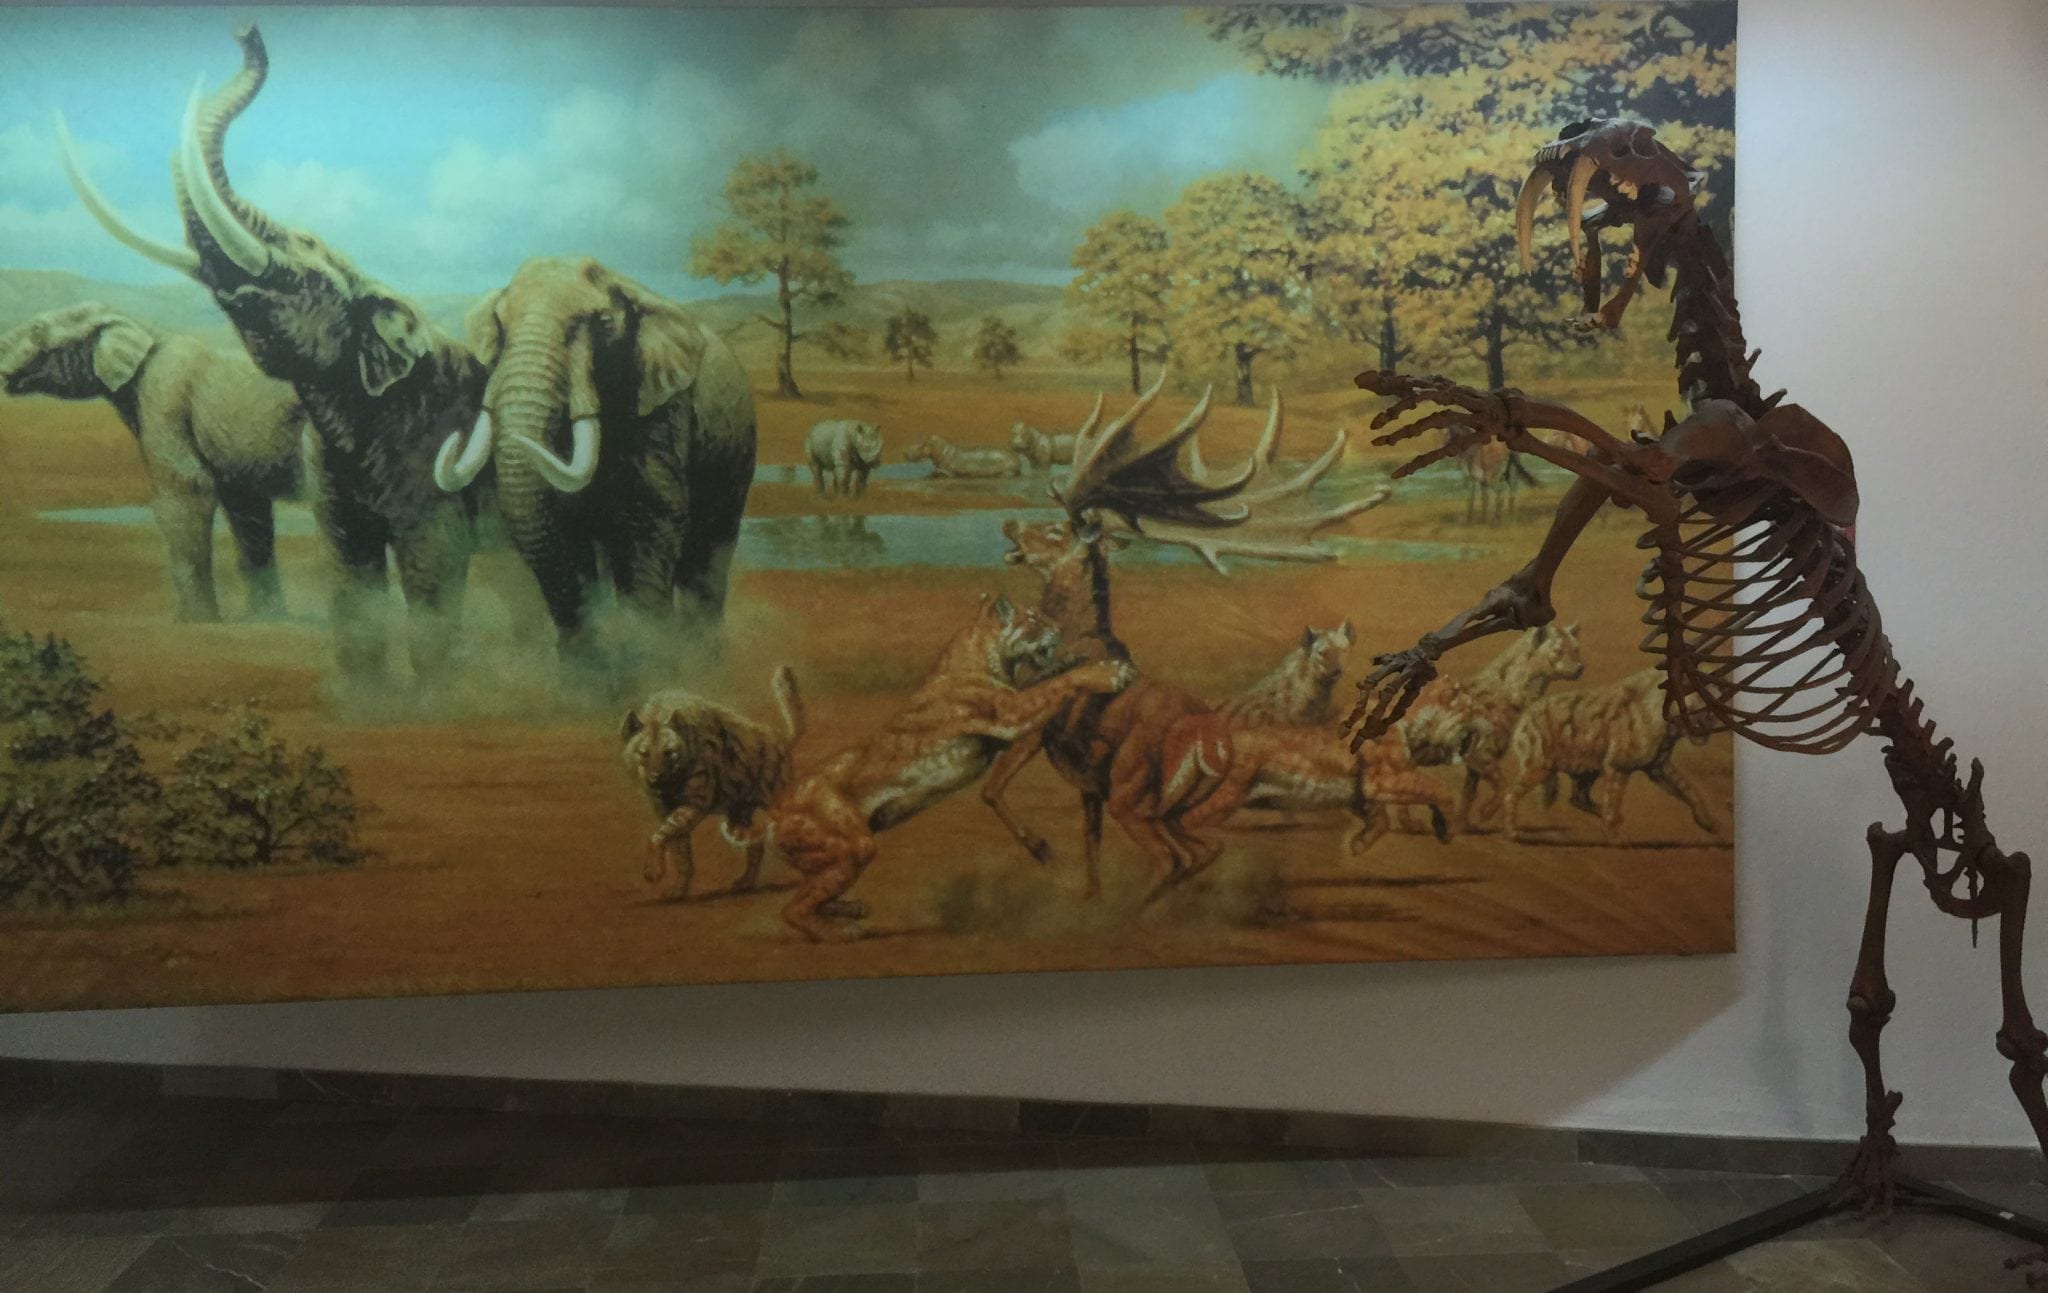
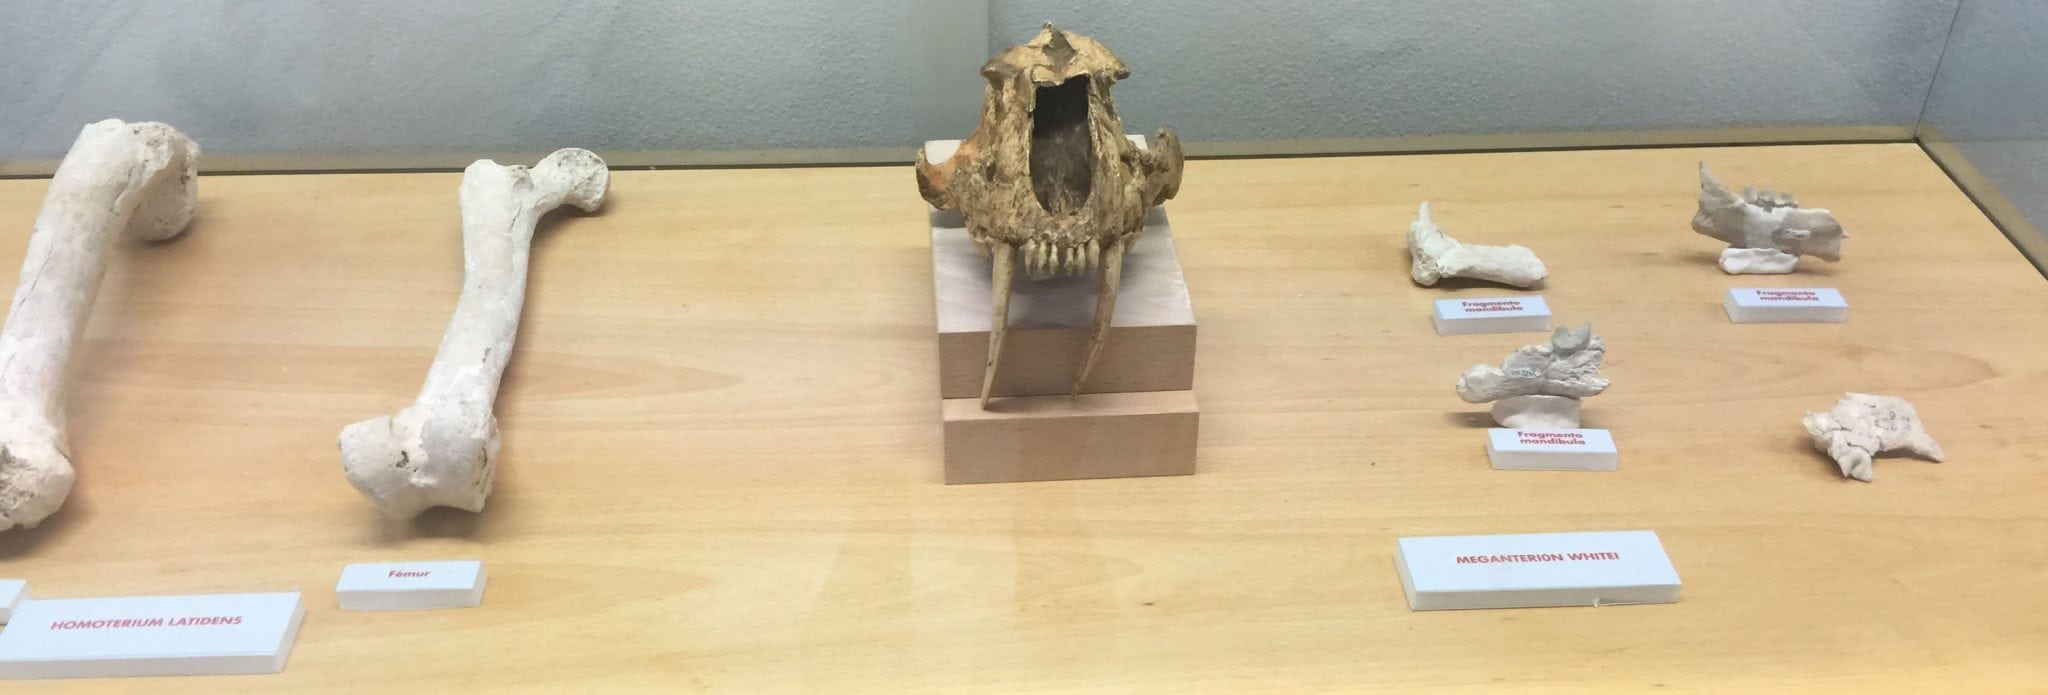
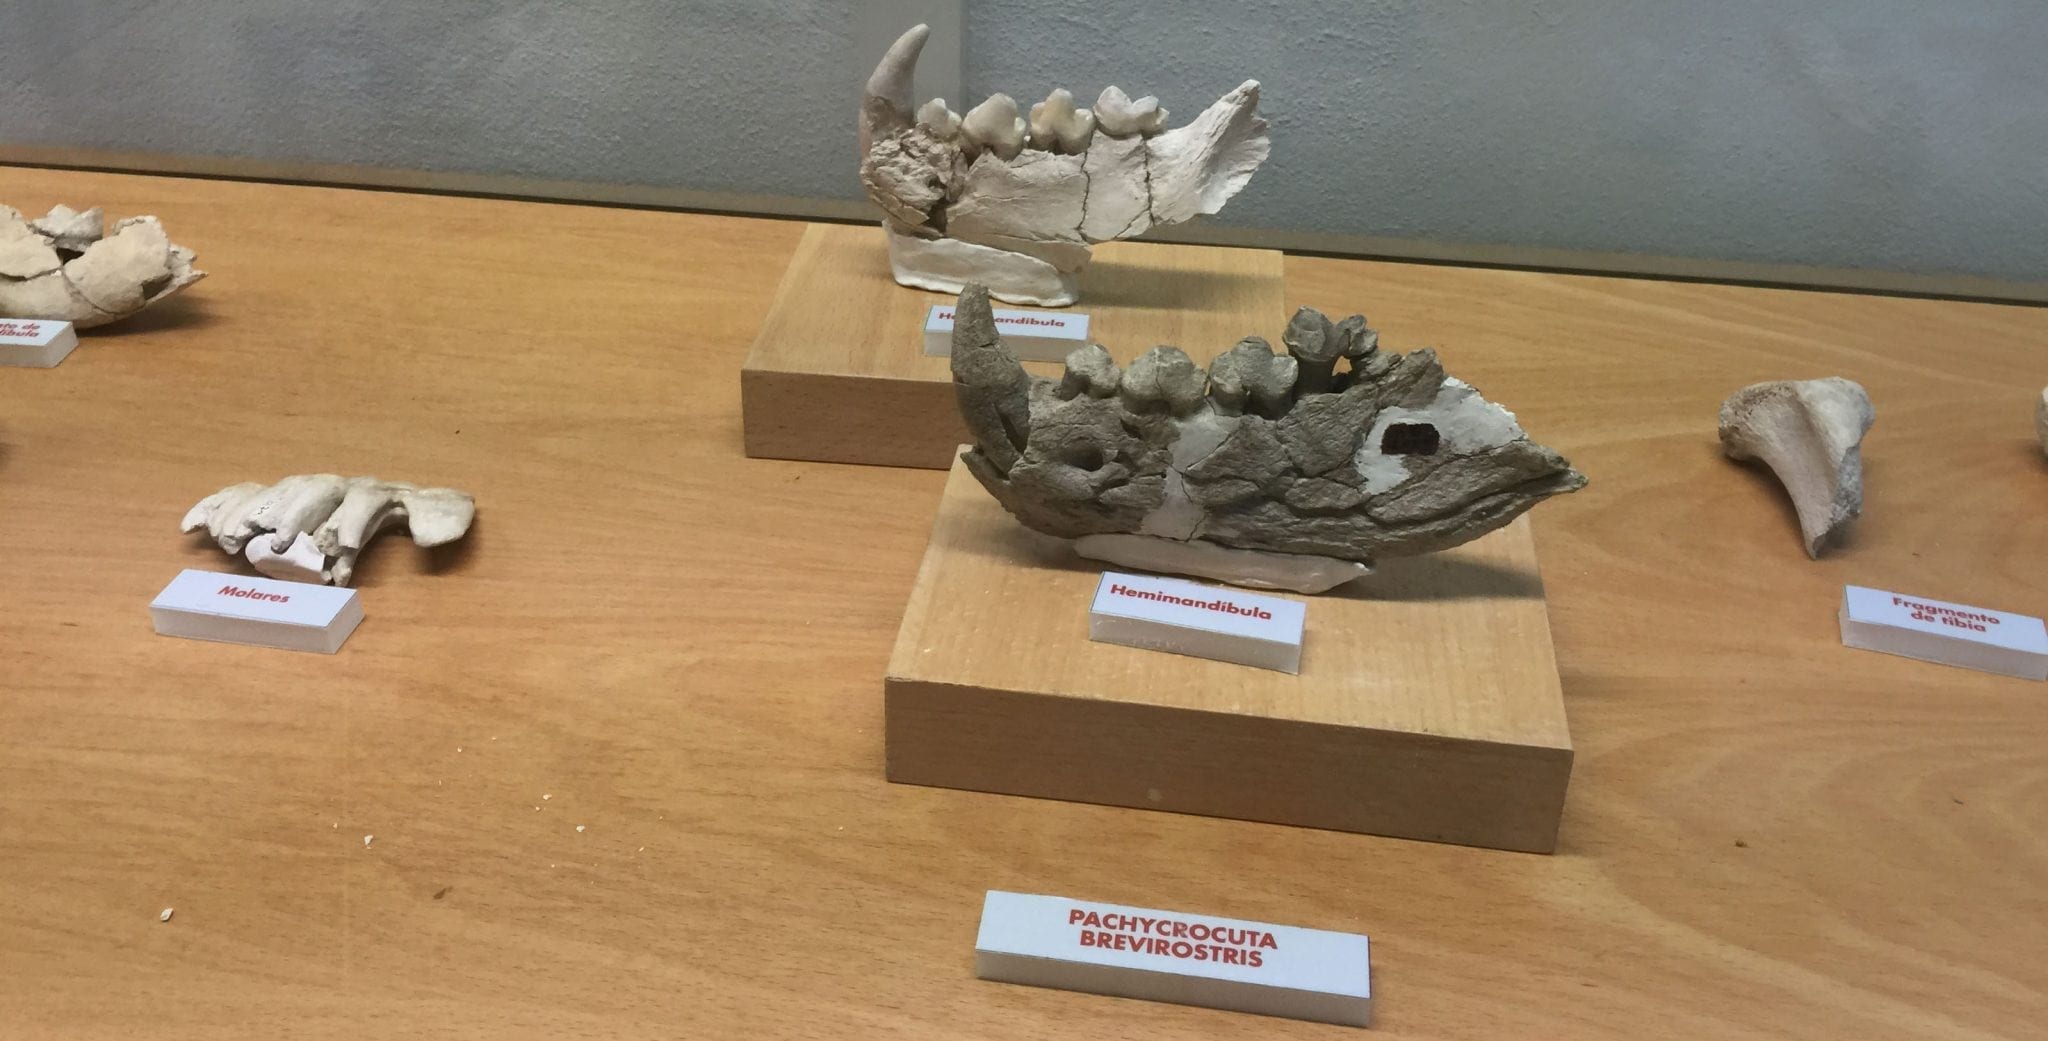
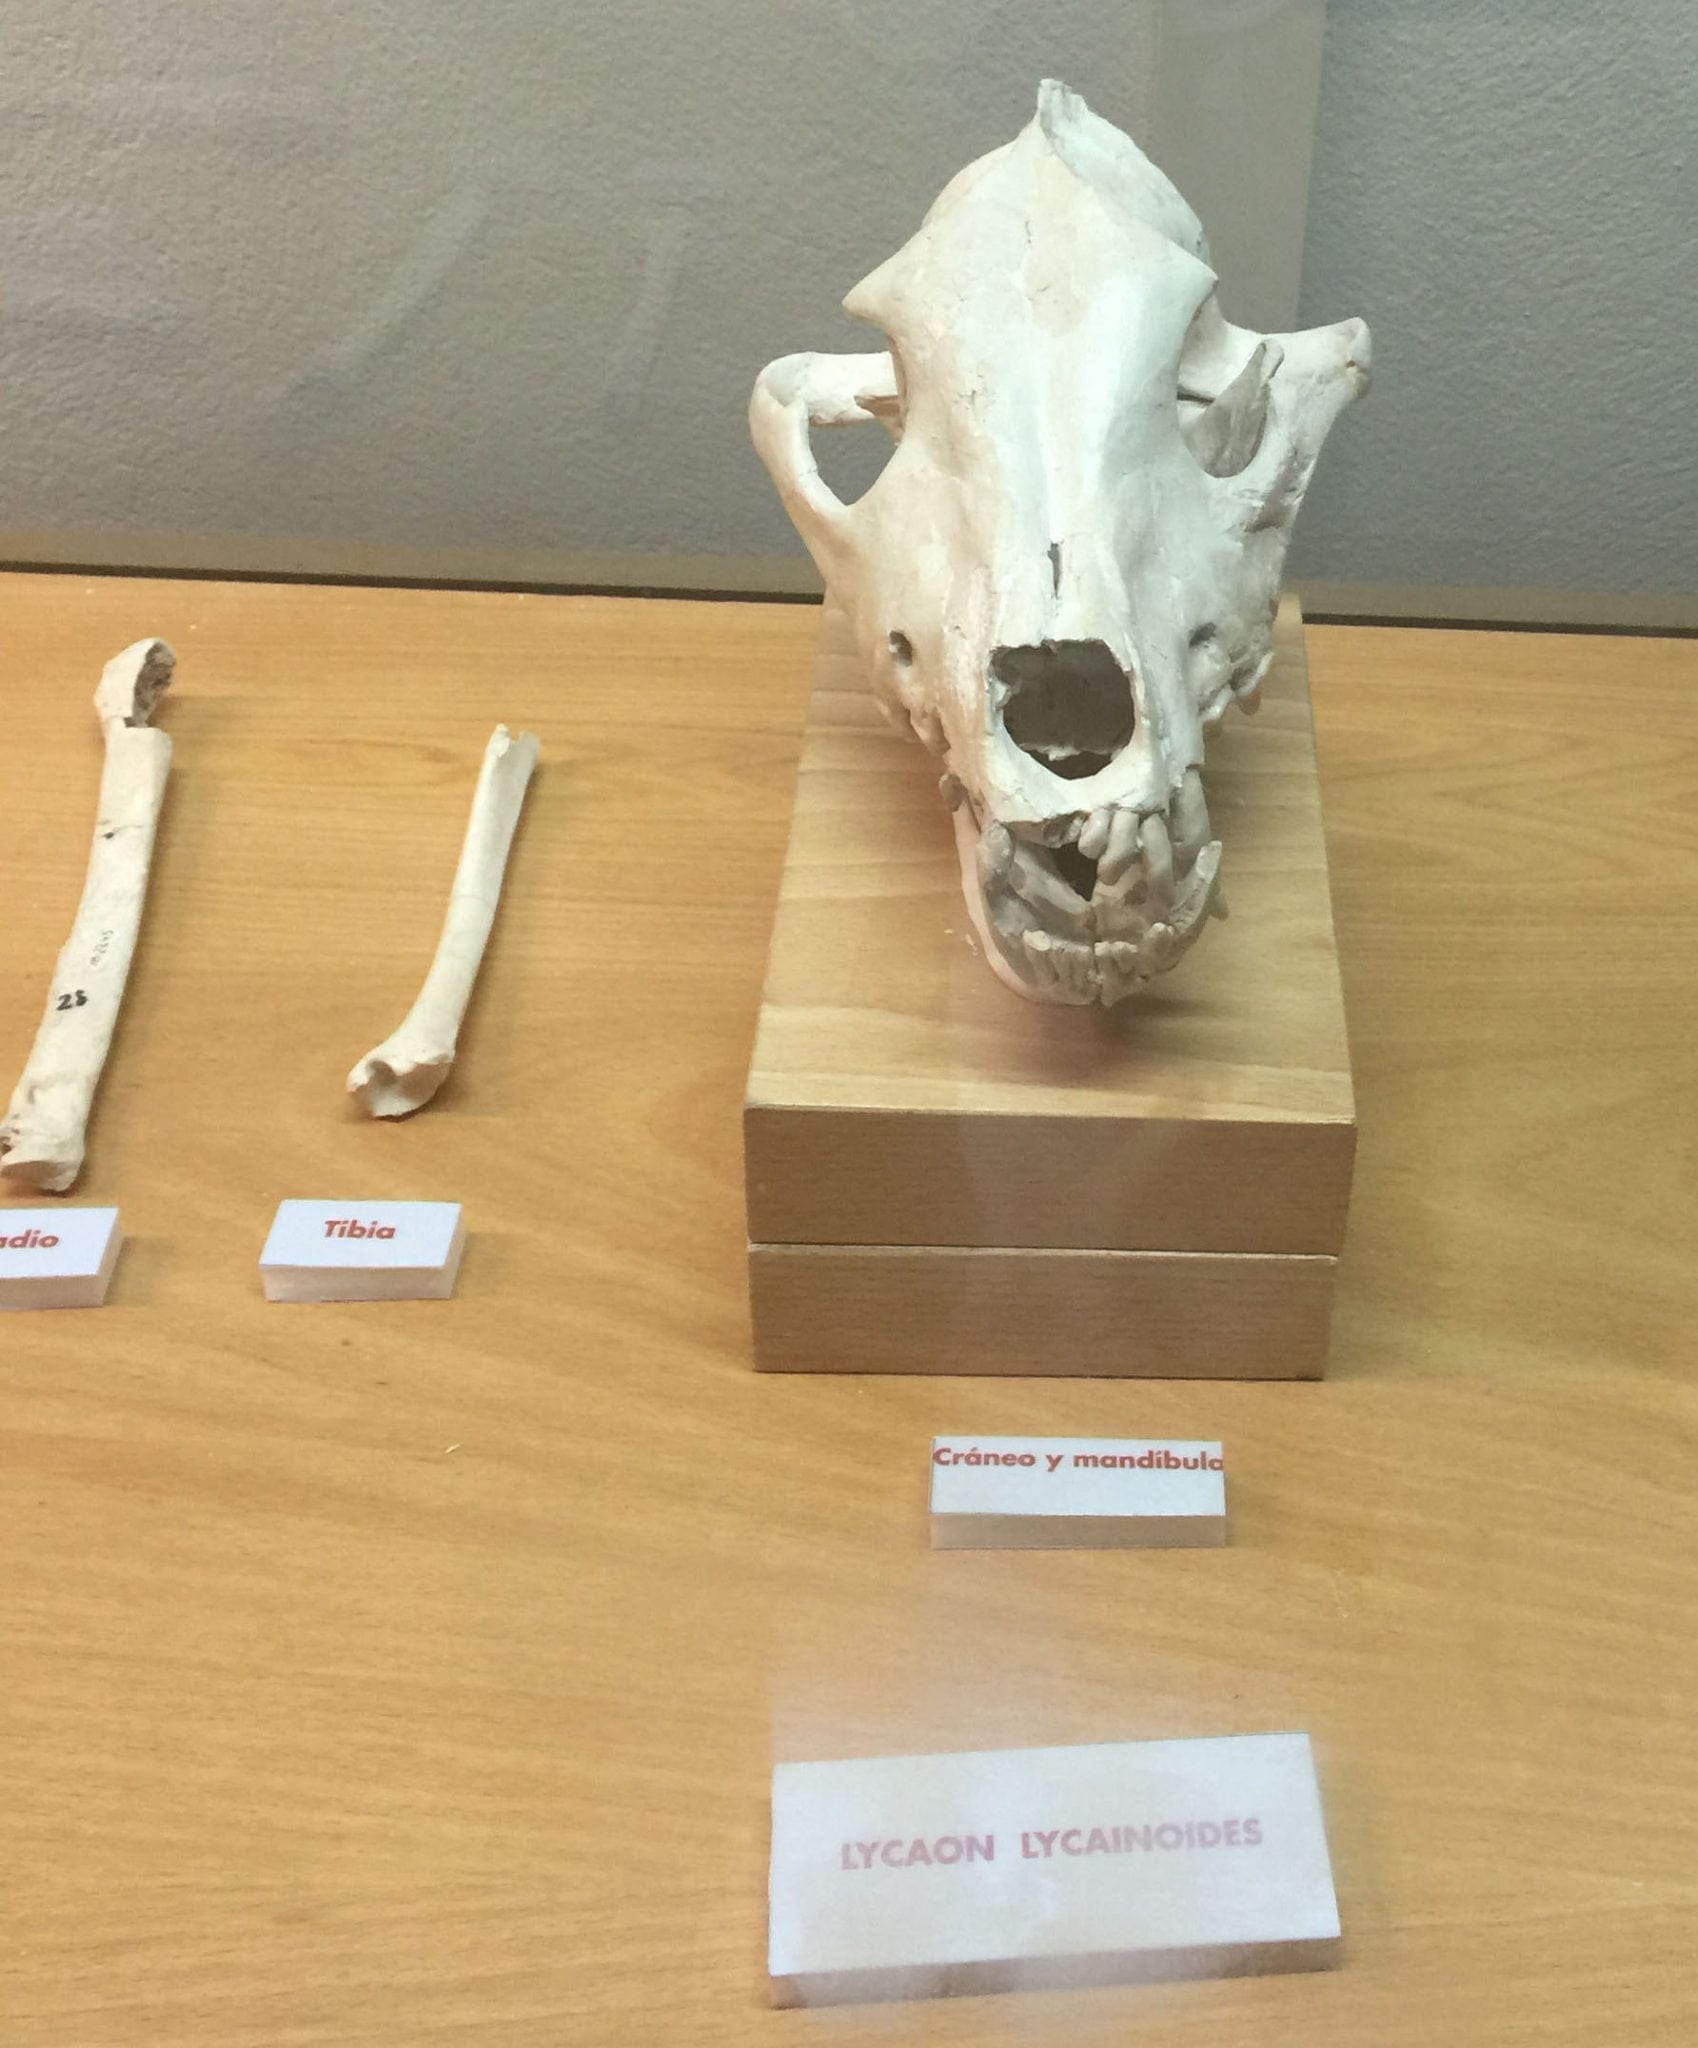
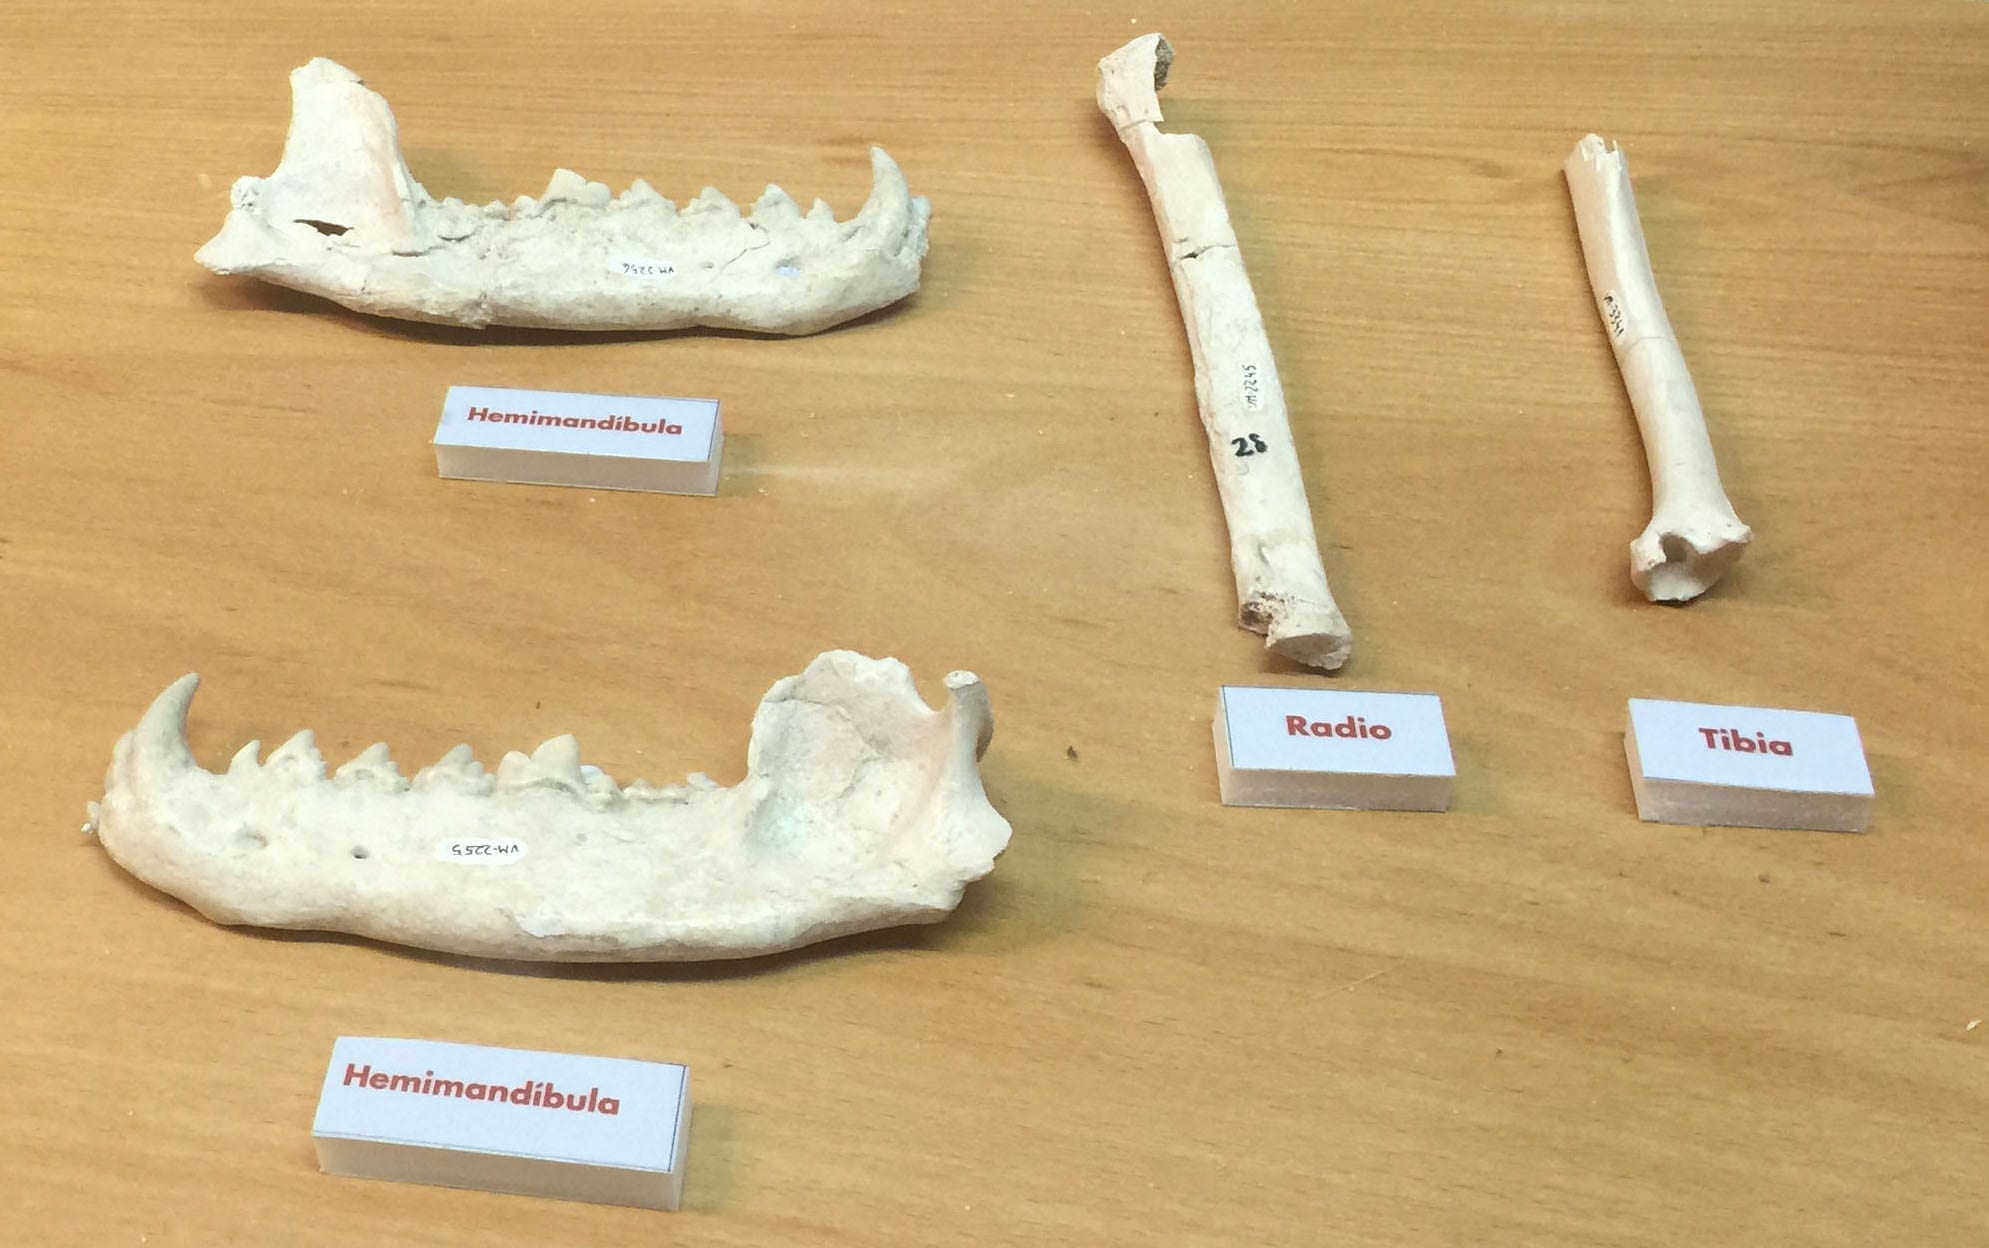
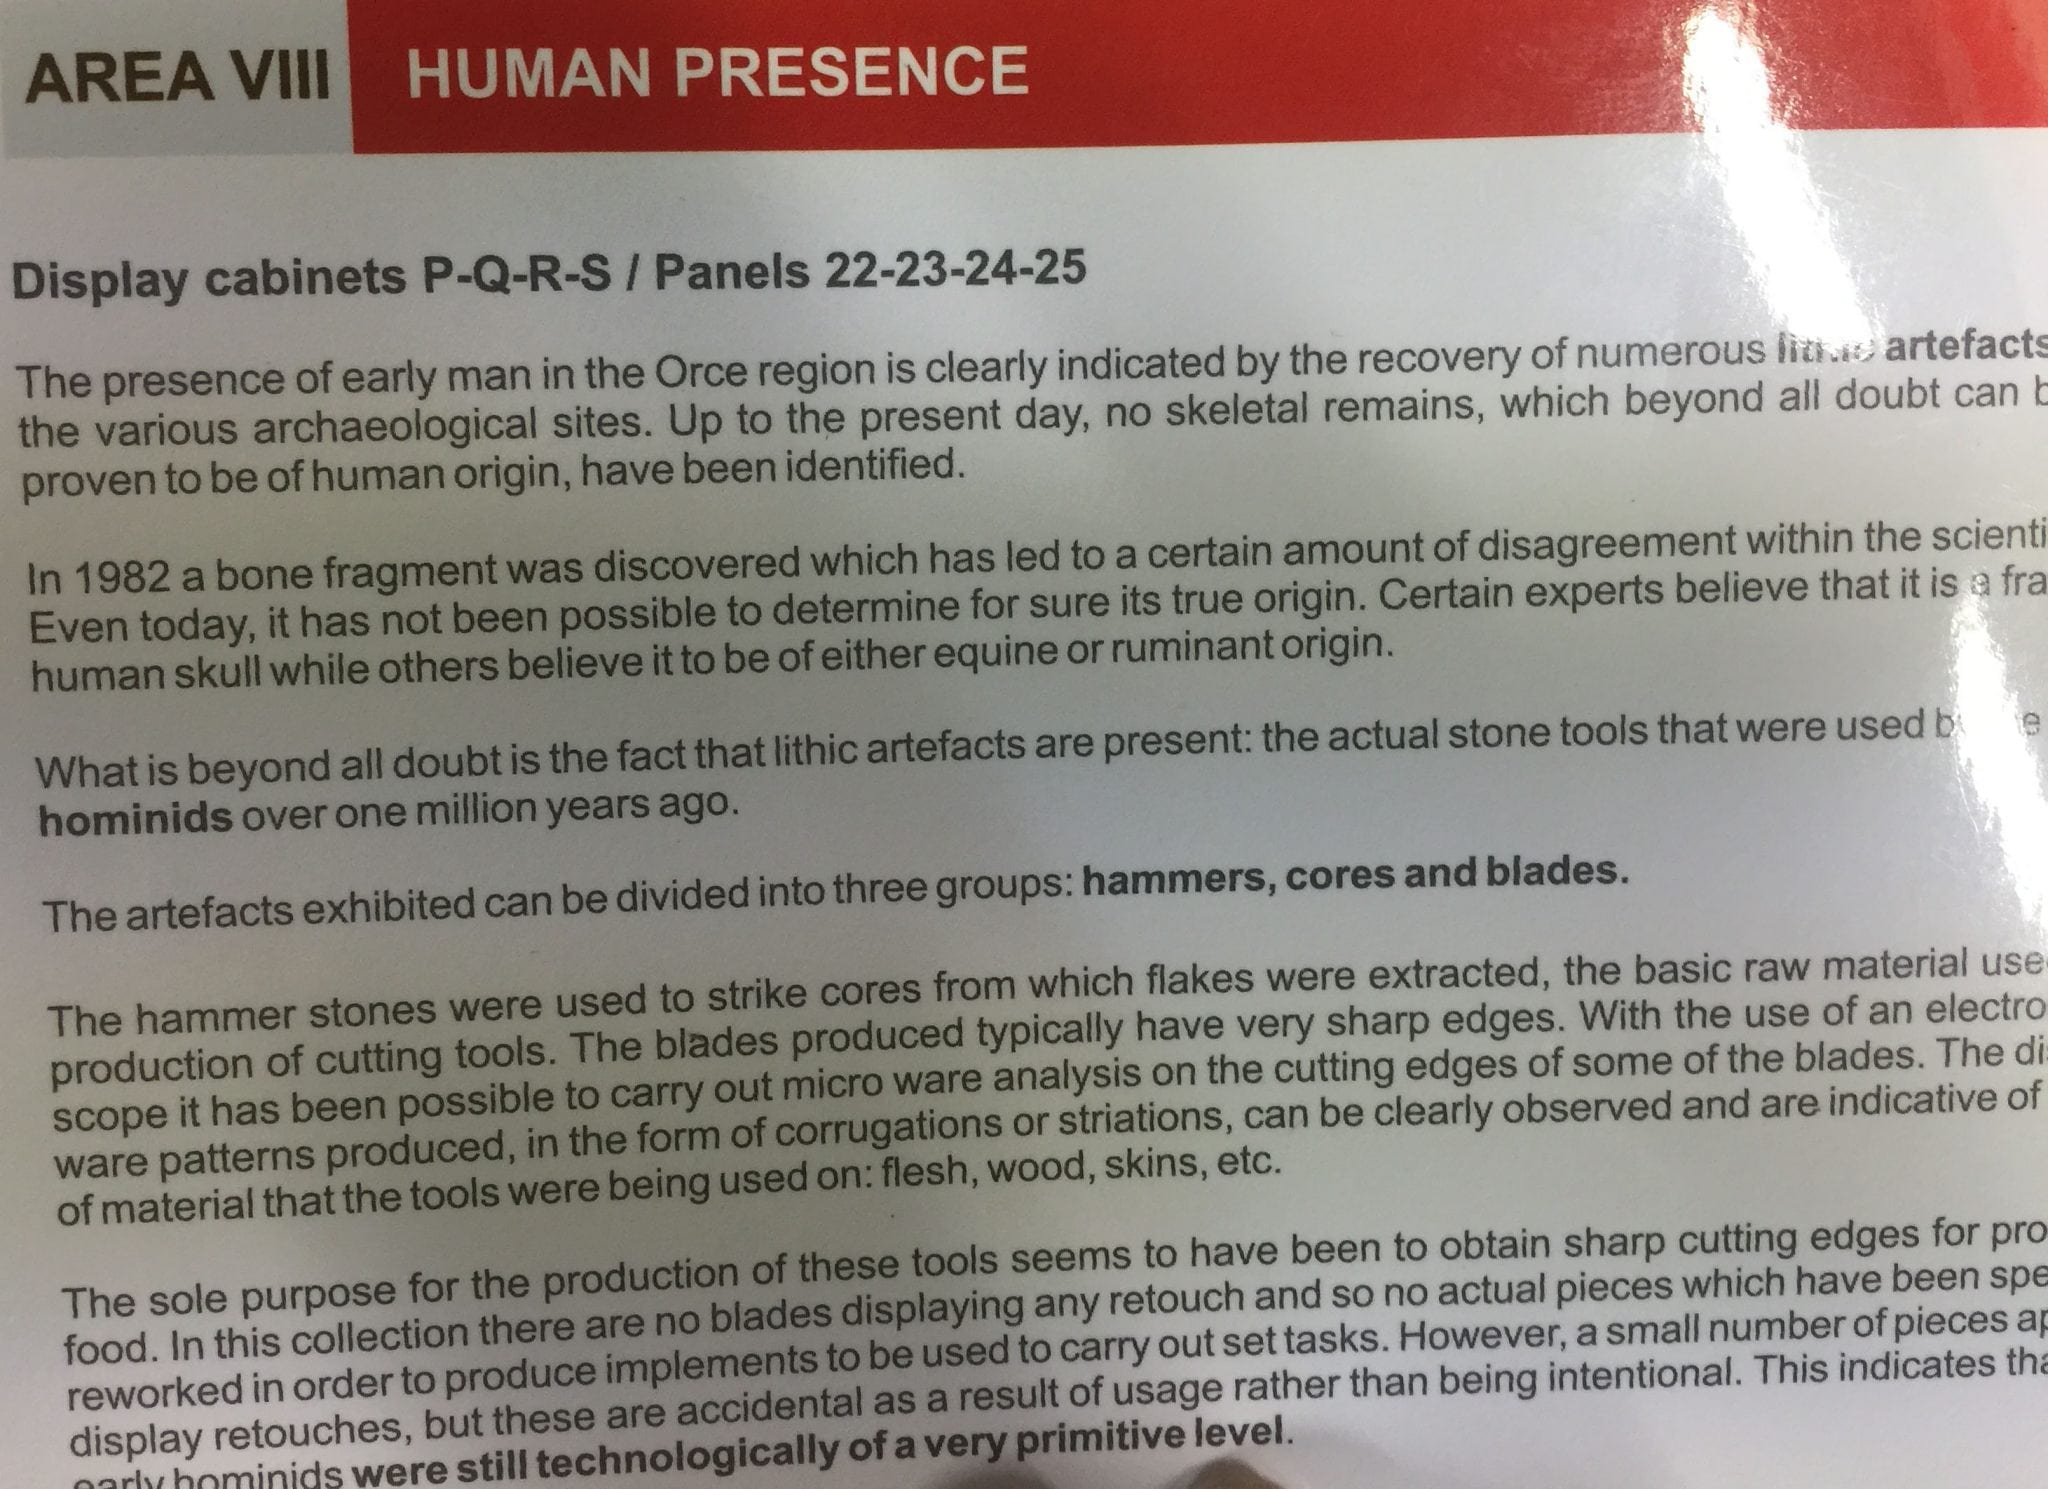
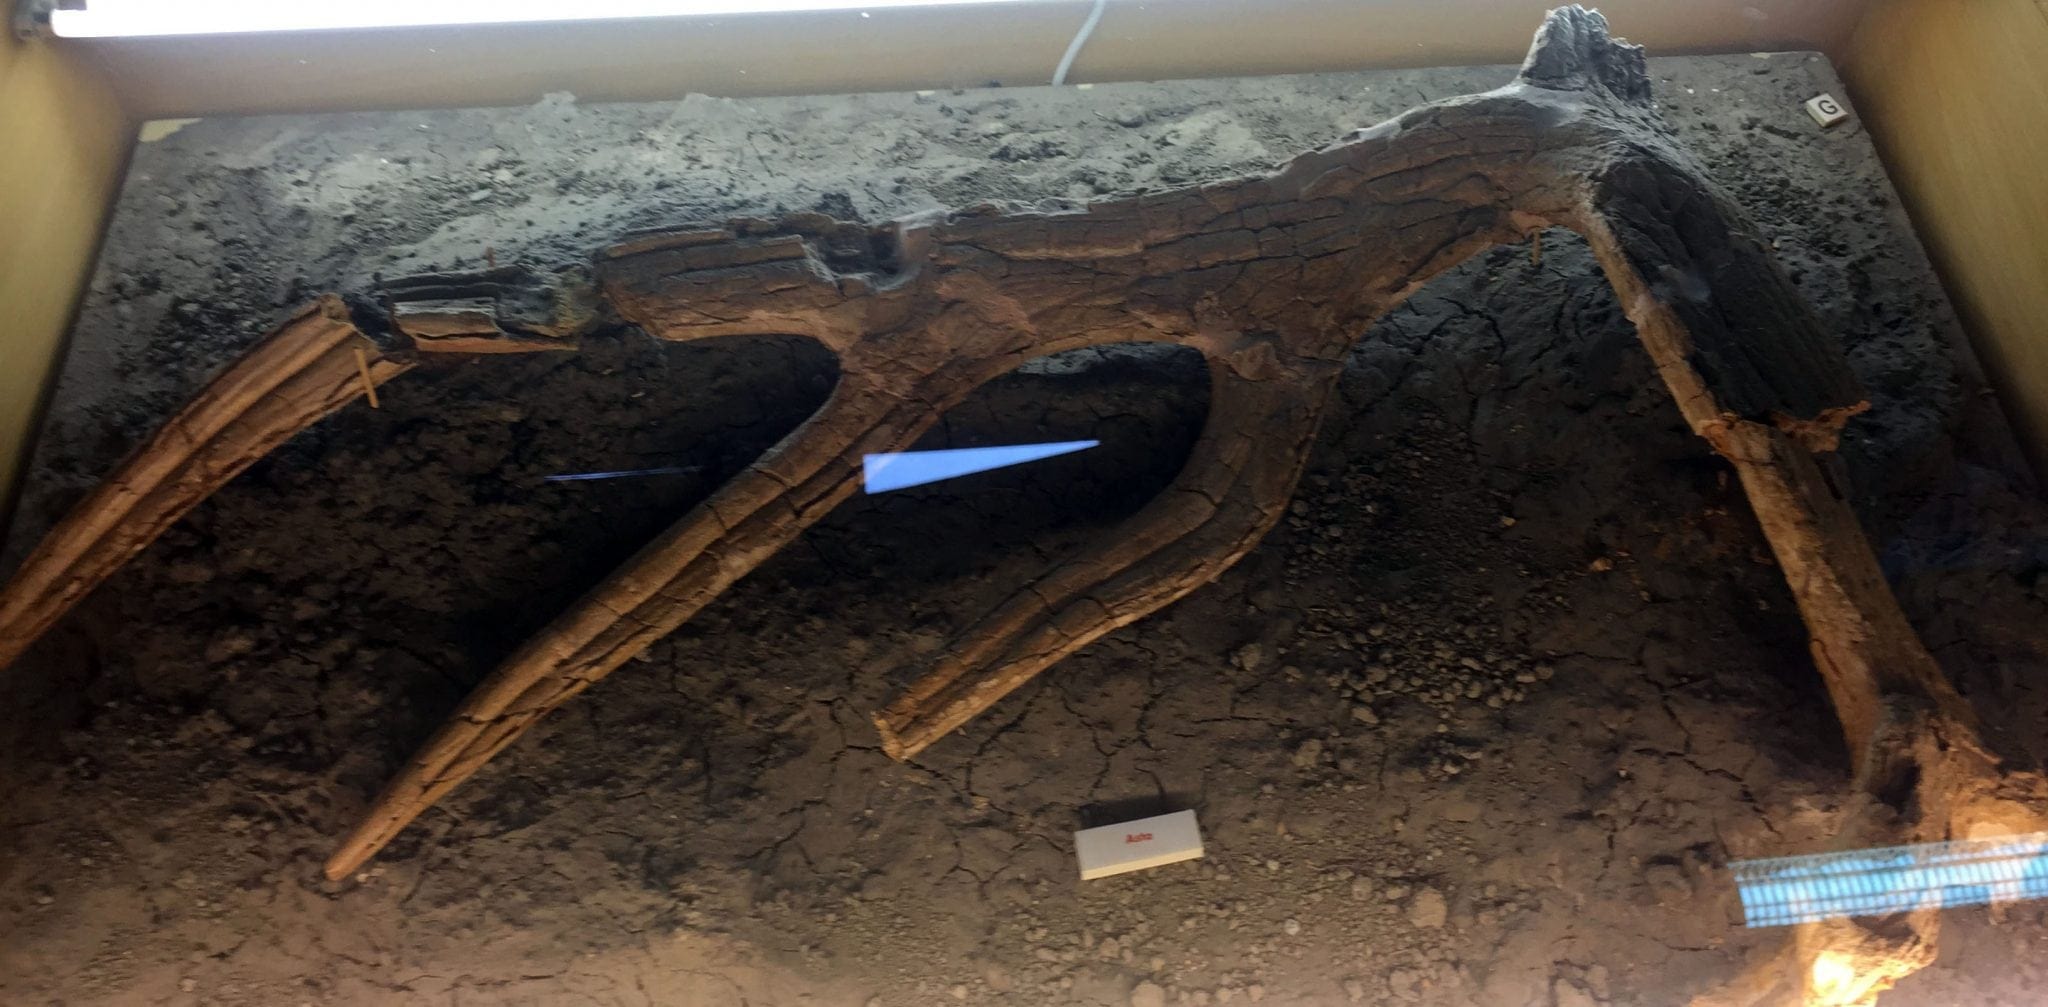
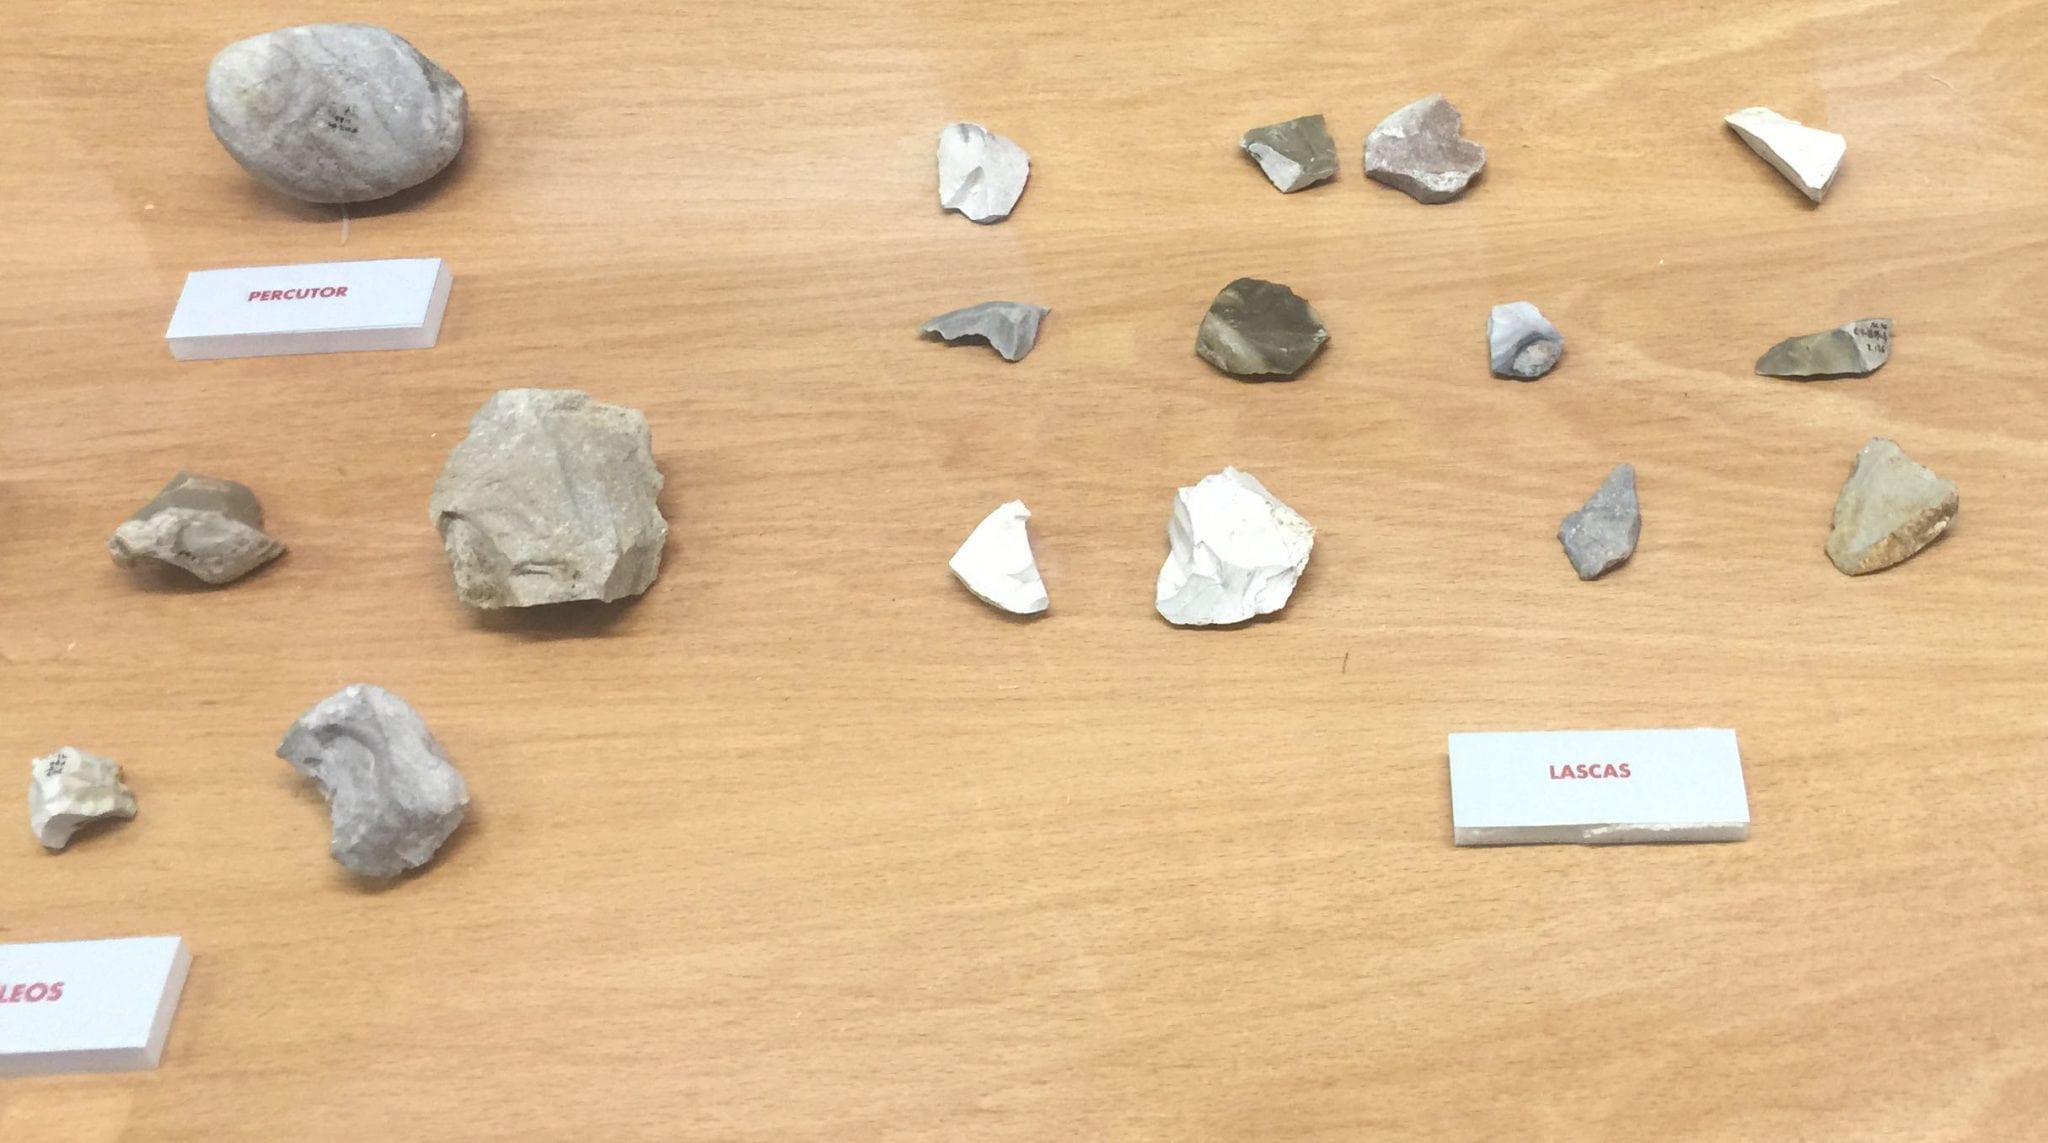
We like to travel off the beaten path. Orce, Spain qualifies for this. We were the only 4 people in the entire museum. They unlocked it for us. Gave us some cards explaining what we were looking at, and left us to look. I should start a hashtag #PlacesInSpainWithNobodyThere. Here is what is sad, people should be visiting these places. These places have all been seriously cool.
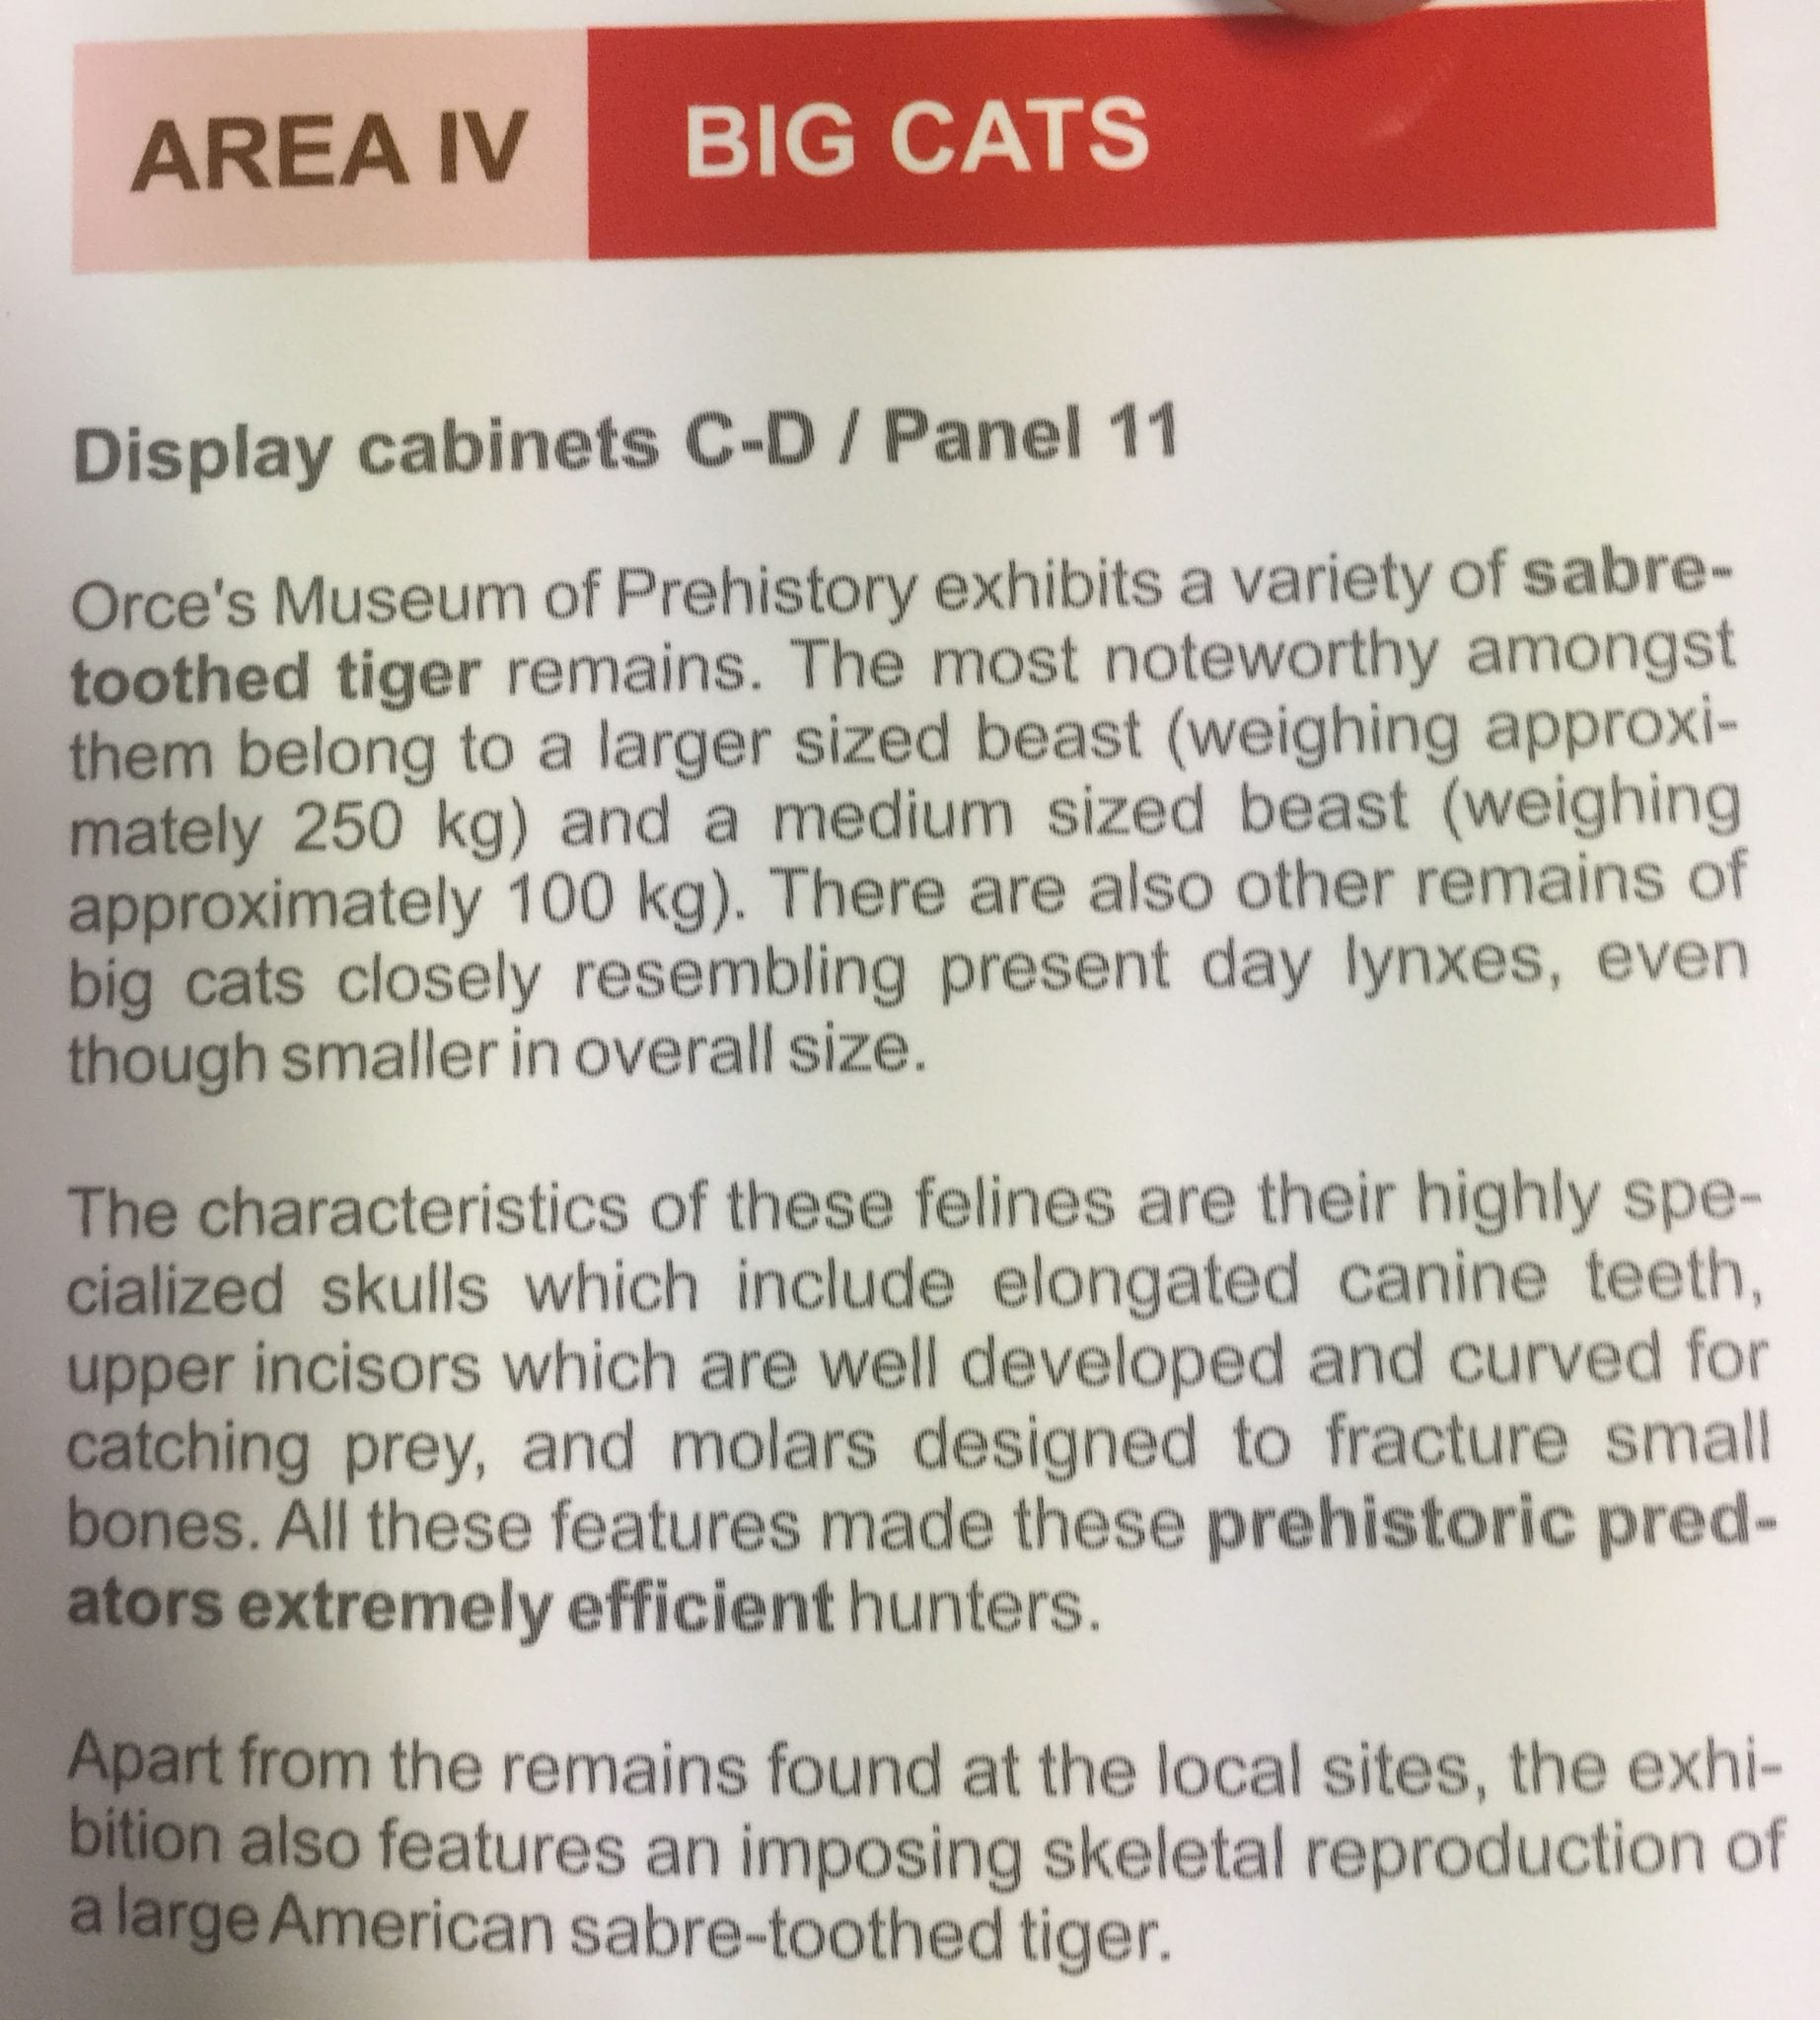
The scene depicts pre-historic life in Orce. There were species of tiger living in the Iberian Peninsula, but this exact species of tiger wasn’t one found here.
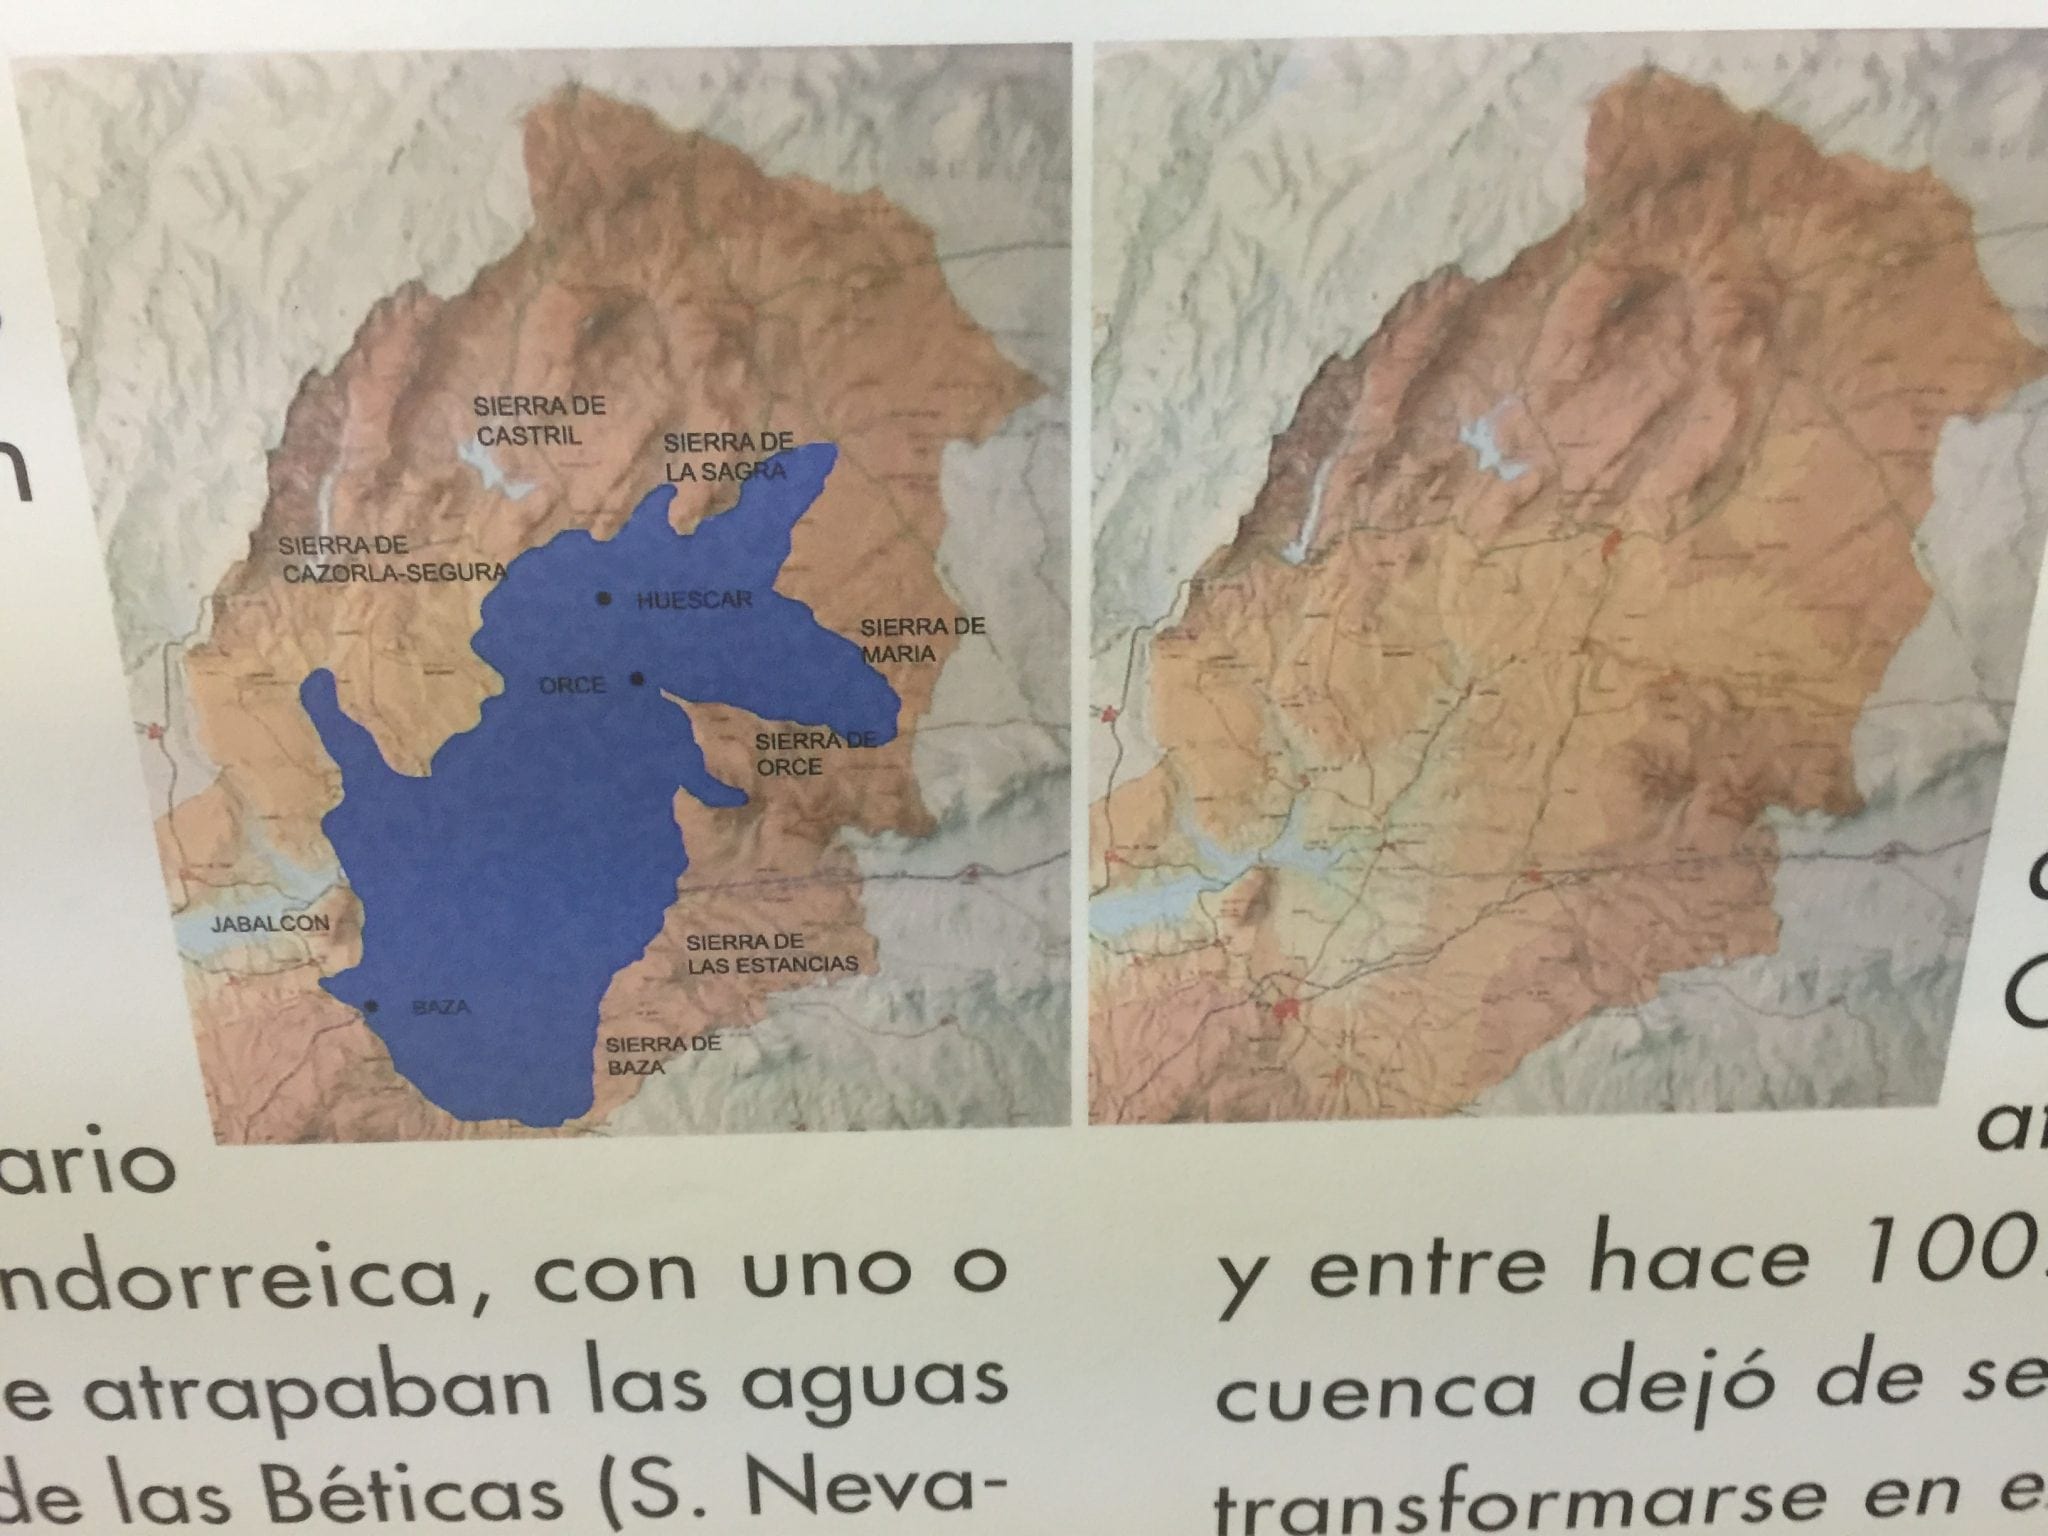
I am including photos from literature given to use while visiting the museum.
Display case B
It is now thought that the first people living on the European continent lived in Southern Spain and were from Africa. Looking at the geography this makes sense. Some scientists think people were living in Europe as early as 1.8 million year BCE. It is thought there might have been a land bridge between north Africa and the Iberian Peninsula. The countries of Spain, Portugal, and Andorra make up the Iberian Peninsula.
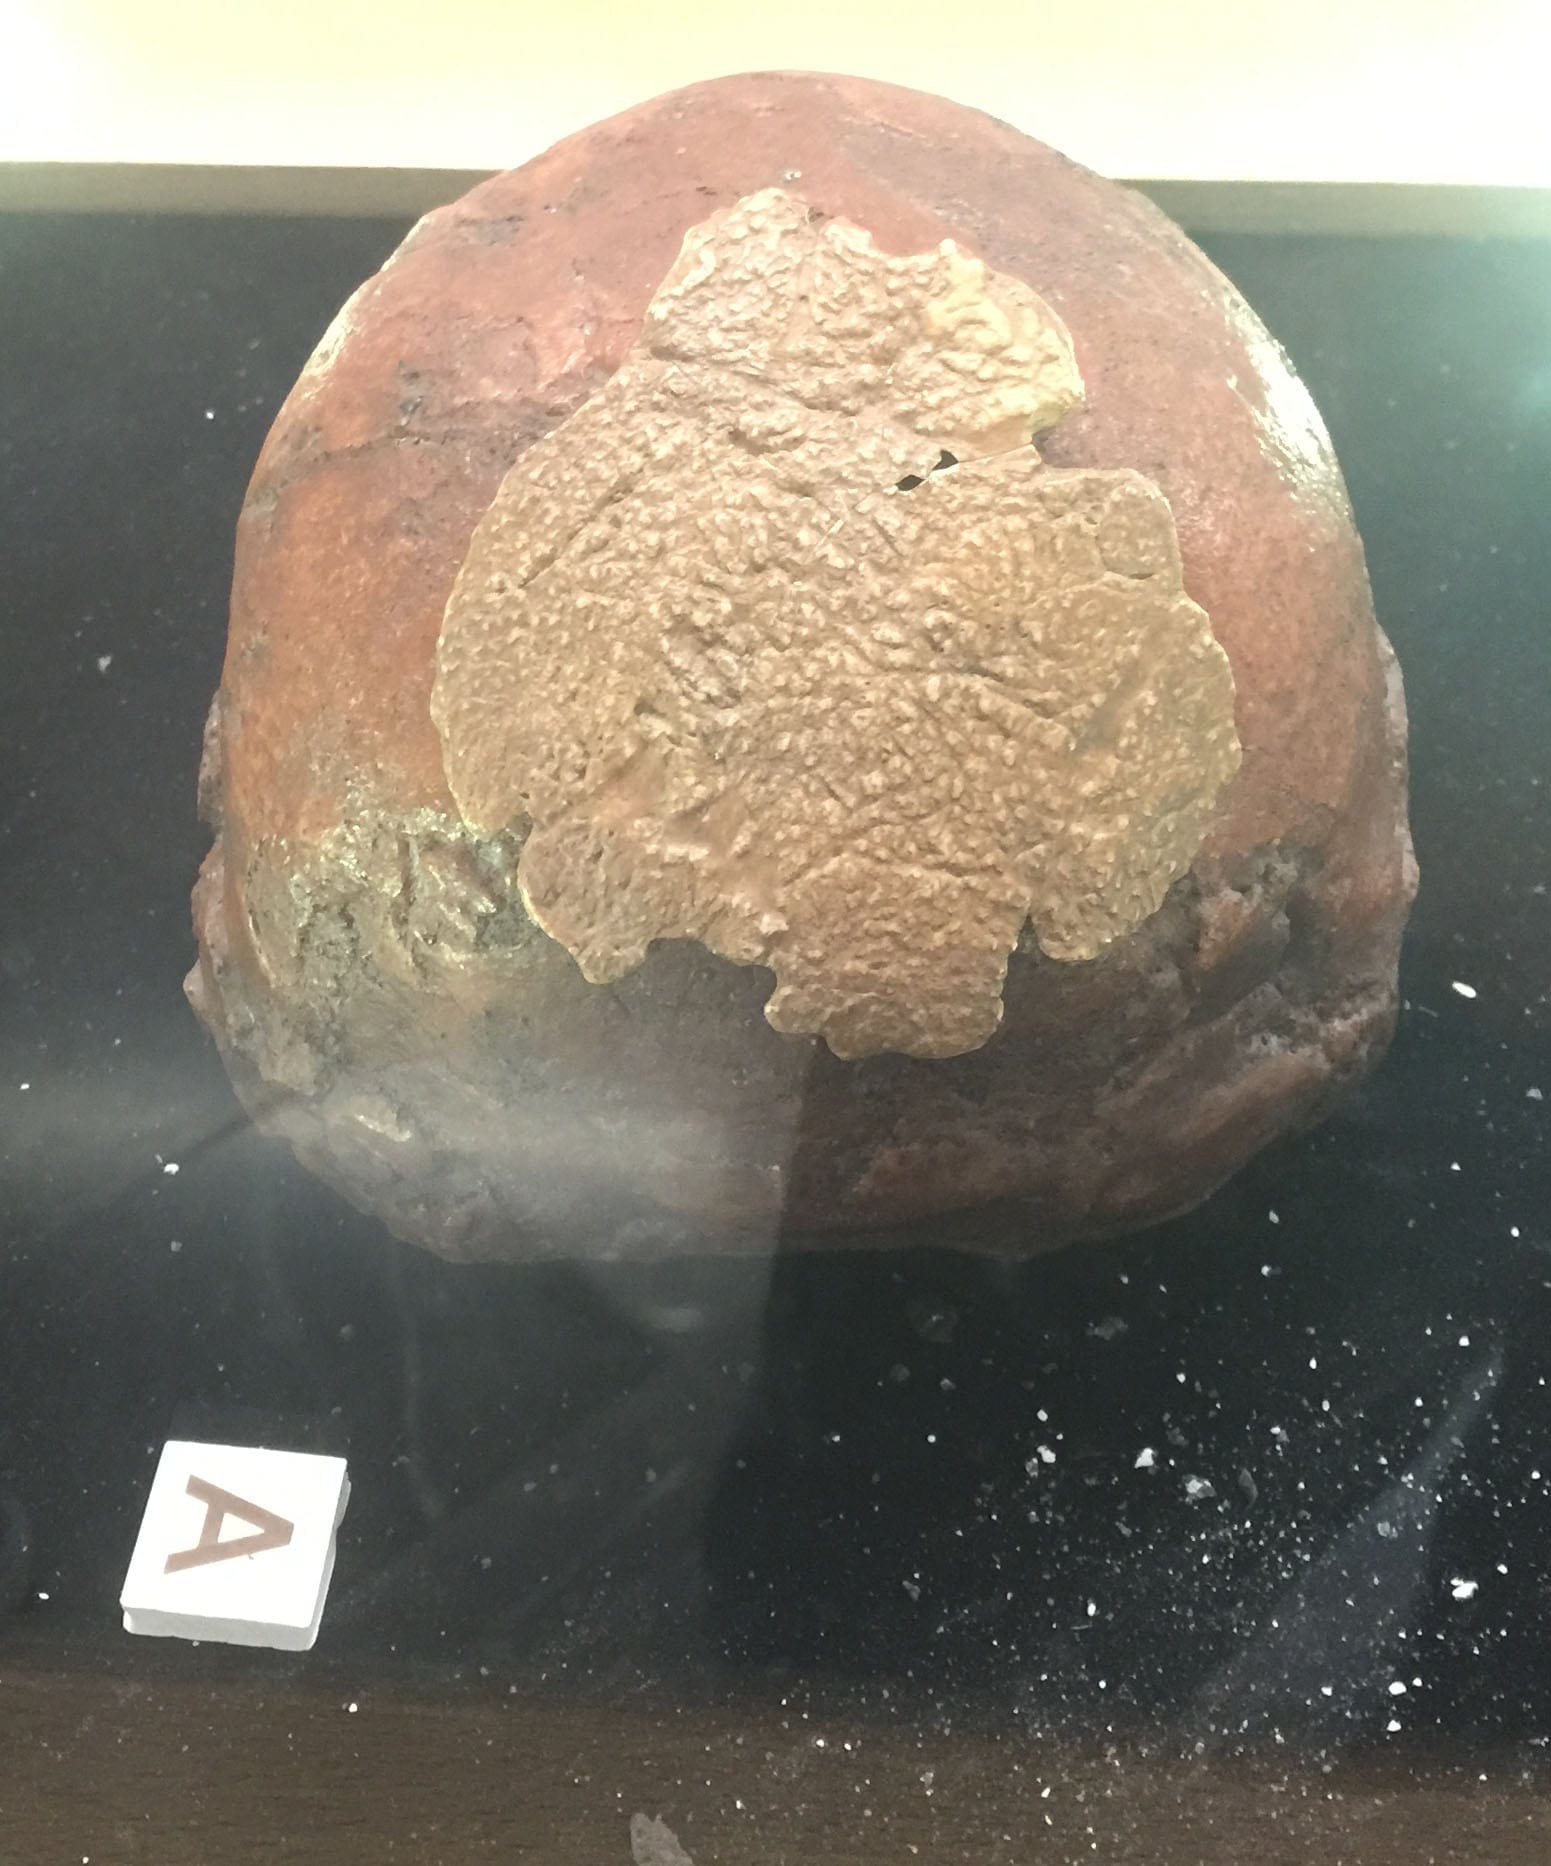
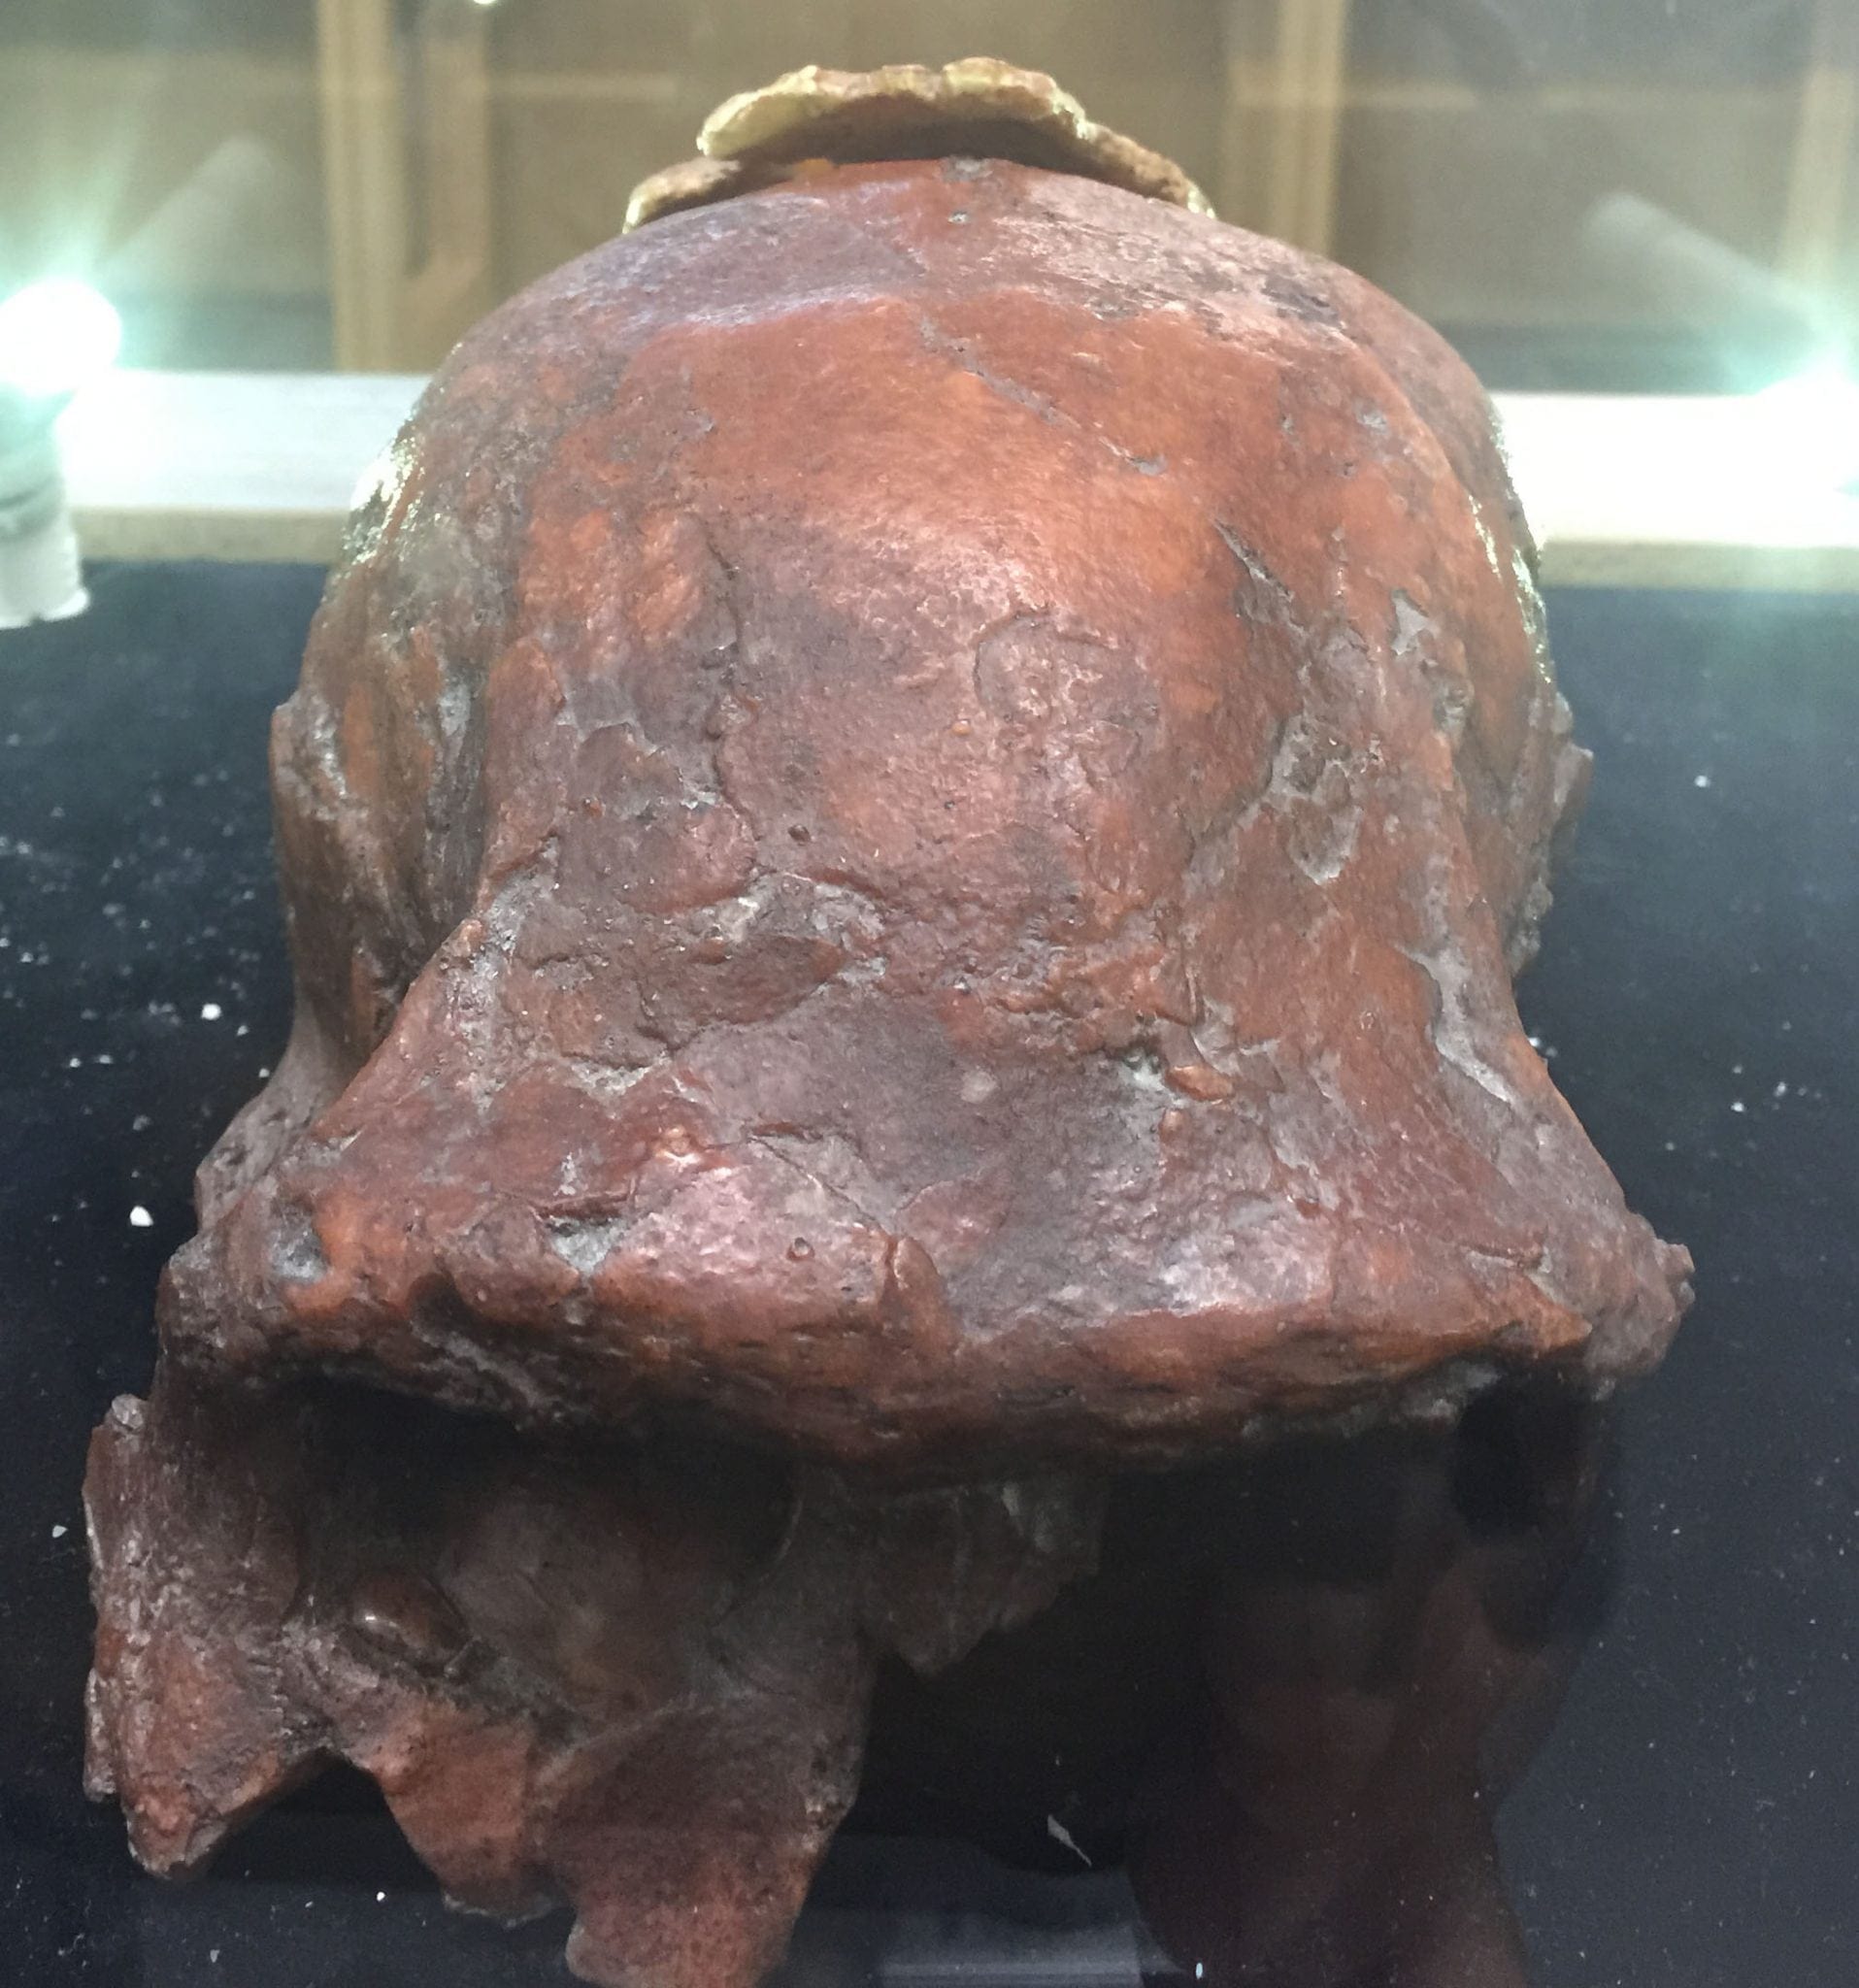
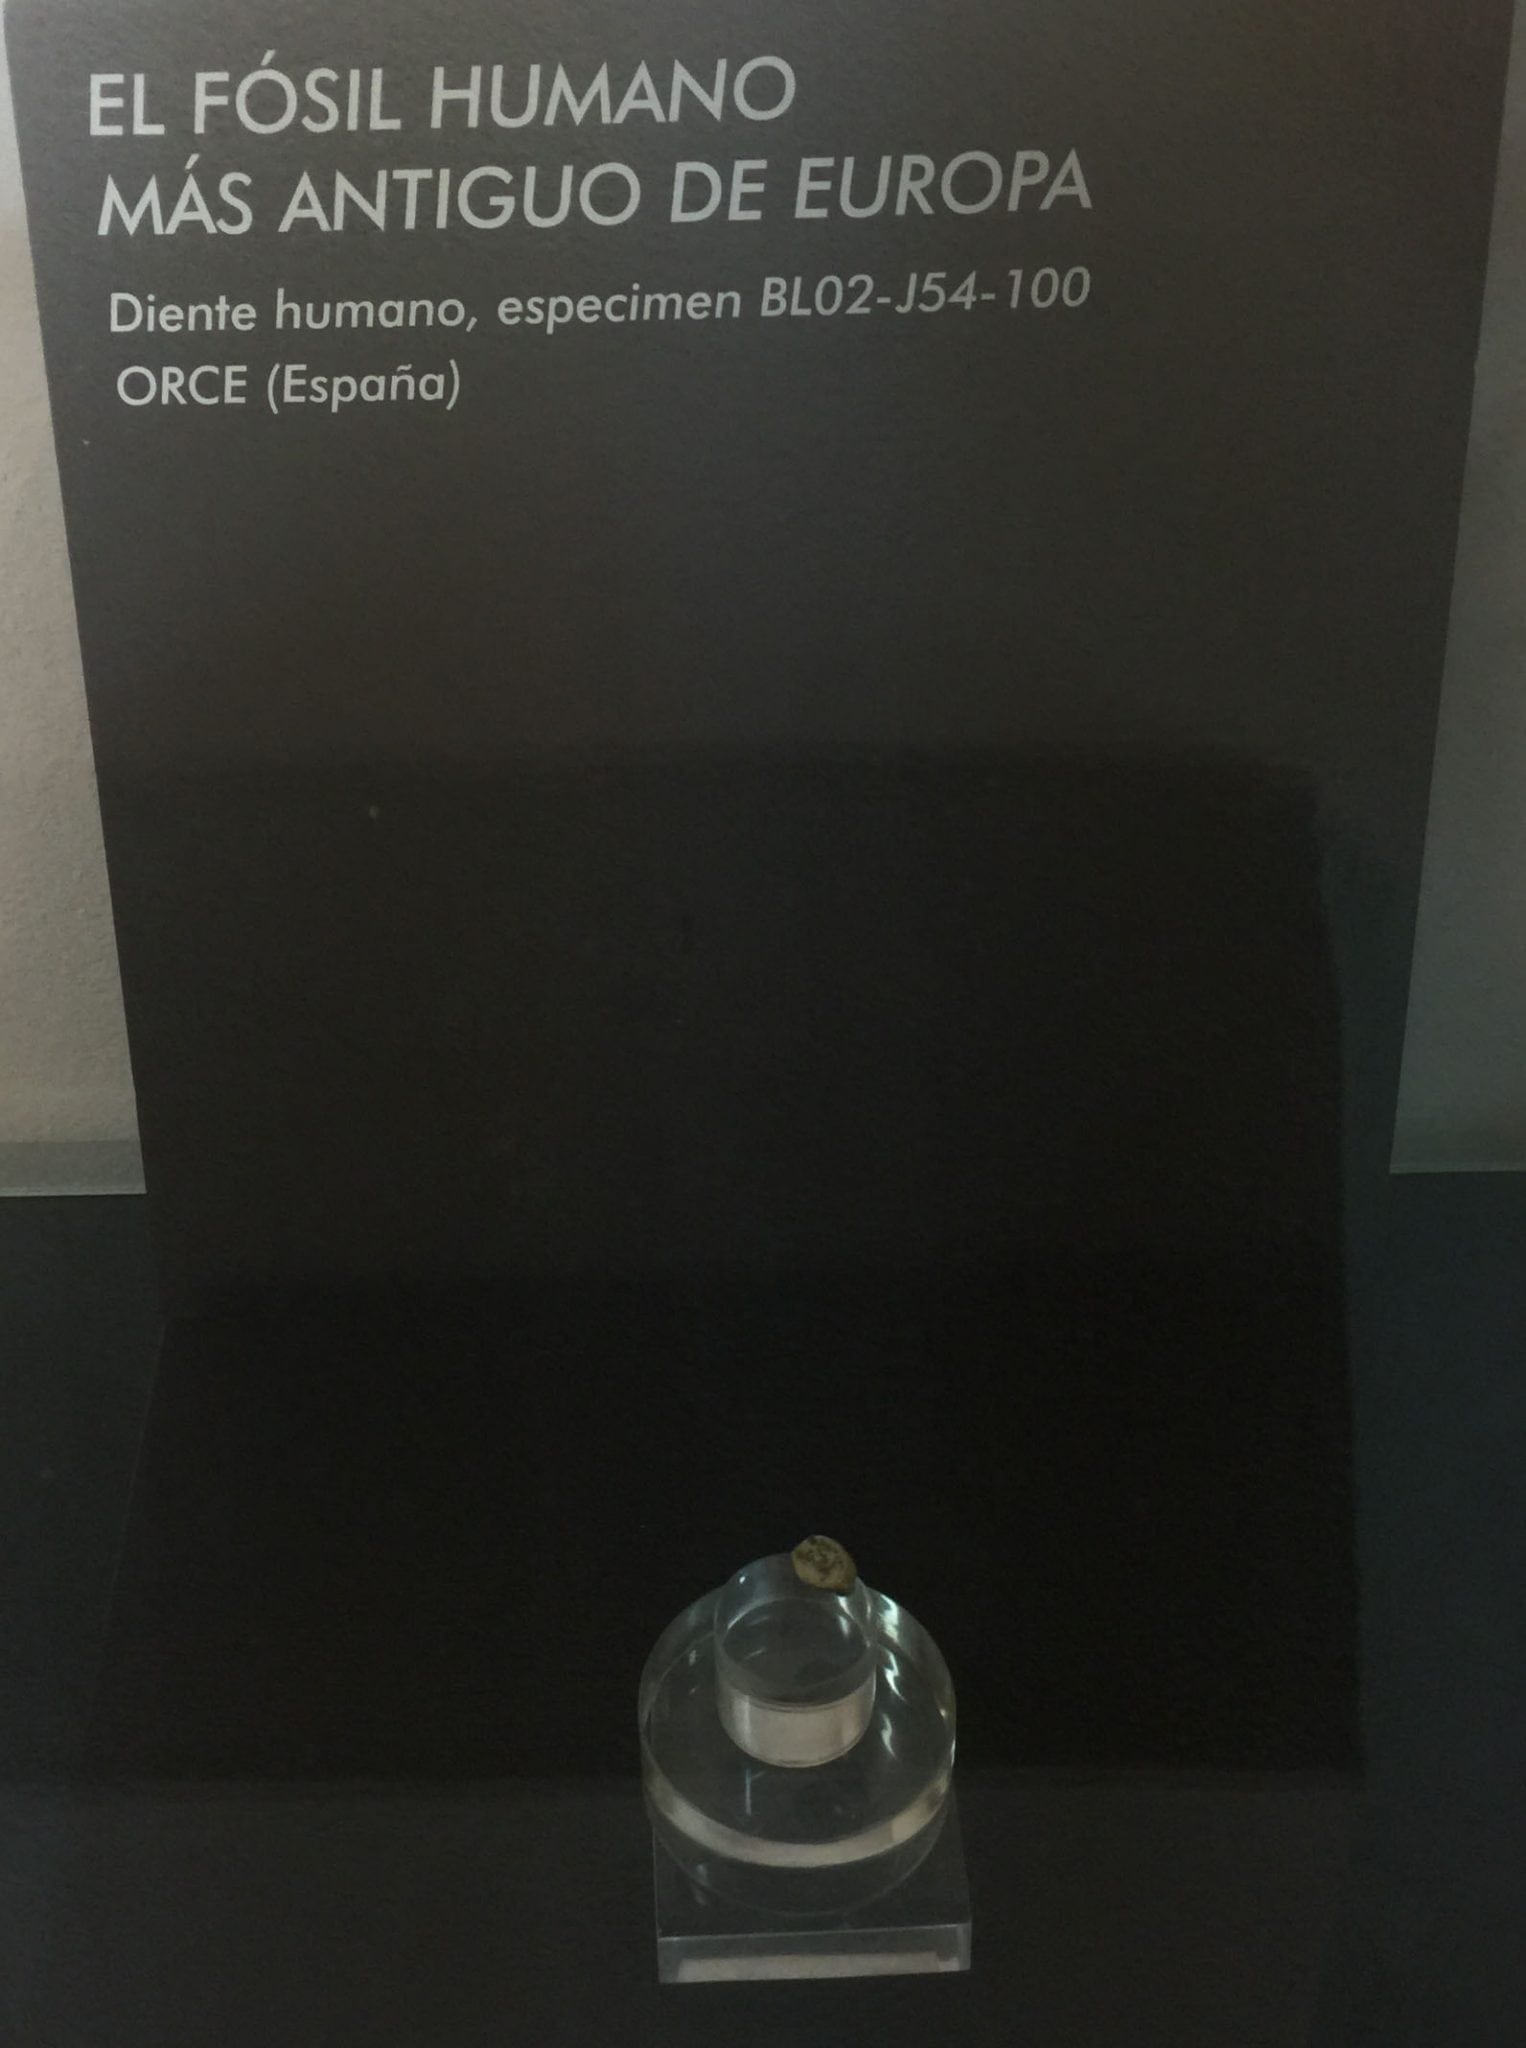
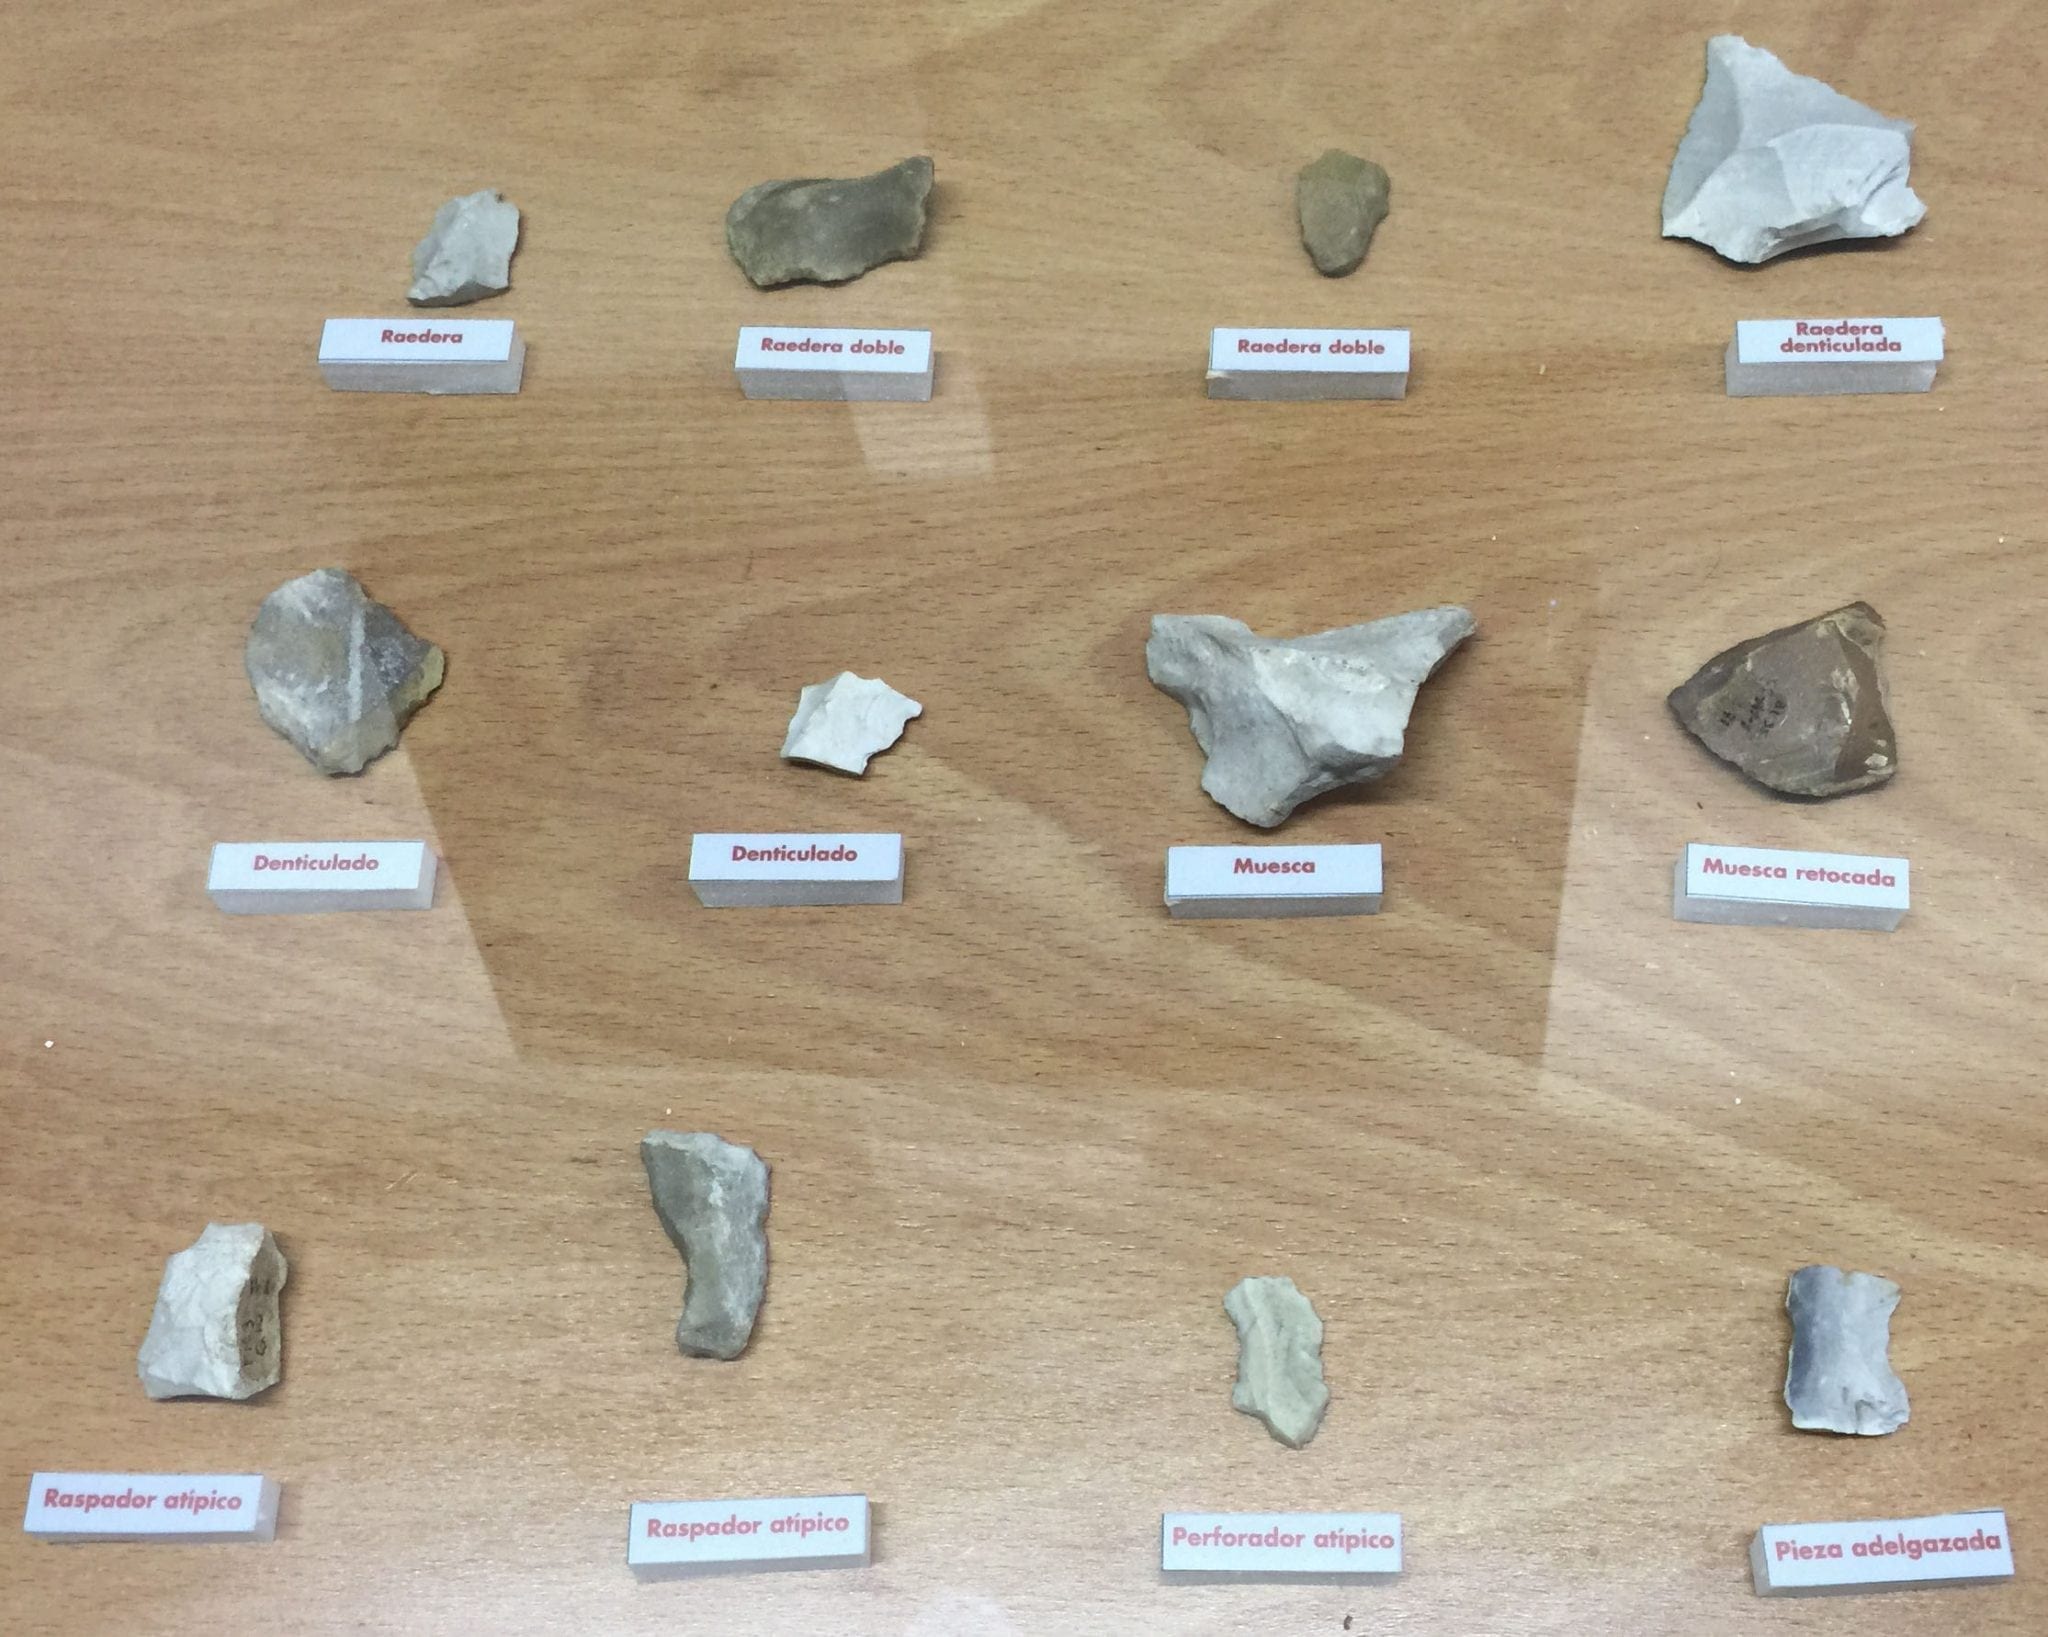
When Orce man was discovered there was great excitement in the scientific community. It was then suggested that the fragment was that of an equine species. Tests done since support the scientific theory that the fragment is of human origin. The other evidence that has been excavated in Orce are several human teeth and stones that have been sharpened to make tools. Until I was back in the States I did not appreciate what I was looking at when I looked at the skull fragment. In Orce, I was more excited about the tooth on display. Little did I know that the skull fragment was one of the key pieces of “evidence” creationists use when attempting to discredit the occurrence of evolution. The skull fragment was found at one of the four excavation sites surrounding Orce.
This is a fossilized human tooth. The human lived over a million years ago.These tools show evidence of having been shaped. It made me think of finding arrowheads in Bridgeport, California.
What the creationists say about Orce man.
Orce man: Found in the southern Spanish town of Orce in 1982, and hailed as the oldest fossilized human remains ever found in Europe. One year later officials admitted the skull fragment was not human but probably came from a 4 month old donkey. Scientists had said the skull belonged to a 17-year-old man who lived 900,000 to 1.6 million years ago, and even had very detail drawings done to represent what he would have looked like. (source: “Skull fragment may not be human”, Knoxville News-Sentinel, 1983) http://www.nwcreation.net/evolutionfraud.html
The statement is misleading and they do not use a solid science reference. it also has not been updated to include the latest evidence using albumin analysis, http://link.springer.com/article/10.1007%2FBF02436194#page-1, which isn’t very new, but I thought you would find it interesting.
I had no idea when I chose science as a discipline of study, that I was heading down a path with controversy. I am a secular, academic, homeschooling scientist who writes about evolution, the Big Bang, human causes of climate change, and living on a multi-million year old planet in a multi-billion year old universe, though, so… As you can imagine, I was over the top excited when I realized I saw the oldest human fossils to be discovered on the European continent!!!
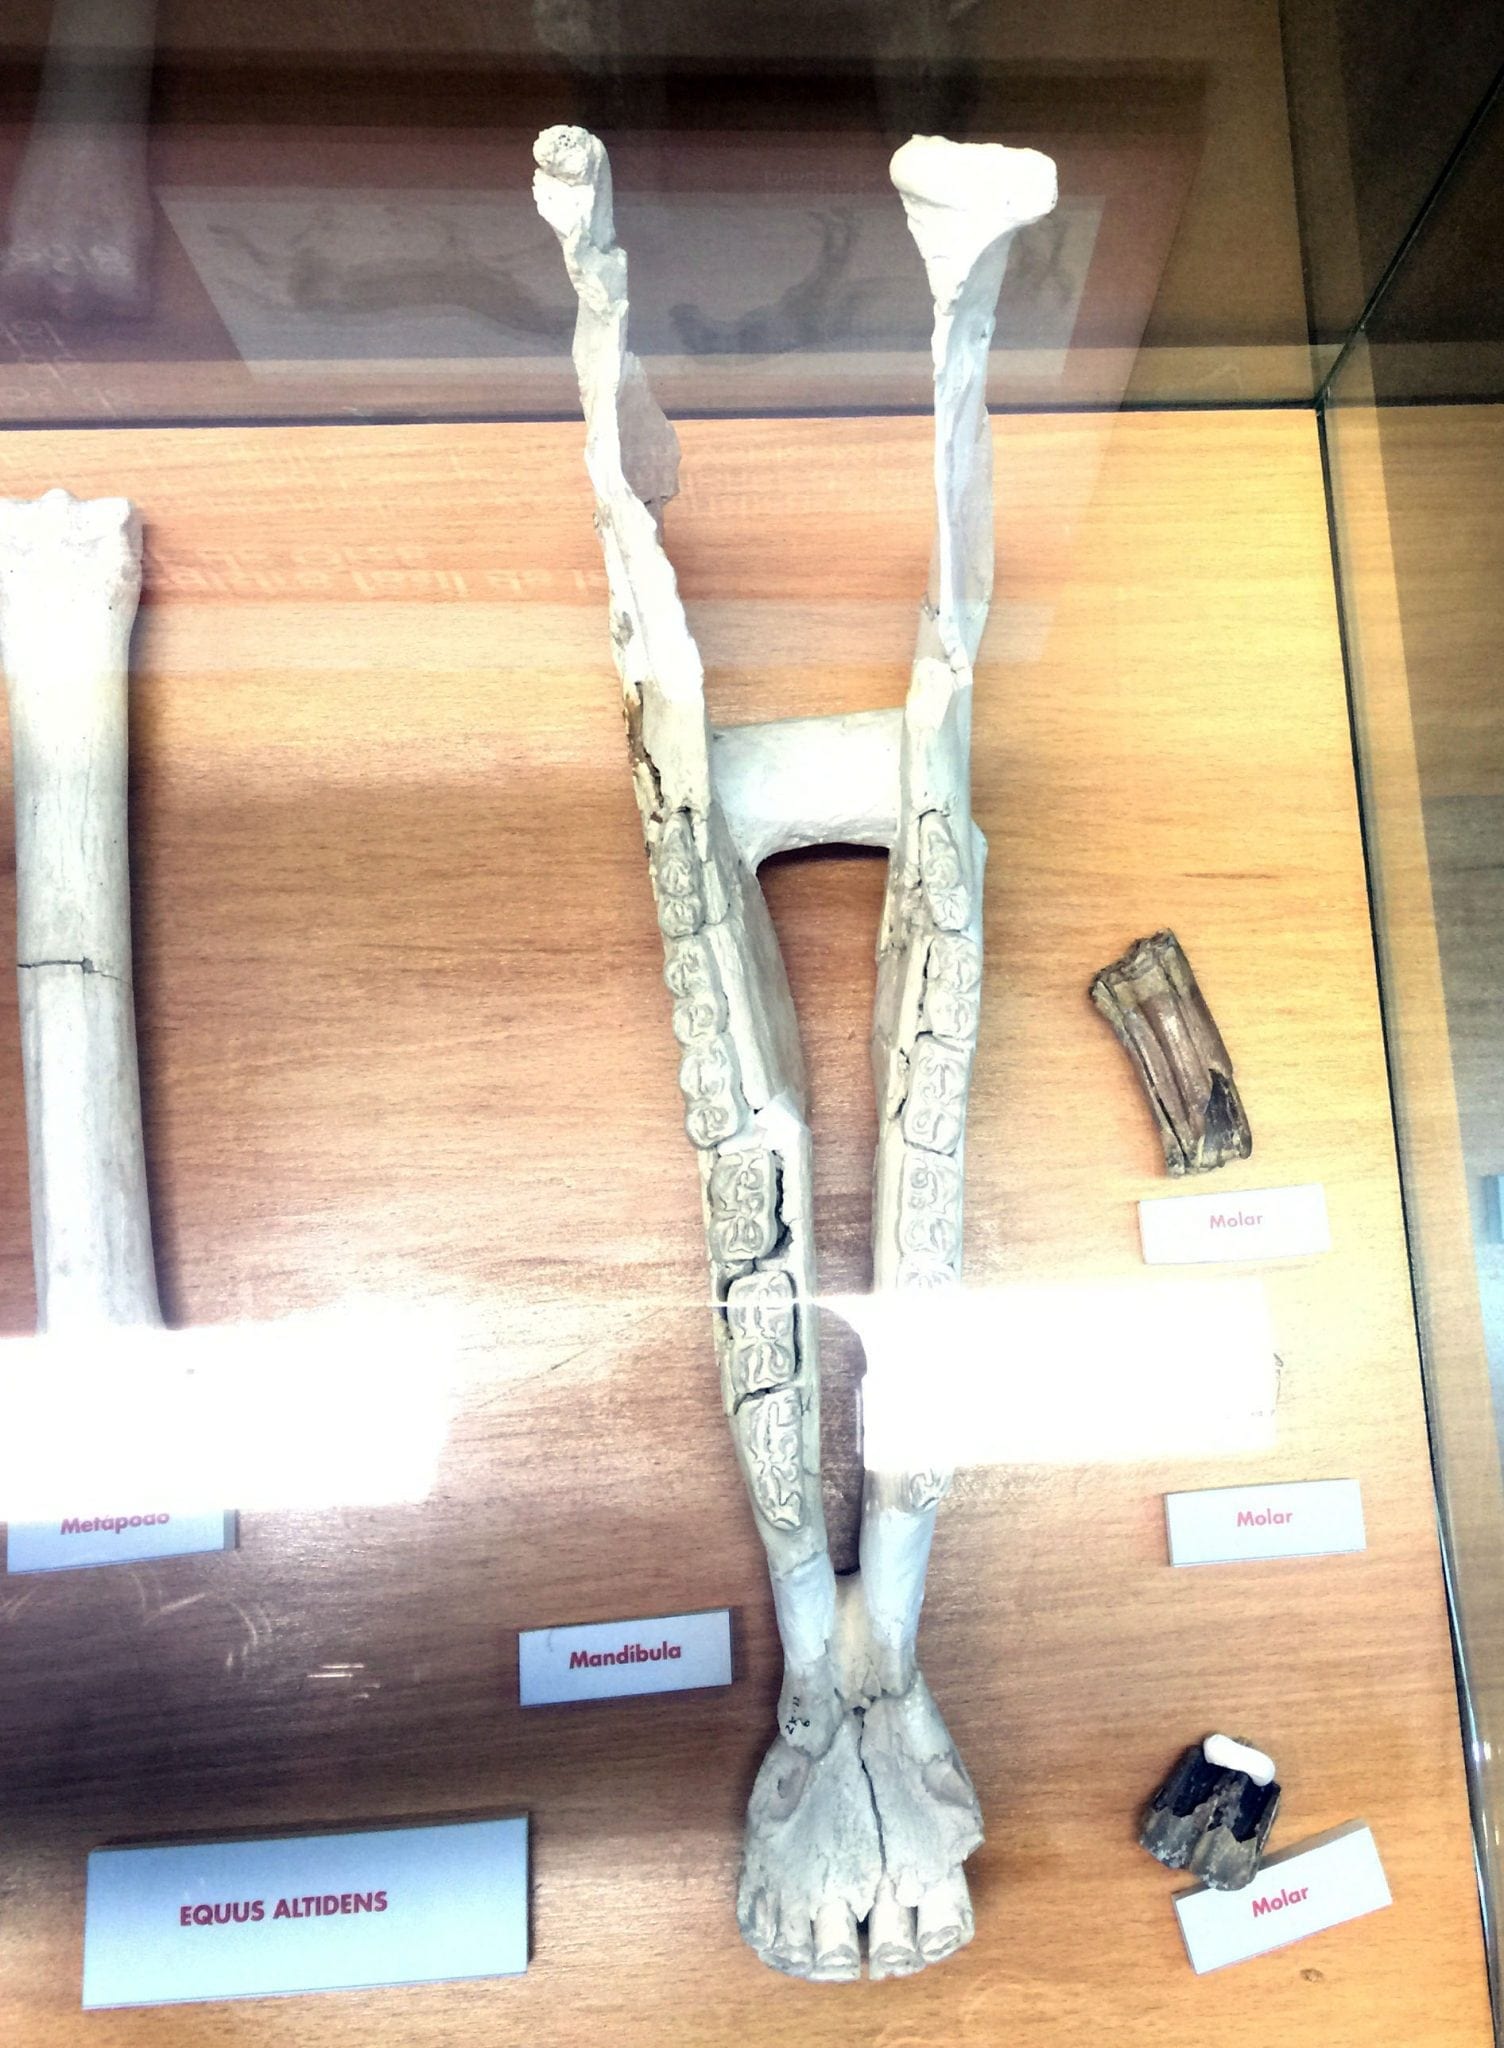
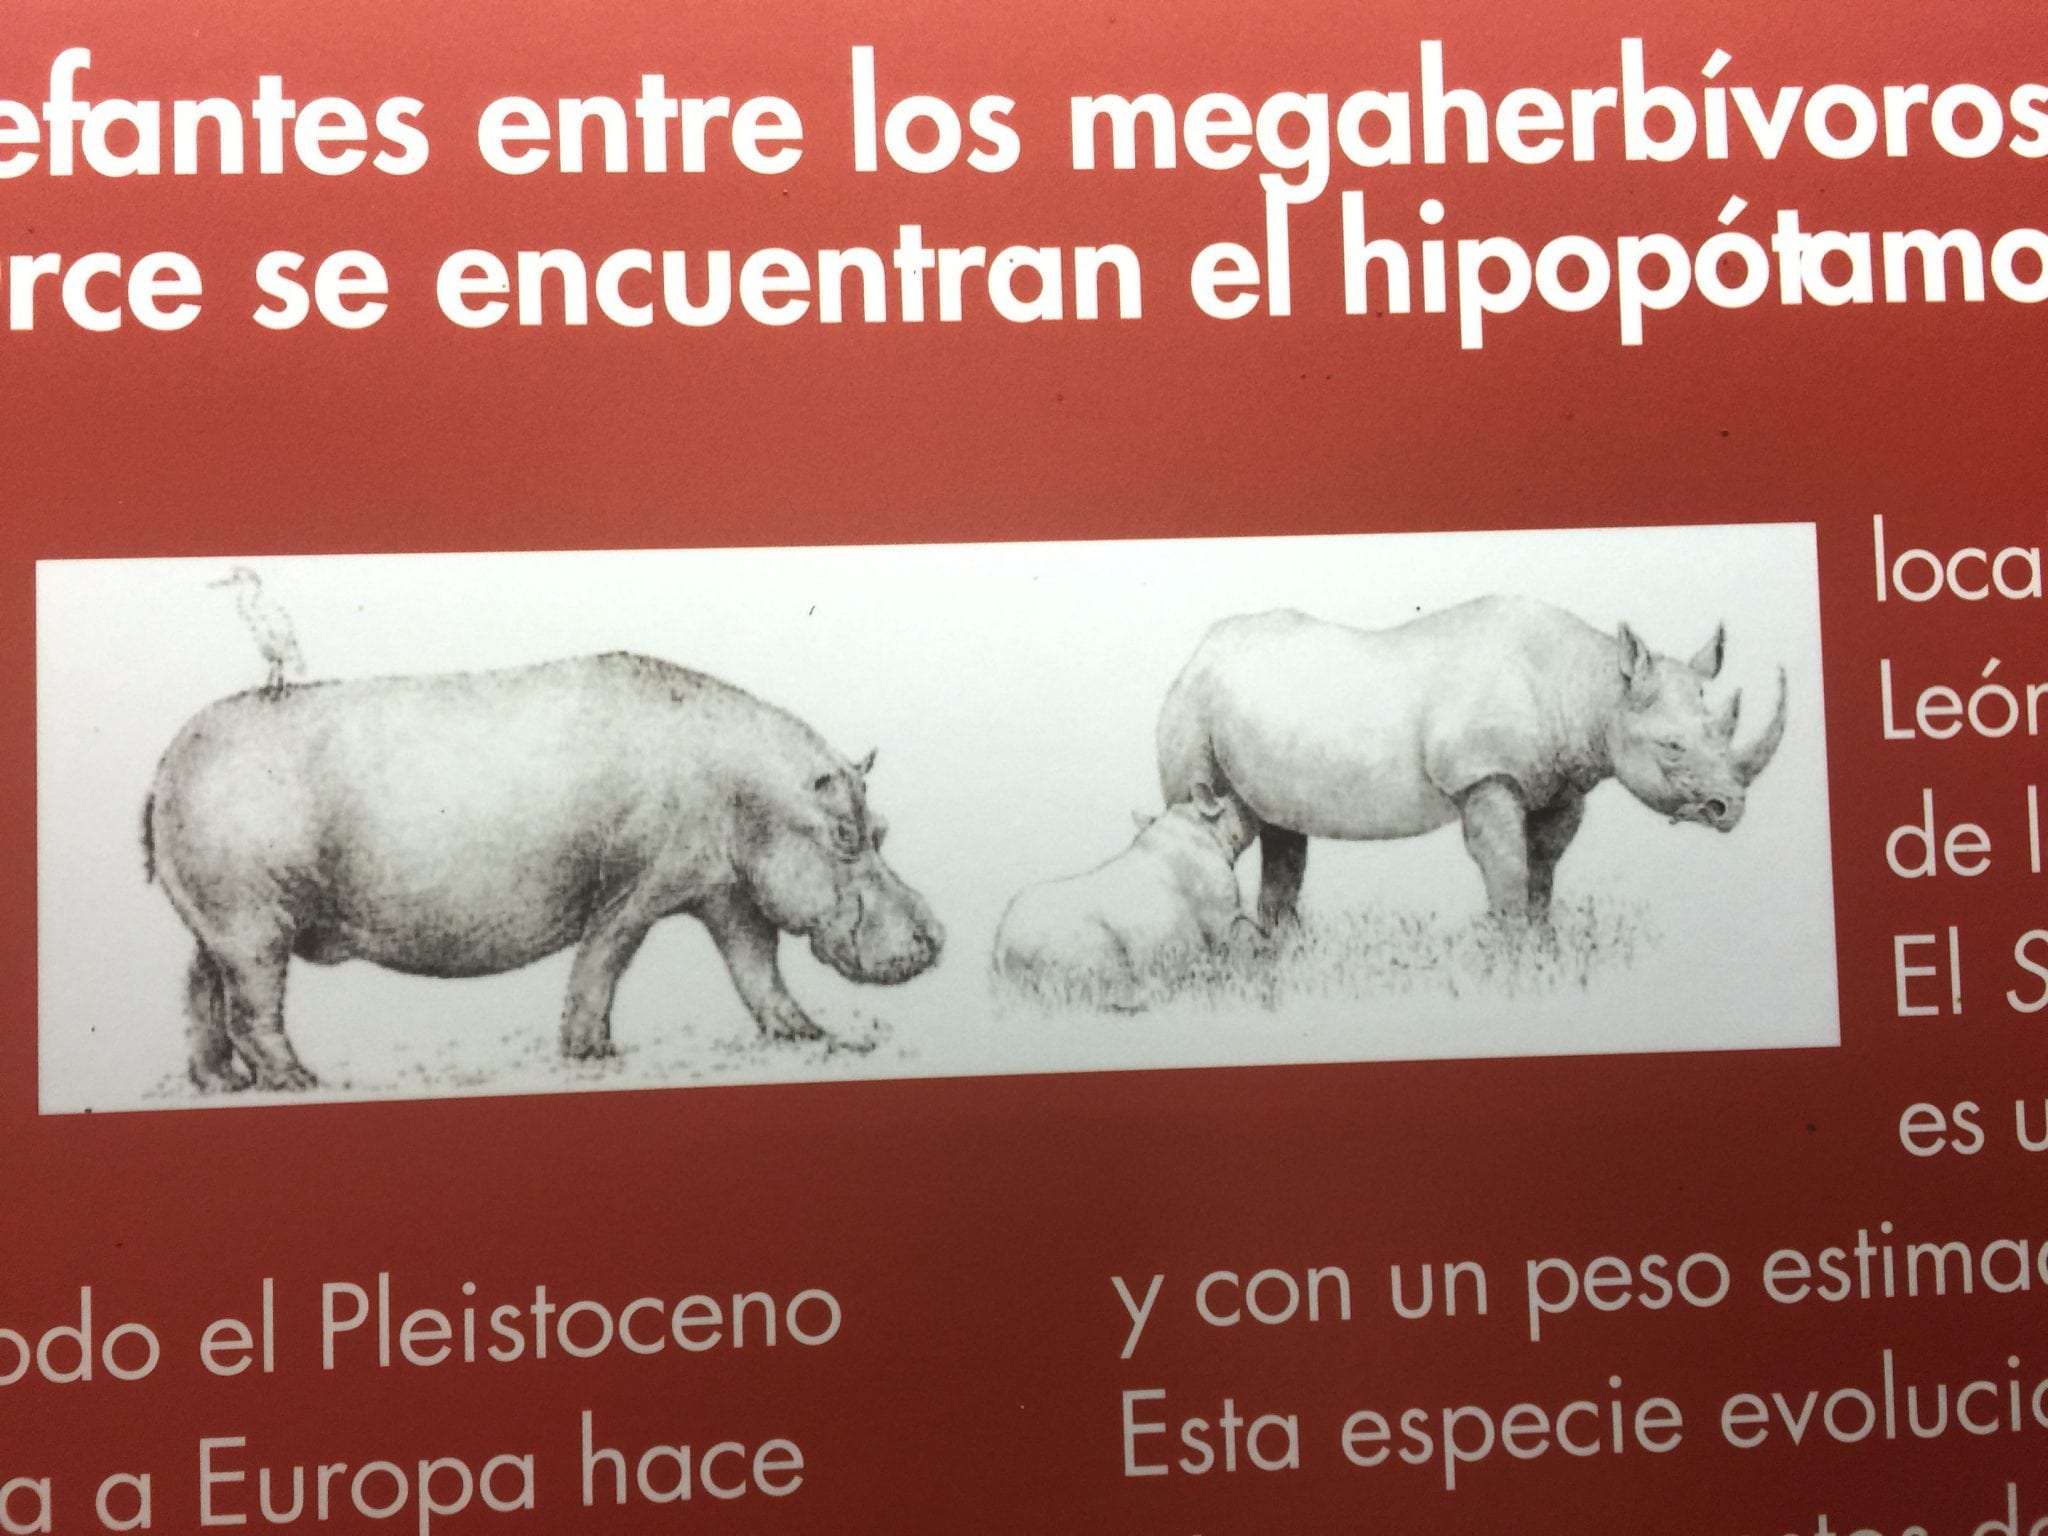
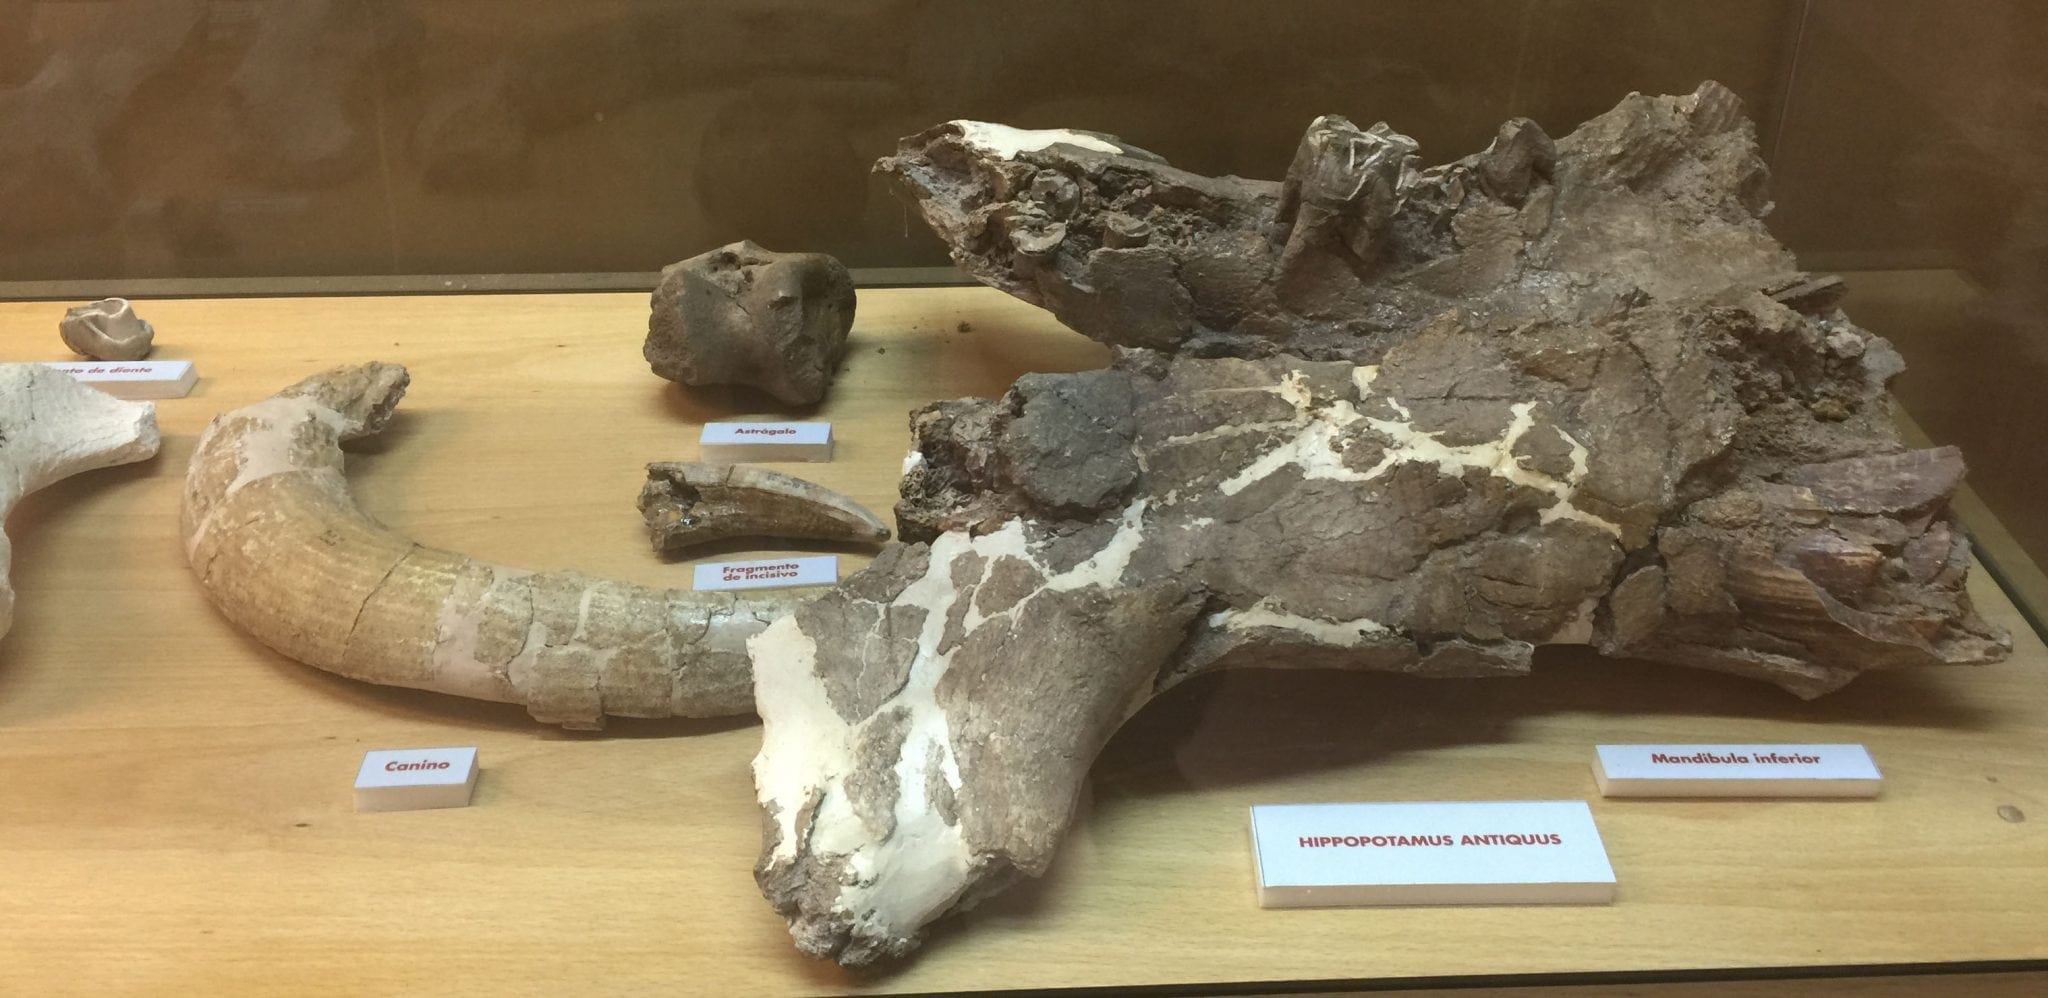
There are 2 floors. The carnivores and human fossils are on the first floor, and the herbivores are on the second floor.
I love hippos!
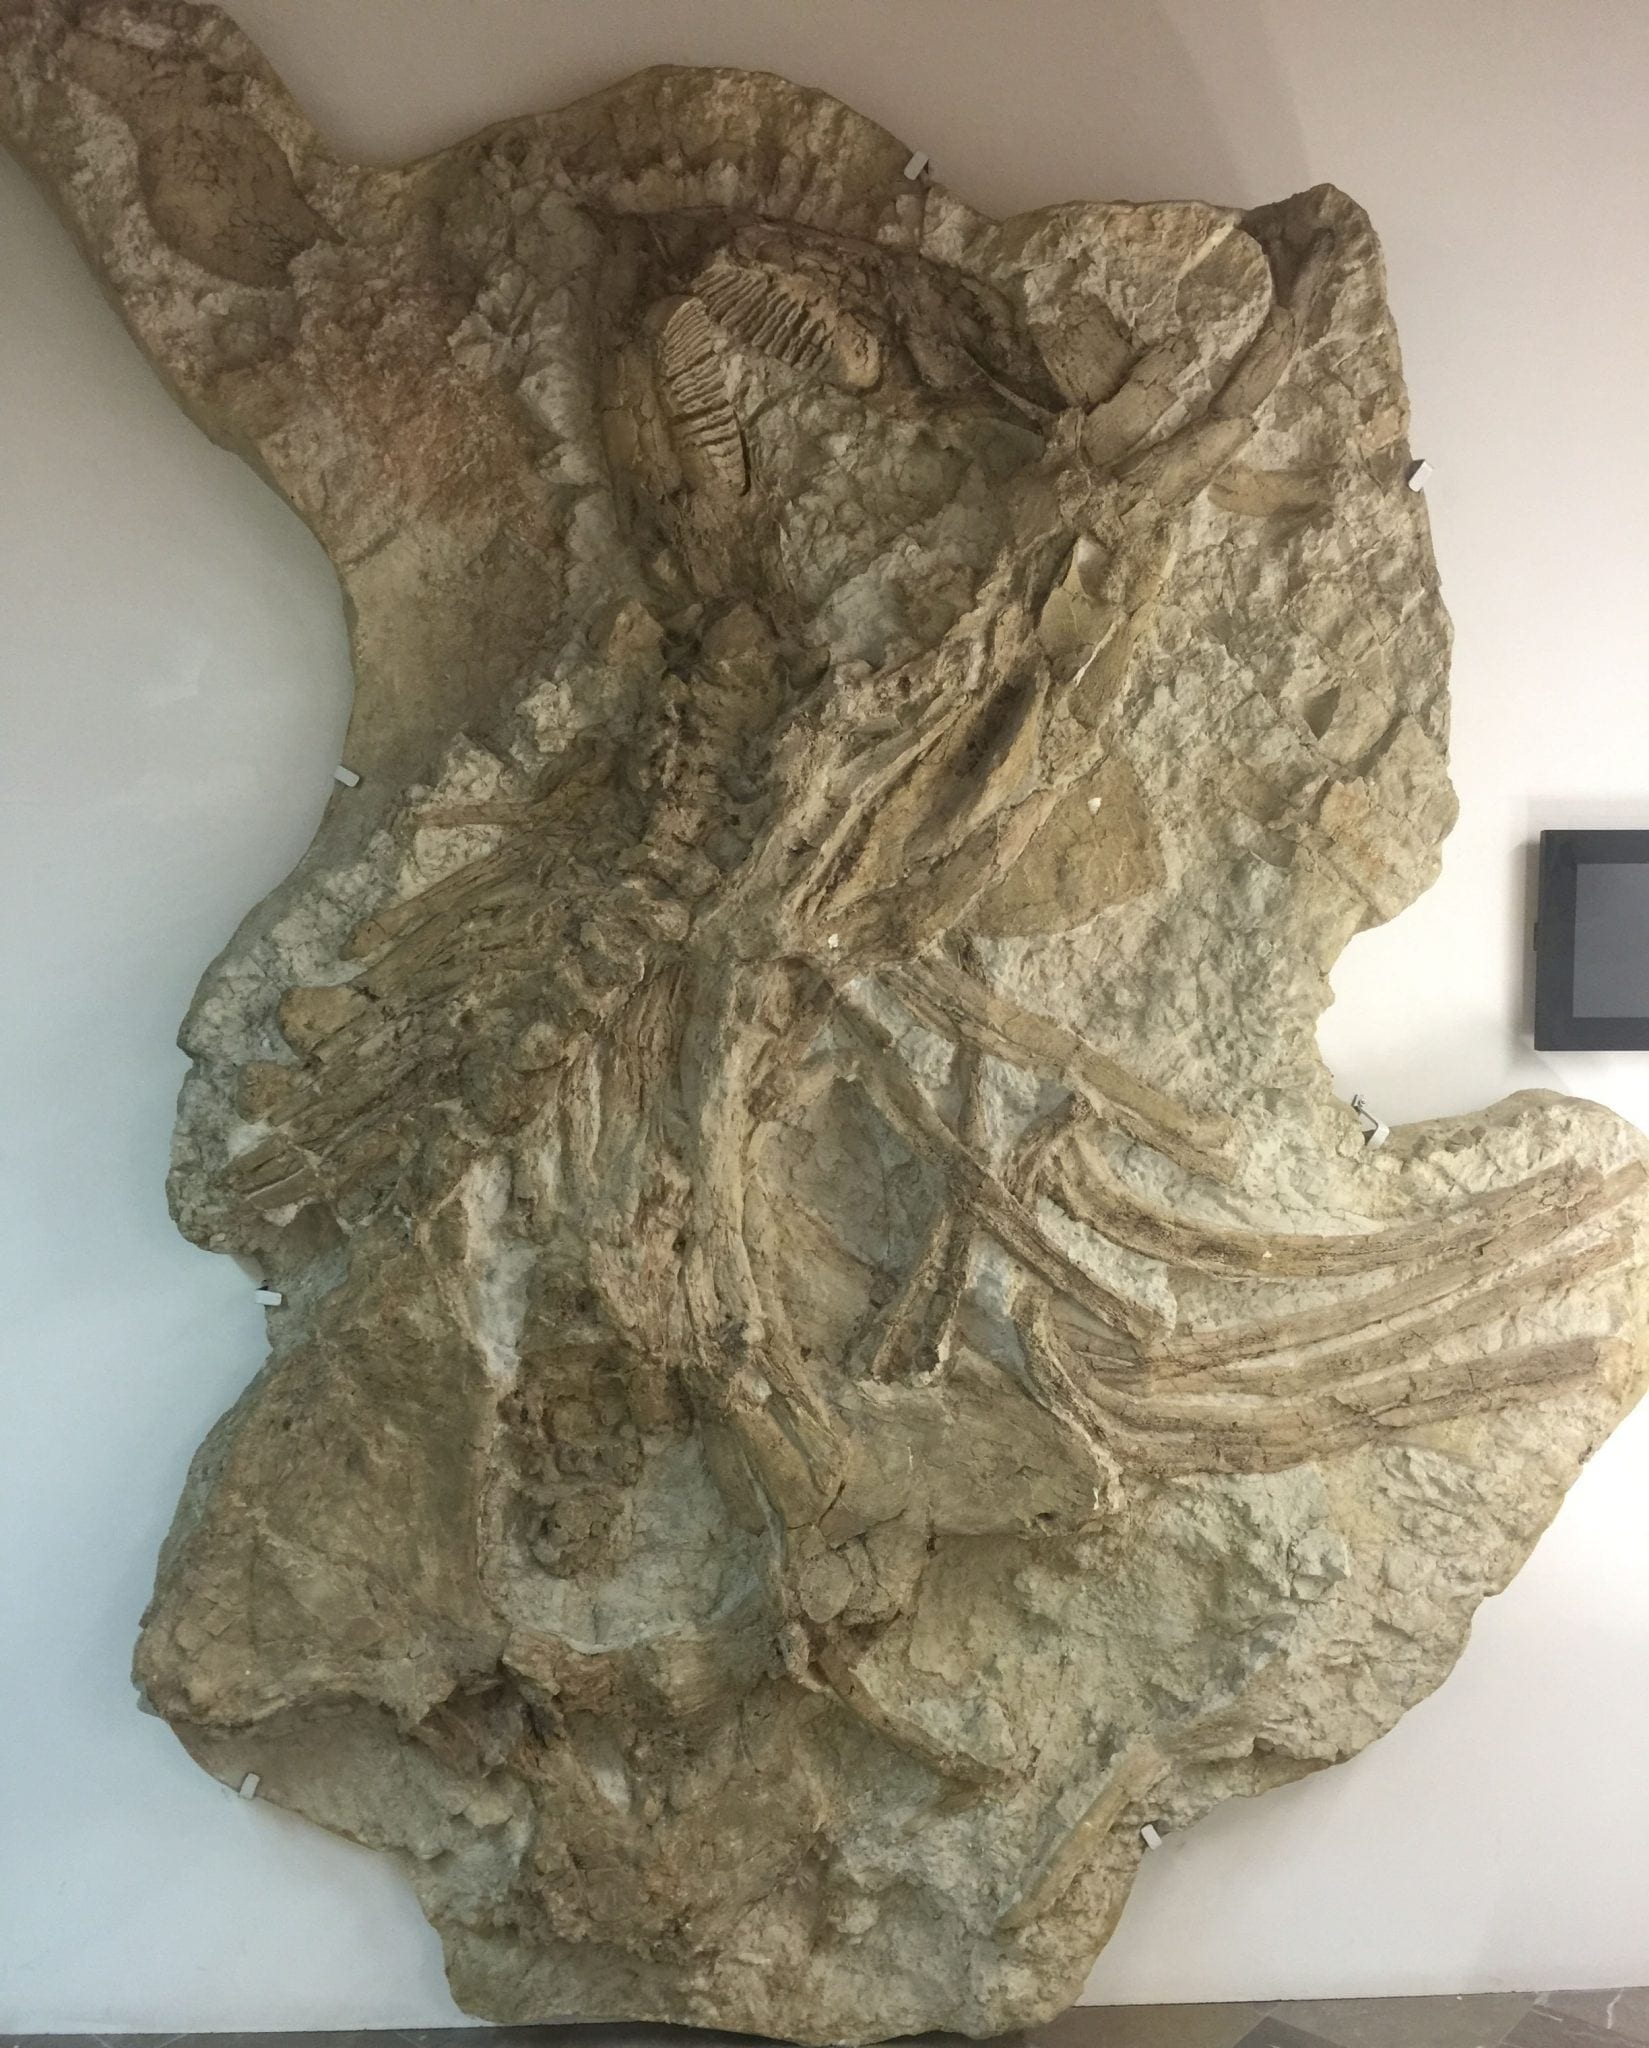
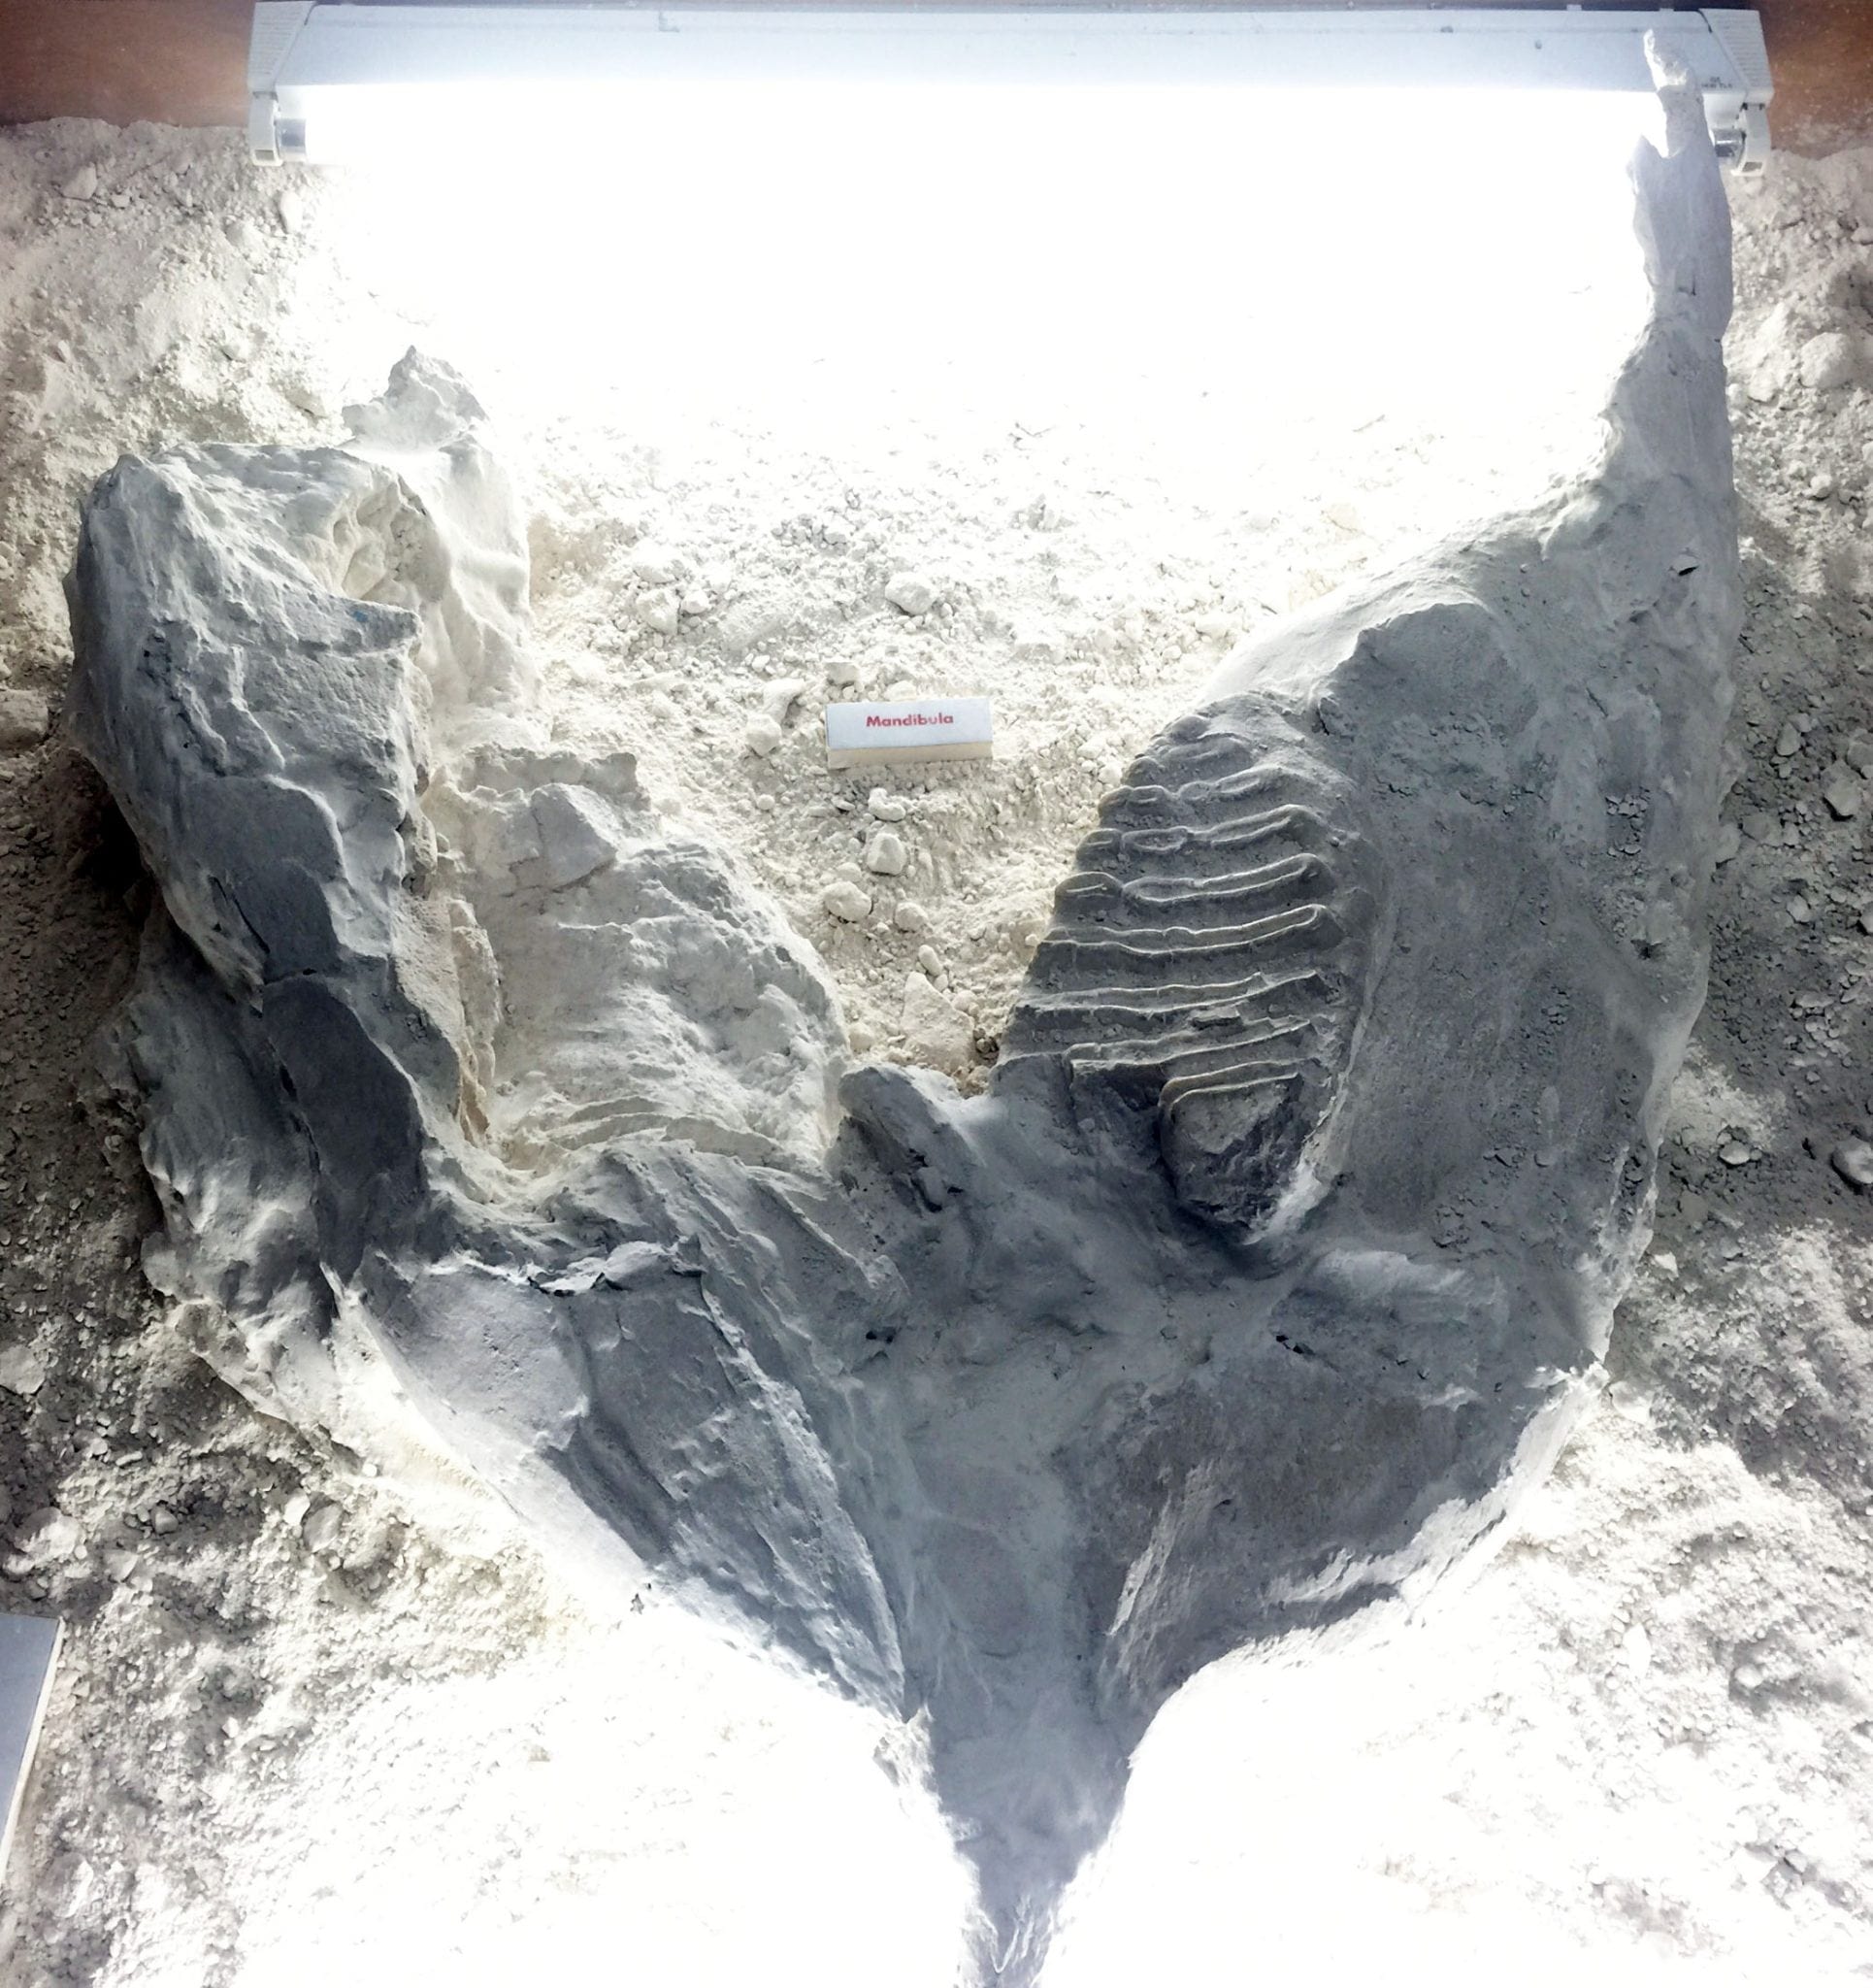
An extinct species of elephant. If you look hard enough you can see it.
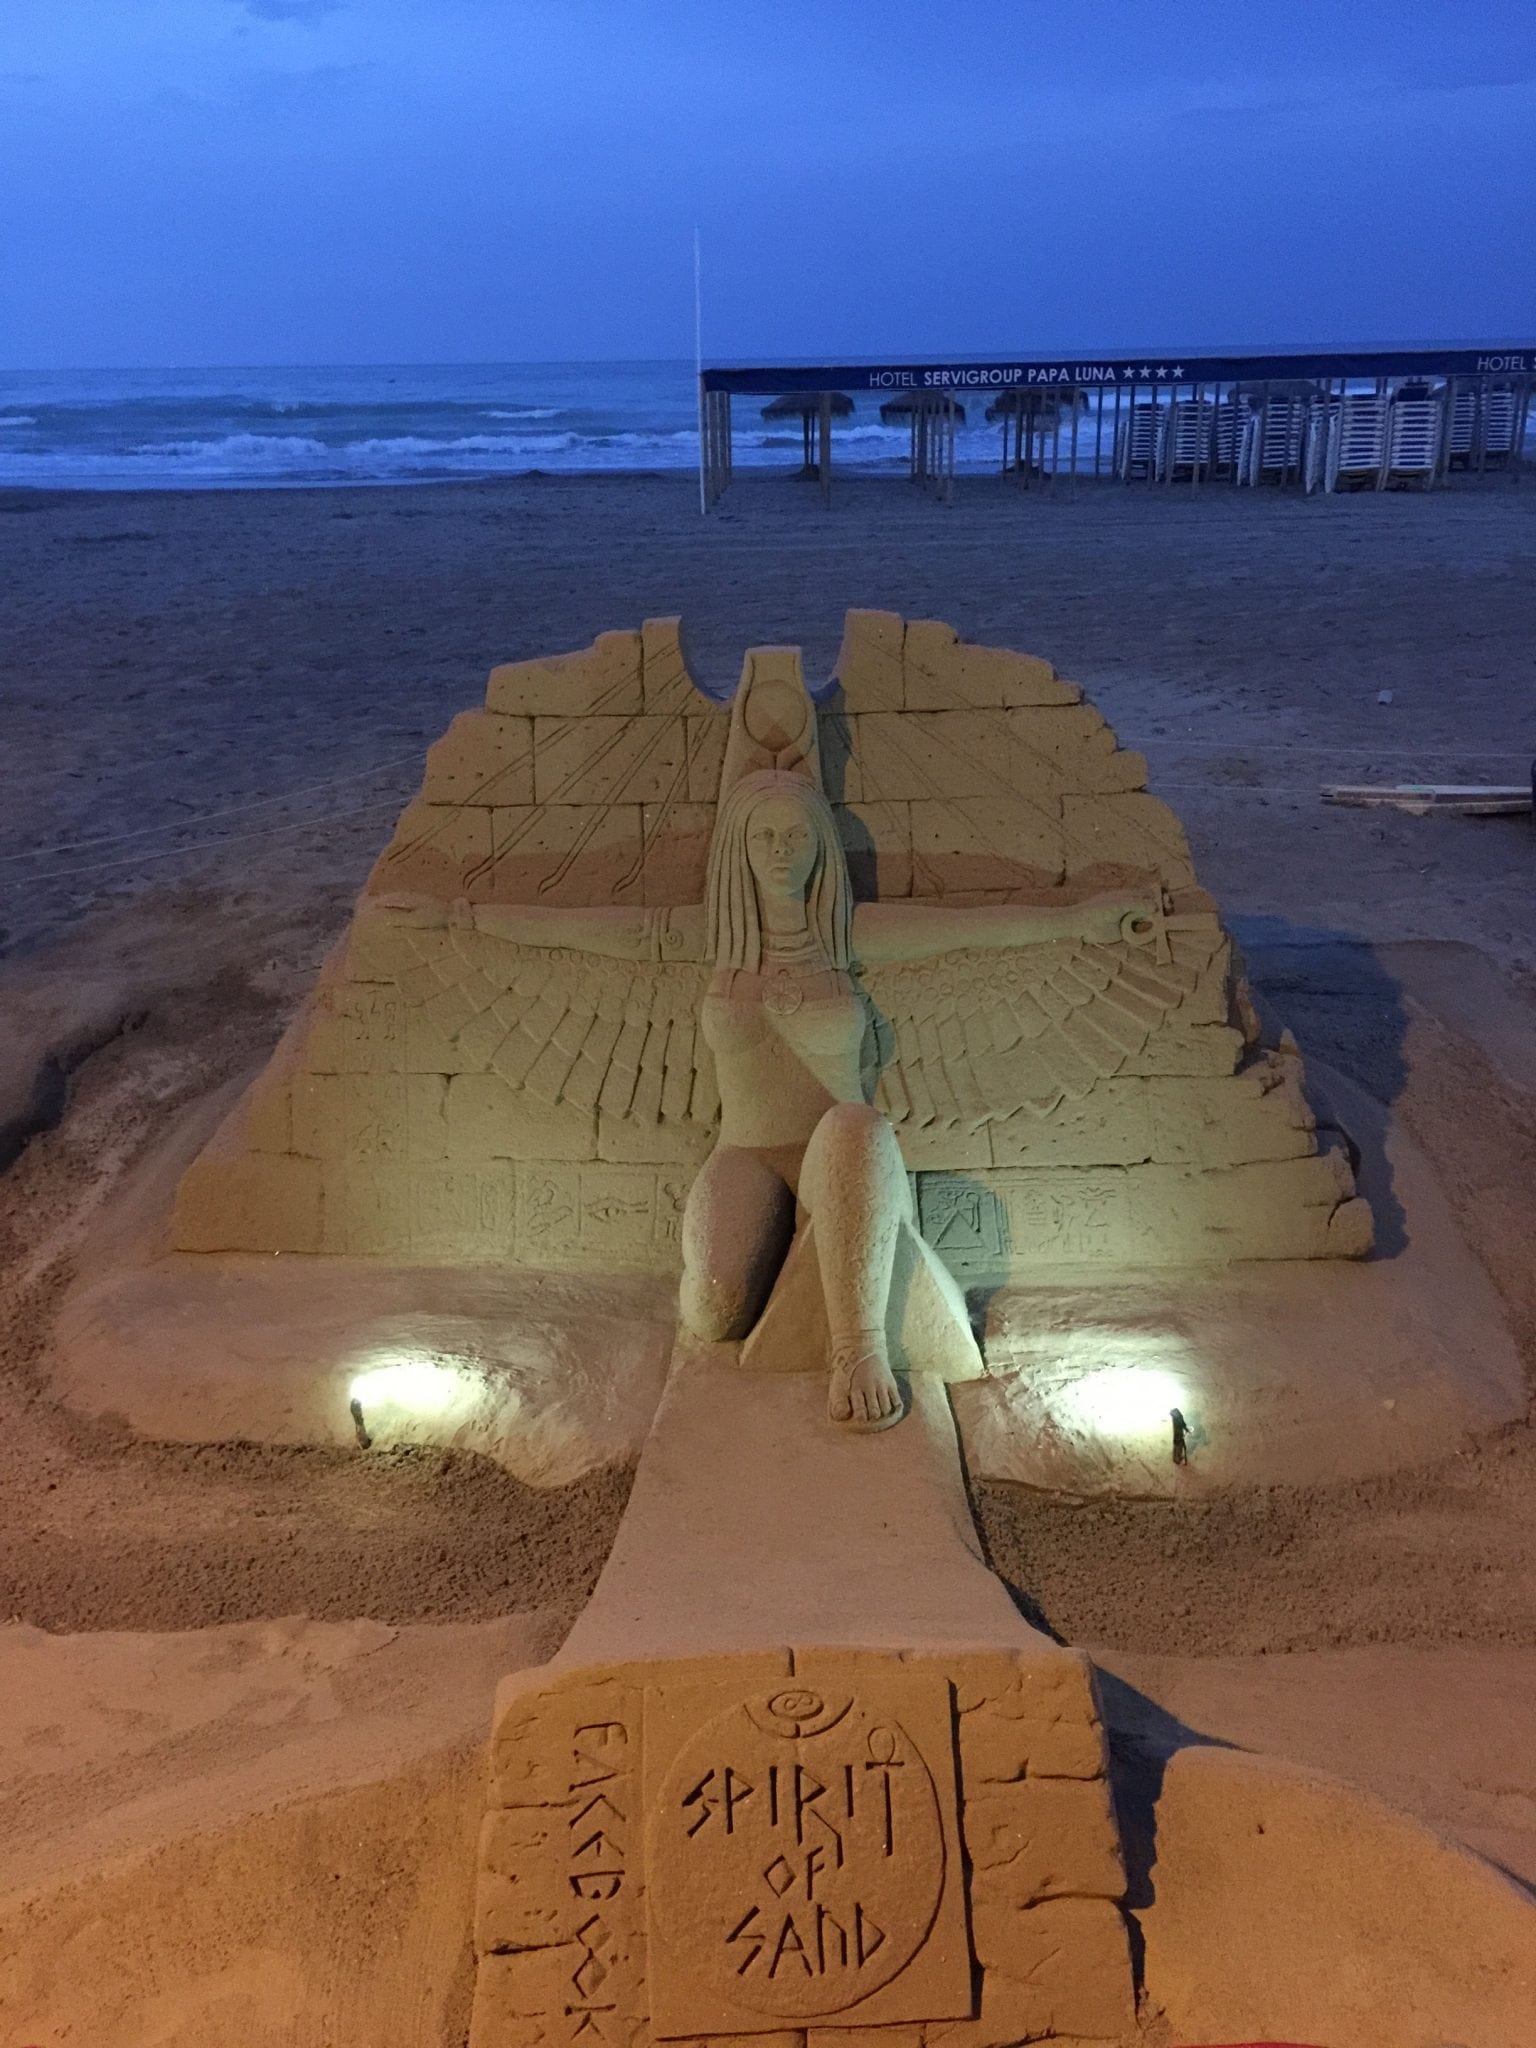
We drove for the night until we were ready to be done. This put us near Peniscola where we found a room for the night. I read about it on my phone and it sounded like a good place to stay. This is where the Spanish tourists hang out. (In droves! It felt like the beach area in California in the summer on steroids!) The people were friendly, the beach lovely, and we could not wait to get out of there the next morning. Imagine a Disney Hotel at max capacity and then add more people!
Sand sculpture in Peniscola
People kept asking if we were British. I asked, and was told that is because Peniscola is not a destination Americans go to. It was eye-opening though, and I am glad we stayed, because now we know the Spanish do vacation. When I said something about the hotel staff not being able to distinguish between a U.S. and British accent Sean made a great point. He asked why someone who barely speaks English would notice the difference. Several people told me I speak Mexican Spanish. Sean pointed out that I couldn’t tell the difference between that and Castillian Spanish.
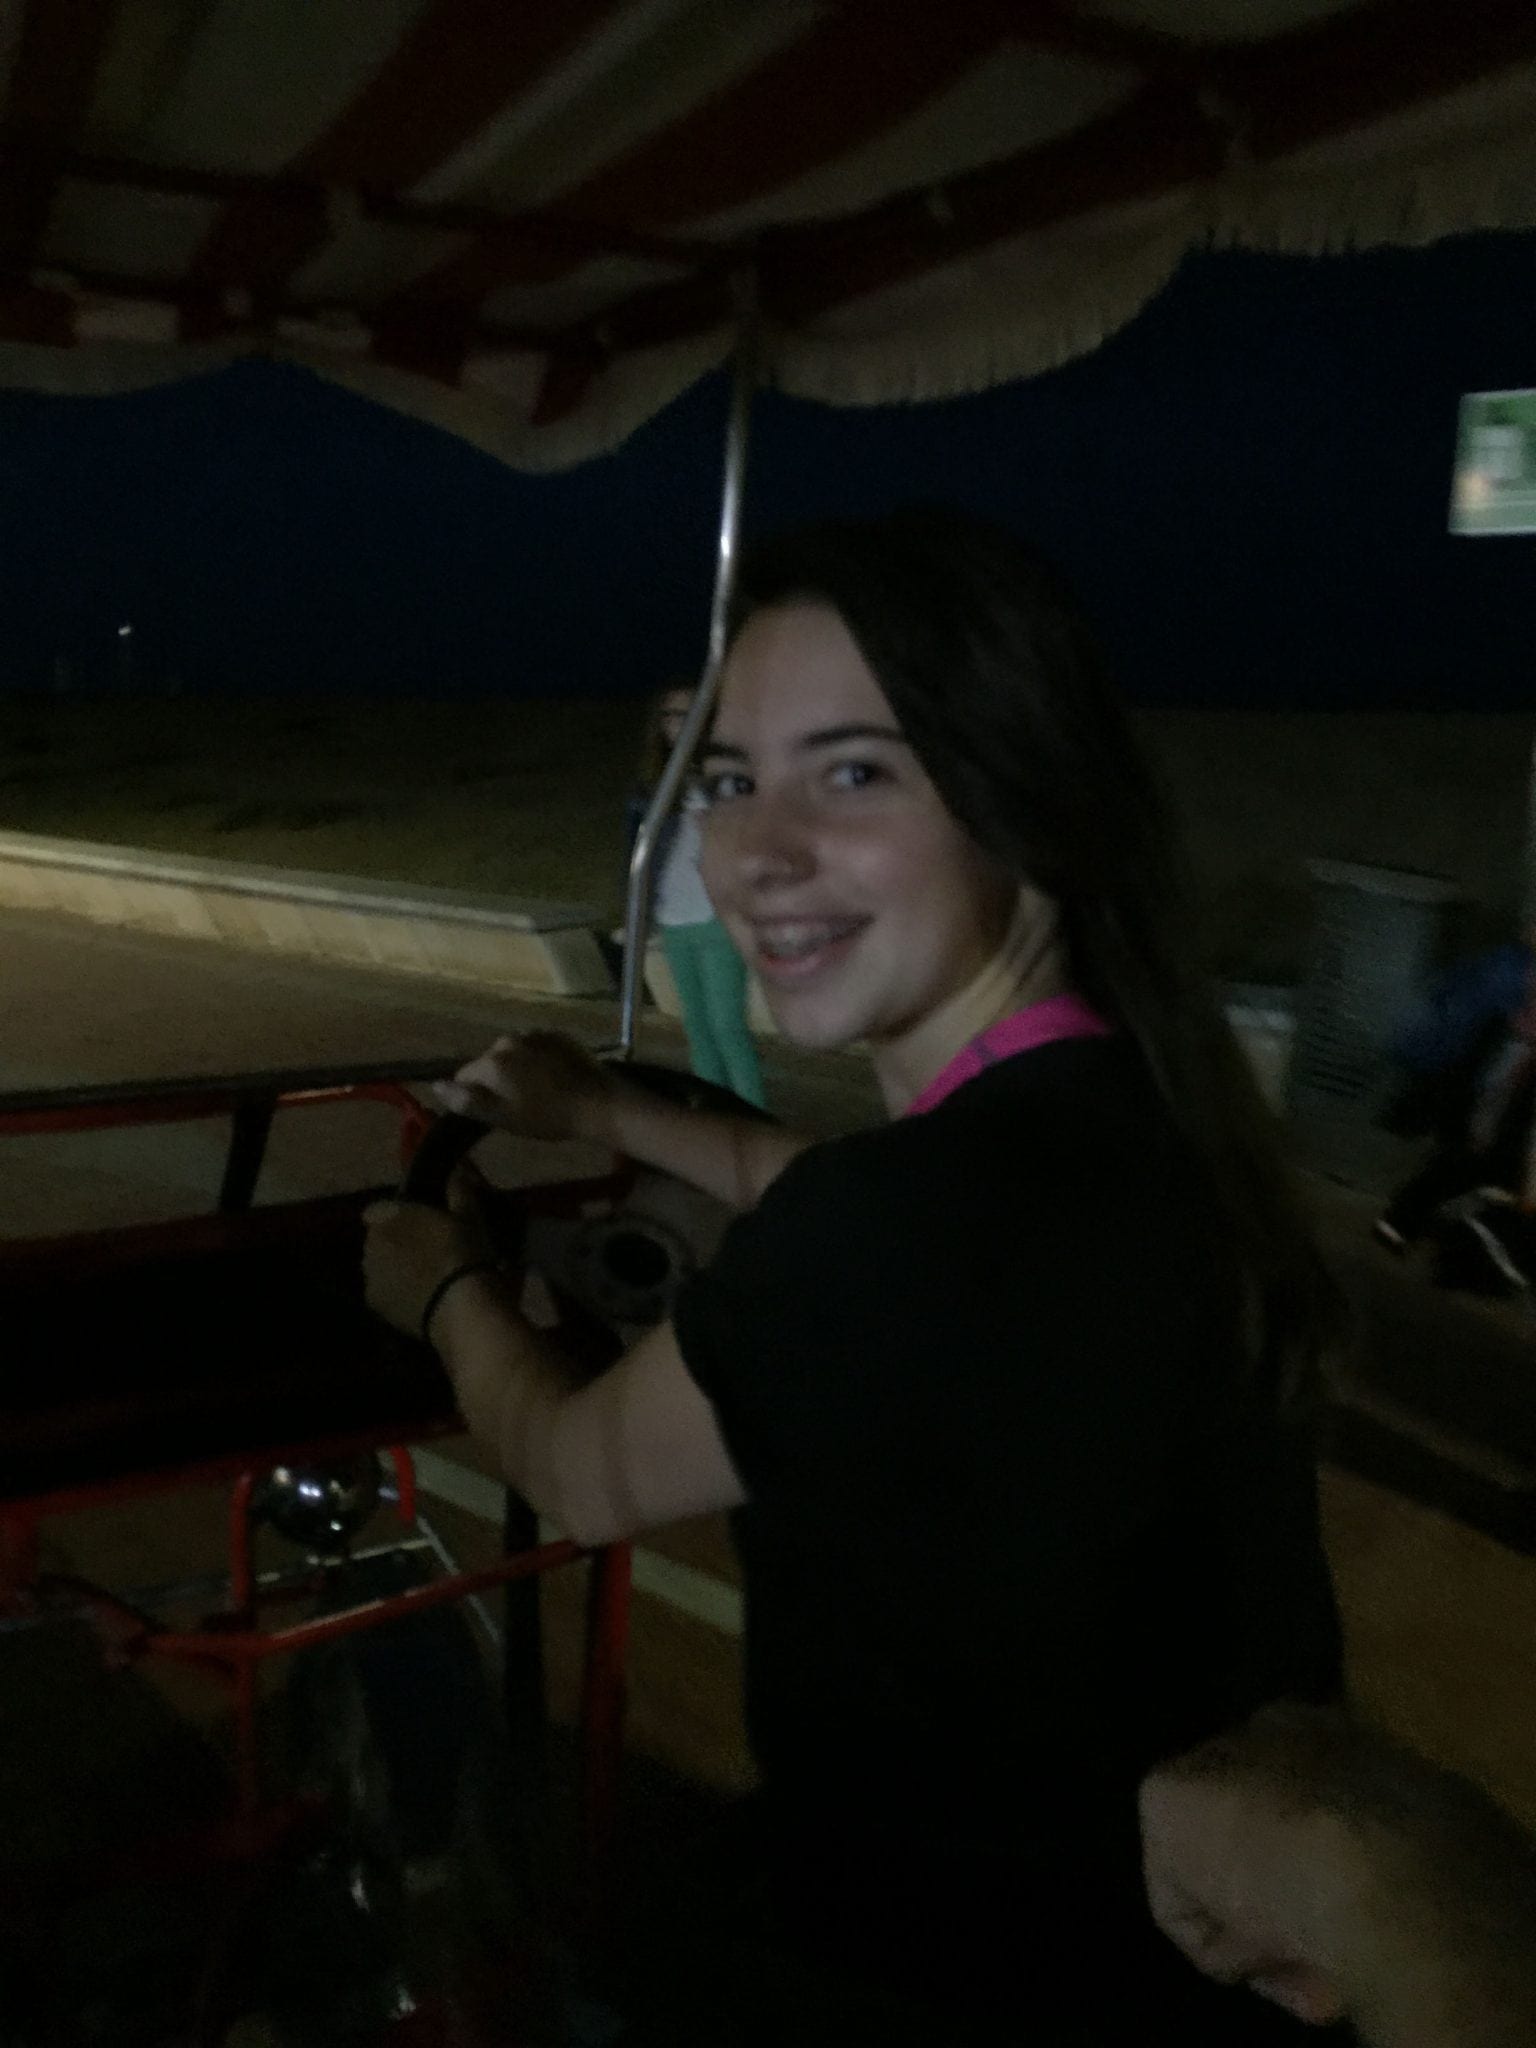
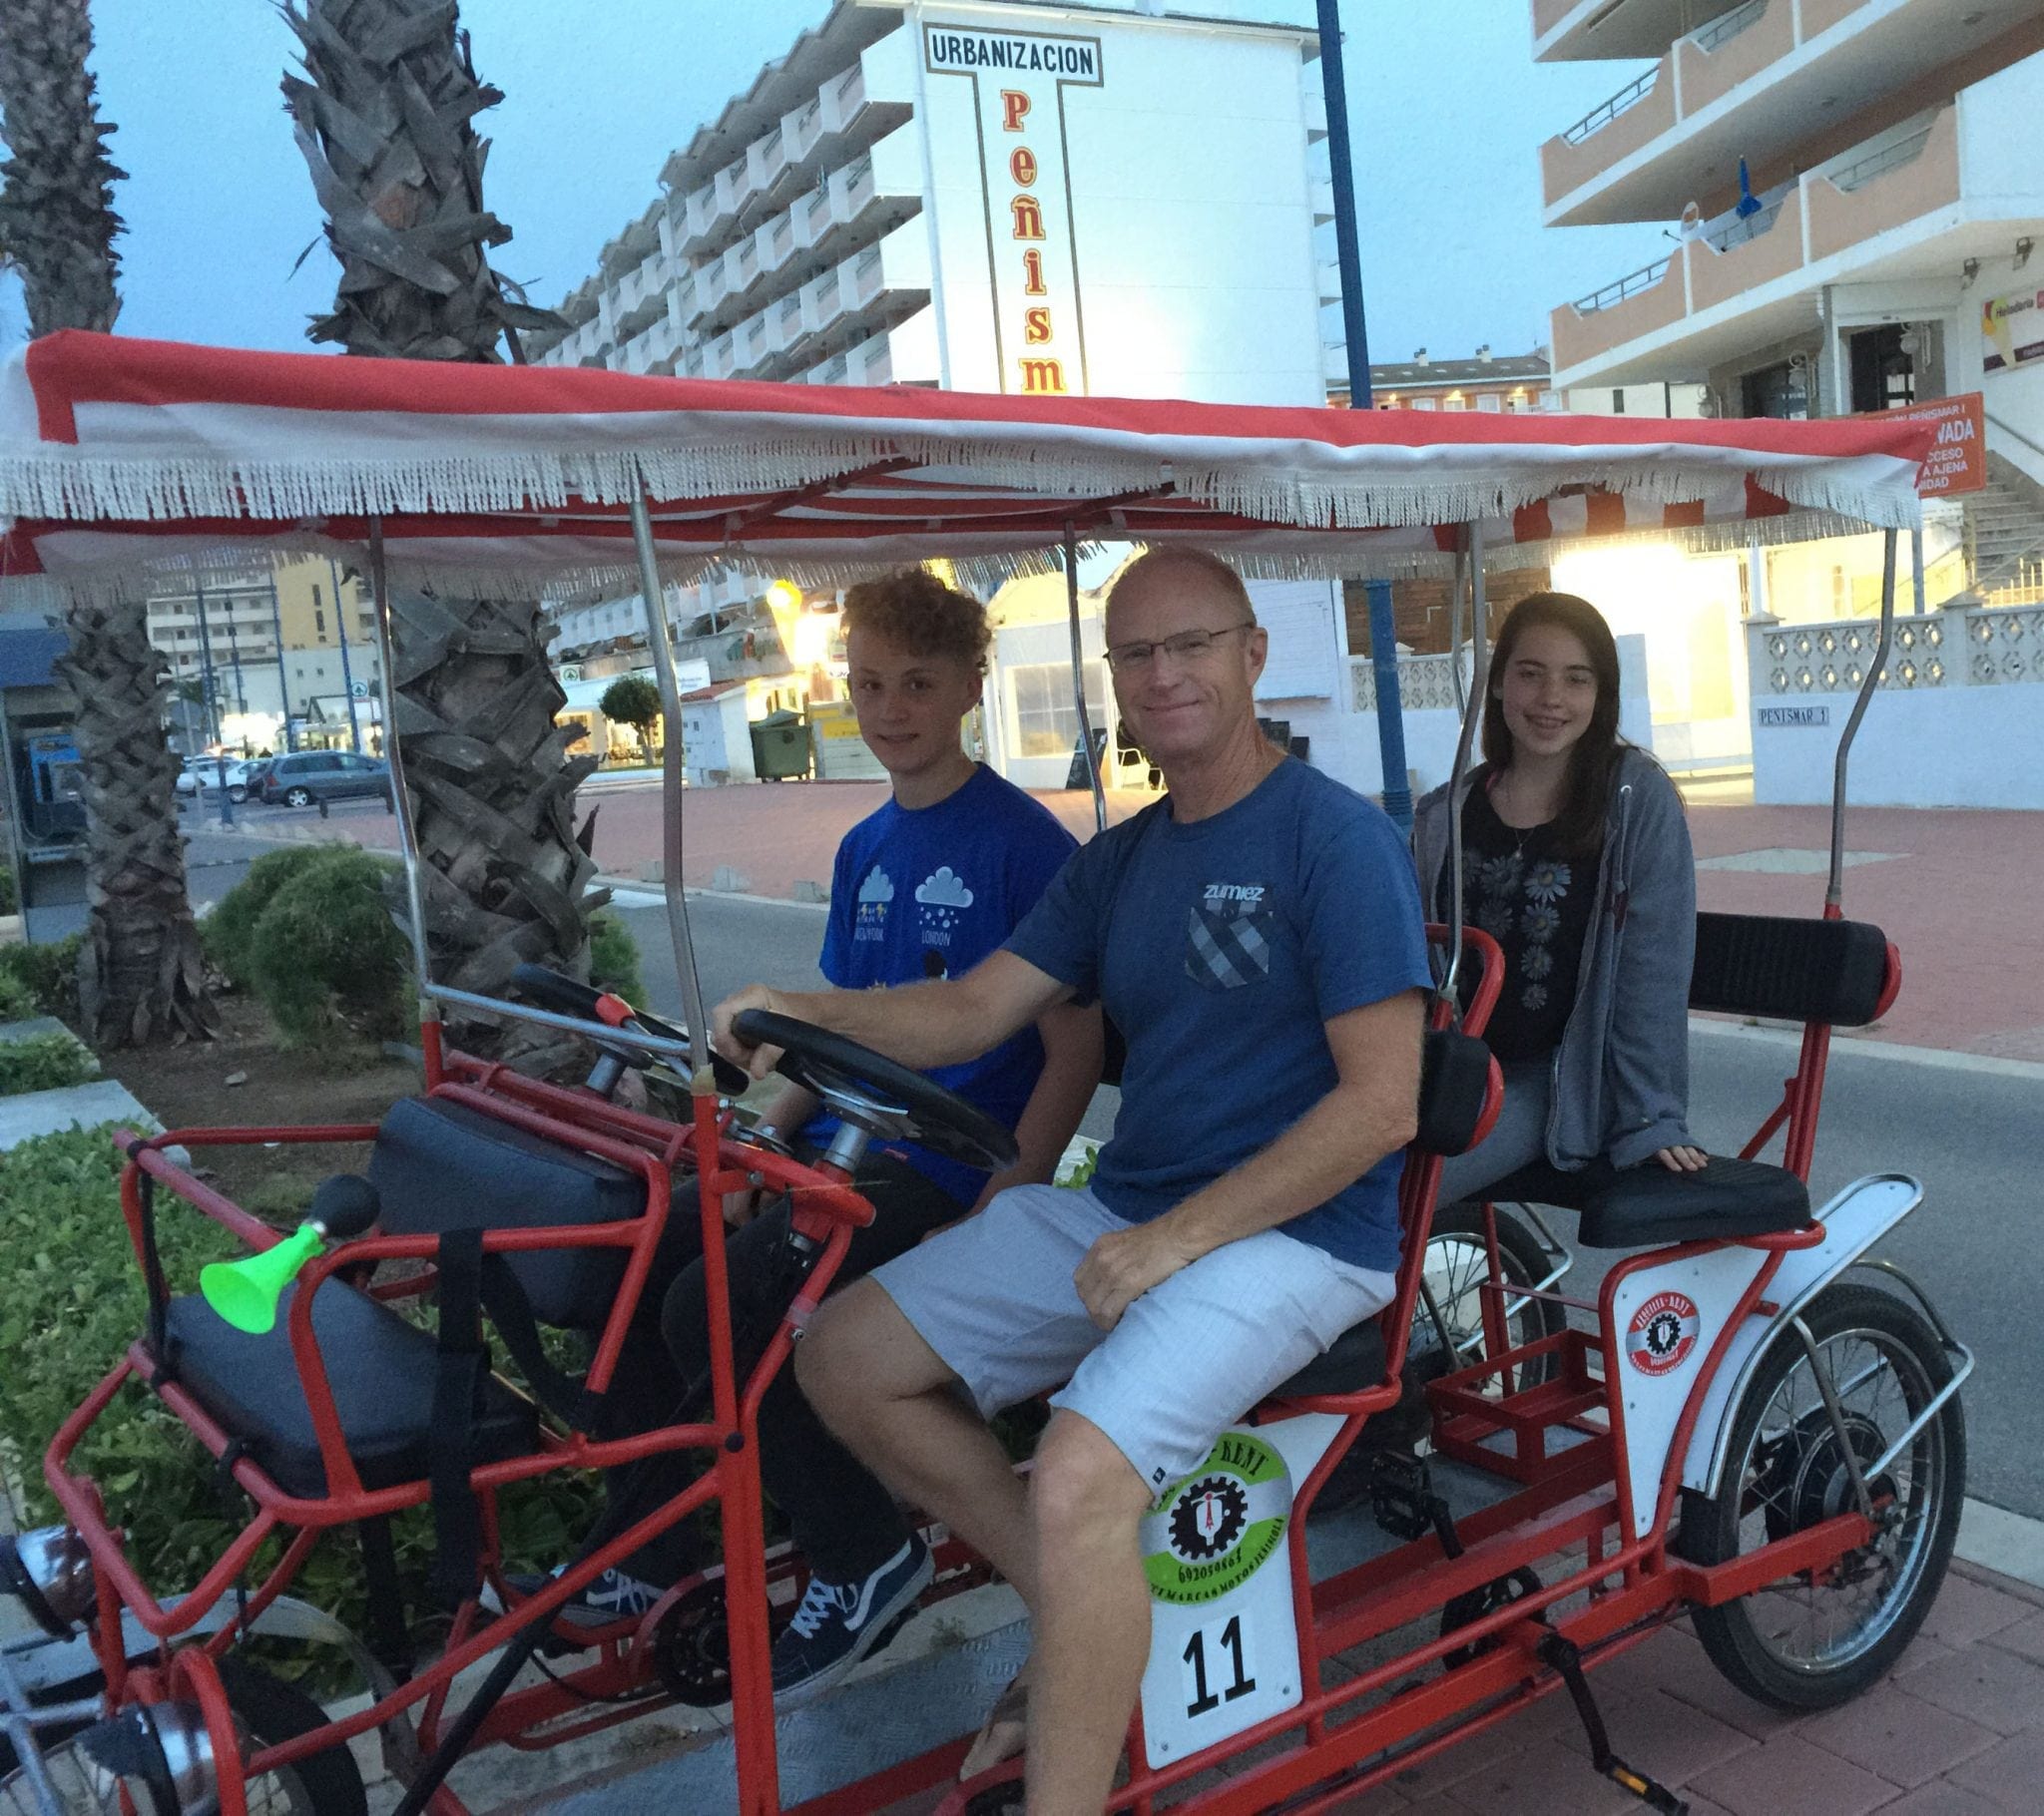
After dinner we rode around Peniscola in a pedal cab. Sean and Jim did most of the peddling. Then Sean took over and did it all. Just one of the perks of bringing a fit 15-year-old boy with you! We were laughing so hard. Don’t you love the sound of kids laughing!
Here is a list of the articles I read about the fossils in Orce.
For the past few months, I have been receiving emails asking for my help figuring out science for next year. The emails are from parents who are hoping RSO Astronomy and Earth Science 2 will be out for the start of the 2015/2016 school year. It won’t. I even get emails from people hoping RSO Chemistry 2 will be out. I only have 1 chapter of that book written, so it definitely will not be out next year. I will start writing it in time for Sean to use it for chemistry during the next school year, but that course is going to be in very rough form when he uses it. When parents find out these courses will not be ready they want my help figuring out what they can use in the interim.
To help all of you, I wrote this post detailing what we did for Physics when Sean was in middle school. We used Bite-Size Physics, a course written by Science Jim Mueller. Like my courses, this course is rich in labs that are paired well with theory. In fact, when I went to his website to get information for this post, I was pleased to read Mueller discussing something I also focus on in my courses. He states, “Here’s the problem, science books with experiments but no content or books with content but no experiments. You have to create an effective science curriculum with these poor materials.” (It reads a bit weird – but he means “you” the parents.) http://www.bitesizephysics.com/bitesizephysics.html It seems that one of Mueller’s goals with his course is the same as one of mine, which is to create a course that pairs content with experiments, so you don’t have to. Like my courses, these are not video labs either. These are get-your-hands-dirty, I-need-space-to-spread-out, homeschool-science-rocks labs. As a side note, I was at an event recently (not a homeschool event) when someone who is a fellow homeschooler began pushing very hard to have me try an on-line program where all labs are virtual. Uh, no, but thanks for the input. They did not know who I was other than that I am a fellow homeschooling parent of a high school student. RSO Physics will be out at some point. These suggestions are not for a course that will take the place of that course. These are suggestions for a more advanced course. I do not recommend using Bite-Size Physics in place of RSO Level 1 Physics.
For those of you who used RSO Biology 2 for high school. If that worked for you, then this course could also be used for high school. I will tell you what you should do to bring it up to the high school level. This course would work very well for a science co-op.
Bite-Size Physics by Science Jim Mueller
There are several options for packages, I recommend buying the bundle, because it comes with the fun and cheesy videos where he explains concepts. Sean loved them. There is some of the same material in his Force Book (which comes in this bundle) as there is in the Physics Book (which is the main spine for the course.) It is a bit confusing, but it in no way detracts from the course. In case you are wondering, I am not affiliated with the author at all. He has no idea I am recommending his course. It is just a really well done Physics course. Both Sean and I loved it. Here is where we bought our bundle. http://www.currclick.com/product/43327/Super-Science-Jim-Pack-BUNDLE?manufacturers_id=297&it=1
For Middle School
This is what Sean did.
Bite-Size Physics – There is math throughout the course. He makes it very easy to ignore the math. I had Sean do the math, but if your student is not strong in math, the course can be done without it. Sean struggled with some of the math. When this happened we breezed through it. Sean learned a lot of physics even when the math was lightened or skipped.
In addition, Sean read
Three books from Kathleen Krull’s Giants of Science series
Isaac Newton
Leonardo de Vinci
Albert Einstein
Isaac Newton, Kathleen KrullLeonardo de Vinci, Kathleen KrullAlbert Einstein, Kathleen Krull
Several books from the Max Axiom Graphic Library series
Electricity
Forces and Motion
Magnetism
Scientific Methods
Energy
Light
Here is a nice illustration with the books in the series. I recommend this series, where appropriate, in the RSO courses I write.
I had Sean write lab reports. Use the guidelines I give in Biology 2 for what a middle school lab report should look like.
For High School
Bite-Size Physics – The math should not be optional unless your child really struggles with math. In fact you should go online and find more math problems that cover the same physics to increase the math. Make sure there are solutions with the problems you find. Here is an example of what I mean: http://www.physicsclassroom.com/calcpad/circgrav/problems
Make sure your student begins to understand how units are used in applied math problems. Even if you do fewer math problems as you focus on this. Being comfortable converting between units and doing Dimensional Analysis is an important concept in all high school and college science courses especially physics and chemistry. Look it up if you have a high school student and you don’t know what I am talking about.
Lab reports – these should not be optional. Somewhere between 1 a week to 2 a month is a good number of lab reports.
Have your student read 1 to 3 books focusing on physics or a famous physicist. Here is a list, but the book does not needto be on it. Let students have some say in the choice. The choice shouldreflect their interests. I like to download a sample of a book (even if I am not going to read it in e-book form) so that Sean can check it out to make sure the reading level is a good fit.
Physics of the Future, Michio Kaku
Physics of the Impossible, Michio Kaku
E=mc2: A Biography of the World’s Most Famous Equation, David Bodanis
Surely Your Joking Mr. Feynman!, Richard Feynman
How to Solve It: A New Aspect of Mathematical Method, G. Polya
The Theory of Almost Everything, Robert Oerter
The Cartoon Book of Physics, Larry Gonick
Emperor’s New Mind, R. Penrose
Dark Side of the Universe: Dark Matter, Dark Energy, and the Fate of the Cosmos, Iain Nicolson
A Brief History of Time, Stephen Hawking
From Eternity to Here, Sean Carroll
Read http://preposterousuniverse.com/eternitytohere/quantum/ which is chapter 11 of From Eternity to Here by Sean Carroll. It is free to read. Carroll does a good job of making the complicated subject of quantum mechanics understandable.
High school students should keep a record of the work done. The easiest way to do this is to keep a file with the lab reports, data sheets, and photos of the labs. Also keep a record of the books read. A short synopsis, oral or written, from the student about the book is a good idea, but not mandatory. An oral synopsis can be done into a wireless phone.
I hope you have a great year of science.
Check out our post on month six of handcrafting high school here and month seven here.
A science fair in a co-op class? You bet! Actually, I am calling this a science fair, but it isn’t like any science fair you have ever seen. I gave students a question from an area we had studied. They had to design an experiment looking at that question, conduct the experiment in class using their fellow students, collect data, and explain how they would analyze the data. I did this with my co-op class last year, and it was one of the highlights of the class! You do not need to have a large co-op class to make this work, either. In fact, if you are going to get through all the experiments in the allotted time, you don’t want too many experiments. This is the last of my co-op posts. I am not teaching a co-op this year, even though I have had some very tempting offers. I am too busy writing Earth and Space 2, which my guinea pig… I mean my son… is using and loving. I have to stick with it for the rest of you!
Lucky for us there is one more co-op post coming from Karen. At the end of this year she will share her suggestions for extra-super extra-curricular resources! Have you ever noticed I love exclamation points! If you met me you would see that they are the punctuation mark that best describes my personality‼‼ An exclamation point with a smiley face at the bottom! (I would definitely not be a comma. Commas make me crazy. My commas make my editor crazy too. I put them in the wrong places and leave them out of the right ones. No one can be good at everything. If you ever find a typo of mine that bothers you, send me the correction, and I will fix it.) 😉
What You Will Need
Two to four parents (no more, no less – less is too few, and more is not always better)
A scoring rubric
My students furnished their own supplies for this, but I offered to do so. I told them I needed at least 24 hour notice, but no one took me up on it.
Be Thoughtful about the Amount of Help Needed
You should assume that no student in your co-op has ever participated in a science fair, or designed their own experiment. I did not want my students to be lost or intimidated by the process. I sent them a couple of e-mails during the week to make sure they were on track with their experiments.
Decide if You Want Students to Work in Groups or Individually
I started the students in groups, but one of the groups wanted to split up for this and design their experiment individually. The other two groups preferred to work in groups. This resulted in there being five experiments at the fair.
I asked each group to design an experiment dealing with a specific sense. I chose this because the five senses is an area that everyone has experience with. If you want originality with the experiments, you should choose an area that kids really understand. It is easier to get real creativity if your students are not bogged down figuring out details of the science involved. Could you imagine if I did this with a focus on genetics!
Here is the text I gave to my students:
Labs this week
I have asked each of the groups to work together to create an experiment. Since I do not want only 1 sense getting all the attention, each group will be given a different sense. I want to see you all do your best, there might be a clear winner or not. If more than one team wins that is great. There are experiments out there that test all of these things. Try to develop your own experiment first before getting on the internet. Only get on the internet if you absolutely cannot think of anything, and please contact me before you do that. I will help you if you need guidance.
I want to hear from each team on or before Monday about your planned experiment. These are some of the elements you need to think about
How will the results from my experiment answer the issue I am studying?
Did I create an experiment that is unbiased?
How will I collect and analyze the data from my experiment?
Group 1: Create an experiment testing if the color of food affects the sense of taste.
Group 2: Create an experiment testing if you need your sense of smell to taste.
Group 3: Create an experiment testing if your sense of touch is affected by your age.
The groups need to figure out the experiments together. One person should not do all the work!
Group 2 was the group that did three experiments all looking at the same issue. The three students created three very different experiments.
The Night before the Fair
Contact your students to make sure they have everything they need and ask them to be a little early to set up. (Make sure parents know this lab could run late. We did not do it, because I did not think of it, but what would be really great is to have the parents go through the experiments after class. Make sure everyone has enough material if you decide to do this.)
Contact parents who are judging and remind them to be there.
Make sure you have a rubric printed for them. Here was mine.
Use the scale from 1 to 10, 10 being the best; circle your answer
How well does the experiment answer the question? 1 2 3 4 5 6 7 8 9 10
Was the presentation and procedure coherent and well thought out? 1 2 3 4 5 6 7 8 9 10
Can the group explain their methodology and what they are testing? 1 2 3 4 5 6 7 8 9 10
How unbiased is the method used for conducting the experiment? 1 2 3 4 5 6 7 8 9 10
Uniqueness and creativity? 1 2 3 4 5 6 7 8 9 10
How good was the group’s system for collecting data? 1 2 3 4 5 6 7 8 9 10
How will the group analyze the data? 1 2 3 4 5 6 7 8 9 10
Do you think the group will be able to make meaningful conclusions from this experiment? 1 2 3 4 5 6 7 8 9 10
The experiment my son thought was the best did not win, because the person conducting it forgot to collect data, and could not answer the question of how he would analyze the data if he did collect it!
The Day of the Fair
Get there early. Some of you students will be nervous, and most students will need help setting up.
Give each judge a copy of the rubric.
Your judges might want to be test subjects or they might want to watch. Let them decide how they want to proceed. The judges should decide on values for the rubric independent of each other.
Have students conduct the experiments.
You need to have students cycle through to be test subjects as well as presenters. You will have to figure out the logistics of this as you go, but be prepared. You will have to be on top of this. Some experiments are quick to conduct and some are not.
Have the judges tally the results. Ties are awesome. There are no winners or losers on a day as fun as this one!
Check out our post on the homeschool history project here.
REAL Science Odyssey Chemistry 1 is a great choice for a science co-op, however because it was designed to be done 2 days a week it presents some scheduling challenges when conducting the labs in 1 day. You might want to teach this class 2 days per week, if you do, follow the format in the book as laid out on pages 14 – 16 of RSO Chemistry 1. If you don’t, some weeks will require parents to do work at home. This schedule is for doing the class 1 day per week.
Chemistry Co-Op: RSO Chemistry 1, Blair Lee M.S. RSO Chemistry 1
Note: The page numbers below are for the written text. If you have an e-book these page numbers will be a little off. Refer to the schedule in the book if there is any confusion about page numbers.
For more general information about teaching a science co-op read my blog article, Using REAL Science Odyssey for a Homeschool Co-op: General Notes.
Unless noted I recommend the following format for your class each week:
In class
Read the theory
Conduct the lab
At Home
Crossword Puzzle, when there is one
Some assignments and projects, as indicated below
Week 1
The first week of class can be a bit hectic. I suggest you divide the week up this way
In class: Lab #2 pages 27 – 30
*** It is very important you go over the process you are using when conducting this lab. Discuss the scientific method, what it means, and how it is being applied.
At home: Lab #1 and the crossword puzzle pages 23 – 25, 31
Week 2
Each week discuss the parts to the scientific method. These are on the lab sheets for most labs. By the end of the year you want students to be fluent in the vocabulary used when applying the scientific method.
Lab #1 pages 37 – 39
Lab #2 pages 43 – 44
Week 3
At home: Read over pages 46 – 47 and Make Parts poster page 47
In class:
Do the Parts! Lab: 49 – 51 next week
Types! Lab: pages 54 – 61, There will be plenty of time for students to do this individually, but you could have students work on this together, so that the entire class makes this on a large table building one element at a time. If you do, make sure everyone participates (maybe put the labels in a hat and have students choose one, and make that element when it is his or her turn; if you have more than 10 students have students work in pairs for the larger elements like neon).
Week 4
There is a lot of sitting around today so I would suggest breaking it up by
Read pages 66 – 67
Do Parts! Lab: 49 – 51: Have an extra balloon for each student to take home, so they can share this demonstration with their family. Ask students to teach their family what is happening in this experiment.
Do The Alphabet Lab #1 pages 69 – 73: Work through this methodically with your students. Students will be using this periodic table for several more chapters DO NOT let them take it home!!!
Have student do pages 75 – 79 at home, unless you have time at the end of class in which case have them do page 75 in class
Week 5
There are three parts to the Atomic Numbers section
Atomic Numbers Lab #1 can be done as a demonstration or individually it is up to you
While you wait the 20 minutes for the final observation for Lab #1: Read over page 81 and have students fill in the atomic numbers section on their periodic table.
Atomic Numbers Lab #2 start in class, if students don’t finish it have them finish it at home
Week 6
In class:
Read over pages 95 – 96 and have students fill in the assigned section on their periodic table
Do Massive Matters Lab #2
At home: Massive Matters Lab #1
Week 7
Read over page 105 and have students fill in the assigned section on their periodic table
Do the Lab, page 111
Save the worksheet page 109 for last in case you need to have students do it at home
Week 8
In class:
Read over page 113 – 115 and have students fill in the atomic numbers section on their periodic table
Do Lab 119 – 122; take your time with this lab. It is a really good one
At home: page 117
Week 9
The lab on page 129 – 131 requires an oven. If this is a problem for you:
Fill in worksheet pages 125 – 127
Have students (with parental supervision) do the lab at home and bring the muffins in for a tasting party. If you do this have student mix in berries or chocolate chips (assign this individually) so you have some variation in the muffins.
You should have completed periodic tables to put on walls or desks for students to show off to their parents. This is the end of Unit 3, so it is a good place to take the time to do this.
Week 10
Over the next 9 weeks students will be creating a book for the first three rows of the periodic table going across by group. There is some drawing to be done each week. Class time for this can be problematic because some students will take 5 minutes to do the same task another student take 55 minutes on.
Each week for the next 8 weeks: Read over the For My Notebook page and make notes about the elements in the spaces on the pages for the Element Book.
I will give you my advice each week, but you might need to tweak it.
Recruit 1 or a group of parents to do the work on pages 139 – 140 for each student
This week In class:
Read page 136: have students follow along on their periodic table
Fill out page 137 and glue it to their book. Do not let students take this home.
Read page 141: have students fill in the Facts section on page 149. This and every other week, have students work on the rest of the page at home.
Do Lab page 143 – 145
Read page 142: have students fill in the Facts section on page 151. This and every other week, have students work on the rest of the page at home.
Week 11
The Lab for this week< Crystal Creation, is short and will not be completed until next week. Students should be able to do all the work for their Element Book including decorating it in class.
Week 12
Make observations for the Crystal Creation Lab page 157.
Expect a fun mess with the lab today! Save some of this for week 26. It will stay good if you refrigerate it.
Students should be able to do all the work for their Element Book in class. If they cannot have students complete the pages at home.
Week 13
Students should be able to do all the work for their Element Book in class. If they cannot have students complete the pages at home.
The lab requires an oven. Try to round up a toaster oven if you need to. This lab is fun and yummy.
Week 14
Students should be able to do all the work for their Element Book in class. If they cannot have students complete the pages at home.
The lab requires an oven and a mixer. A toaster oven will work.
Week 15
Students should be able to do all the work for their Element Book in class. If they cannot have students complete the pages at home.
There are 2 labs for this week.
The lab on page 193 requires a heat source. Have students do it at home if that is a problem. A toaster oven will not work.
Do the lab on pages 195 – 197
Week 16
Students should be able to do all the work for their Element Book in class. If they cannot have students complete the pages at home.
There are 2 labs for this week.
Lab #1 needs to be done as a demonstration. Bleach is too toxic and caustic to risk having a group of students use it.
You will start Lab #2 today and finish it next week. There are a few changes to the procedure so that this lab can be done by all the students. Change the procedure instructions for Procedure 8 in the book to Let the egg sit for 7 full days. Do not refrigerate the egg. Have students make the vinegar solution in a double baggie. If the egg breaks and leaks out of the baggies it will be badly stinky!!! Have students take the baggied egg home and complete the experiment at home the next day. Have them share their observations at the start of next week’s class.
Week 17
Students should be able to do all the work for their Element Book in class. If they cannot have students complete the pages at home. You might even be able to put the books together. If you do not have a refrigerator in class, use an ice chest with ice in it. Perform the experiment while working on the Element Books. Have a balloon for each student to celebrate the end of the unit or just use 1. If you have a balloon for each student, have everyone put their balloon in the cold source at the same time so all the cold air does not get out from being opened repeatedly.
Week 18
There are 3 labs/activities this week. The Lab on page 243 – 245 will be done at the start of next week.
The puzzle pages 233 – 235: You might want to have 1 set of pieces per student pre-cut. If you do consider asking parents or students to bring these pre-cut pieces with them to class.
Lab #1 pages 239 – 241
Week 19
Begin class with the lab page 251, set a timer for 1 hour and make the second observation. I am not sure if this experiment will last over a week. You are going to need to check on it after 24 hours, and take a photo. Then you can wait a week and see. That way your students can use your photo as the final observation if they have to.
Lab page 243 – 245
Worksheet page 249
Week 20
Lab 261 – 264
Have students finish today with the worksheet page 255 – 259. They can complete this at home if you run out of time.
Week 21
Have student complete the poem at home.
Start class with Activity #1 on pages 269 and 271
Have student share poems if they are so inclined.
Have students do Activity #2 on pages 269 – 270 and 273
Week 22
Do pages 275 – 279
Week 23
Do pages 281 – 289: Use a microwave if you have to in order to boil water. An electric tea kettle will also work.
Have the ingredients for Jell-o present, but make a batch of Jell-o ahead of time so students can make observations about the Jell-O in class.
Week 24
Do pages 291 – 300: You have a group of students so why not use them for a density demonstrations. Mark off a space on the ground that will just fit all the students standing as a group. Have the students fill the space 1 by 1. Have the students move around in the marked off area. This will show them how much less space there is to move when more particles (people) occupy the same amount of space.
Week 25
Take a look at the lab on pages 303 to 305. The amount of set up time is perfect. But the lab takes 1 week to complete and you make a hot sugary solution. It is a good lab though.
You have a group: do the group activity on page 304
Week 26
Do pages 307 – 315: Use the slime you saved
Week 27
Do page 317 – 325: To do the lab on page 319 in 1 lab period. Use 3 bottles. Take one bottle and freeze it with the cap off the day before class. Bring the bottle to class, but take a photo in case it starts to melt before class starts. Suggest students put a bottle with the cap off with a dish under it in the freezer overnight to observe the expansion of water for themselves.
Week 28
Pages 327 to 337: There are three activities/labs this week. You should be able to get through them all. You will need a microwave and 1 or more kites. If it isn’t windy, the kite is optional.
Week 29
Pages 339 – 347
Week 30
Pages 353 – 361: You will need pre-frozen Kool-Aid
Week 31
Pages 363 – 371
Week 32
Pages 373 – 379: The indicator should be made at home. Do Step 1 at home and bring the indicator to class. Have kids make the coffee filter pH paper from Step 1 in class. They will use it next week.
Week 33
Pages 381 – 387
Week 34
Pages 389 – 397
Week 35
Pages 399 – 403: Have students make the solution for Day 1. You are going to need to make the same solution the day before so you can do the entire experiment in 1 day. Have students take the solution home in a baggie so they can see the results for their own solution. Alternatively, you could leave it a week and have students make their observations next week.
I received an email asking about how the material list is affected when teaching a co-op with RSO Chemistry 1. I thought it was a question that deserved an answer for RSO Biology 2 as well. My goal with this series is to make it easier for anyone who wants to teach a science co-op. Teaching is a LOT of work. I respect the time and energy you as an educator are taking to teach science and this is my way of making it a little easier for you.
Note 1: You are going to have to match the lab with the week. I changed the weeks where some of the labs are performed for a co-op class from the order they occur in the book.
Note 2: No change means there is no change to the quantities as listed in the Material List in the Student Guide and Teacher’s Guide for that week.
Note 3: I am assuming every student has their own text.
Note 4: Microscope supplies – you will need a quantity of microscope supplies for a class. I bought a box of slides and slide covers at the start of the year, cleaned those that could be cleaned over the course of the year, and disposed of those that couldn’t. At the end of the year I threw them all away. I will assume you have a large enough quantity of general microscope materials each week for your entire class. I will only list changes for materials specific to that experiment.
Week
Changes to Material List
1
The plot study lab: You will want multiples of – tape measures, graph paper, clip boards, markers for plots
2
Microscope techniques: 1 – 3 corks, 1 X-Acto knife per 4 students, 1 syringe per 4 – 6 students, 1 tweezers per 4 – 6 students, 1 plastic spoon per person
3
Cell model: 1 glue per 5 – 6 students, 1 ruler per 5 – 6 students, extra toothpicks
4
Chapter 4: multiple colored pencils, 1 syringe per 4 – 6 students
5
Diffusion: Are you going to teach this as one large experiment for the entire class toobserve or an experiment each student takes home? That affects the material list.
Microscope: 1 corn kernel per person, the same as for above – when you gather multiples of things like syringes make sure they stay in class for the duration of the co-op.
6
Photosynthesis/Cellular respiration: * 1 plant for the group (do not change this), 1 piece of fruit/vegetable per person
7
DNA lab: (LOL people hate or love marshmallow labs! They are cheap. I am sorry if you hate them. Any other ingredient makes this lab much more expensive. I am vegan, so trust me I get the entire anti-marshmallow thing. Just warning you, some parents are sure to complain. I get emails about this ingredient on my material list.) Multiply the number of marshmallows, beads, toothpicks, skewers, and pipe cleaners by the number of students.
8
Mitosis Poster: The supplies list depends on whether students do this at home or in class. If they do it in class, you will need multiples of poster board, marshmallows, pipe cleaners, yarn, and beads.
Microscope 7: 1 sports drink per student, 1 cup or glass per student
9
No change
10
Activity 10: 1 coin per student
Microscope 10: No change
11
Frog dissection: 1 frog per student, 1 set of dissecting tools for every 1 – 2 students*** Not all students will do this dissection. Make sure they will BEFORE purchasing frogs.
12
Plant dissection: 1 plant per student (if students are not working in groups, use 1 plant per student.)
13
Flower dissection: 1 flower per group (if students are not working in groups, use 1 flower per student.)
14
Labs 14 – 1 & 2: Multiply the number of lemons, wire, nails, pennies, calculators by the number of students.
15
15 – 1: As many cardboard nail messages as you can for students (this is a very simple but fun lab), multiple blind folds
Microscope 15: No change
15 – 2: Multiply the number of bottles, coffee filters, gravel, sand, cotton balls by the number of students
16
16 – 1: 1 flashlight per pair of students
17
Microscope 17: 1 needle per person
17 – 2: 2 balloons per student, multiple tape measures or measuring sticks
18
Lab 18: Multiply the number of chicken wings, gloves, and dissection tools by the number of students
19
19 – 1: No change
17 – 1: Multiply the number of bottles, tubing, X-Acto knives by the number of students
20
Microscope 20: Both of these labsrequire some thought about you want to run them for a class. By the time you get to these labs you will have a good idea how best to run them. For the microscope lab, will each student make their own slide and look at the slides of other people? In that case you need 1 insect per student. Or will you make the slides and have students look at them without preparing the slides? In this case the number of insects needed varies from two to as many as you want for comparison.
Lab 20: Where you do this lab determines whether there are changes to the material list. If done outside there are NO changes. If done inside you need 1 set of materials per student. Alternatively you could make the timeline as a mural, with all students working on it together.
21
Microscope 21: No change
Lab 21: Multiply the number of pompoms by the number of people who will be performing the experiment at the same time.
22
Lab 22: Multiply the amounts of supplies by the number of students
Microscope Lab 22: No change
23
Lab 23: Multiply the number of sheets of construction paper by the number of students
Microscope Lab 23: No change
24
Lab 24: Have parents help by bringing in supplies for their student’s project
Microscope Lab 24: No change
25
Lab 25: No change
26
Microscope Lab 25: 1 piece of grass per student
Lab 26: Multiply the amount of materials by the number of students
Microscope Lab 26: No change
27
Microscope Lab 27: No change
Lab 27: a minimum of 1 plant per student, 1 container with a lid for each student to take home the watering solution (I make my own jelly, so I used canning jars which I have a lot of.)
28
Lab 28: Multiple students mean more students making dichotomous key mysteries – there is no change to your materials list
29
Lab 29: No change
30
Lab 30: No change
31
Microscope Lab 30: Enough leaves for students to each make their own slide
Lab 31 and Microscope Lab 31: It would be nice to have 1 set of specimens per student. It is not necessary though.
Start Lab 32: 1 banana for every two students, 1 tsp yeast per student, 2 baggies per student
32
Microscope Lab 32: Multiply the number of mushrooms by the number of students, you also need multiple cutting boards and flashlights
Each week students were expected to do work outside of class.
Outside of class:
Weekly
Read the text
Complete the Famous Science Series
Complete the Show What You Know
When assigned
Lab Reports: not all labs are good lab report labs. Check the Teacher’s Guide t labs I o see which labs I recommend having students write lab reports for. As a former college professor, I strongly recommend having students learn this important skill now. Lab reports are very formulaic to write and yet many college students cannot write them. If a student has trouble with the actual writing of them (separate from what to put in the content) have them get help from a parent. Fine motor skills issues are an example of what I mean.
At the end of each unit
Unit Test
By the end of the school year
Research Paper from chapter 28
As you know from the introduction I am relaxed about who is doing the work outside class. I do however give preference in class when asking questions to those students who have read the material and done the work. At the start of class I have students give me a show of hands as to who has gone over the material. Those are the students I want to hear from when I ask a question, because they are giving me an informed response based on the material that they were responsible for. I wasn’t upset with any student who didn’t do the week’s reading, but I was honest with the students as to why I preferentially called on the students who had done it.
I will only discuss the Theory when I have something to add separate from what is in the Teacher’s Guide.Teacher’s Guide
Terms in this document: Lab refers to general labs that are NOT microscope labs. When referring to microscope labs I specifically call them microscope labs.
Unit 1: Chapter 1
The Theory: Assign the reading before coming to class. It makes for a good introduction. The plot study can take some time to do. You are going to want to get right on it.
The Labs: There are two great labs in Chapter 1. Start with the plot study lab. I think that every general biology class should start with a lab outdoors looking at what’s out there. Take the microscope lab and combine it with the microscope labs from weeks two and three, so that for the second week of class you are working on microscope technique.
Unit 2: Chapter 2
You will be devoting this week to microscope work instead of doing the canning experiment which is difficult in a classroom setting. I suggest buying 2 containers of processed applesauce. Open one and leave the other sealed. Compare the two samples weekly until the opened one needs to be thrown away. Come back and fill out the lab sheet for this lab then.
The Labs: The microscope work for the first three weeks focuses on basic microscope techniques. Take your time with these. I learned that even kids who think they are experienced using microscopes often fall down in the area of making good slides. Just remember THIN SLICES!!! Discuss drawing microscopic specimens on their lab sheets. Demonstrate how to make these drawings by drawing one. Make the drawing while looking at the slide. Have students look at your drawing, and then look at the view of the slide. Have them all draw one of the specimens from one of their slides today.
This is the time to go over rules about microscope care and handling. I have included an explanation in the text. You want to make sure students read it over. You could send a sheet with the rules written on them separately to parents and students and have both the parent and the student sign the sheet saying that they have read them and will respect them. All of the students that I had in my co-op class were careful with the microscopes. Kids are kids though, and sometimes they just didn’t think. That’s why it’s good for them to know that there is a policy for microscope handling and care in place, and make sure that they know what those policies are.
Unit 2: Chapter 3
The Labs: I let students decide if they wanted to make the plant cell model or animal cell model. Plan ahead how you are going to make the organelles. If using Sculpey you need an oven. You might need to make the organelles outside of class. If that is the case you will need to know ahead of time which type of cell students want to make.
Unit 2: Chapter 4
Have students do the activity before coming to class.
Students need access to a computer for today’s lab.
The Labs: Start with the microscope lab. Pay attention to students’ slide making technique. Demonstrate how to make a slide for them before they make one of their own. When the microscope lab is completed have students begin the lab. This is one of the most important labs that your students will do all year. It deals specifically with their nutrition and health.
Unit 2: Chapter 5
The Labs: Start by having students set up the lab so they can monitor it over the course of the two-hour period. After that discuss what it was like following the menu they made last week, and what they learned from it. Next discuss the material for this week. Then do the microscope component. The lab should be monitored for 24 hours or more. I don’t know for sure, but an entire week might be too much time. Optimally, each student should take it home and continue to make observations over the course of 48 hours. If you feel that students will not do this, you should take it home yourself and e-mail your observations to students.
Unit 2: Chapter 6
The Labs: I love this lab. It was inspired by a middle school student who I was tutoring in biology. He’s the adopted son of a friend of mine. LOL, I only teach co-op classes that my son is in, and I only tutor the children of really good friends of mine. My husband would divorce me otherwise. He set these rules a few years back. 🙂 Go over the material as briefly as possible while making sure that kids understand the chemical process. That way you will have more time outside. You might choose to wait and do the microscope lab next week. Do the microscope lab after you do the regular lab to make sure you have enough time for the regular lab. There is enough time to get through everything this week unless somebody is having trouble with the chemistry for photosynthesis and cellular respiration. It took my son more than once through this material to understand it, so I know it can happen.
Unit 3: Chapter 7
The Theory: Be prepared. This unit gives students and their parents so much trouble. Genetics is where biology is at these days. This is not going to go away. To be literate in the field of biology you have to know genetics. Parents find it difficult because most of them did not have it when they studied biology. In part this is because this area of biology has been growing in leaps and bounds as the testing, equipment, and methods have become more and more sensitive and advanced. Don’t let students get discouraged. Prepare them that it’s going to be challenging. If you are going to offer office hours this is the four-week period to do it in. Do not lose sight of the forest for the trees, though. It is not expected that most students will have 100% mastery of this material. At the end of the four weeks your students should have an understanding of the basic vocabulary and knowledge in the area of genetics. Assign videos you like for the class. For some reason for these complicated topics, students and their parents tend to use videos put together by college professors to help their college students. These are not helpful to a middle school student who is struggling with middle school material. These college tutorials discuss vocabulary and concepts that are not discussed in a middle school text.
Chapter 7 has coloring and drawing sections within the chapter. I sometimes hear these called coloring pages by parents. Ironically, when I explain these pages to educators they get excited by this sort of interactive text because when kids interact with the text, like happens in this chapter, it leads to what educators call ownership of the material. I recommend working your way through the chapter with the kids. Ask them to read the text and work through it. Tell them that if they get stuck on anything they can e-mail you, or they can take a Post-it note and write their questions on the Post-it note at the location that stumped them. Give high praise to anyone who seems to have some level of mastery over the material. I would work through the Show What You Know in class. Have students bring it to class completed and go over it, or complete it in class.
The Labs: Do the lab this week and the microscope lab next week.
Unit 3: Chapter 8
The Theory: Use the same system that worked last week, assuming it did work. If it didn’t work and students seem to be struggling with the material try tweaking your system. Don’t forget to assign videos for this week’s material.
The Labs: The lab for this unit is to make a poster. I like having students make their poster over the week and bring them to class. It’s really fun to see the level and energy that some students put into making their poster. Between the theory and looking at posters this should leave about an hour for the chapter 7 microscope lab, which is about the right amount of time. The microscope lab for chapter 7 requires students to go slowly and be careful with their technique. The chapter 8 microscope lab will be done next week.
Unit 3: Chapter 9
The Theory: If you are doing a lot of explaining with this chapter, have students do lab 9 at home. If not it can be done in class. Don’t forget to assign videos for this week’s material. Warning: Students who found mitosis challenging really struggle with meiosis.
The Labs: Do Lab 9 or discuss the work for Lab 9 that students did at home. The two microscope labs that will be done this week use prepared slides. One has students find the phases for mitosis; the other has students find the phases of meiosis. This might seem like it will be a quick pair of labs. It takes time to find the phases. I would set up two microscope stations one for meiosis and one for mitosis. You could pull students aside so it does not get too backed up at the microscopes and go over their Show What You Know work to make sure they understand the two processes. Make sure that the prepared slides come from a good source. Do not use slides that are plastic and not high-quality. Home Science Tools has very nice prepared slides. That is where I got mine.
Unit 3: Chapter 10 – today’s class is jam-packed! It might go over 2 hours. Take your time with it. You could add an extra week to the course for this chapter if you want.
The Theory: On page 211 of the student text is a box with a representative of a chromosome in it. Do this in class together. Make sure students can do the Punnett Squares individually as students are doing the microscope lab. You could have a mini session after class re-doing the Show What You Know Punnett Square, then assign the Extra Practice Punnett Square to students who are having trouble with them. You could even give students extra credit toward the test for the Punnett Squares.
The Labs:
Before class:
Have student’s come to class with the family traits questionnaire on pages 219-220 already completed.
Assign each student a strand of hair to bring to class. During week 9 ask about hair colors at home with students, such as who can get a white hair, who can get a red hair, etc.
It is up to you whether students do the qwitekutesnute activity at home or in class. If they do it at home have them bring their qwitekutesnute and share it. If they are doing it in class, end the day with that activity. The qwitekutesnute activity is a favorite of students. You might be tempted to drop it. I do not recommend that. It does a good job of demonstrating Mendel’s Principles of Genetics.
You will do the lab sheet, page 221, together in class. Give kids time to discuss what they learned. It is fun to discuss the results. Have each student make a slide with the strand of hair they brought.
If you break chapter 10 into 2 weeks:
Week 1 of 2: Family Traits Lab and the microscope lab
Week 2 of 2: Punnett Squares, the qwitekutesnute activity, and a review of the material from all 4 chapters. This is the best plan if you are having students take the end of the unit tests. This is the Unit Test that is the hardest for most students.
Unit 4: Chapter 11 – A dissection!!!
The Labs: Of the nine students in the co-op class I taught, only one made it to the end of this dissection. Only six were willing to even try to do the dissection. The one who made it to the end loved every single minute of it. This student was also an avid fisherman. The five who started the dissection but didn’t finish became nauseous and felt like they would faint; to be honest I began to feel nauseous just watching them try to hold it together. Be prepared for this. Have people bring their laptops so they can do a virtual dissection on-line. There are many, choose one or several before class. Some of your students won’t even want to do that. Those students I had watch a video.
Unit 4: Chapter 12 – Another dissection!!!
The Labs: Do both labs. Poor plants, no one faints when it comes to chopping them to bits. I suggest buying the plants for students and having them work singly or in pairs. It depends on the ratio of students to microscopes. The reason for you buying the plants is so you can make sure you have the right number of plants, and that they will be good plants to dissect. Choose a plant with leaves that make a good slice. I used one plant for each group of three students.
Unit 4: Chapter 13 – And yet another dissection!!!
The Labs: The instructions for this week are the same as last week except for flowers and seeds. While doing the dissection discuss the process of fertilization for angiosperms with students. If you have them in your area, you could bring a pine cone and a leaf from a fern for students to examine.
Unit 4, Chapters 14 – 19: I strongly believe that at the end of middle school biology a student should have a basic working knowledge of human anatomy, physiology, and epidemiology. The epidemiology part has been infused through the text to this point and will continue to be where it is relevant. Now the text brings in the anatomy and physiology parts. That is why other than in chapters 11 – 13 humans are the organism of focus for anatomy and physiology. I had my students download and play with the App, http://www.cdc.gov/mobile/applications/sto/. This is an epidemiology game from the CDC. We all loved it including me. Throughout this unit, I assigned extra reading to students focusing on epidemiology topics. You should choose topics that interest you and your students. For example, my husband has rheumatoid arthritis. When we got to the chapter on the immune system, I had my son read about rheumatoid arthritis.
To deal with before you get to Chapter 16: Chapter 16 has the reproductive system in it. You should talk to parents and the group you are running the co-op thorough to decide if you are going to teach this section or have parents teach it at home. The co-op I taught through chose to have parents teach it at home. I explained this to the parents, with a strong recommendation that it be taught. I realize a lot of parents are uncomfortable with this material but people REALLY need to know it.
Most of these weeks have two organ systems in them. It is quite a bit of material to get through each week.
Unit 4: Chapter 14
The Labs: Chapter 14, Lab 1 is fun to do with a partner. Do both Labs. I had students do a bit of research for Lab 1 before class so they could make the best battery possible.
Unit 4: Chapter 15
The Labs: There are 3 labs this week, if you want to make sure you get through them all this week, warn parents you might run 15 minutes over.
For Chapter 15, Lab 1: You need to have the set-up ready for students before class, so that lab doesn’t take much time.
Next go to Chapter 15, Lab 2: I had students do a bit of research for this lab before class so they could make the best filter possible. I made a contest out of the lab. I sent them a sheet of materials that would be on hand for their use.
Finally do the microscope lab. If you run out of time, start next week with this. It can be hard to get a good sample for this lab. Have one you made on hand in case no one gets one. If you are not teaching the reproductive system then definitely do the microscope lab next week.
Unit 4: Chapter 16
The Labs: Do Chapter 16, Lab 1 as explained. Students should work in groups of two or three, with each student doing all parts of the lab. It helps to have one person doing the experiment, one person writing down the results, and one person timing. Even if you do go over the reproductive section in class, have students do Chapter 16, Lab 2 at home.
Unit 4: Chapter 17
The Labs: There are 3 really good labs this week. Do the microscope lab and Chapter 17, Lab 2 today. Have students work in pairs for Lab 2. Make sure they get results for both students. Some students will struggle with the math for this lab. Go over it after students have gathered results for both people. Remind students NOT to share balloons. As crazy as that sounds some will share if you do not remind them! Students will do Chapter 17, Lab 1 in two weeks.
Unit 4: Chapter 18 – it’s another dissection!
The Labs: Once again not every student will be able to complete this lab. Some students are just not able to handle dissections. That is too bad. This lab is awesome for showing how the skeletal and muscular systems work. You should get a good feel for which students are getting the hang with their microscope technique with this lab. You have to make sure no one hogs the microscope though. there is a lot of cool slides to be made in this lab. If you have time have students play the Game. Otherwise have them play it at home. I had students play it while waiting to use one of the microscopes.
Unit 4: Chapter 19
The Labs: Do Chapter 19, Lab 1 and Chapter 17, Lab 1. Take 15 minutes at start of class to go over the procedure portion of Chapter 19, Lab 2.
Unit 5: Chapter 20, Class today will probably run over in time especially if you do a timeline outdoors.
The Labs: Have each student bring an insect for today, or you can collect them all yourself. Start inside with the microscope lab. For the lab you need to choose a location ahead of time. Your choice of location will decide whether you do this outside or inside on paper.
Unit 5: Chapter 21
The Labs: Have each student bring a sample for the microscope lab, or you can collect them all yourself. You can do Lab 21 with students in teams of two. Each setting up the lab for the other while you have the rest of the students performing the microscope portion. The lab is pretty lively. You are going to want to make sure it stays on track with no peeking from the super competitive students. Done without peeking, this lab does a great job of showing how natural selection works. You might want to ask another parent to help. That way you have one person helping with the microscope lab and another helping with the lab.
Unit 5: Chapter 22
The Labs: Do both lab and microscope lab. You might want to set the microscope lab up with the instructions, “Look at the view, but don’t mess with the microscope.”
Unit 5: Chapter 23
The Theory: This is a shorter day for labs. I suggest taking your time going over the material. Kids find it confusing. If you are having students take the test it might take some time to review the material today.
The Labs: Do both labs. Leave about 1 hour and 15 minutes for the two labs. That should be plenty of time.
Unit 6: Chapter 24
Have students complete the activity before class. This is a really good activity for this chapter. Briefly at the start of class ask what students learned from the activity.
The Labs: Start with the microscope lab. Have students decide on the biome they want to make before they come to class. You are going to need to have the materials on hand for making the biomes. If students do not finish have them take their diorama home to finish. While they are working have anyone who wants to share their Mad Libs poem recite it.
Unit 6: Chapter 25
The Labs: This is an outside lab. Go somewhere where there is a lot is going on ecologically. I live in Southern California. We did this lab at the beach looking at tide pools. Do the microscope lab next week.
Unit 6: Chapter 26
The Labs: You will need to collect or purchase the plants for the lab ahead of time. Do the Chapter 25 and Chapter 26 microscope labs today. Then do the lab.
Unit 6: Chapter 27
The Theory: After going over the material have a discussion about ways students could help themselves and their families reduce their carbon footprint.
The Labs: You will need to have each student do the procedure for the microscope lab the day before class. Before leaving for class, have them observe the differences between the two leaves. Have your own specimens ready to look at with the microscope. Do the microscope lab first. Start the lab today. Have students make the different solutions in class. Part of the goal with this lab is teaching students how to make solutions of varying concentrations, so you should focus on that during class. The results will be collected over the next week or two. Have enough plants for each student to take one home to water at home with 1 type of solution throughout the week. Each student will get one or two plants (depending on the number of students) and 1 type of solution per plant. Make sure students understand that they are responsible for watering correctly to the specifications stated in the procedure, and that they are expected to make daily observations. If they are not able to commit to this, have another student take their plants.
Unit 7: Chapter 28
The Labs: Today you will do both microscope lab and lab. You should go over the medium cladogram with students in class, and have them do the easy and the hard cladograms at home. Make sure students understand the concept of shared derived traits. If you are having students write the research paper, explain what you want from them during today’s class.
Unit 7: Chapter 29
Go over the cladograms from last week and the one from this week from the Show What You Know section.
The Labs: Use the instructions in the Teacher’s Guide to do this experiment in one day instead of two.
Unit 7: Chapter 30
Go over the cladograms from this week’s Show What You Know section.
The Labs: For the lab, have your class meet at the best nursery close to you or at an area with a lot of different types of vegetation. Start next week with the microscope lab from this week.
Unit 7: Chapter 31
Go over the cladograms from this week’s Show What You Know section.
Start the lab for chapter 32 at the end of today’s class. Make sure and tell parents not to throw it out during the week. This happened to over ½ of the students in my class.
The Labs: Start with Microscope Lab 30. You are going to need specimens for the labs this week. Have students collect them, or you can start collecting them early in the year so you have enough. In a pinch use one pair for the entire class. Do Lab 31.
Unit 7: Chapter 32
Go over the cladograms from this week’s Show What You Know section.
The Labs: Start by looking at the bananas. Discuss chemotrophy when you do. This is an unfamiliar feeding strategy for most students so some discussion of it is helpful. Do Lab 32.